Issue properties
Issue properties describe the work on an issue: the state it is in, how urgent it is, how it is categorized, what it depends on, how large it is, and when it is due.
Issue status
Set statuses that your issues will move through on each team.
Status overview
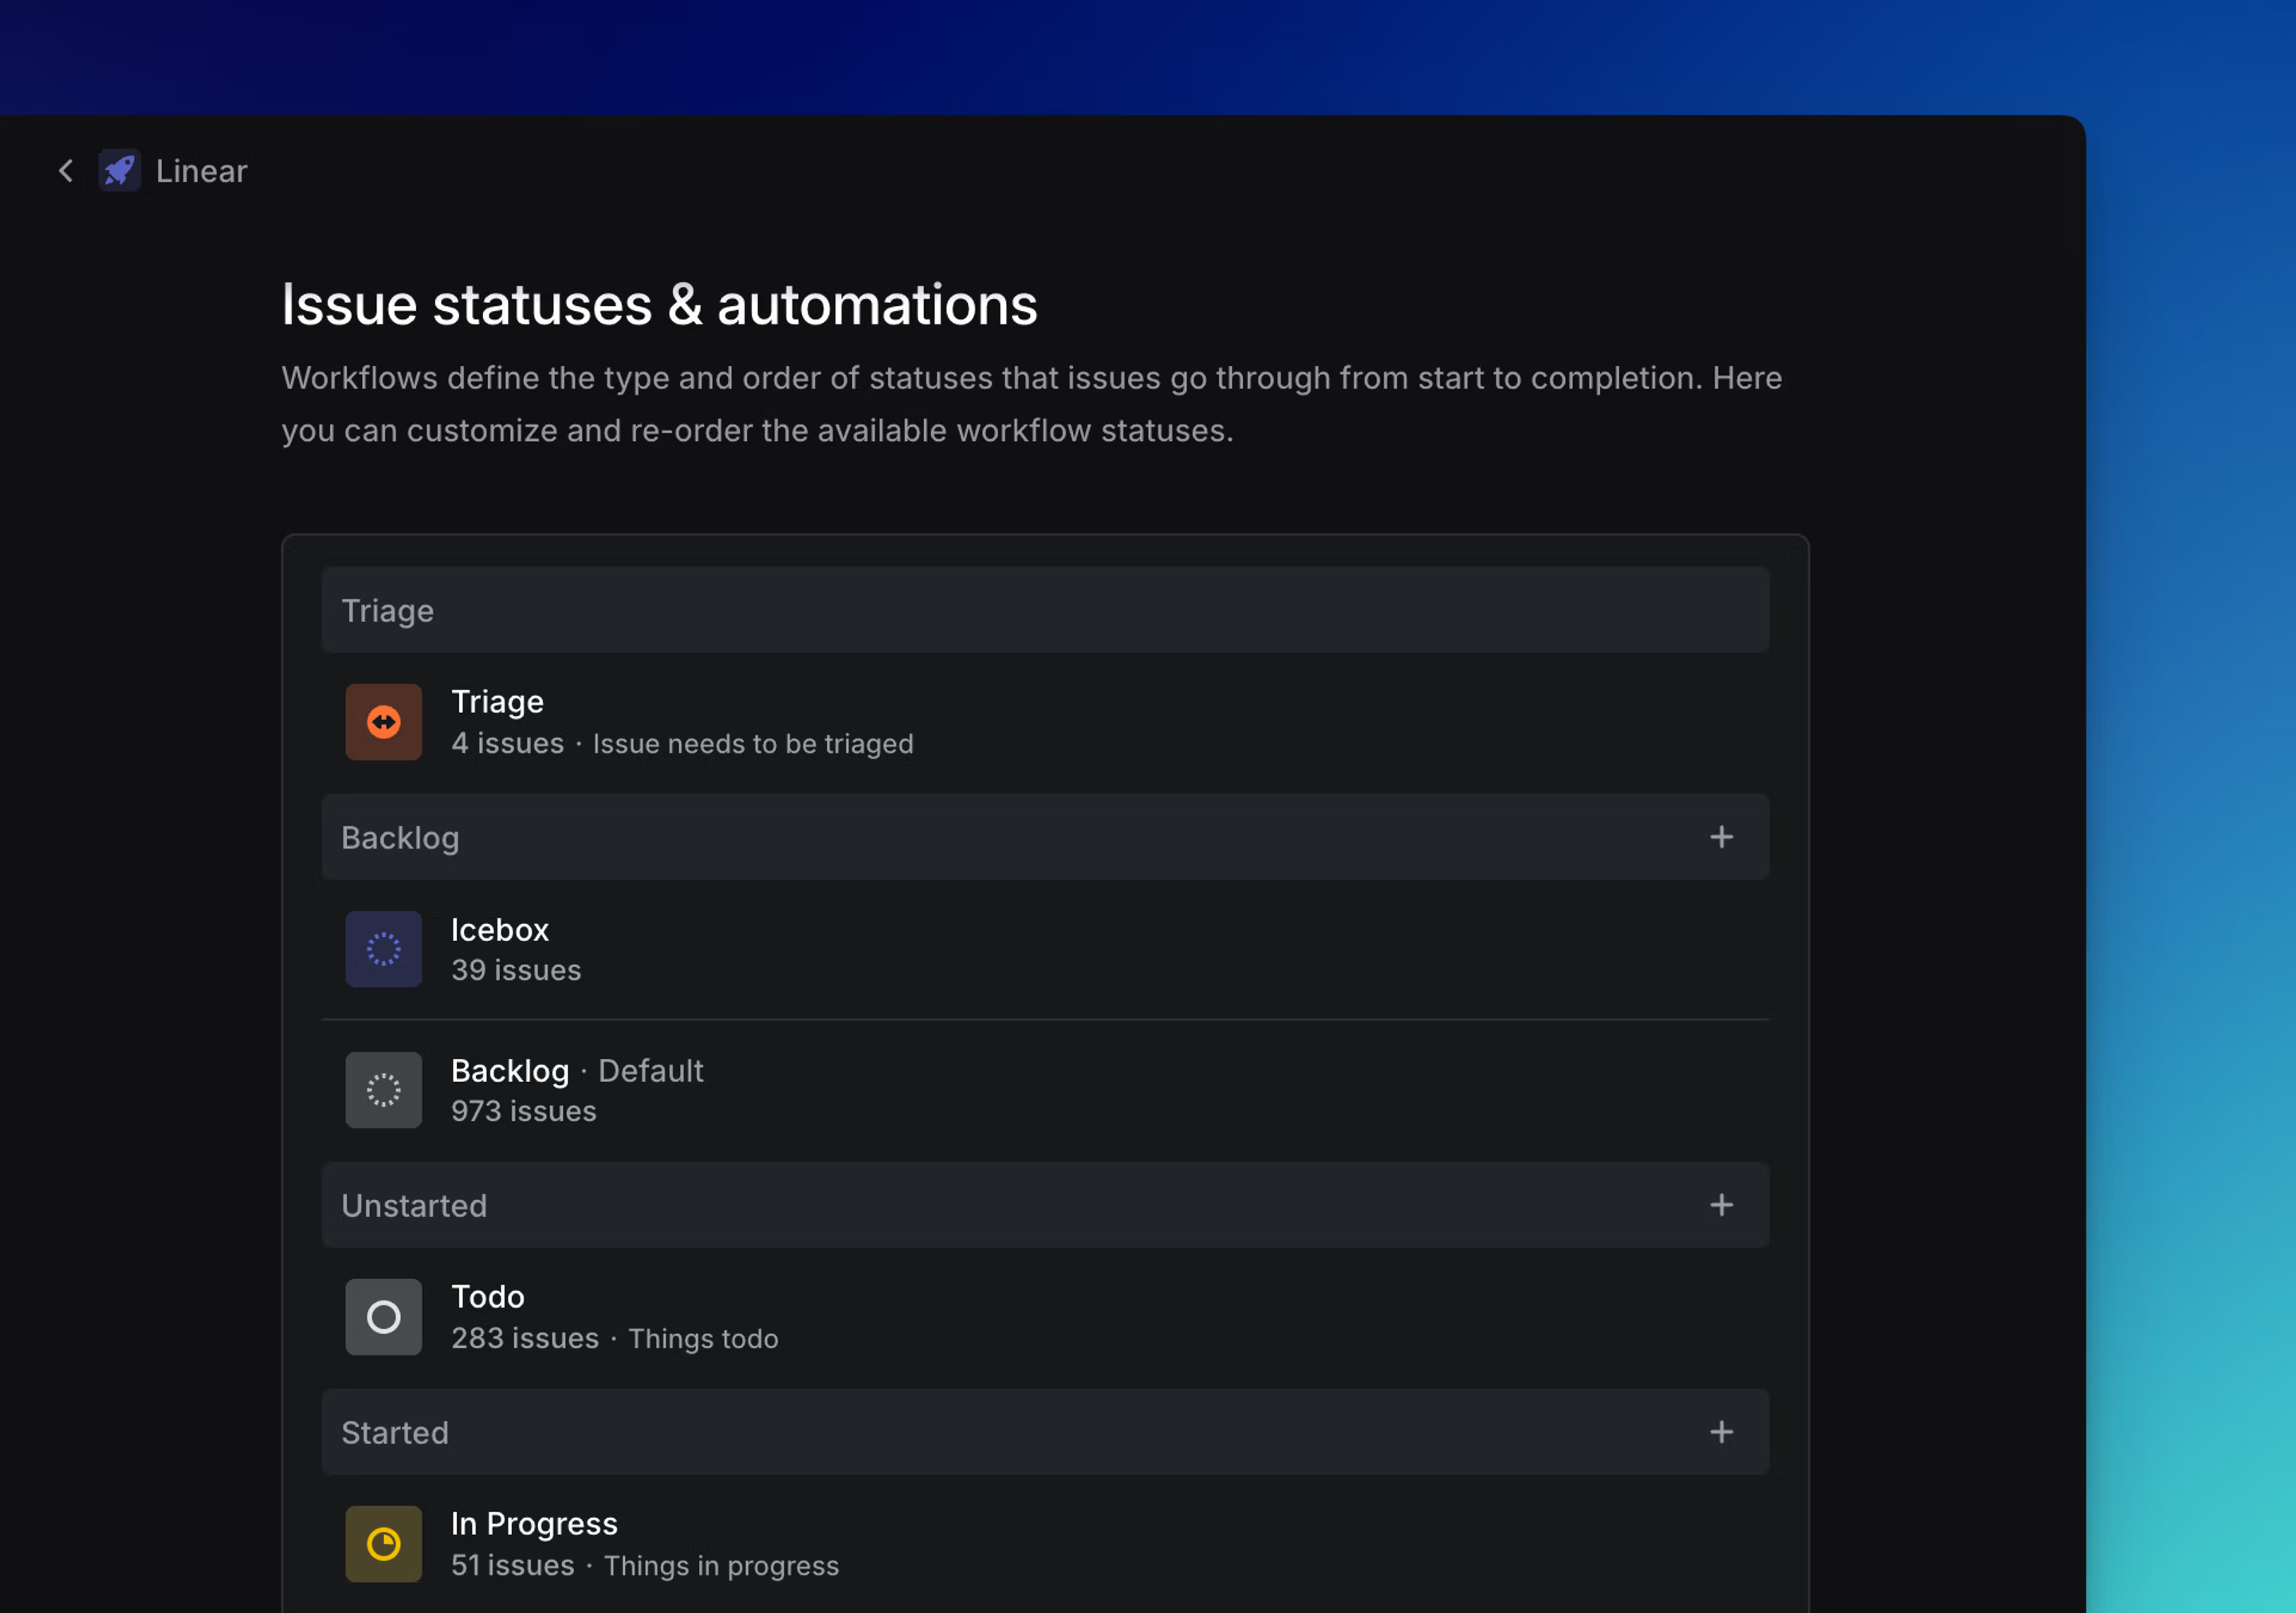
Issue statuses define the type and order of states that issues can move through from start to completion. These workflows are team-specific and come with a default set and order: Backlog > Todo > In Progress > Done > Canceled.
Issues marked as duplicates are automatically moved into a reserved Duplicate status.
Configure statuses
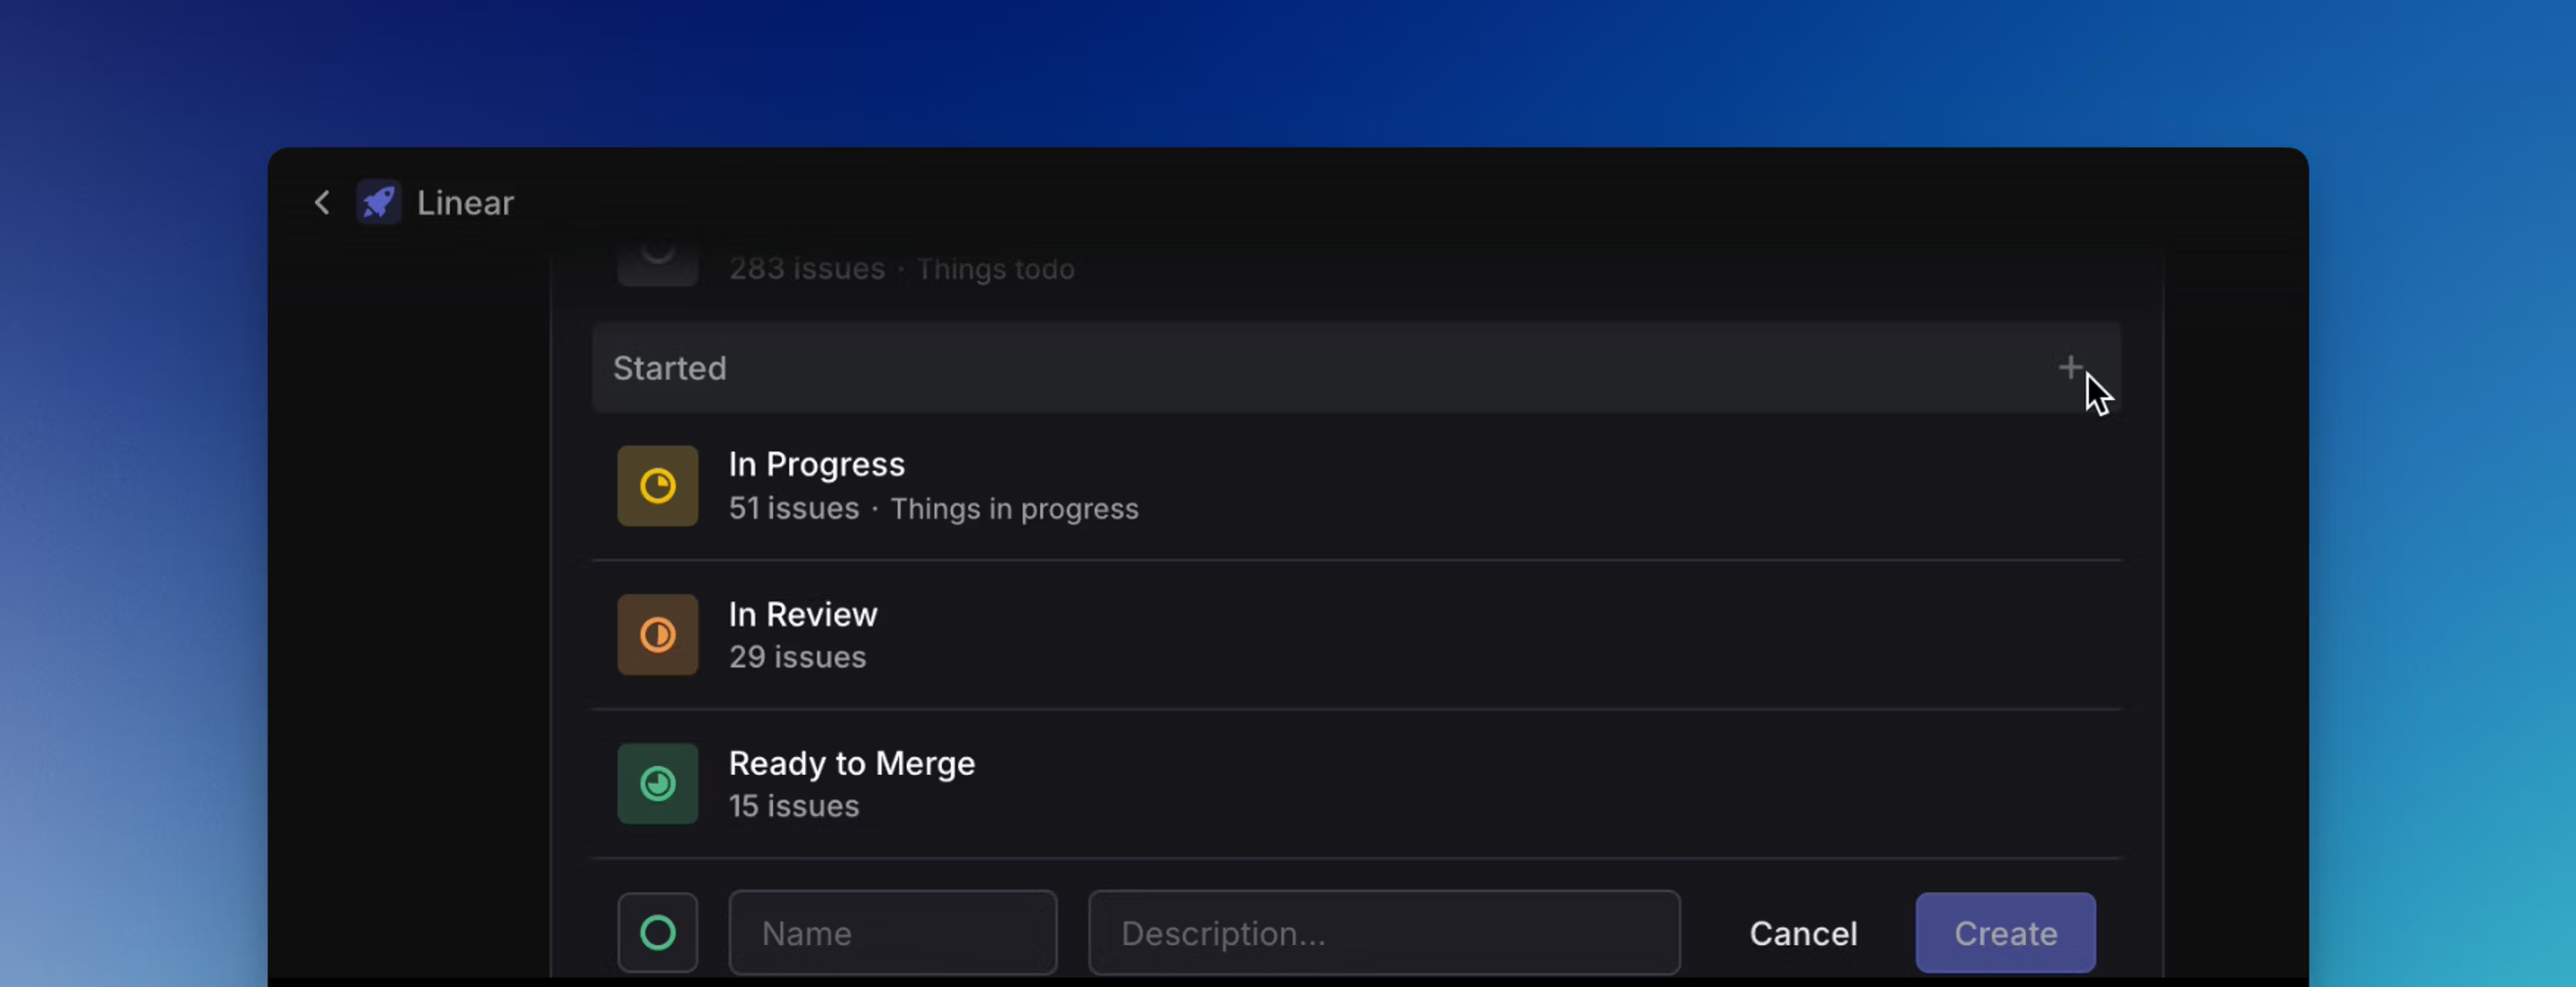
Add or edit statuses in a team from Settings -> Teams -> Issue statuses. You will see a list of all statuses in that team and their order. Click the three dots next to each status and select Edit to make changes to the name, color, or description. Create statuses by clicking the + button, or remove statuses (as long as at least one status exists in each category).
Teams can reorder statuses within each status category, but the categories themselves stay in a fixed order. To change the order of a status, drag it to a new position.

How we work at Linear
We have the following workflow set up for our product team:
Backlog: Icebox, Backlog
Unstarted: Todo
Started: In Progress, In Review, Ready to Merge
Completed: Done
Canceled: Canceled, Could not reproduce, Won’t Fix
Duplicate: Duplicate (applied automatically when an issue is marked as a duplicate)
Default status
The default status defines the workflow status that will be applied to newly created issues in your team. This can be overridden by the user when creating an issue, but makes it a lot easier to track and organize new issues that come in. By default, your first Backlog status will be the default status. To change that, hover over a different status in the Backlog or Todo categories and then select Make default.
Duplicate issue status
When you mark an issue as a duplicate of another, its status is automatically changed to Duplicate — this is a system-managed status that cannot be renamed or customized. See Issue relations > Duplicate below for how to mark an issue as a duplicate.
Triage
Triage is an additional status category that acts as an Inbox for your team. Triage is particularly powerful when combined with other integrations like Asks, Slack, or our support ticketing integrations. Learn more in the dedicated Triage article.
Auto-close and auto-archive
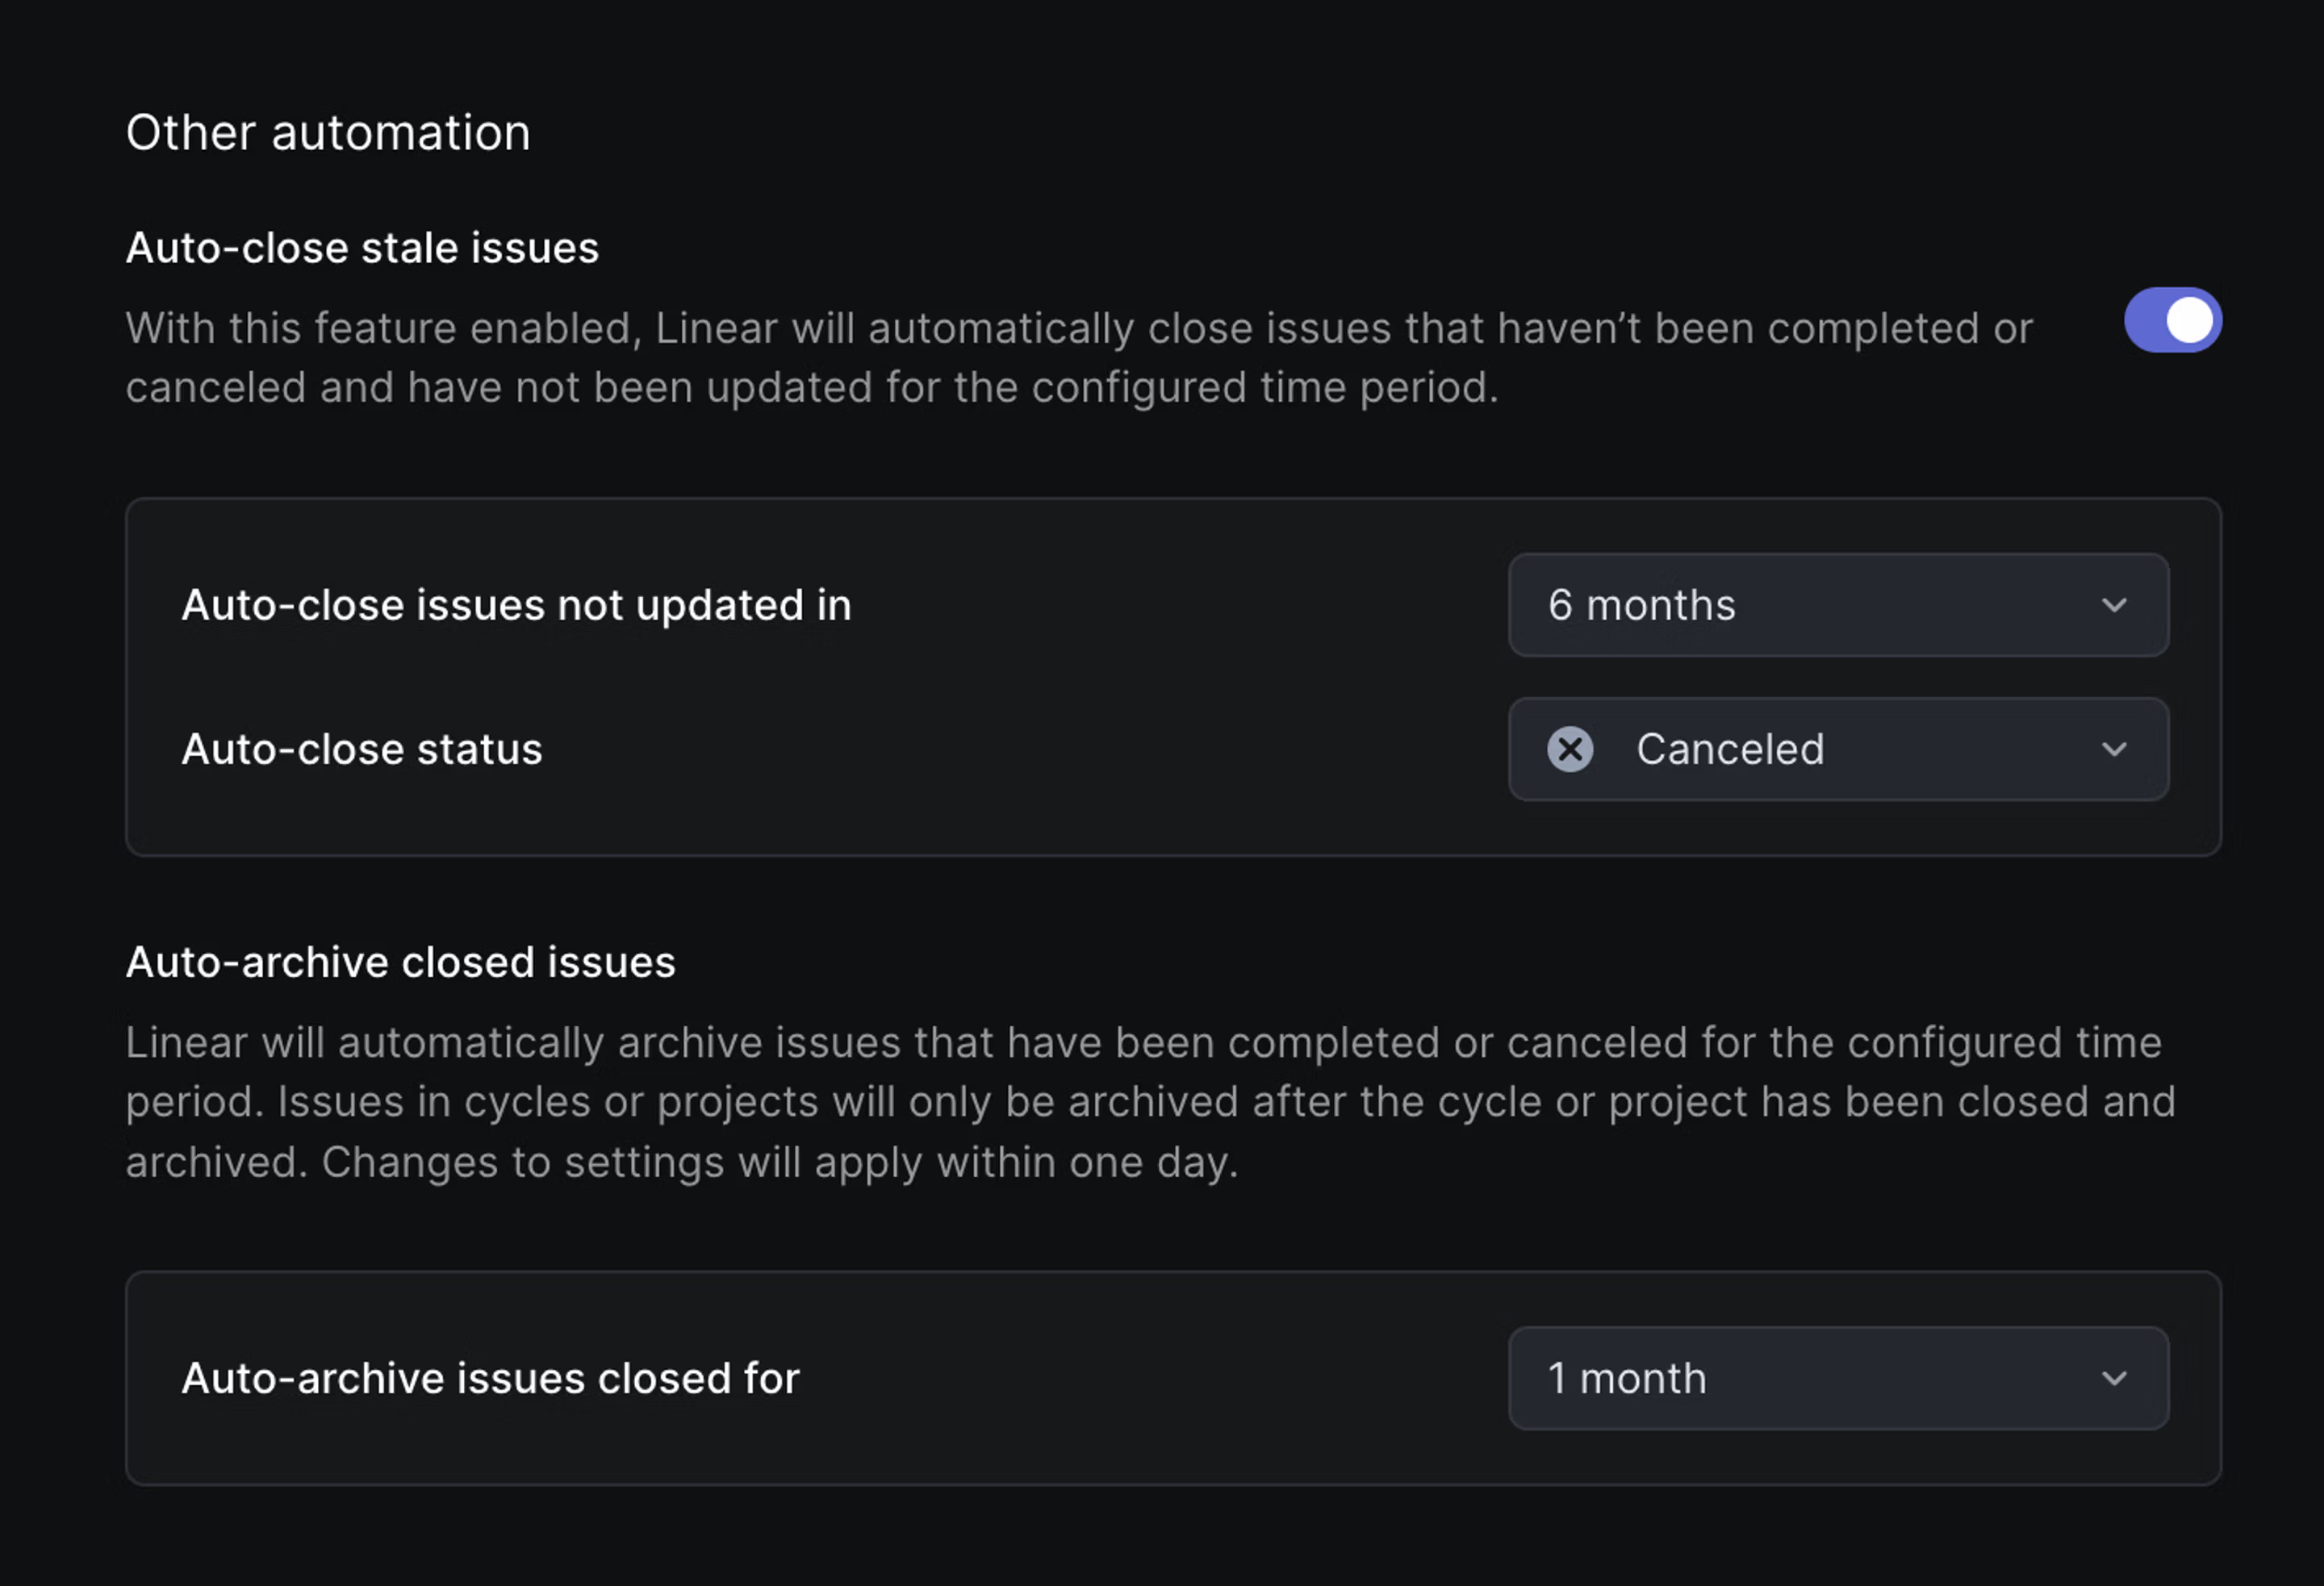
When enabled, auto-close will close issues that have not been updated in a set period of time.
Auto-archive controls when issues in the team will be archived. When an issue archives, its creator will be notified—this is an opportunity to unarchive if the issue is still relevant. Archived issues are still searchable and restorable in the future.
Archiving is only automatic and is not available as a manual action. More information about archiving is available here.
The auto-archive setting also controls when projects and cycles will archive.
Priority
Set issue priority to indicate which issues to complete first.
Priority overview
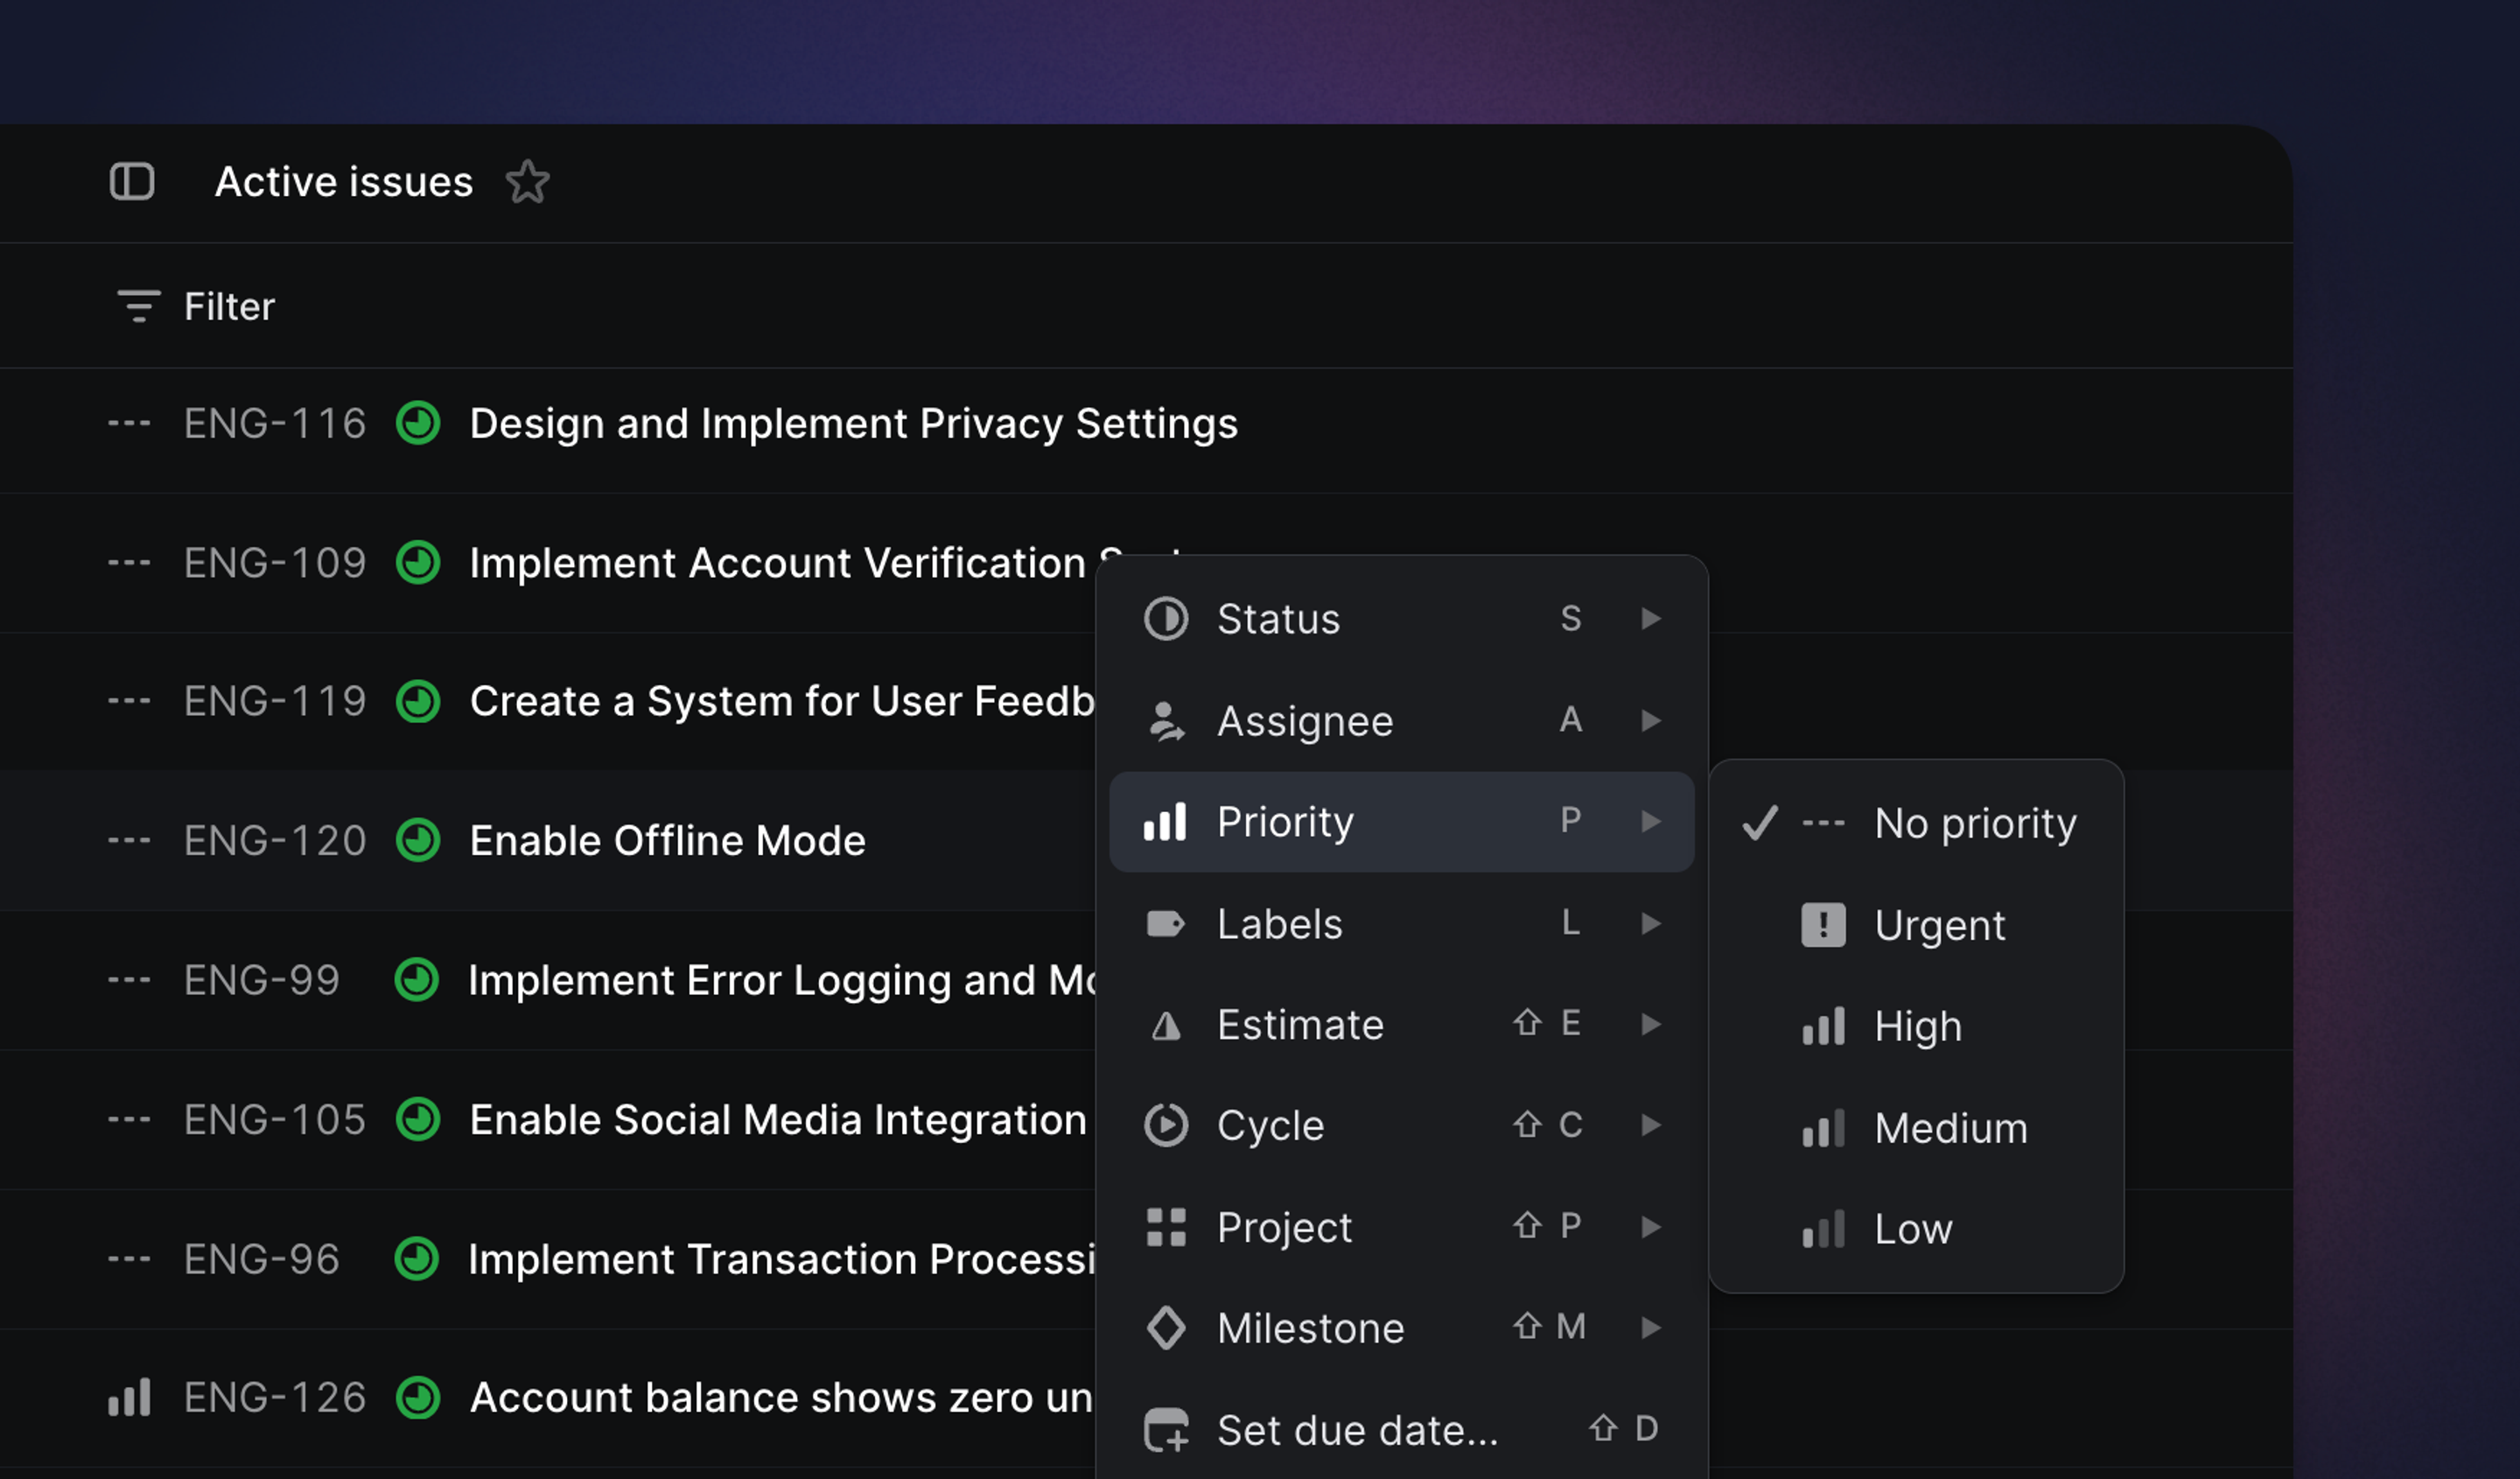
Priority is an optional property for Linear issues to signify to your team the urgency of the issue. Issues can be set to No priority, Low, Medium, High, or Urgent.
We don’t have the option to set custom priorities or more granular priorities since it’s easy to get carried away with specificity. Adding too many options makes it harder to set priority and leads to diminishing returns. If more granularity is needed, the best workaround is to create additional workflow statuses or use labels.
Set priority
Select one or more issues in an issue view, press P, and choose a priority. Use the shortcut again to change or remove it.
Priority ordering
On any view ordered by priority, simply drag & drop an issue or project above other ones to indicate it is more important. The exact position will be saved globally across your workspace, so that anyone else looking at a view ordered by priority will see these issues or projects in the same relative positions. By default, items without an assigned priority level are now always sorted last. Priority ordering also applies to projects. For project-specific guidance, see Project priority.
Urgent notifications
When an issue is marked as Urgent, Linear notifies the assignee and, if email notifications are enabled, also sends an urgent email notification.
Priority is also the most common trigger for SLA rules. See SLAs below.
Issue labels
Use labels to categorize issues.
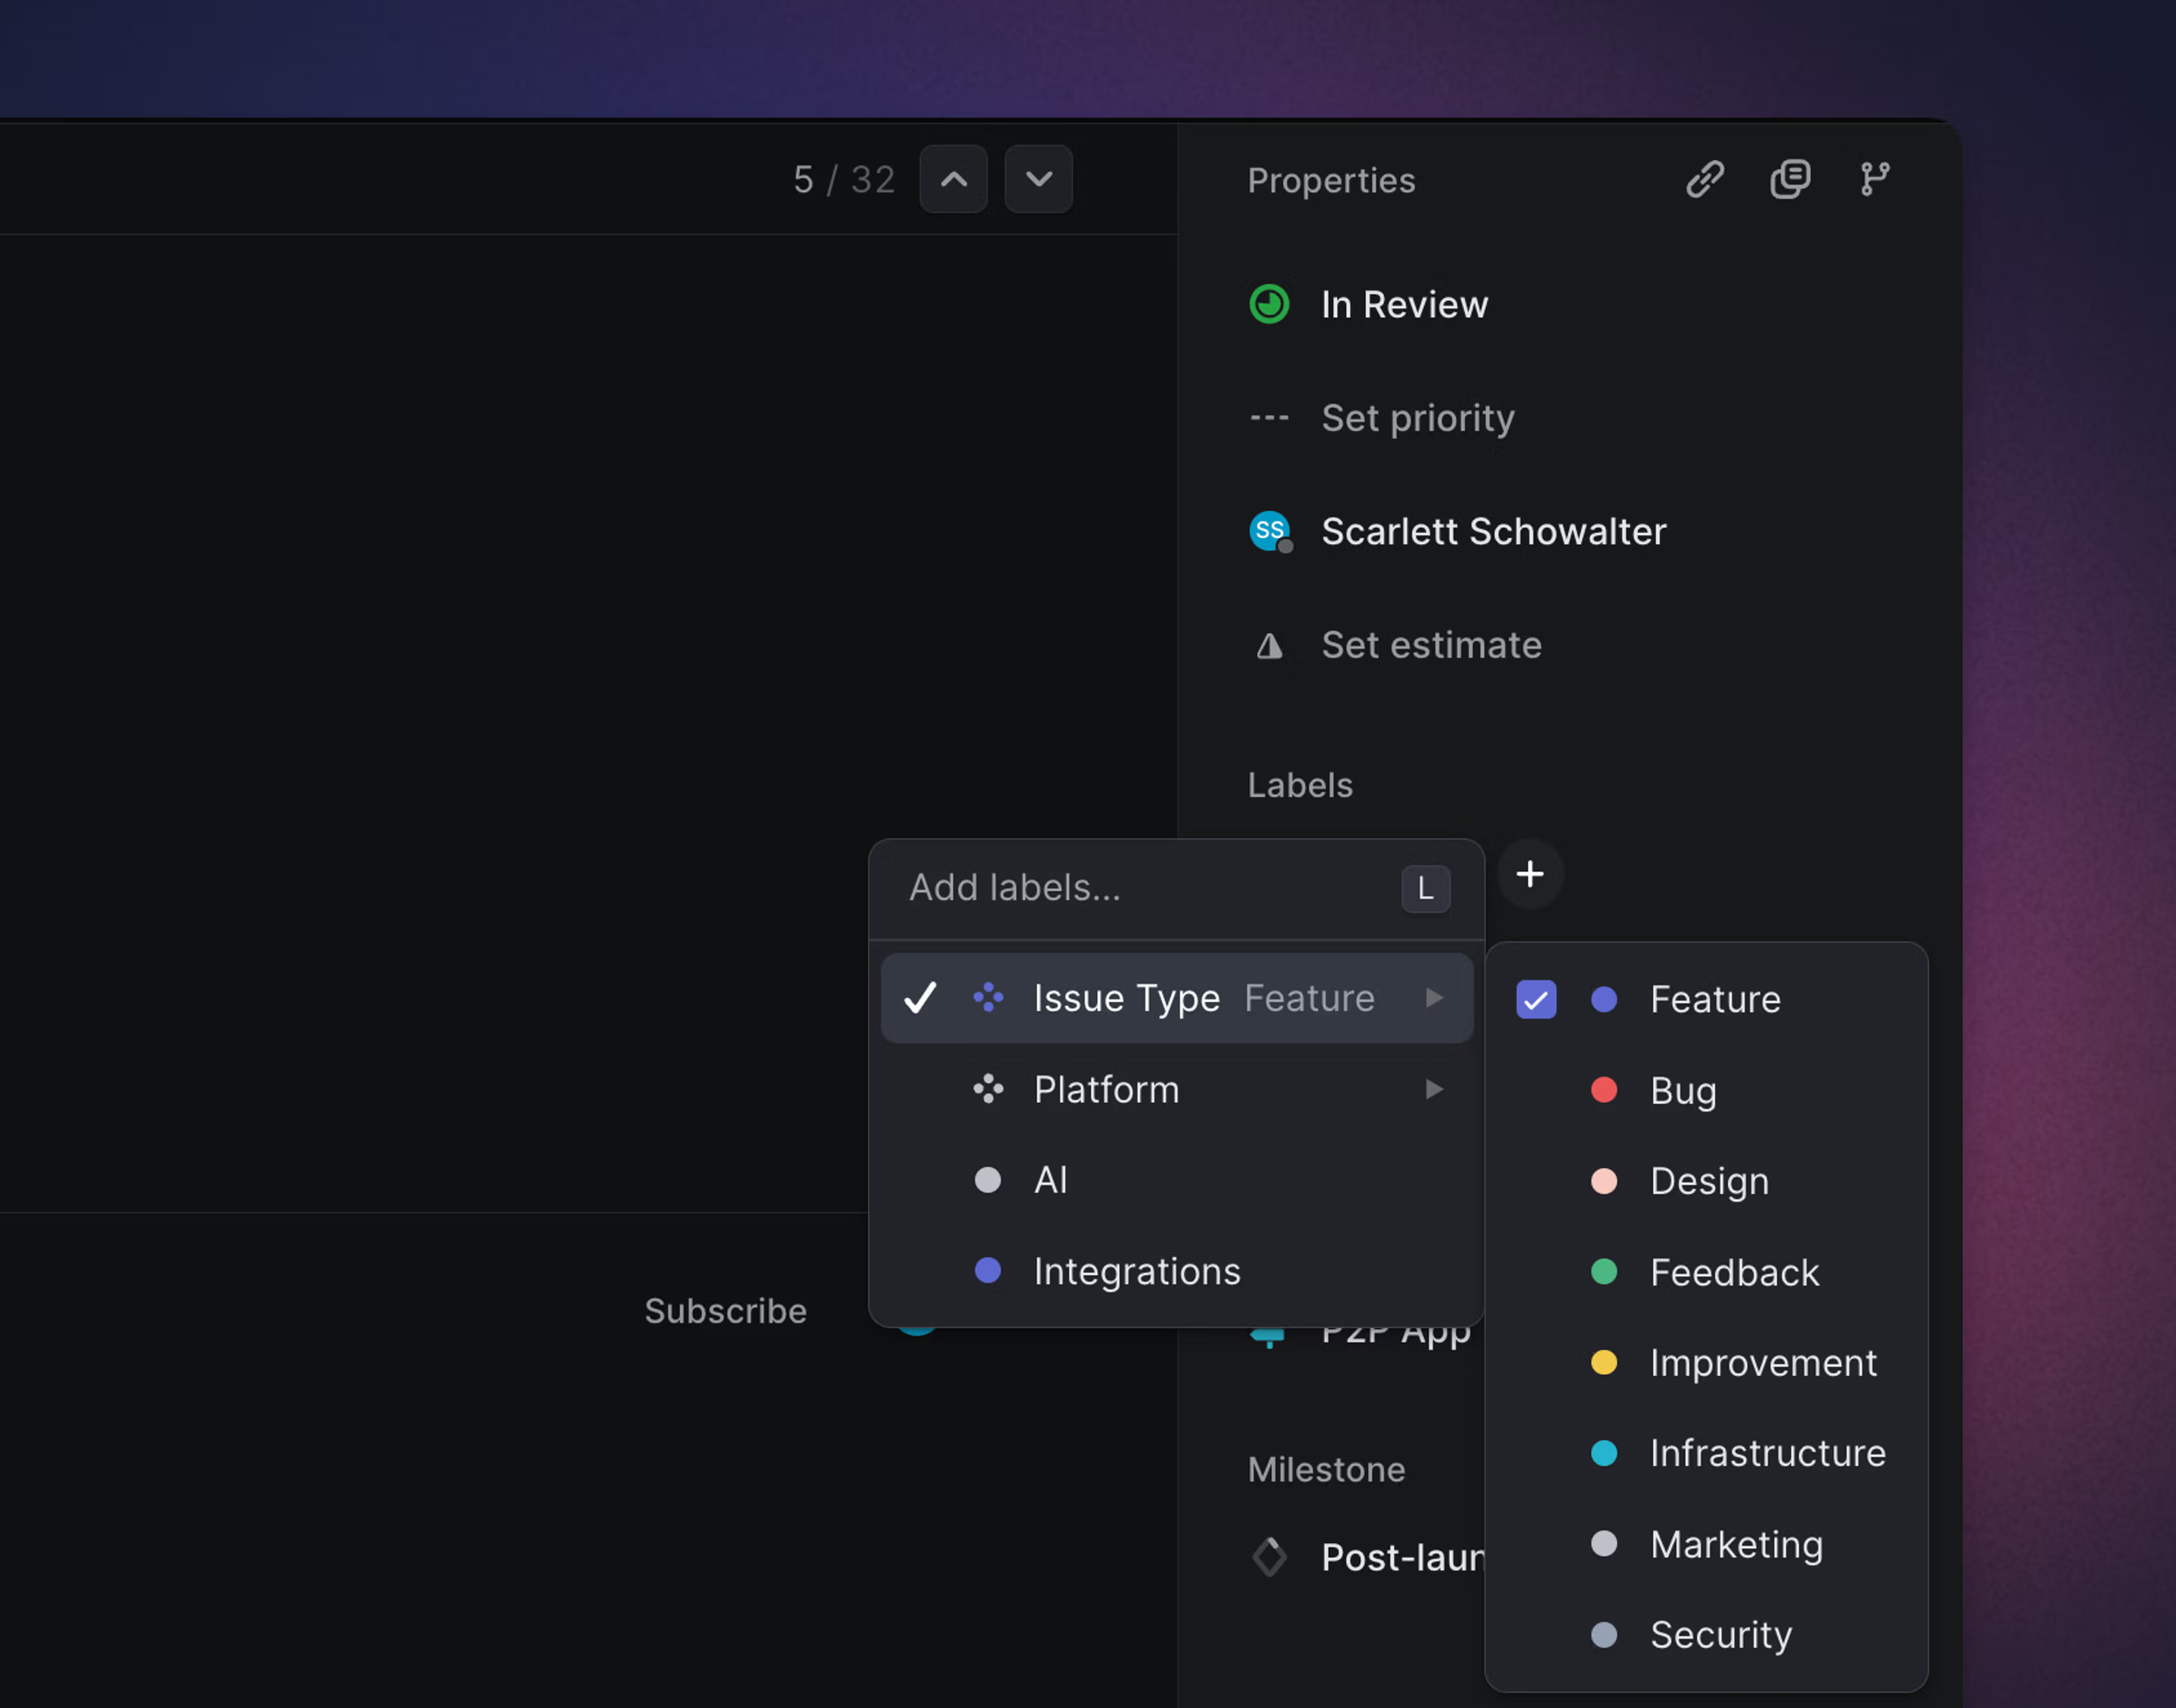
Label overview
Labels allow you to organize issues. Create labels at the workspace level or for a specific team, so they’re available only where relevant. You should create labels that are used by all teams (e.g. “Bug”) in the workspace-level, so they will be accessible to all teams.
Subteams can use labels inherited from their parent team. To change an inherited label, update it in the parent team.
Label groups
Label groups create one level of nesting in your workspace and team labels, giving you more options when organizing issues. Each label group is limited to 250 labels.
Label groups organize related labels. When labeling an issue, you apply a label from the group, not the group itself. Labels within a group are not multi-selectable, so only one label from a given group can be applied to an issue at a time.
Create labels
Create labels in Settings > Workspace > Labels page or Team settings > Labels.
You can also create labels in the Add label flow. Take the action to apply a label, then type the name of the label you want to create. You will have the option to create the label at the workspace level or for your team.
To create a label or label group directly from the Add label flow, use the syntax label group/label or label group:label. For example, using Type/Bug or Type:Bug will create the label group “Type” and the label “Bug”.

Apply labels
Apply labels to any issue with the shortcut L, or by clicking into the label property field in an issue’s right sidebar.
Manage labels
Labels can be edited, merged, and deleted in issue label settings. Label data like SLA and Triage rules the label’s used in, when it was last applied, and how many issues have that label appear in settings to guide your choices.
In workspace label settings, optionally select to display both all team and workspace labels on that page for ease of editing. Or, in larger workspaces, search for particular labels to assist in cleanup.
Edit label name or color by clicking on those properties in a label row. Or, right click on the row to see additional options like converting to a group, moving to workspace, or deleting the label.
Take bulk actions by selecting multiple labels (x or Shift + click), then right-clicking on any selected label to choose an action. You can rescope labels to and from the workspace level to a particular team, or change a label’s team. If you find duplicates, merge multiple labels into a single label.
Label descriptions
Add brief label descriptions in label settings. These descriptions appear when you hover over an applied label anywhere in Linear. These descriptions give a consistent understanding of when a label should be applied. Triage Intelligence also considers label descriptions to inform whether to suggest a particular label.
Archive labels
Archiving a label keeps it on any issues where it’s been applied, but stops people from using that label moving forward. Views, insights, filters and groups all respect archived labels. Take this option when you no longer need a label actively, but you want to retain historical context.
Archive labels in label settings, through the overflow menu on a particular label’s row.
Delete labels
If you’re sure a label no longer needs to exist, you can also delete it. Deleting labels is not reversible (including by Linear support) and will remove it from issues where it’s applied, so please proceed with caution. Delete labels in label settings, through the overflow menu on a particular label’s row.
Label filtering and views
Team-specific labels “act” like workspace labels when filtering all teams or multi-team views. As long as labels in different teams share the same name, filtered results will show all issues across all teams that match the label. This holds true in custom views, my issues, project all team views, and general search (/). It does not extend to the API (you’ll have to use the unique identifier for each team’s label).
If you only want to see results for a specific team’s labels in a multi-team view, add a team filter on top of the label filter. Creating a workspace label with the same name as existing team label(s), will present the option to convert the team label(s) to the workspace level.
Learn more about Label views and how to filter for labels.
Reserved label names
We reserve the following label names that are duplicative of existing features to not cause confusion:
“assignee”, “cycle”, “effort”, “estimate”, “hours”, “priority”, “project”, “state”, “status”
Issue relations
Create relationships between issues such as blocking, related, and duplicate.
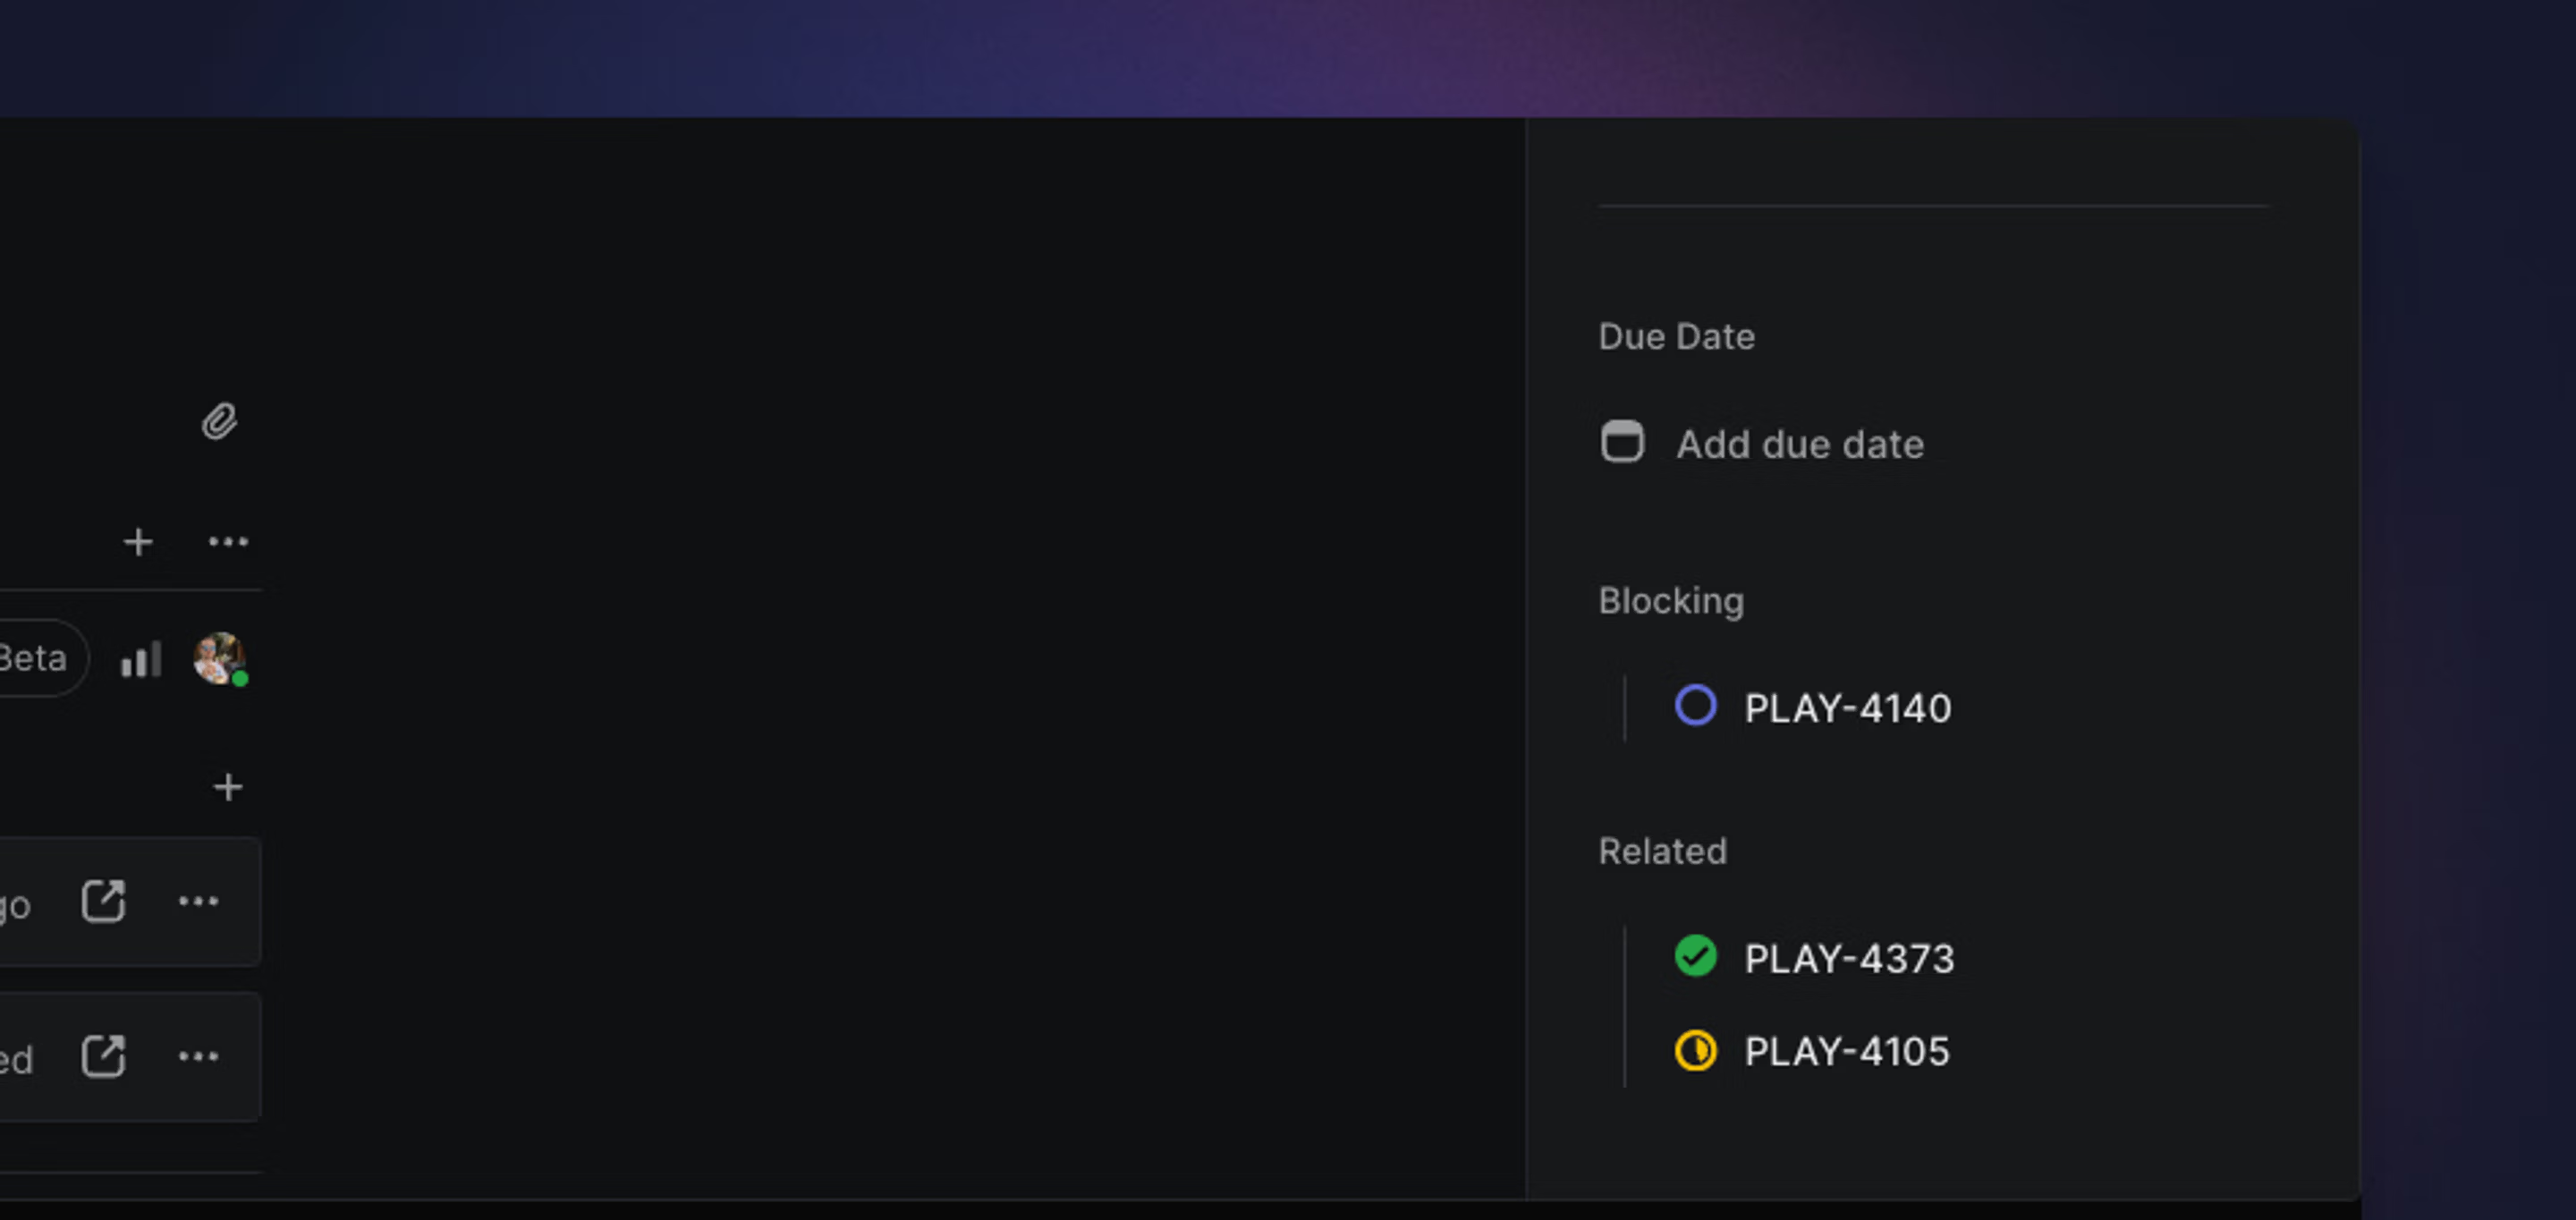
Relations overview
Tag issues with relations and dependencies to help your team identify and remove blockers and work on the most important issues. You can mark issues as blocked, blocking, related, and duplicate.
Add relationships
The issue and type of relationship will show up in the issue properties sidebar.
From the issue editor, add a relation using keyboard shortcuts or by selecting the overflow menu after saving the issue. From a list or board, use either the keyboard shortcut, command menu or contextual menu. You’ll be prompted to find and select the related issue. You can add as many related, blocking, blocked, or duplicate relations as you like but will have to repeat the steps for each one.
When you reference issues in a description or comment, they’ll automatically become a related issue. Alternatively, use M + R to relate one issue to another. When viewing an issue you can open the command menu (⌘/CTRLK) and type “Create new issue related to…”.
To remove a related issue, hover over the related issue and click the X. You can also select Remove relation from the command menu ⌘/Ctrl K. If you have more than one relation, you’ll be prompted to select which relation to remove.
Blocked and blocking
Mark issues as blocked by other issues with M then B. If other issues are blocking the current issue, they’ll show up in the issue sidebar with an orange flag under Blocked by.
Mark issues as blocking other issues with M then X. If the issue is blocking other work, the blocked issues show up in the issue sidebar with a red flag under Blocks.
Once the blocking issue has been resolved, the relationship moves under Related.
Duplicate
Merge duplicate issues into the canonical (saved) issue from the command menu. This marks the issue you are viewing or have selected as a duplicate and moves it into the reserved Duplicate status, making duplicates visible as a distinct outcome in workflows and reporting, not just as a relationship between issues. You cannot mark issues the other way around (e.g. view the canonical issue and mark other issues as duplicates of it).
Duplicate issues show a link to the original issue directly in the issue view, including a dedicated banner and sidebar treatment that links back to the original issue.
Estimates
Show how much effort each issue will take.
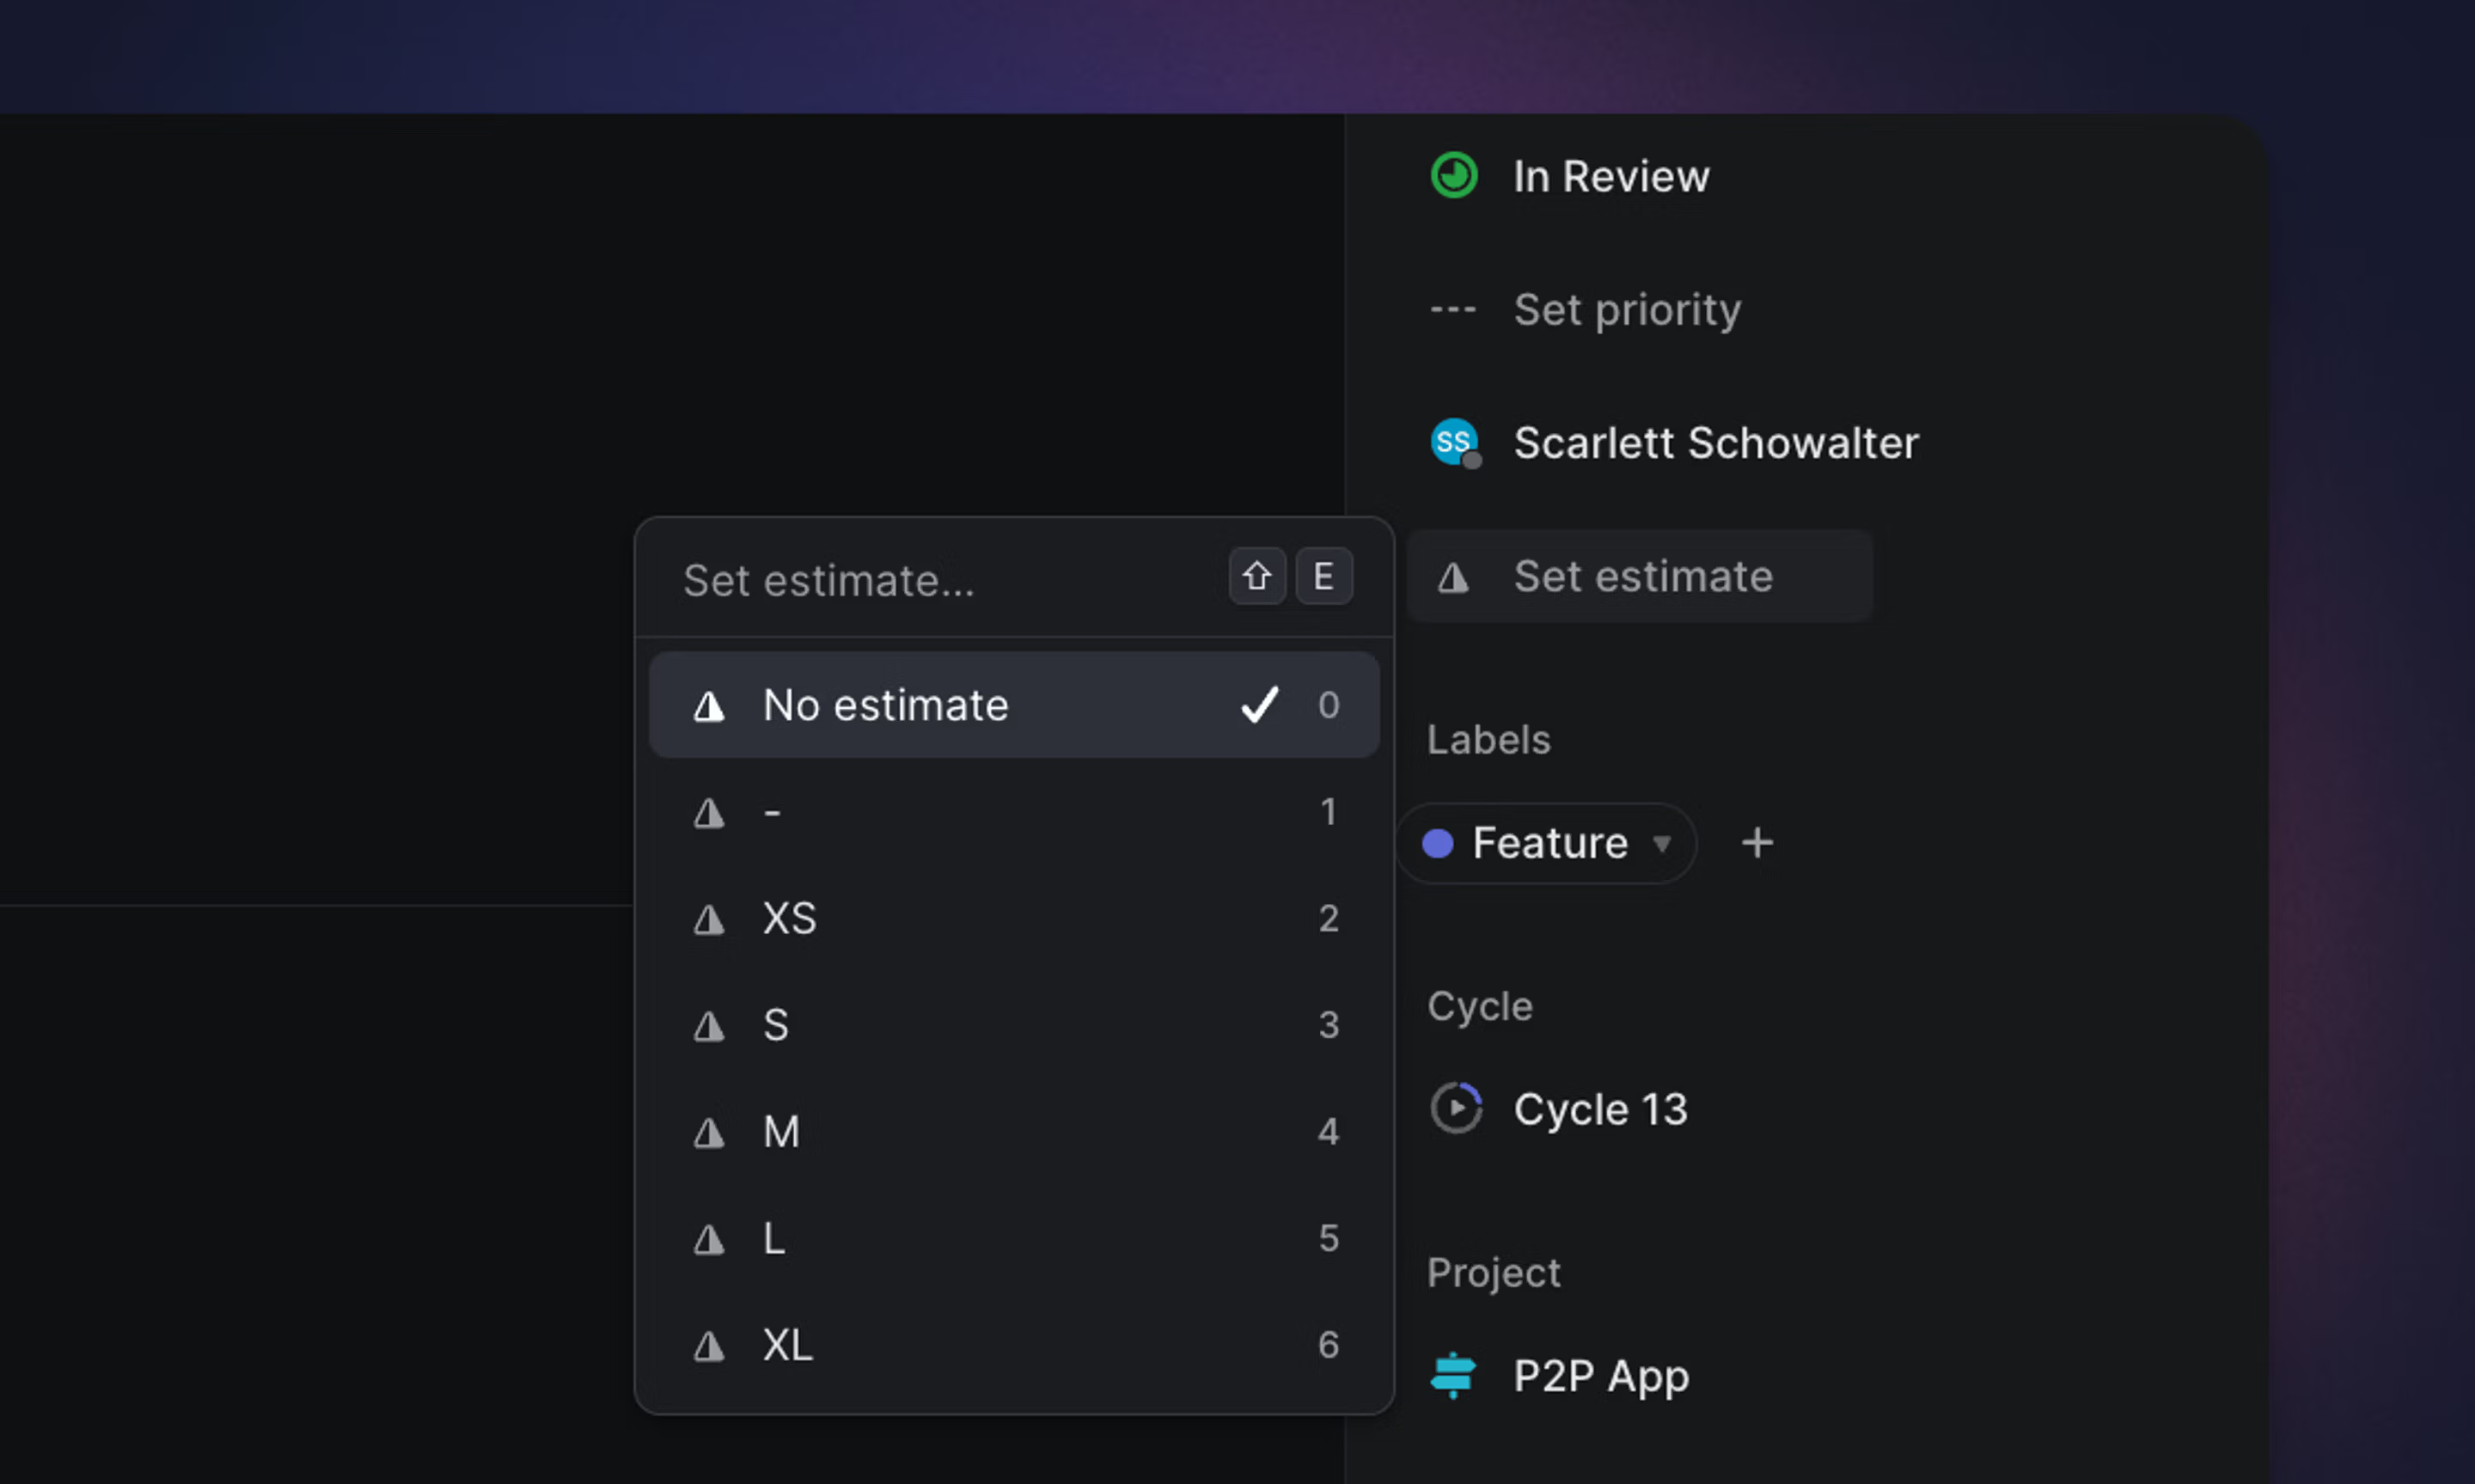
Estimates overview
Use estimates to describe the complexity or size of an issue. Cycles and projects use estimates to calculate effort and related statistics. You’ll opt into estimates on a team level as well as choose which estimate scale to use.
Configure estimates
Go to Team Settings > General > Estimates to enable the feature. Teams can use different estimate scales and configurations, even if they’re working together on the same project. Sub-teams can inherit estimate settings from their parent team.
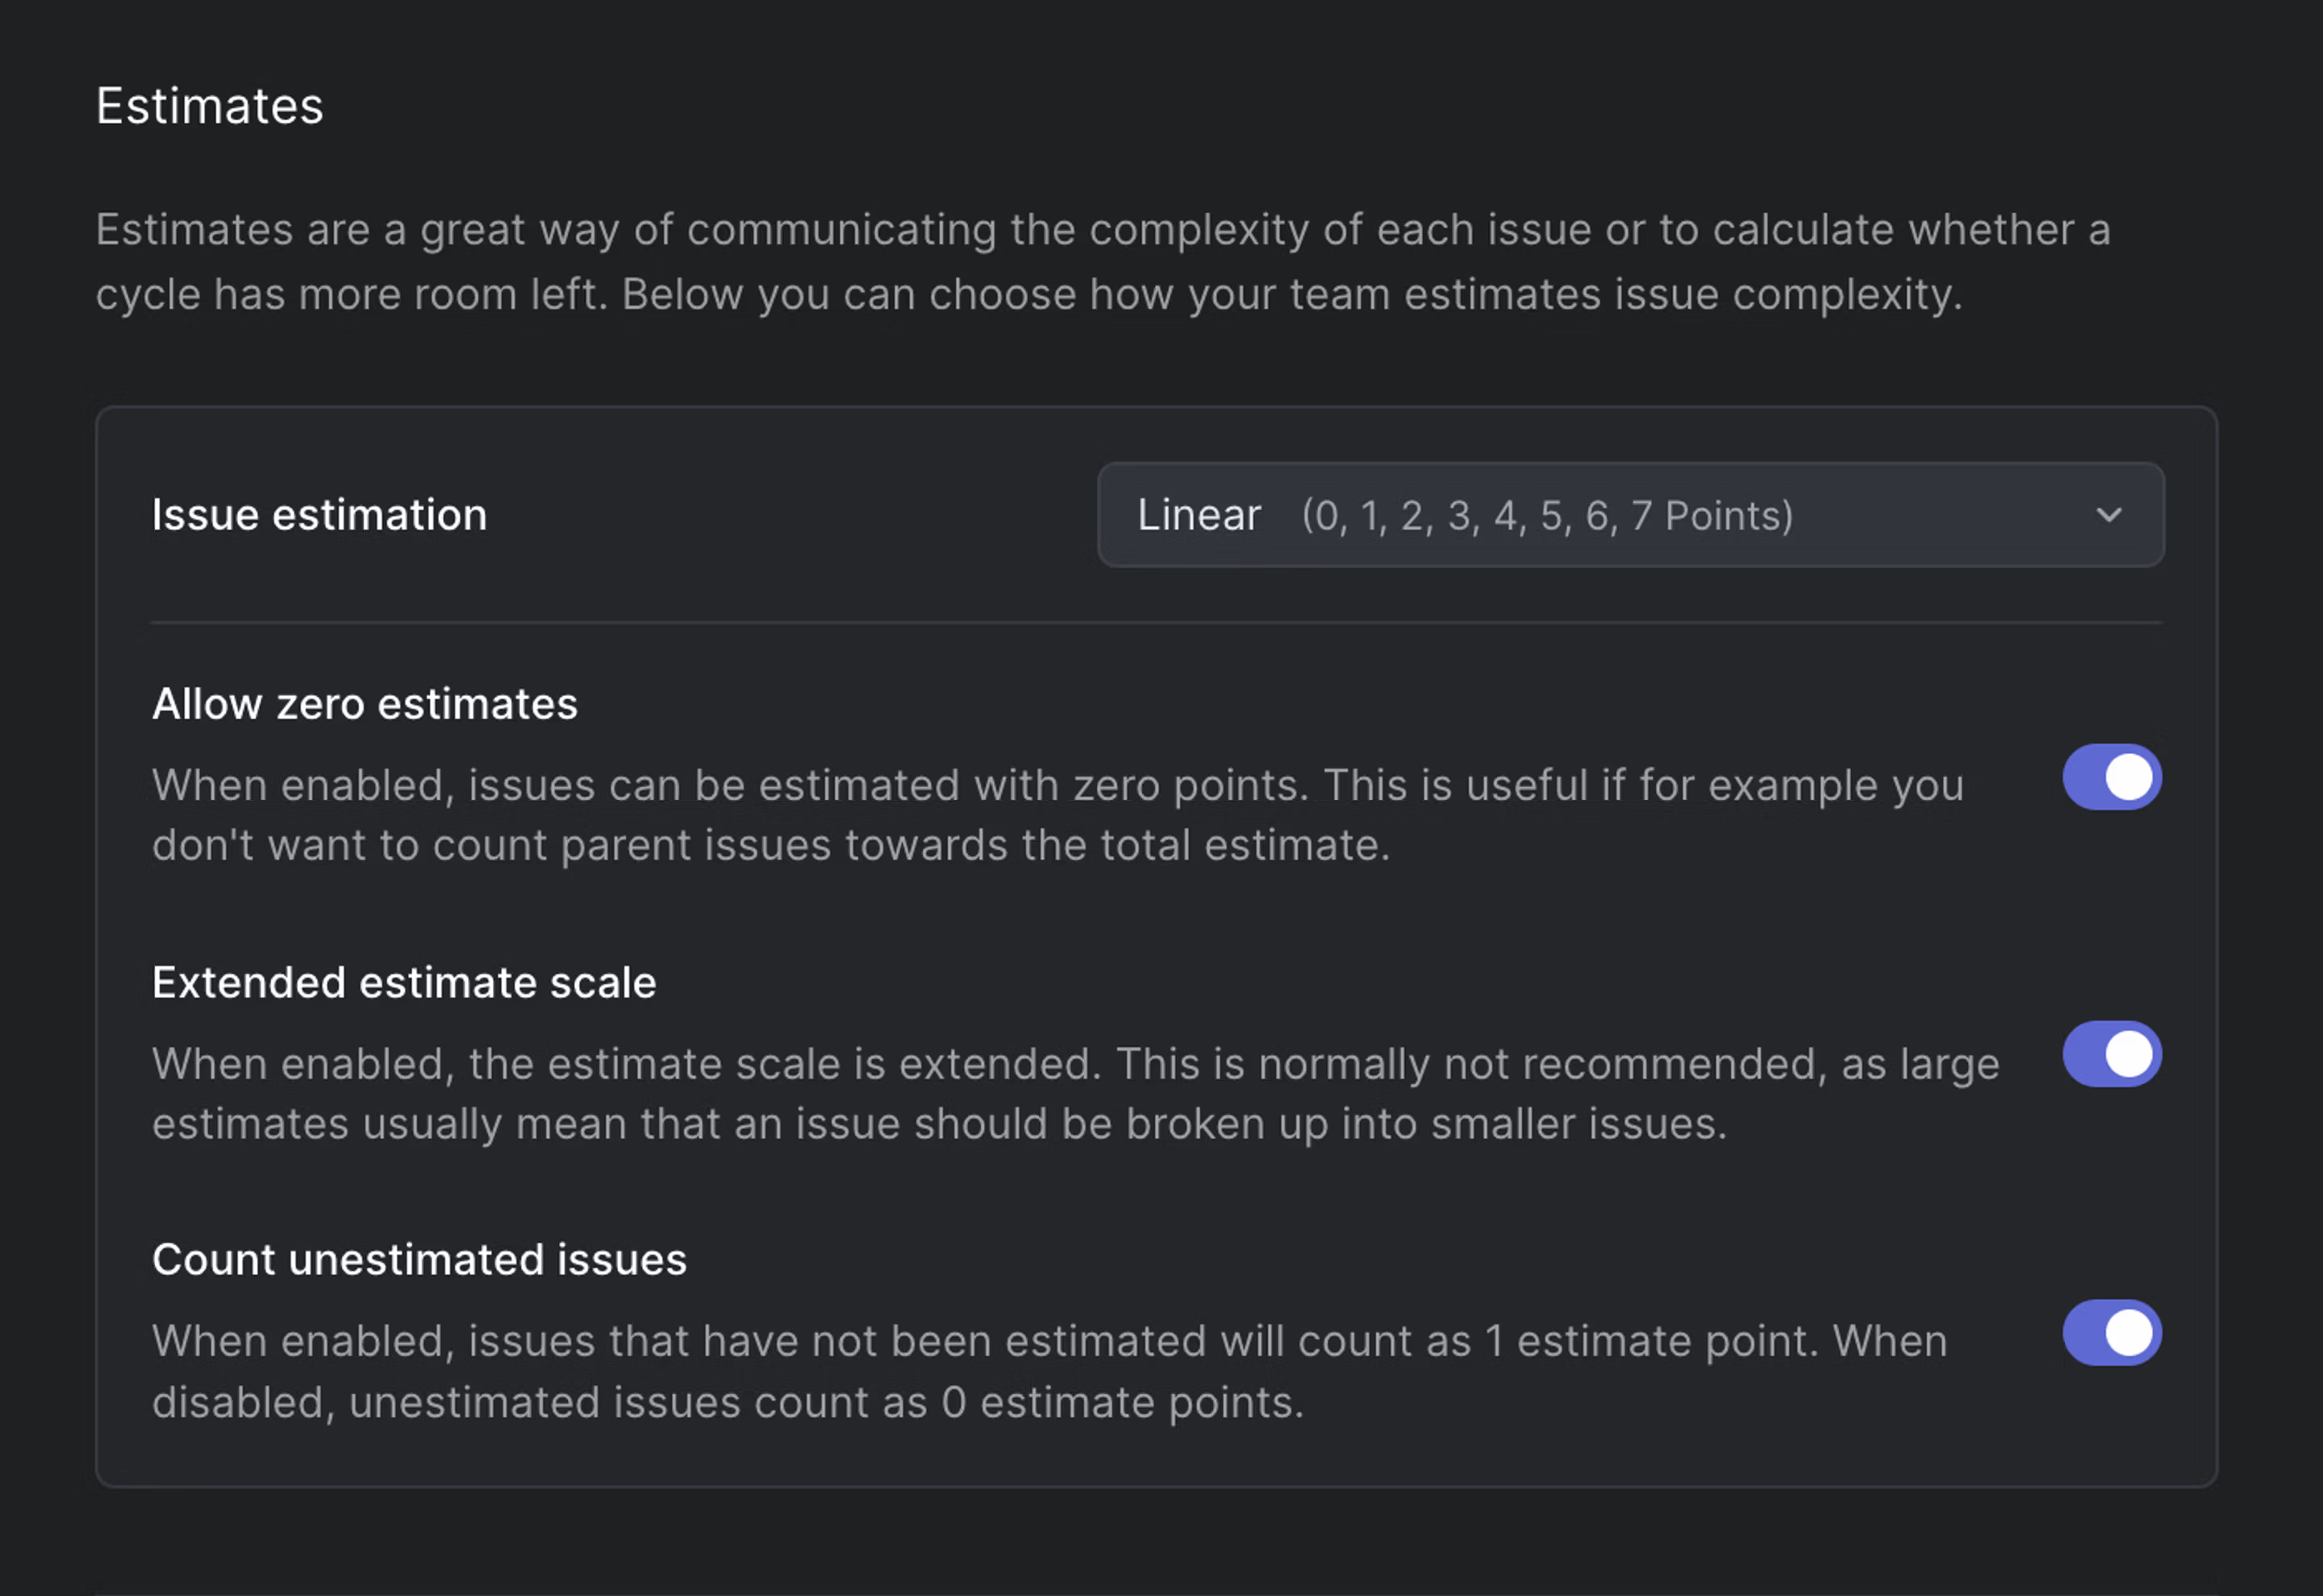
Scale range options
Scale |
|
|
|
|
|
|---|---|---|---|---|---|
Exponential | 1 | 2 | 4 | 8 | 16 |
Fibonacci | 1 | 2 | 3 | 5 | 8 |
Linear | 1 | 2 | 3 | 4 | 5 |
T-Shirt | XS | S | M | L | XL |
When T-Shirt sizes require translation to numerical values (for display in graphs, for instance,) they follow the Fibonacci scale.
Extended estimate scales
Enable the extended scale to add two additional values to your scale.
| Extended Scale | ||
|---|---|---|
| Exponential | 32 | 64 |
| Fibonacci | 13 | 21 |
| Linear | 6 | 7 |
| T-shirt | XXL | XXXL |
Zero estimates
Allow zero estimates to assign an explicit estimate of 0. This is different from leaving an issue unestimated. By default, unestimated issues count as 1 point, but you can disable that in estimate settings.
Add, edit, or remove estimates
Add estimates when creating or updating issues with the keyboard shortcut Shift E. The same keyboard shortcut can be used to edit or remove the estimate.
Filter for estimates
Find issues with specific point values by filtering for estimates. The shortcut F will open the filter menu and you can select estimates from there. This is especially helpful when creating custom views and searching through the backlog.
Estimates in analytics
When you see the word effort, that refers to estimate. When estimates are not enabled, we calculate statistics using a default value of 1 estimate point per issue. T-shirt estimates map to the Fibonacci scale.
If you’ve enabled estimates, we’ll use the estimate values to calculate percentage completion and effort in cycle and project graphs. The top bars on most views will show the total issues count or total estimate value next to the view’s name. Hover over the number to see both values.

When estimates are too large, refine issue scope
Larger estimates usually mean that there is uncertainty about the issue’s complexity. We find that breaking up issues into smaller ones is the best approach.
SLAs
Automate SLAs for issues that should be completed within a certain amount of time.
Available to workspaces on Business and Enterprise plans
SLA overview
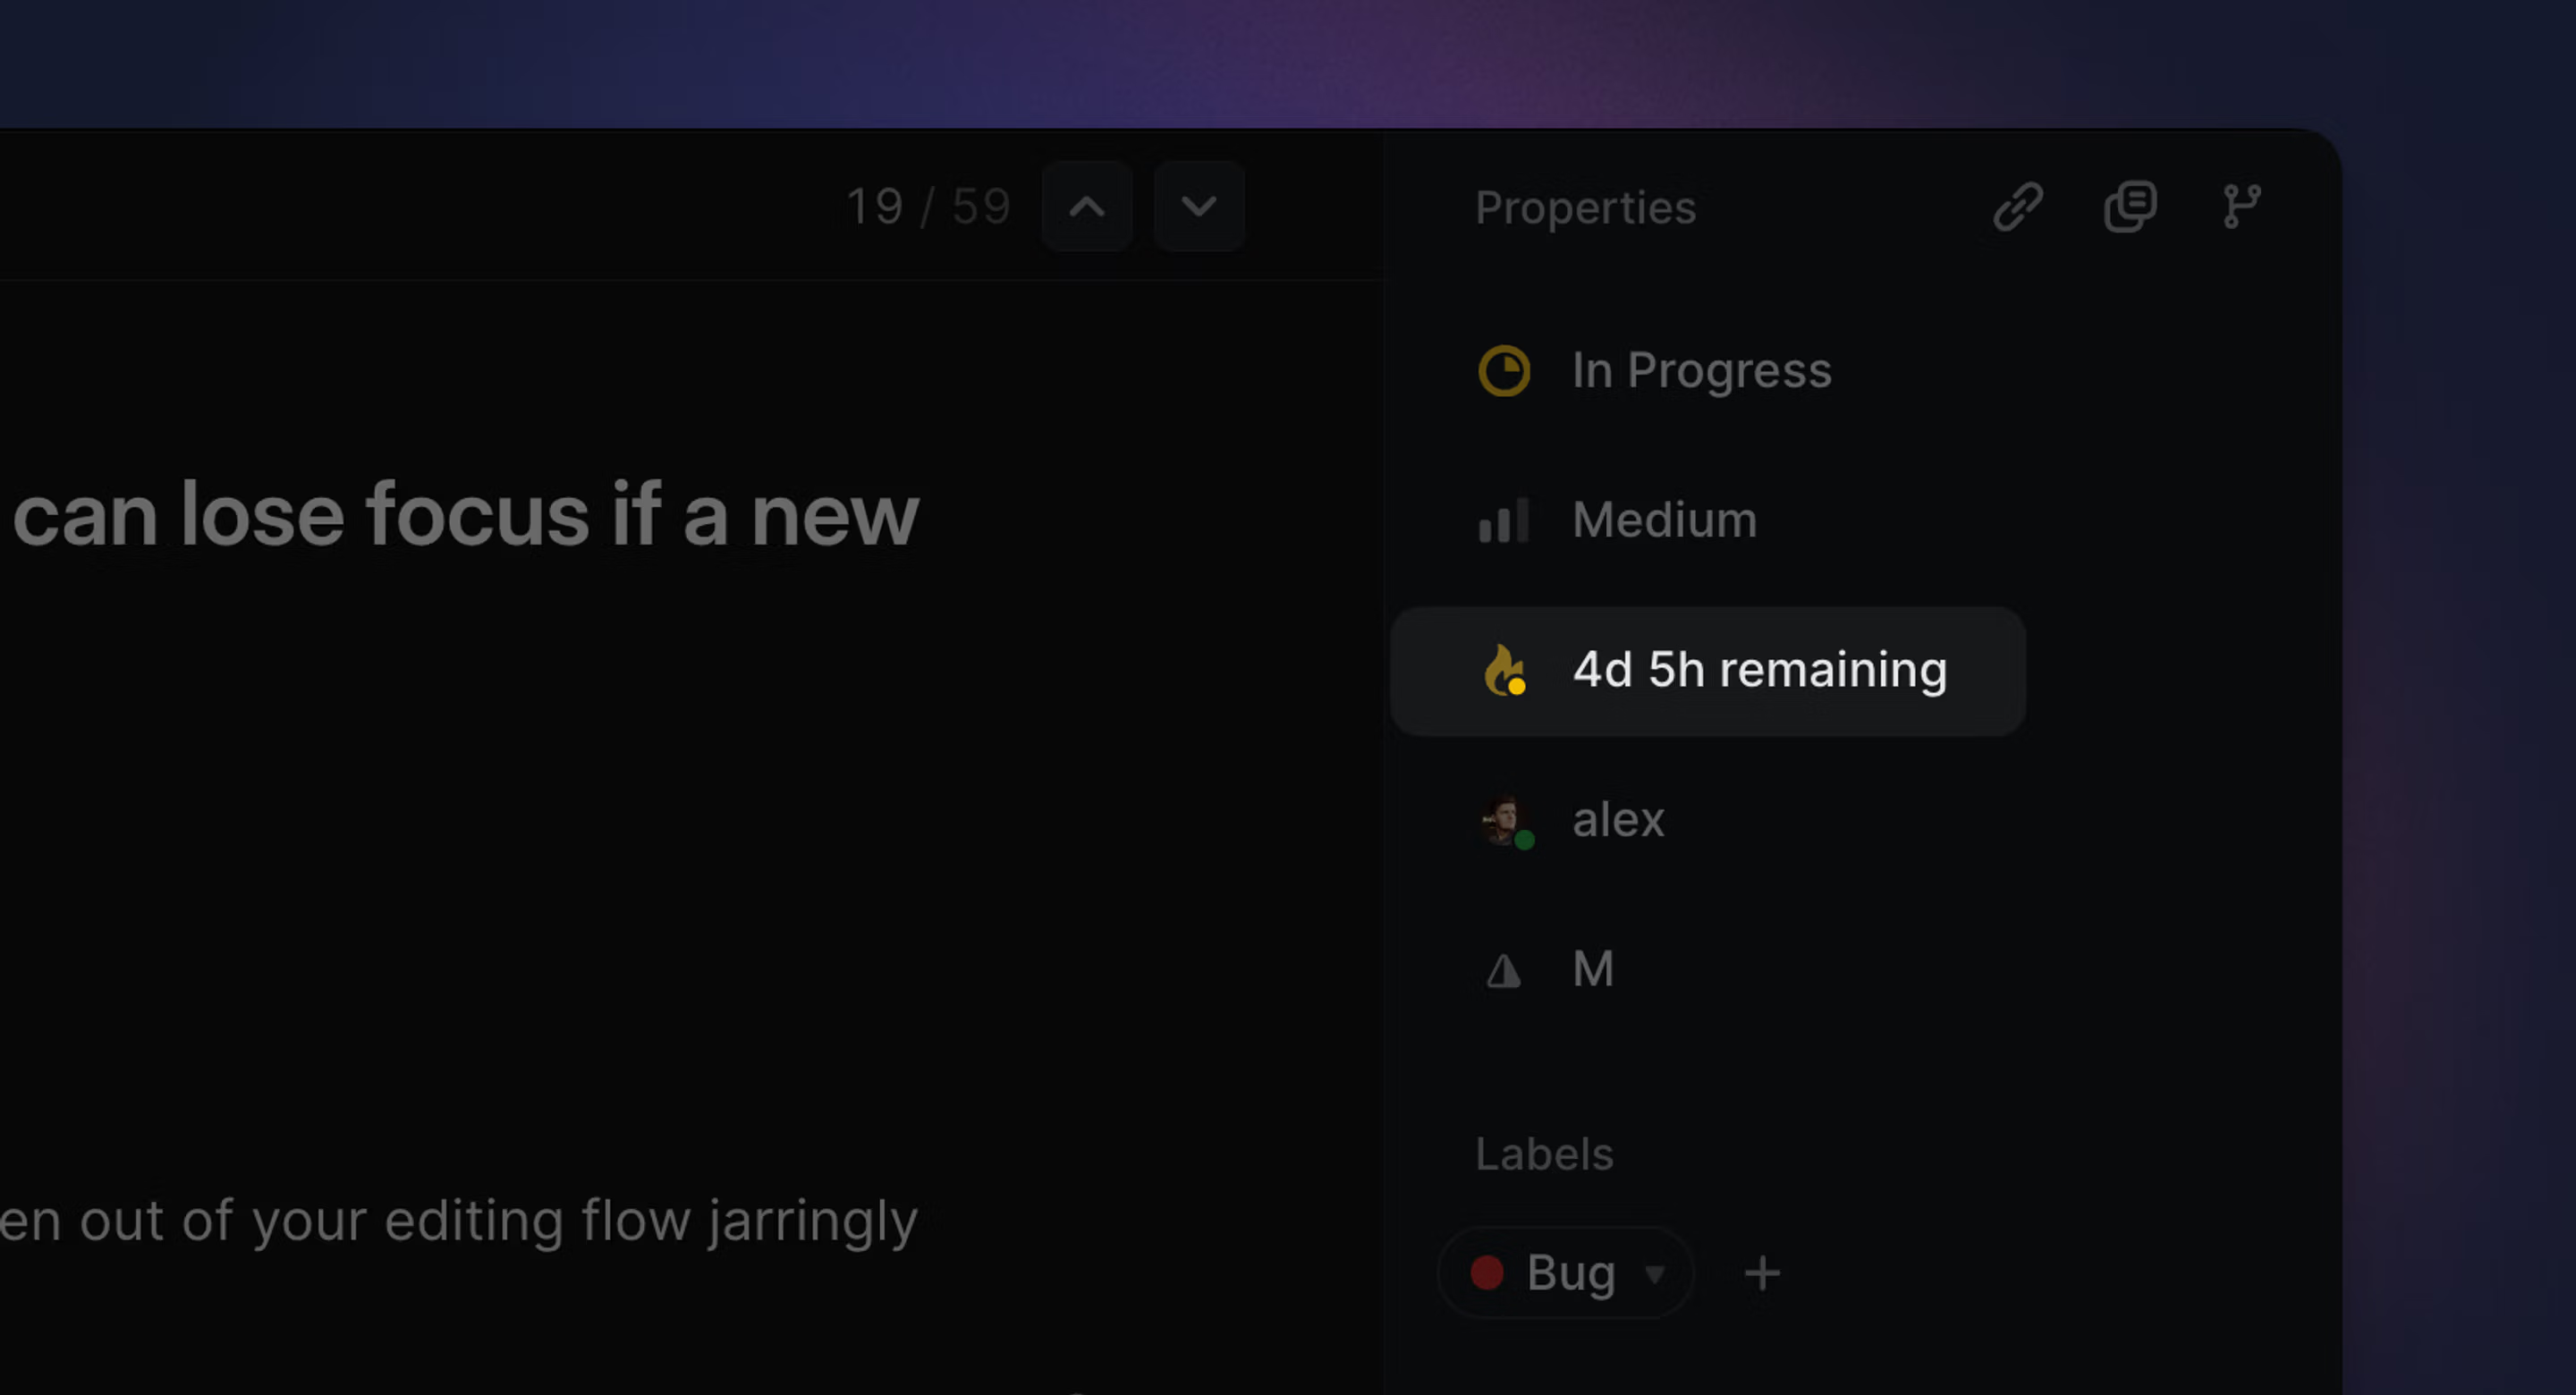
SLAs automatically apply deadlines to issues that match defined conditions. While traditionally used to describe service level agreements with your customers, SLAs can also be used to maintain internal standards for how quickly bugs will be fixed and time-sensitive issues will be resolved.
Configure SLAs
Enable the feature in Settings > Issues > SLAs, then create rules that apply or remove SLAs when issues match defined conditions. Rules are evaluated when issues are created or updated. Creating or changing a rule does not automatically apply it to existing matching issues.
SLAs won’t be applied to existing issues that have already been prioritized. Changing the priority of an existing issue will trigger SLAs however once the change matches your SLA rules.
SLA basics
SLAs appear on issues as a fire icon which transitions from gray > yellow > orange > red as an issue nears and breaches the SLA. Once the issue is completed, the SLA field remains and shows the completion time down to the minute and whether the SLA was achieved or failed.
SLAs are automatically created on any issue that matches the rules set in SLA settings. You can also manually add SLAs to issues if desired.
Default SLAs
When you enable SLAs, you’ll enable a set of default rules:
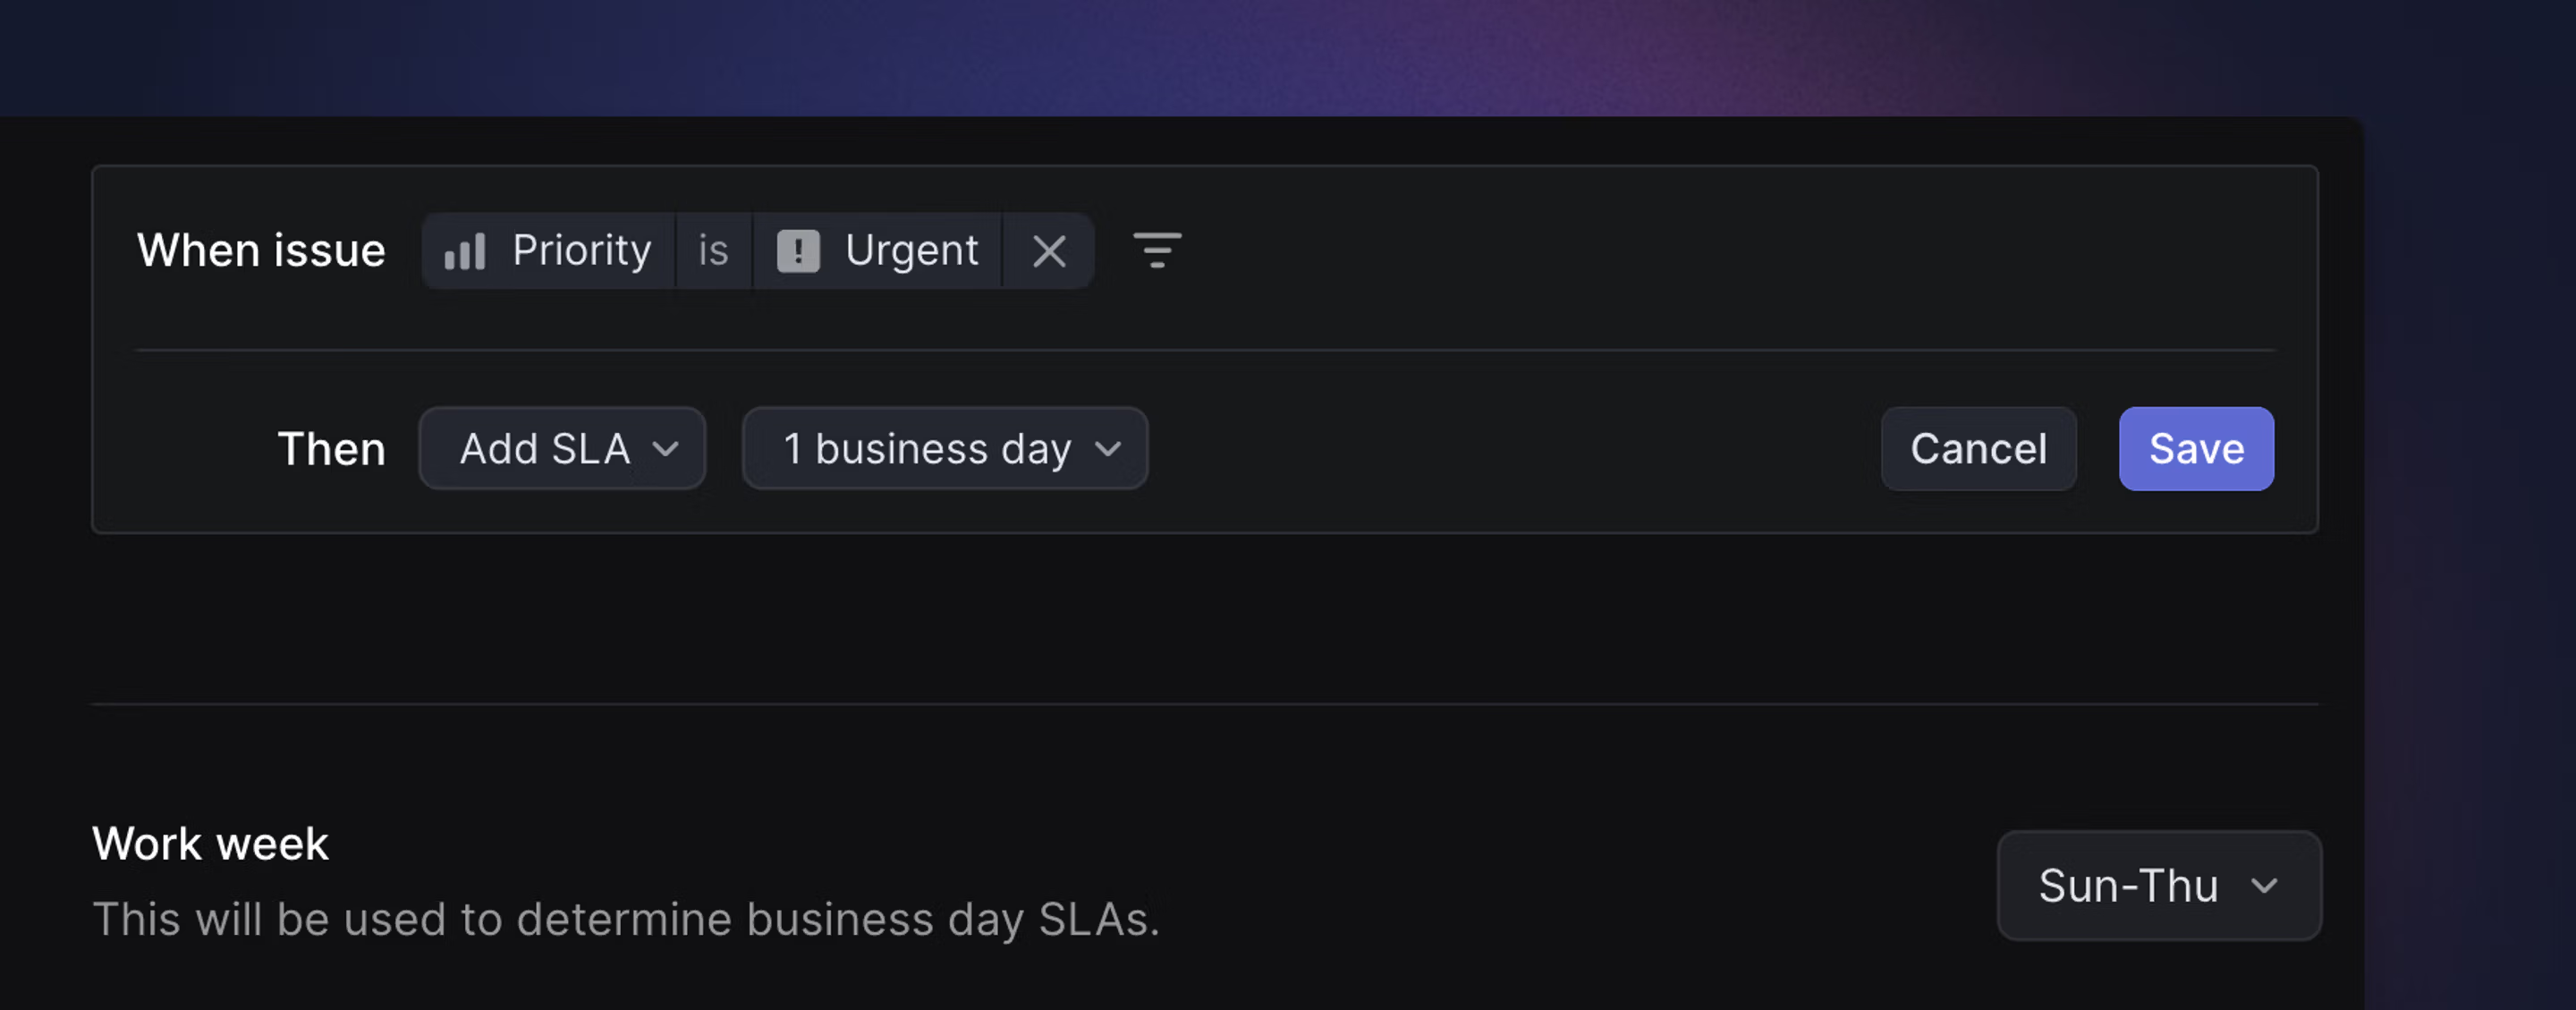
- When Priority is Urgent, add a 24 hour SLA
- When Priority is High, add a 1 week SLA
- When Priority is Medium, Low, or No Priority, remove the SLA
You can edit, delete or create new SLA rules as desired.
Create new SLA rules
Select New Rule to create a new SLA rule. Set the time interval to any of the following durations:
- 12 hours
- 24 hours
- 48 hours
- 1 week
- 2 weeks
- 4 weeks
- Custom time: Hour, Day, Business day and Week
You can filter by almost any field to specify when SLAs should be applied, including Team, Status, Assignee, Creator, Priority, Labels, Project, Project Status, and Initiative, and filters can be combined.
When an issue matches multiple SLA rules, only the first matching rule is applied. Arrange rules in the order you want them to be evaluated.
Business day SLAs
When configuring an SLA with a custom duration, choose ‘Business days’ to exclude days outside your work week. By default, business days are Monday through Friday.
On the SLA settings page, you can optionally set your work week to Sunday through Thursday. This affects SLA calculations and other features that skip non-working days, such as project update reminder nudges.
When manually setting an SLA on an issue, you can choose business days or standard days.
Remove SLAs
Linear’s default SLA rules contain conditions to remove SLAs when priority is marked as Medium, Low, or No priority. These “removal” rules are helpful to maintain data hygiene, so that if an issue’s priority is downgraded, SLAs which are no longer relevant will be removed. We recommend keeping these in the workspace.
SLA status and filtering
Linear groups SLAs into different SLA statuses. You will be able to filter and organize views of issues by their SLA status, and the different statuses will be indicated by the color of the SLA icon.
| SLA status | Definition |
|---|---|
| Low risk | More than 1 week away from SLA |
| Medium risk | Within 1 week of SLA |
| High risk | Within 1 day of SLA |
| Breached | SLA has passed |
| Achieved | Issue was completed within SLA |
| Failed | Issue was completed after SLA was breached |
SLA notifications
Subscribers to an issue with an SLA receive notifications in their Inbox when SLAs are 24 hours away from being breached as well as when SLAs are breached. Individuals can opt in to receive notifications whenever any issue in their Team has an SLA, too. Manage these notifications in settings under Account > Notifications.
Slack team notifications for “an issue is at risk of breaching SLA” are sent 24 hours before the SLA breaches, or if using business day SLAs, one business day.
Viewing SLA issues
You can filter any view to see issues according to SLA status: Breached, High Risk, Medium Risk, Low Risk, Achieved, Failed, and No SLA.
Insights offers a helpful way to evaluate how well you’re meeting your SLAs. Filter a view by SLA, set Insight parameters to Issue count (measure) and SLA status (dimension) to see a clear breakdown of how well you’re meeting your SLAs.
Manually apply SLAs
You can add an SLA to an existing issue even when it doesn’t match a predefined rule. Open the issue, select the three-dot menu, then choose Set SLA.
Applying an SLA clears any existing due date from the issue.
If the issue matches an SLA removal rule, the SLA may be removed automatically when the issue is updated. Review or adjust the applicable rule before setting the SLA manually.
SLA FAQ
We recommend creating a custom view filtered down to issues that contain SLAs. You can group the view by SLA status and also use Insights to explore the data.
Due dates
Add due dates to issues to help your team keep track of time-sensitive work.
Due date overview
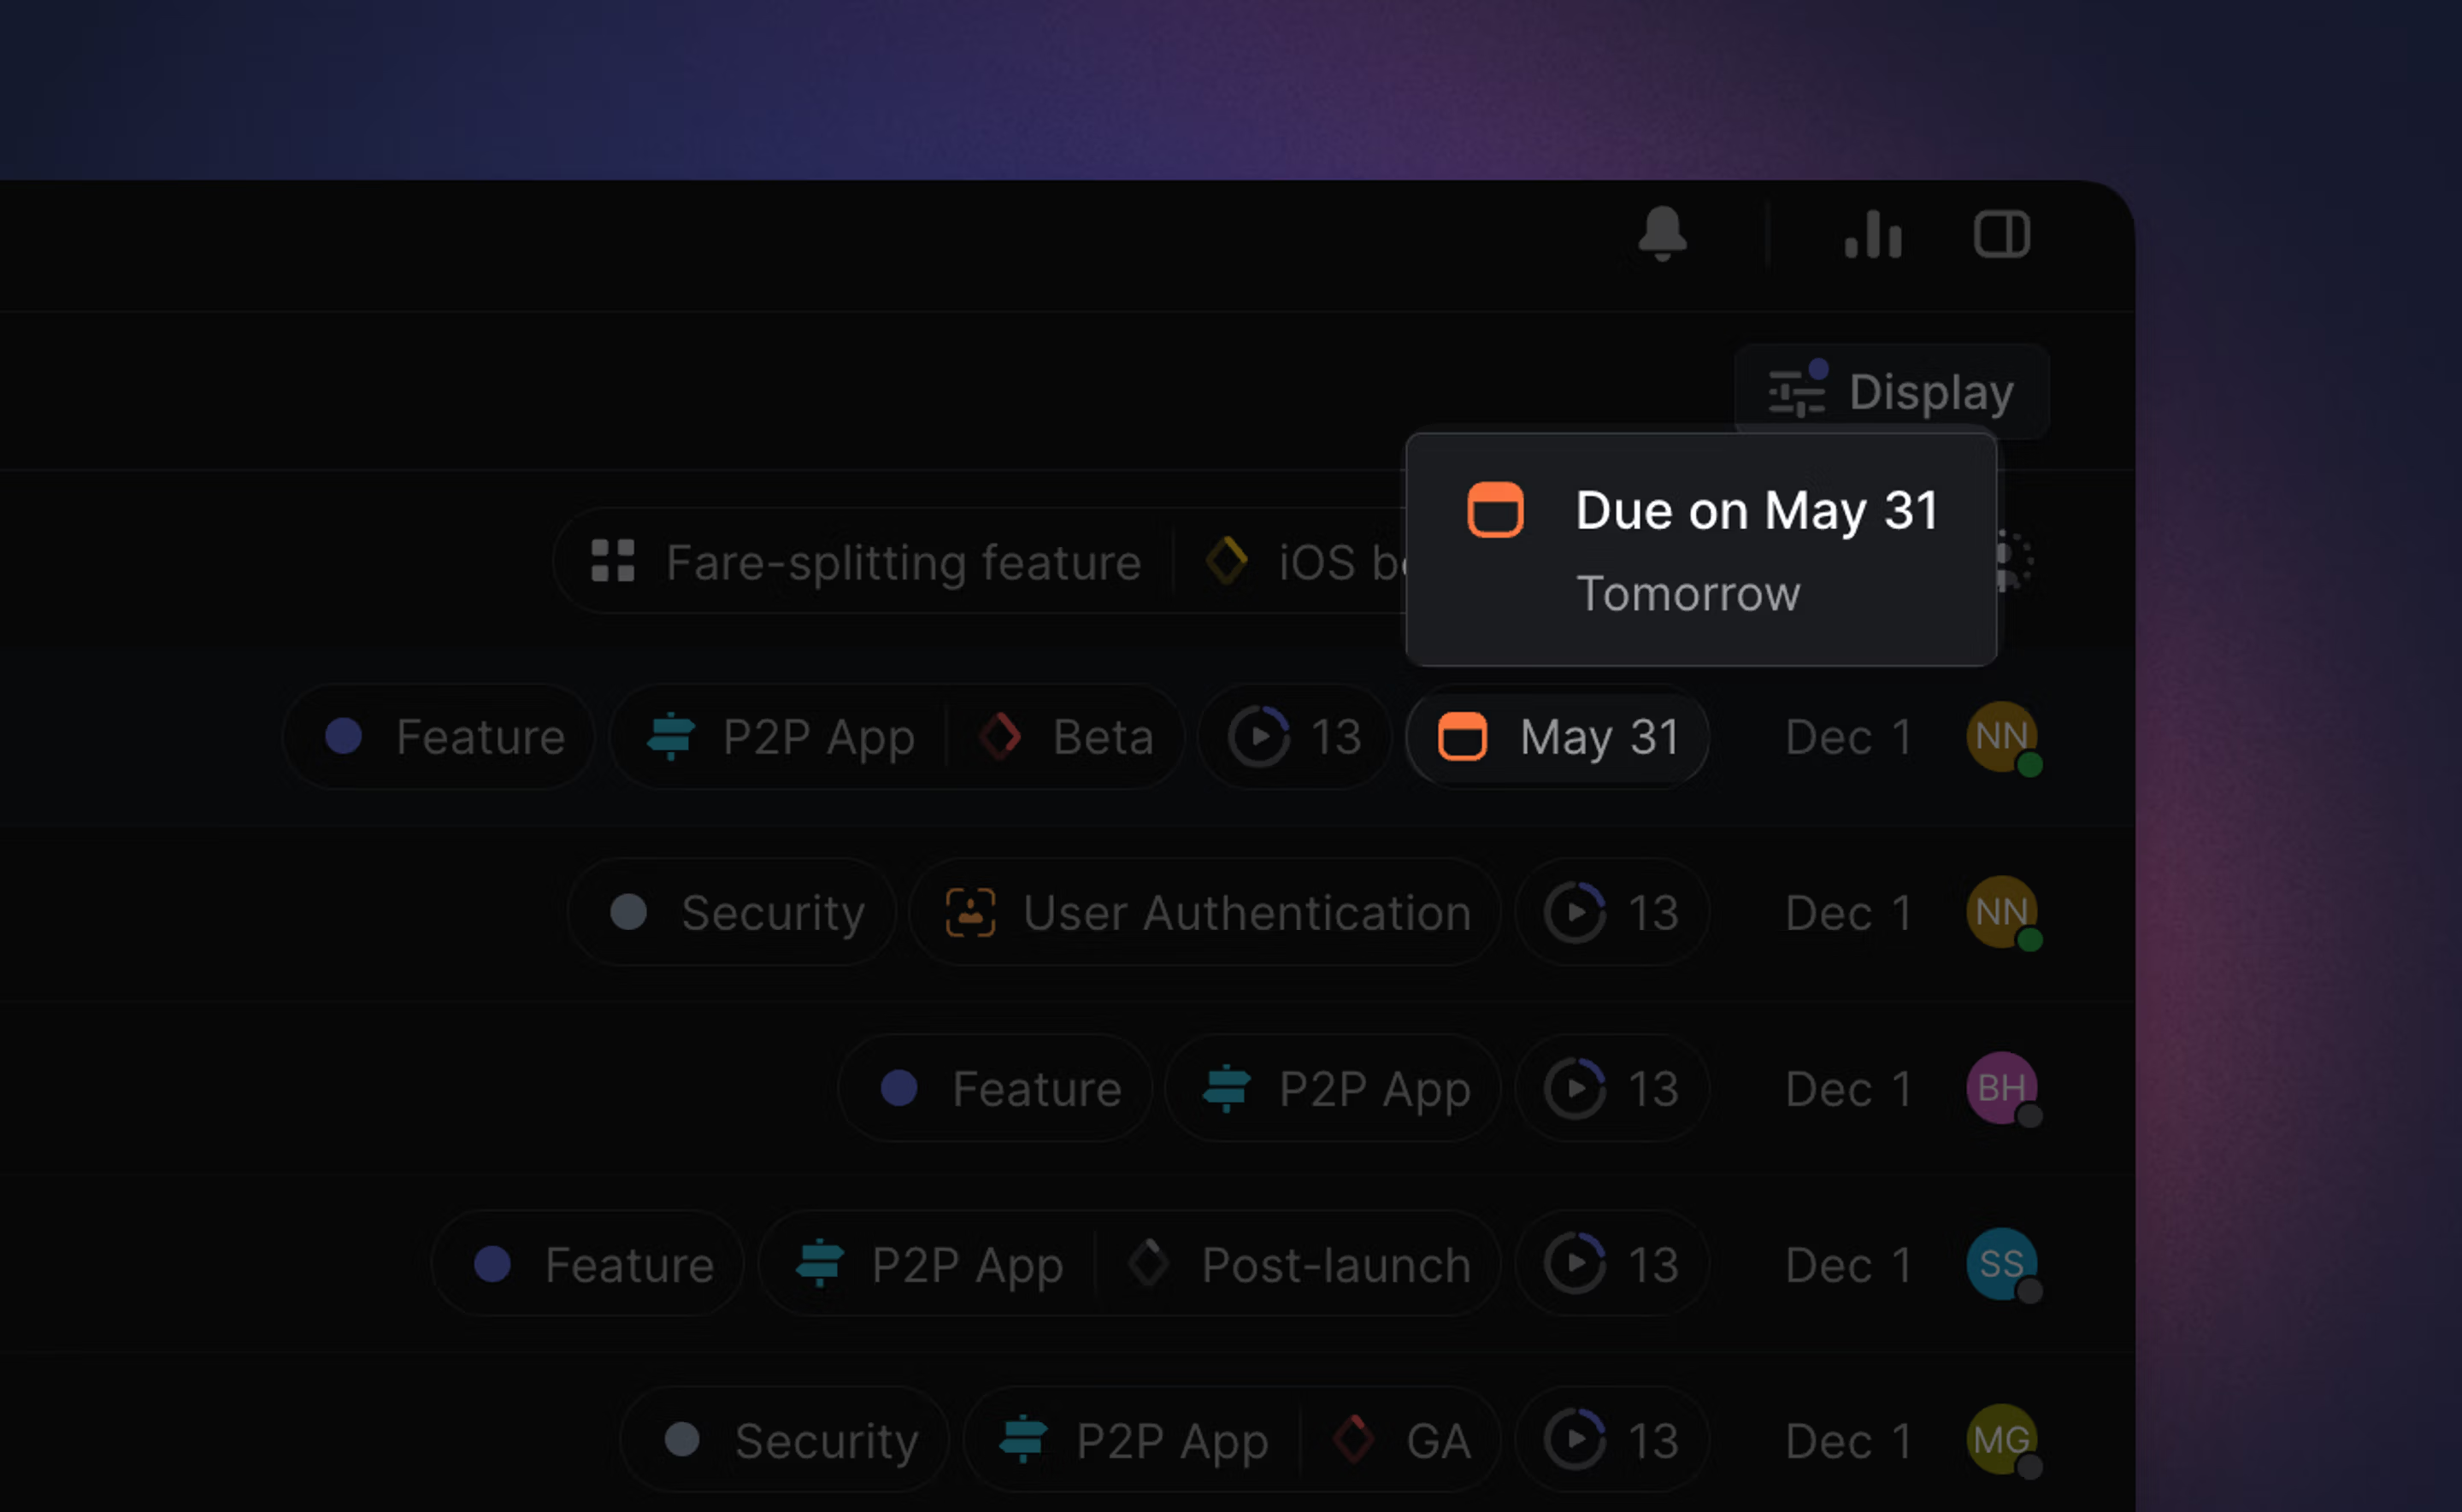
Issues with due dates display a calendar icon on the list or board with a color indication to quick understanding of an issue’s status.
The icon is red when the issue is due today or overdue, orange when due within a week, and gray otherwise.
Hover over the icon to view the due date and how many days are remaining or have passed since it was due.
If you don’t see the icon on your list or board view, open Display Options and make sure that Due Date is selected under Display properties.
Add a due date
Use the shortcut Shift D when viewing or selecting an issue to set the due date. During issue creation, select the three dot menu to bring up the set due date option.
Due date notifications
If enabled in your notification settings, you will receive a notification when an issue’s due date is near and/or if the issue is past due.
Filter by due date
Type F then search due or click the add filter button to apply the following related filters to any issue view:
- Overdue
- 1 day from now
- 1 week from now
- 3 months from now
- Custom date or timeframe
- No due date
Sort by due date
On list views, open view options and select Ordering: Due date to sort issues by due date. Issues with a due date will show up at the top of each group.
Due dates and SLAs
An issue may use either a due date or an SLA, but not both. If an issue has a due date and then has an SLA applied, the due date will be replaced by the SLA. See the SLAs section above for details.