Workspaces
The first step to using Linear is to create a workspace for your team.
Overview
A workspace is the home for all issues and interactions in an organization. We recommend organizations stay within a single workspace as this is the conceptual model we use when designing the product.
When a workspace is created, Linear automatically creates a default Team with the same name as the workspace.
Workspace Settings
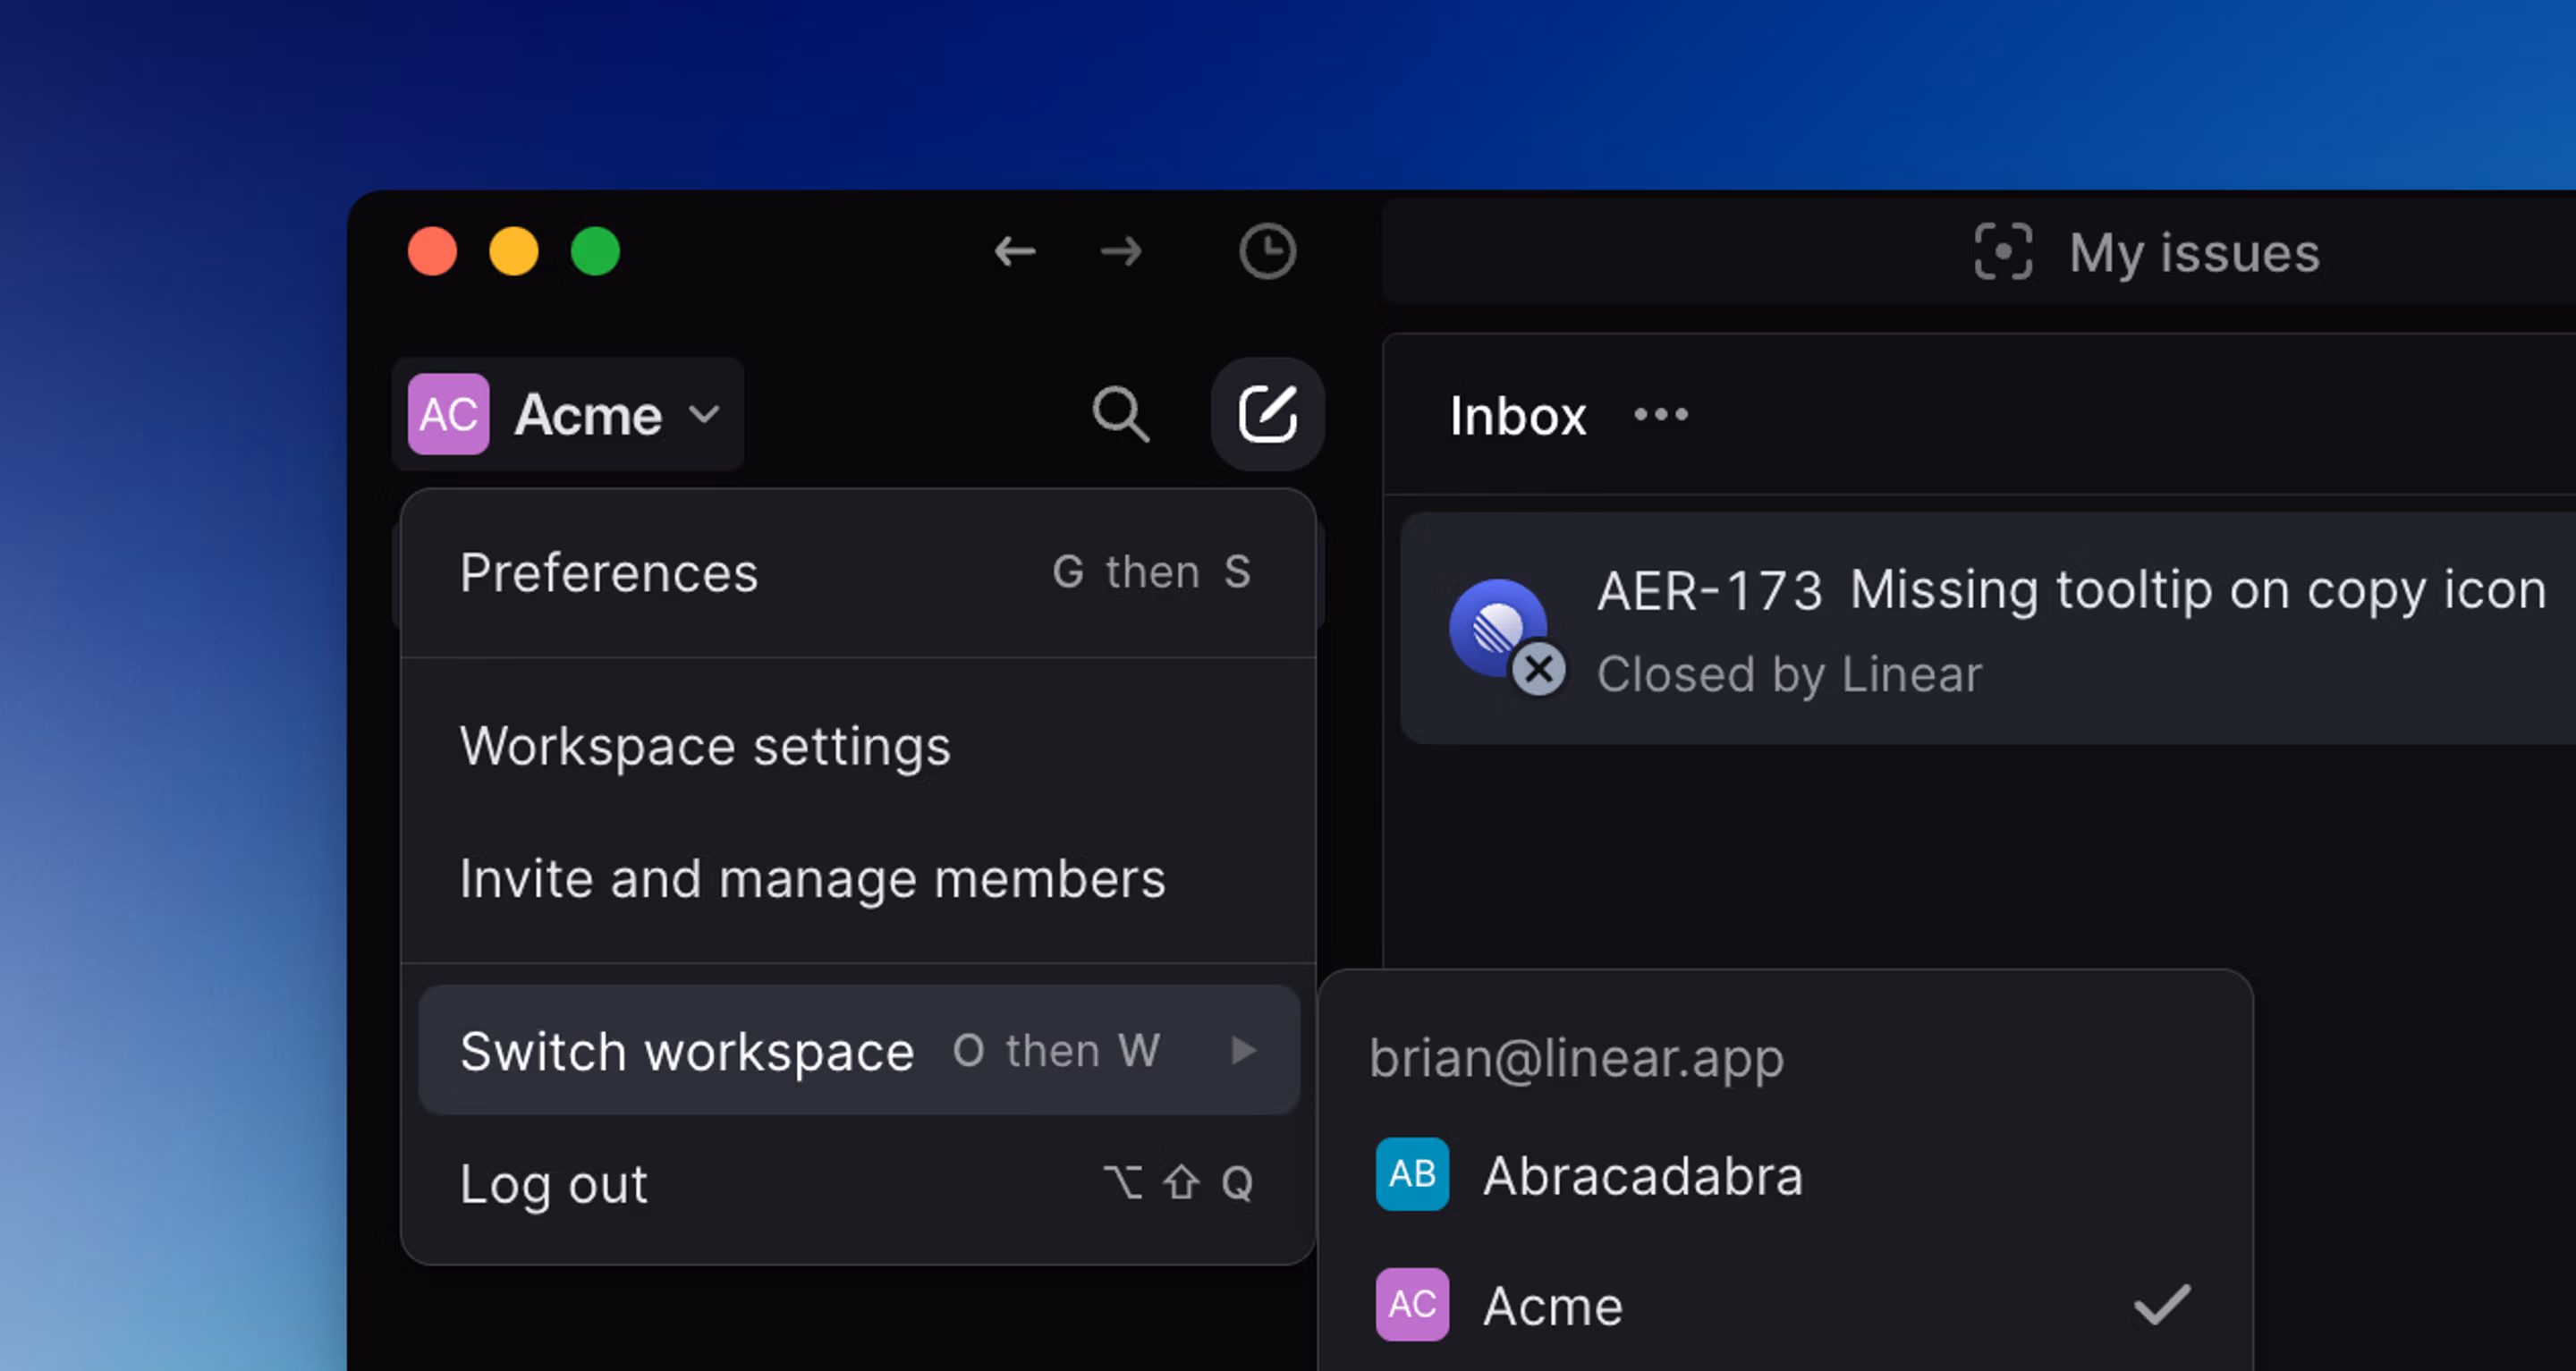
To navigate to your workspace settings click your workspace name in the upper-left corner and select Settings.
Members will see settings related to their own work, while admins and owners also see workspace administration settings.
For more on roles, see Members and roles.
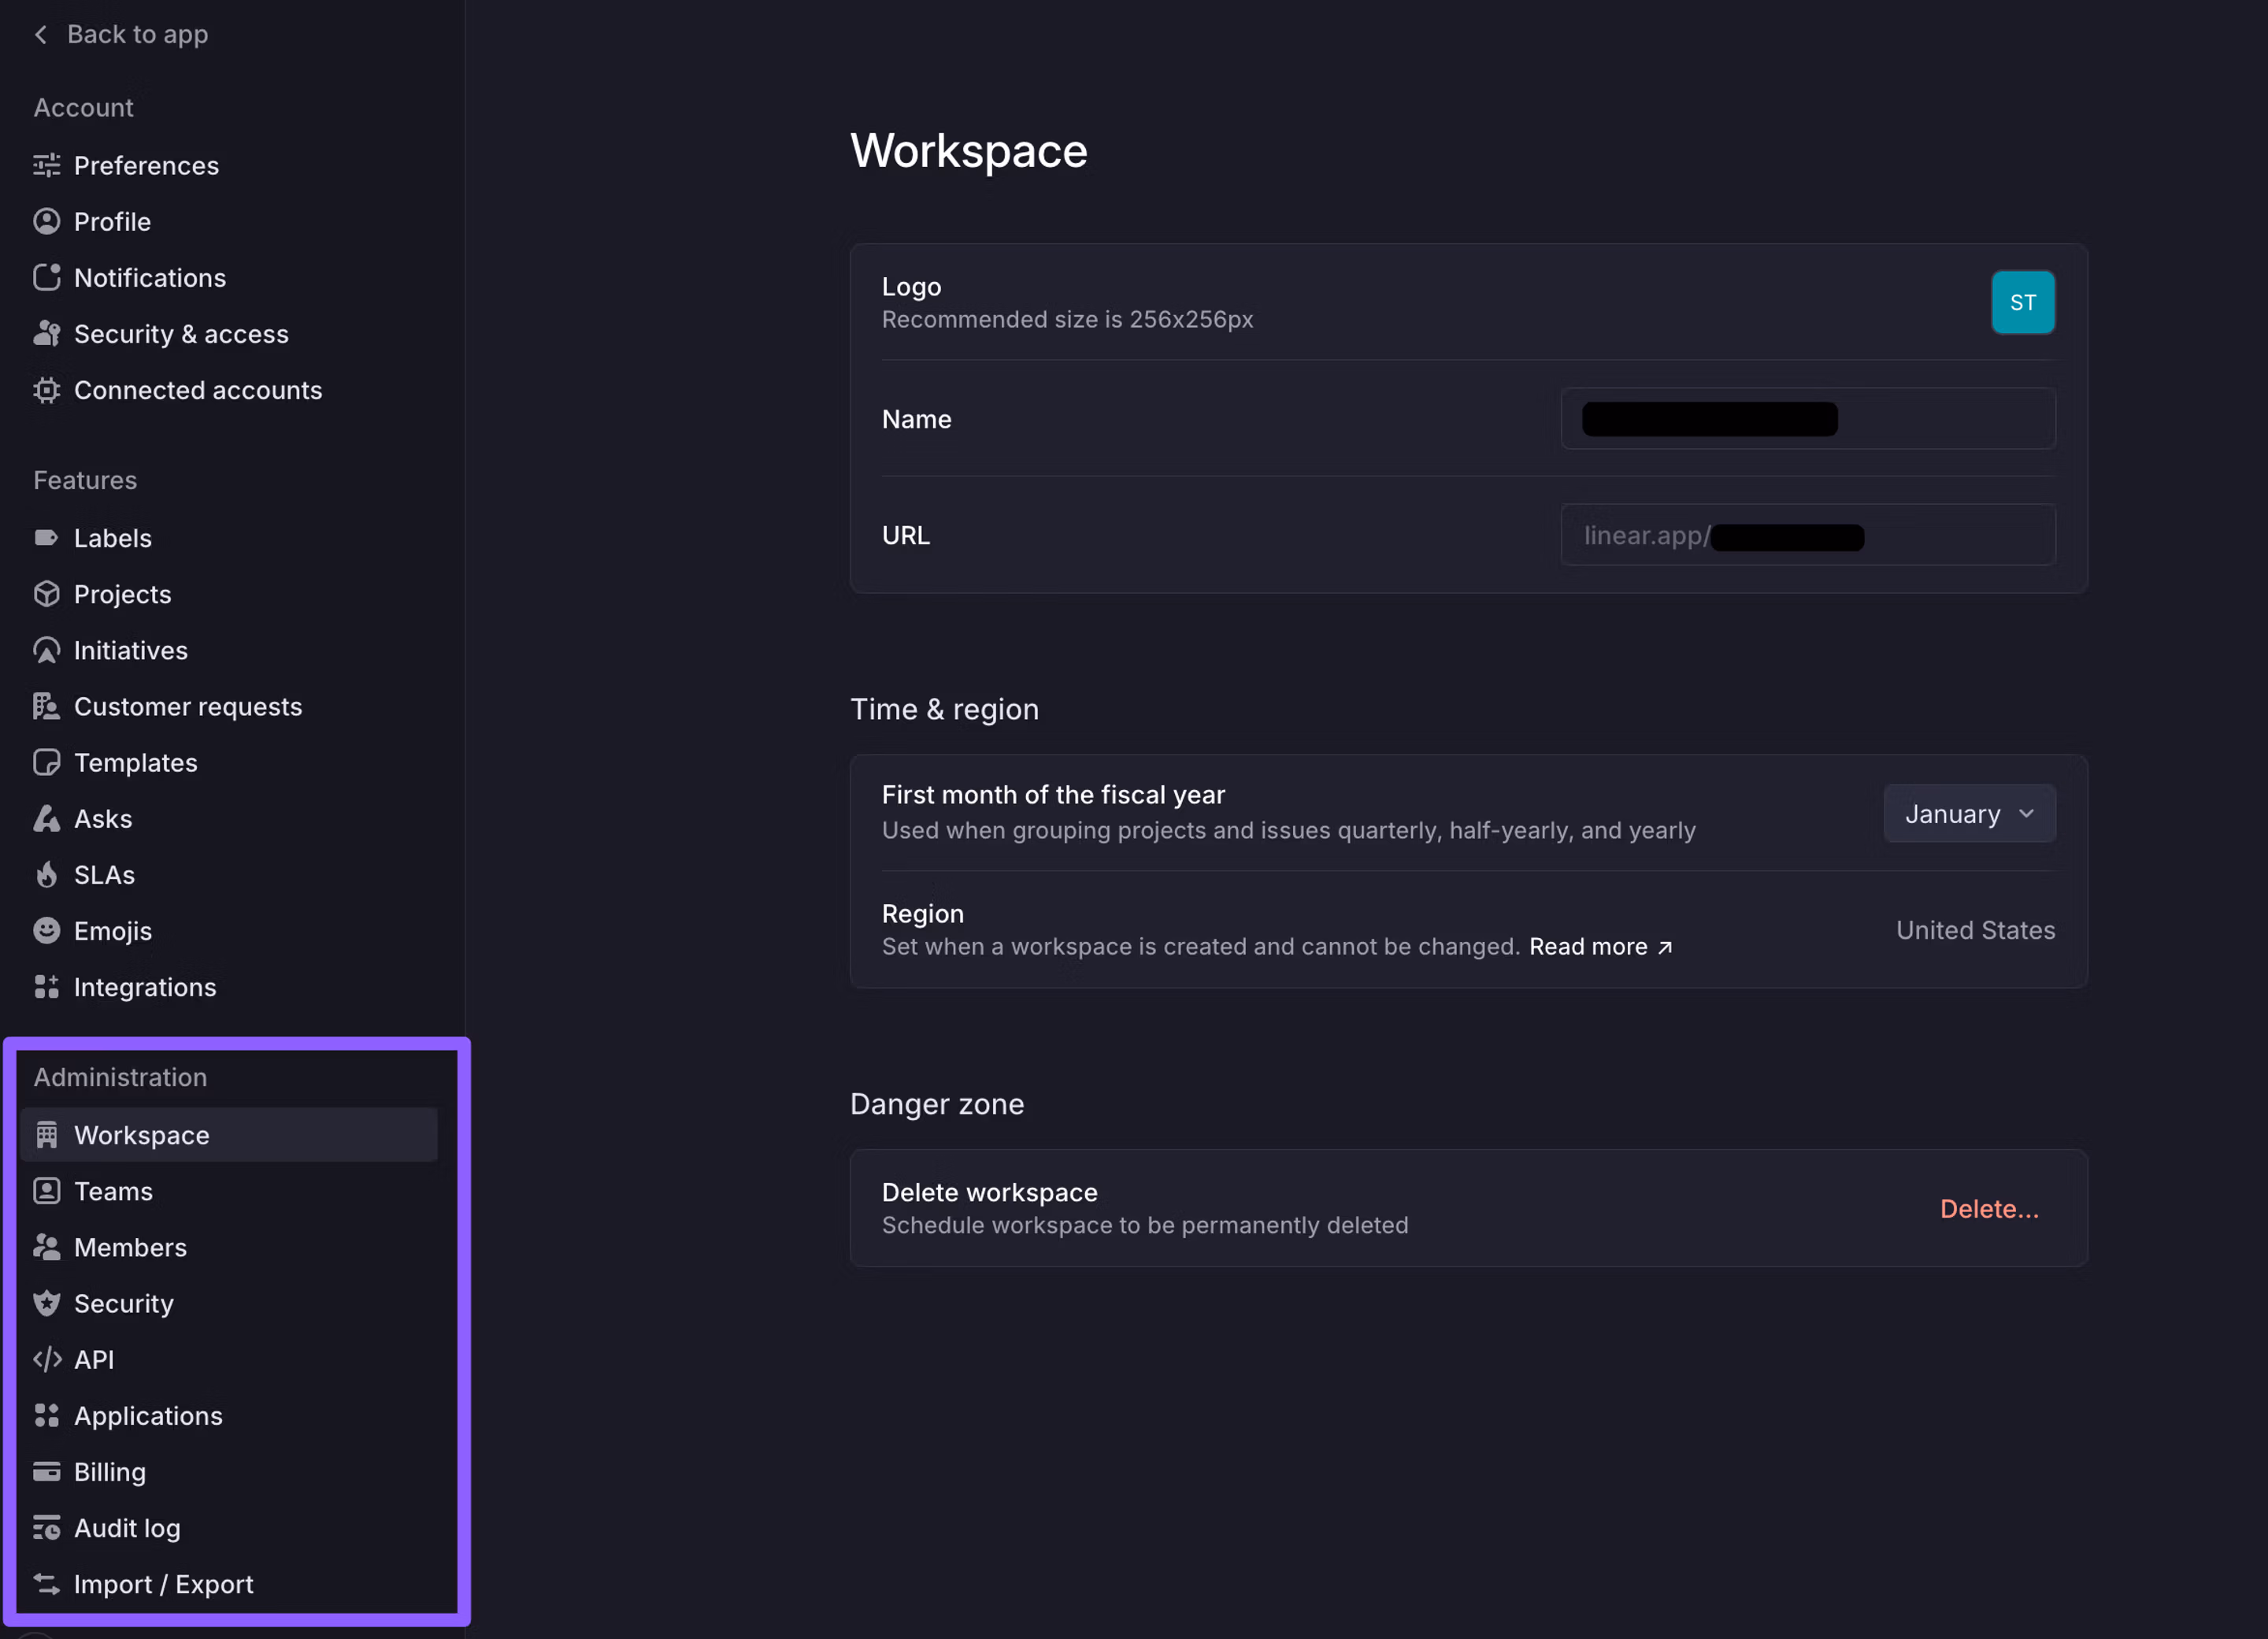
From the Settings > Administration section, admins will be able to:
- Update a Workspace name and URL
- Manage login preferences
- Turn on/off third-party app review requirements (Enterprise feature)
- Set up Project Updates
- Turn on/off the Initiatives feature
- Add or remove members to the Workspace
- Import or export issues
- Change plans
- View or update billing information
Admins and owners will also be able to:
- Manage workspace-level labels
- Create custom project statuses
- Manage workspace-level templates for issues, projects, and documents
- Apply SLA rules (paid feature)
- Customize Asks templates (paid feature)
- Configure workspace-specific integrations like GitHub and GitLab, Slack, Figma, and Sentry. Some integrations can be connected by individual members using their own third-party credentials, but managing workspace-level integration settings in Linear is permission-gated.
Delete workspace
Deleting a workspace includes deleting user and issue data. Workspace owners can start the deletion process, and admins may also be able to depending on workspace restrictions, under Settings > Workspace > General.
We email the requesting admin a confirmation code. After they enter it, the workspace is scheduled for deletion in 48 hours and all admins are notified by email.
Any admin can cancel during the 48-hour window from the same settings page. Once it elapses, the workspace and all its data are permanently deleted.
Delete account
To delete your Linear account, go to your account settings. Note that this is separate from deleting a workspace. If you only want to remove yourself from a workspace without deleting your account, you can leave the workspace. Admins can also suspend accounts within the workspace.
Multiple workspaces
You can create multiple workspaces in Linear under a single account (e.g. tied to a specific email). Each workspace will have distinct member lists and separate billing plans, even if you connect to them from the same account.
If you are using Linear for both work and personal purposes, we recommend you create multiple Linear accounts with separate email addresses.
To add a workspace from another email account:
- Click on your workspace name in the top left corner
- Hover over Switch workspace
- Select Create or join a workspace
- If you have other workspaces associated with your user account, you will see a list of those workspaces to select
You can also switch workspaces by typing O then W.