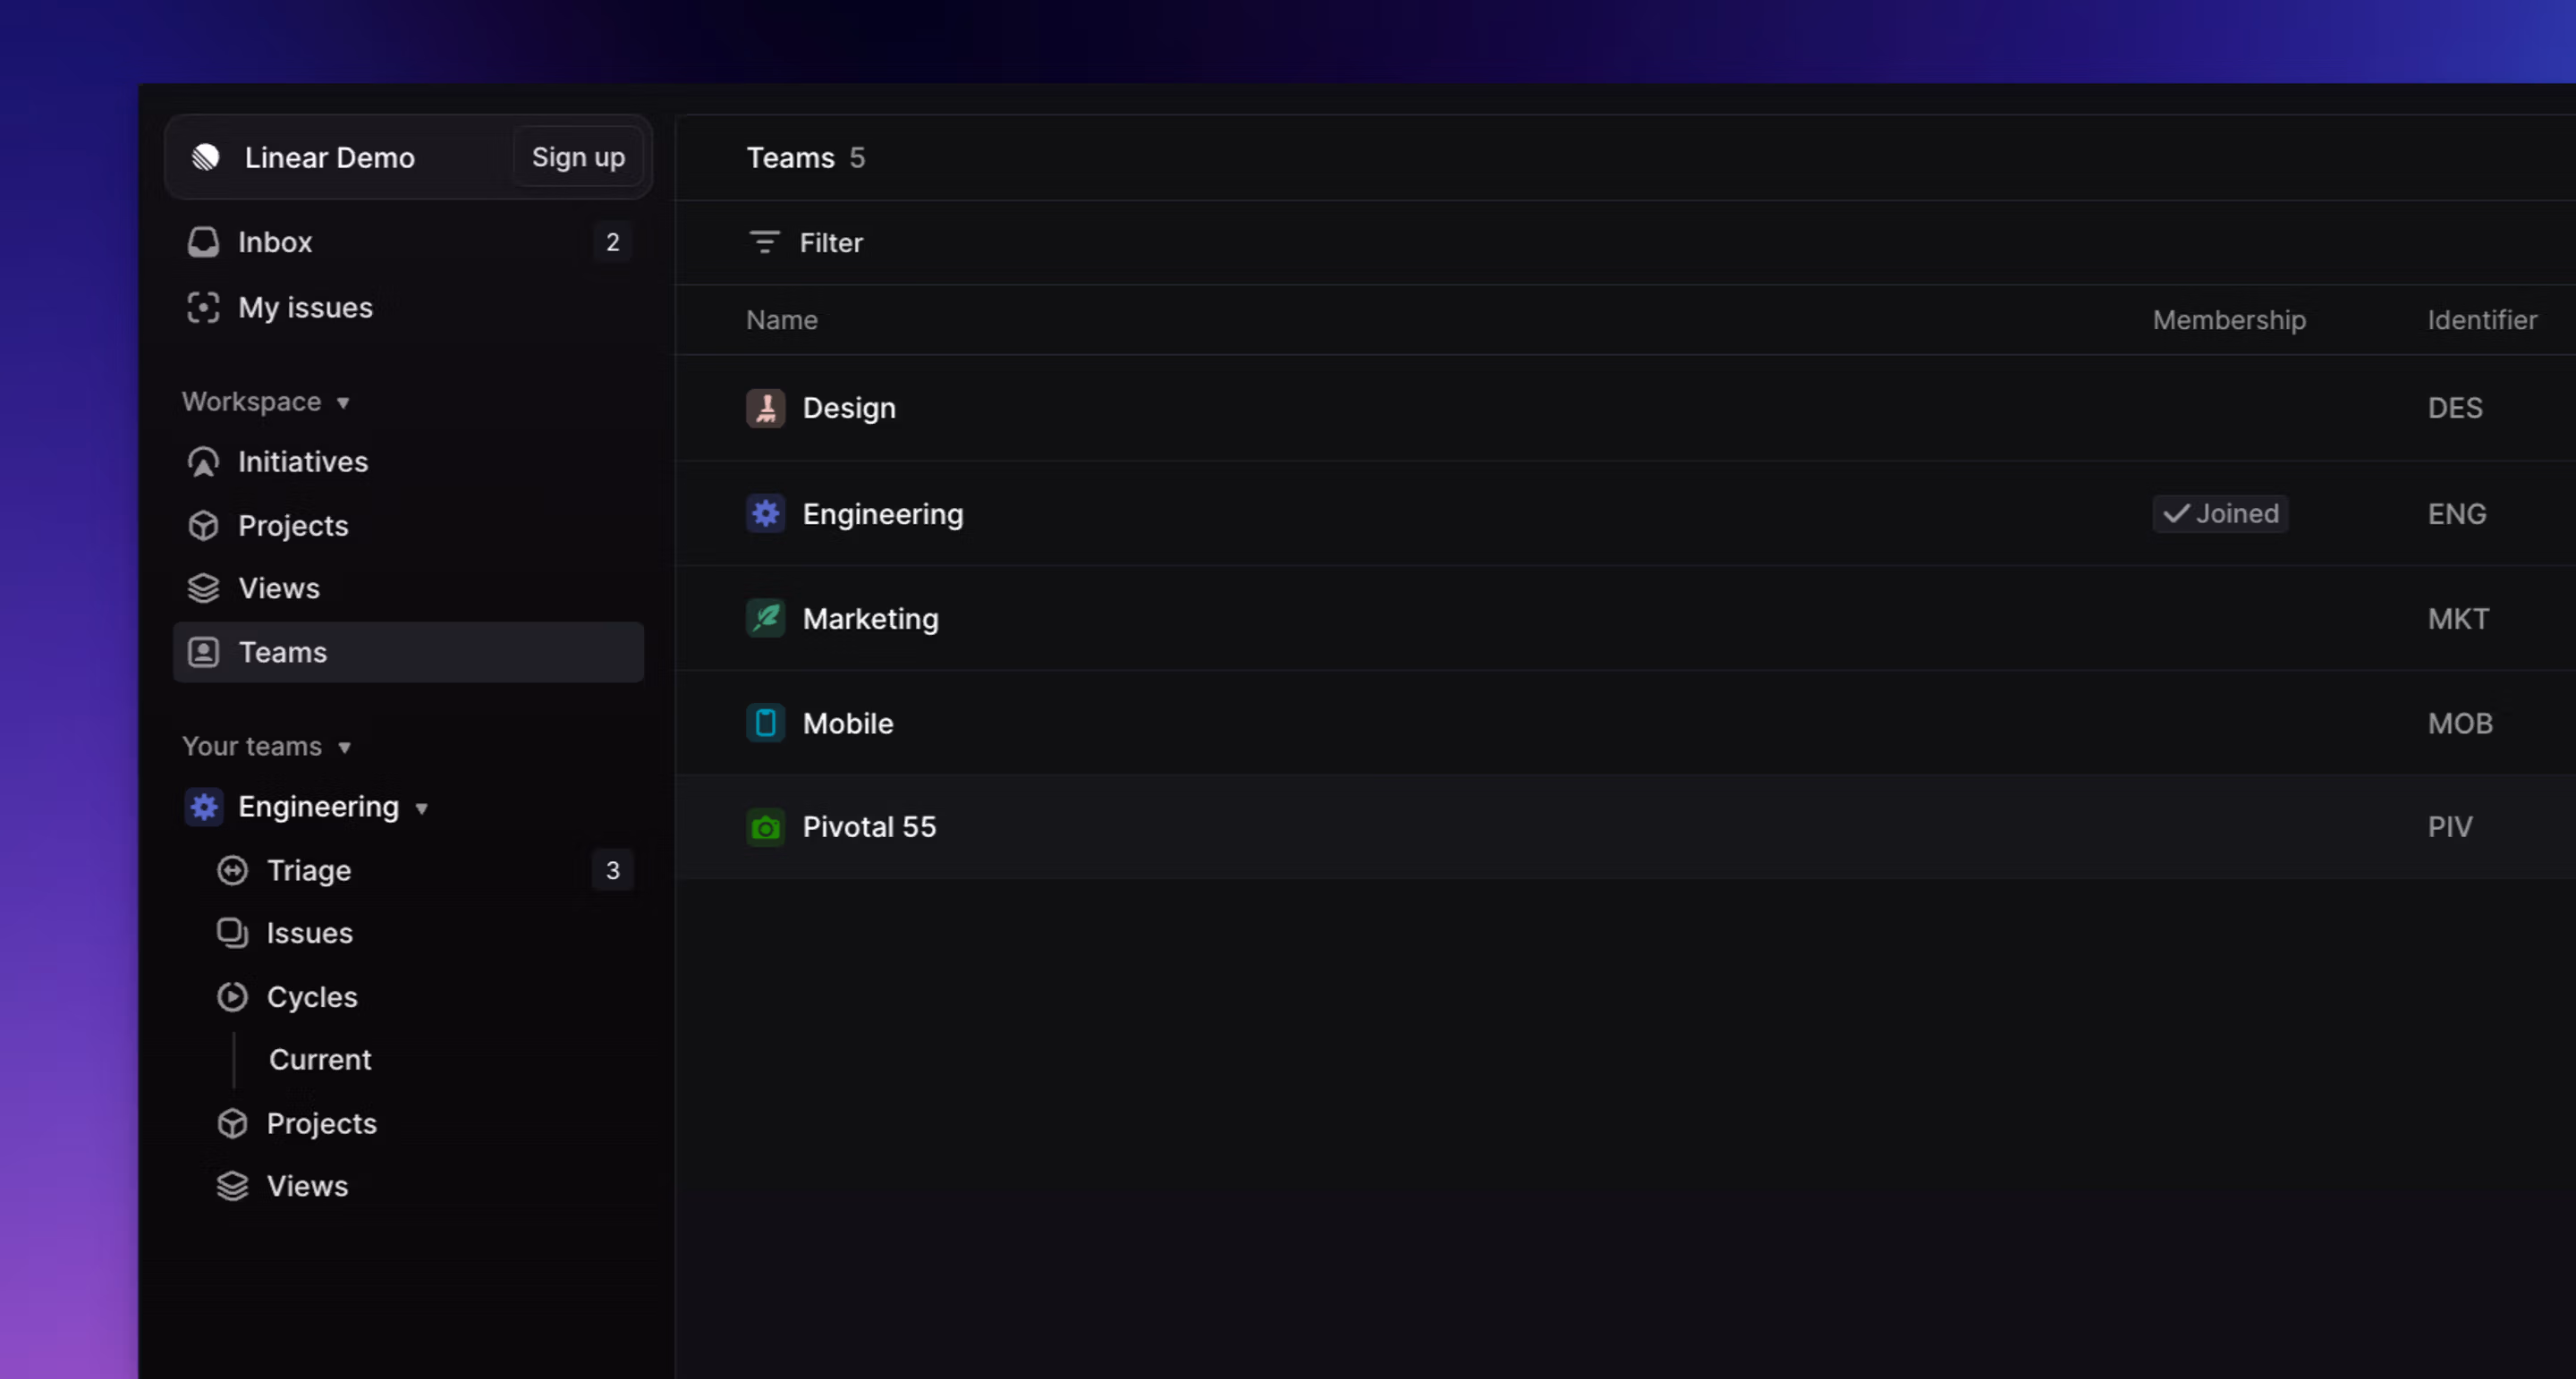
Teams
Create teams in your workspace to organize different types of work functions.
Different plans support different numbers of teams: details available below.
Overview
A workspace is composed of one or several teams. Teams typically represent groups of people who work together frequently. Teams contain issues and can be assigned to a project.
By default, when you create a workspace we’ll generate a team for you with the same name. It’s up to you how to split up teams and users can be part of one or many teams.
Consider grouping teams by:
- Teammates who work together frequently.
- Areas of work such as marketing, mobile app, etc.
- Keeping everyone on one team is the simplest approach (best for small teams).
If you are unsure how to structure your teams, start with one or two. It is easy to add more teams in the future.
Your teams
Teams you have joined will appear in your sidebar.
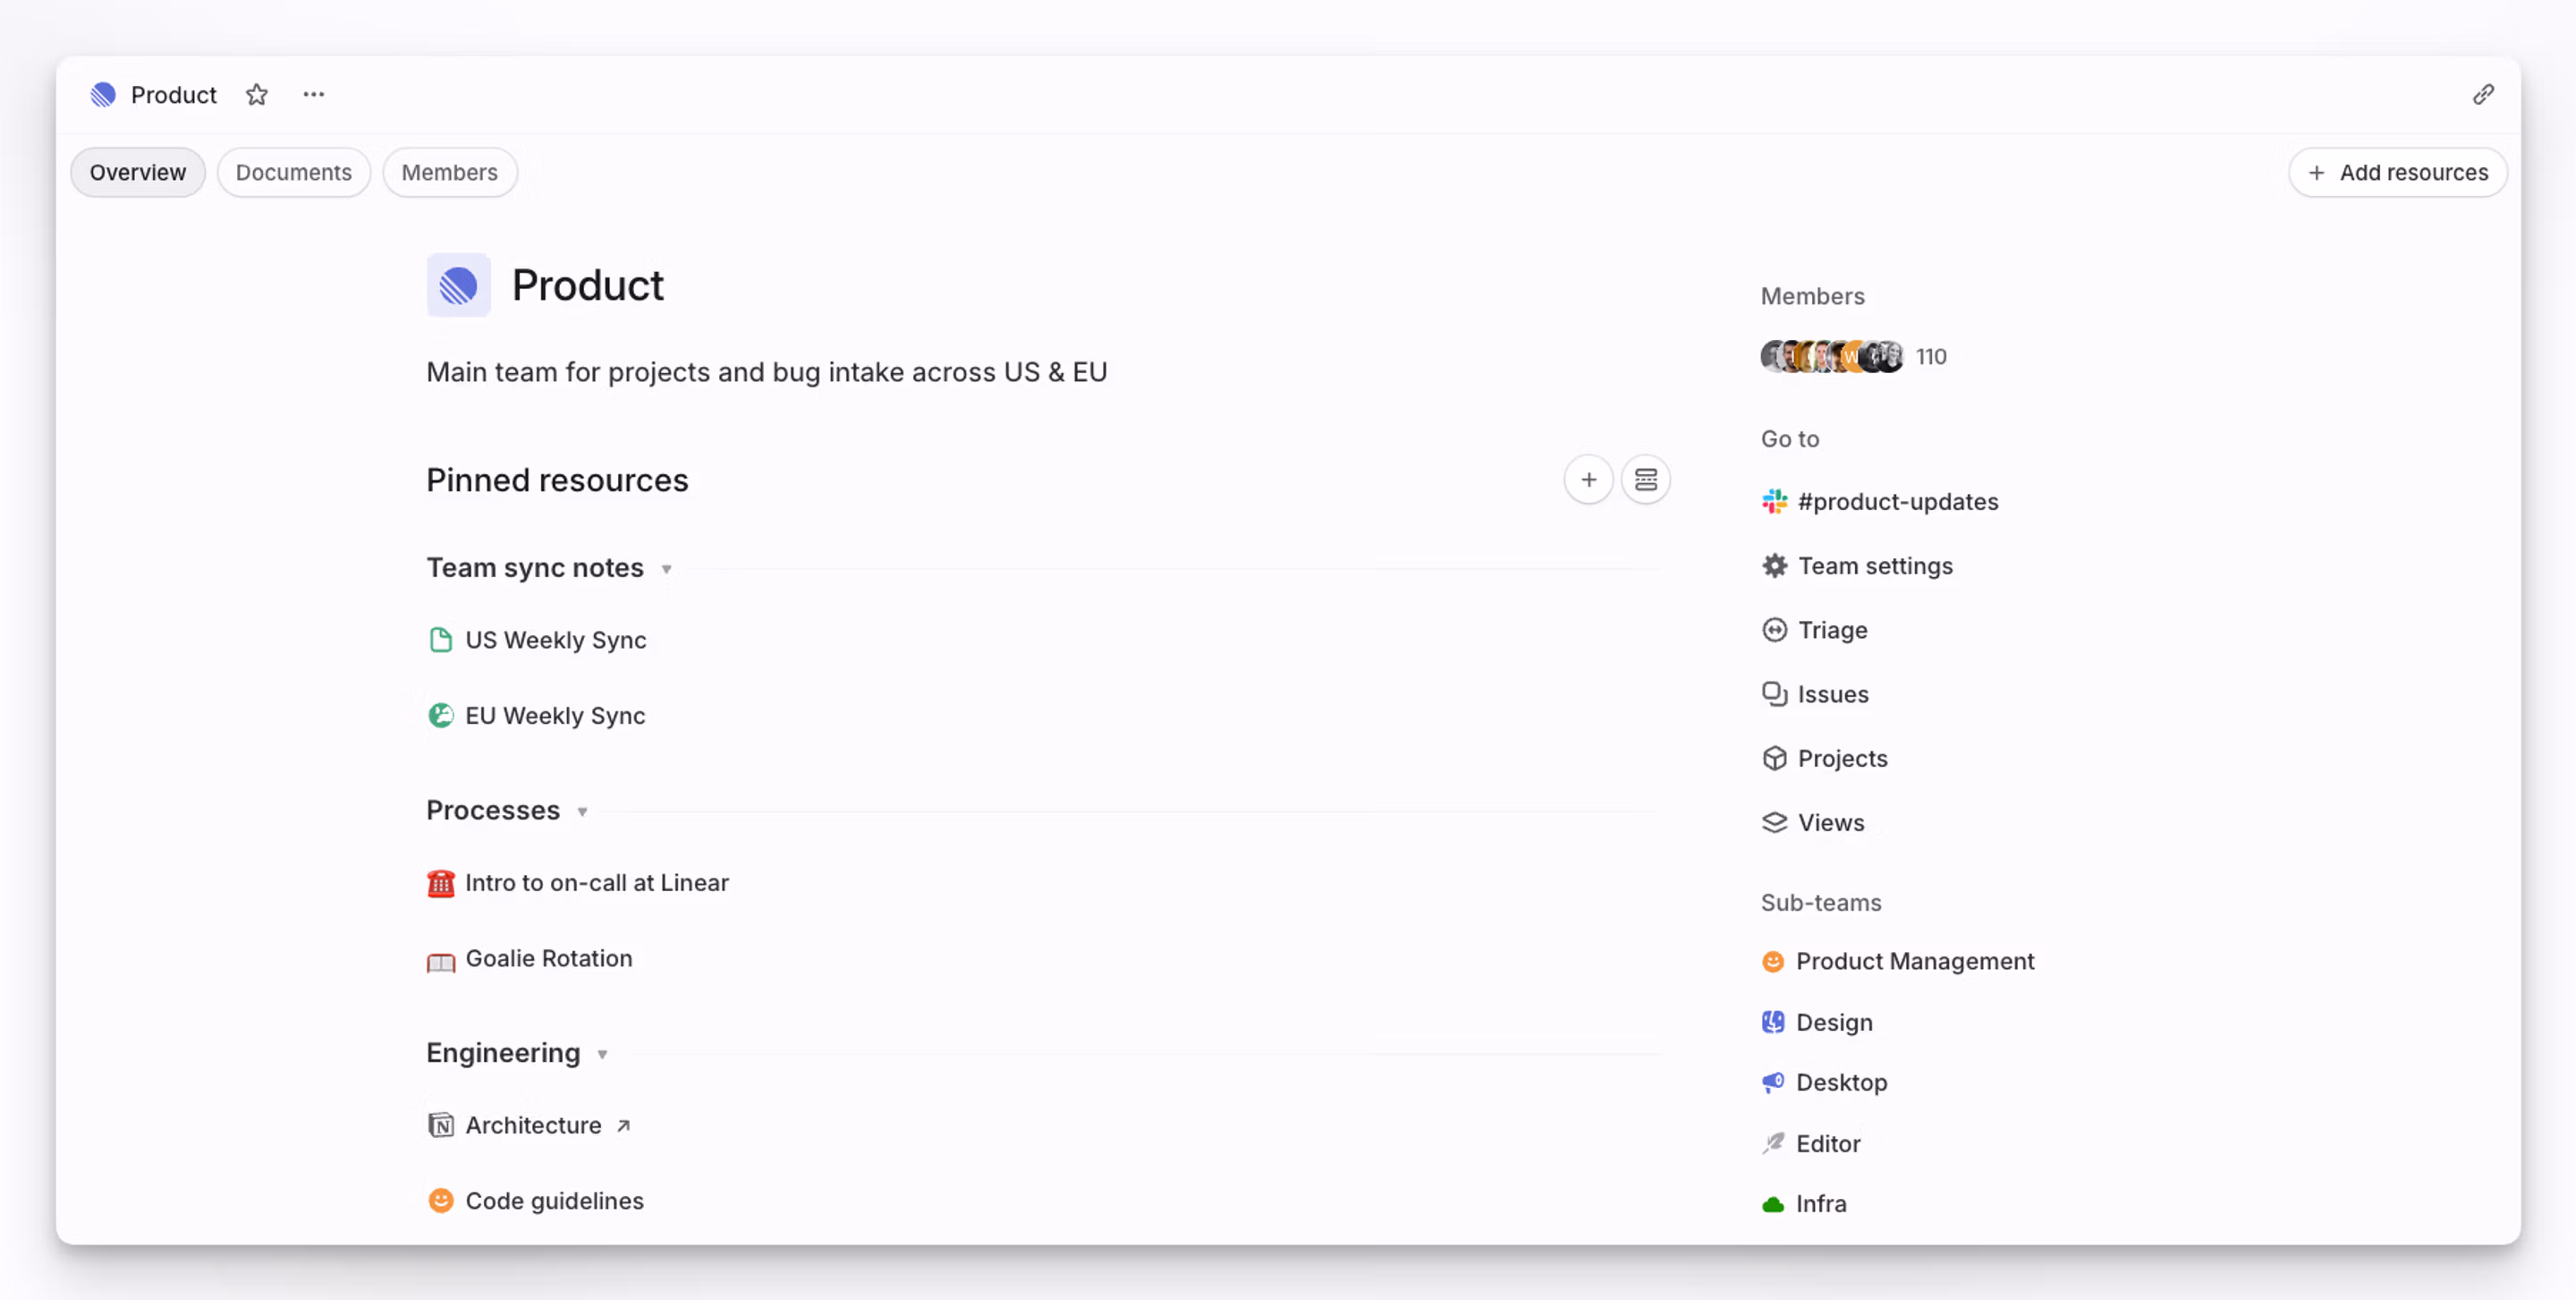
Each team includes a team page for team-level resources such as team documents plus pages to organize the team’s work:
- Team page
- Triage* Newly created issues to be reviewed, assigned or prioritized before entering the team’s workflow
- Issues Default views of all issues in this team
- Cycles* Review current, past and upcoming cycles to plan and schedule your team’s workload
- Projects Default views of all projects linked to this team, along with custom views of projects that you can add and edit.
- Views Custom views filtered to this team’s issue, visible to members of the team
Sections marked with an * are opt-in and need to be enabled in team settings.
Team documents
Every team will have a home view to provide the landing page for your team. It gives members a place to create and organize team-level resources, pin important documents and links, and quickly access common team views.
Open any team’s home page by clicking on the team’s name in your sidebar, or search for a team by pressing o, then t. From a team’s home page, you can pin any resource that exists in its projects or issues within the team, or create a new resource at the team level.
Team settings
Team settings allow you to configure each team differently to support different workflows. To access your team’s settings, hover over the team name in your sidebar, click the three dots ··· menu, and select Team settings.
Available team settings can be configured depending on your role.
| Team settings page | Configure |
|---|---|
| General | Customize team name and team identifier, set timezone, enable and manage estimates, set up issue creation by email, toggle detailed issue history. |
| Members | Manage team members |
| Issue labels | Manage team-level labels and label groups |
| Templates | Manage team-level issue, project, and document templates |
| Recurring issues | View all existing and create new recurring issues |
| Slack notifications | Set team-level notifications to Slack |
| Issue statuses & automations | Customize workflows, add and edit statuses, set up git automations and branch naming preferences, enable auto-close and auto-archive |
| Triage | Enable Triage, assign Triage responsibility (compatible with PagerDuty and incident.io) |
| Cycles | Enable and configure cycles, set cycle automations |
Working with other teams
View other teams
Teams you navigate to that you are not a member of will show up in your sidebar under a temporary Exploring section.
You can search for and view issues, projects, and documents from other teams, too, as long as those teams are not private.
Access control
All members of a workspace can view and join teams as long as the team is not private.
Anyone in the workspace can create issues for other teams or be assigned issues in other teams, too. You don’t have to join teams to collaborate with others unless you use them frequently and want them to show up in your sidebar.
Create or join teams
Depending on your workspace permissions, team creation may be restricted.
To create or join a team:
- Navigate to your Settings
- Scroll down to “Your teams” section
- Click the “+” symbol for “Join or create a team”
Admins can create teams from their Teams page in settings.
Team limits
The number of teams that can be created is dependent on a workspace’s subscription:
| Plan | Team limit |
|---|---|
| Free | 2 |
| Basic | 5 |
| Business | Unlimited |
| Enterprise | Unlimited |
Team creation settings
Private teams: During team creation, you’ll have the option to copy over settings from an existing team and make the team private.
Copy team settings: If you want to copy an existing team’s settings when creating a team, use the “Copy team settings...” option when creating a new team.
Restrict team creation: Admins can restrict team creation to only admin users under Settings > Administration > Security.
Tips on structuring teams
Keep these tips in mind when deciding how to structure your workspace’s teams:
- Issues are tied to teams. Think about how you prefer to manage your work and interact with features such as the backlog and archive. Issue sharing can be enabled for public teams, allowing issues from that team to be shared with guests who are not members of the team.
- Workflows can be customized per team. Different work areas or internal teams (e.g. engineering, design, marketing, sales) may require different statuses.
- Cycles are team-specific. You can set up cycles so that all teams follow the same schedule, but you can’t view more than one team’s cycles at once. Think about how you manage your work, run meetings, measure progress, and whose work you’ll want to oversee as a manager.
- Projects can belong to a single team or be shared across many teams (but issues can only be tied to one team)
- Sub-issues can be assigned to any team or member in the workspace, not just the parent issue’s team.
- Other features are team-specific but also easy to copy over to another team, such as pull request automation and issue templates. Labels are team-specific but you can create views that show issues from multiple teams as long as the label has the same name across them.
Manage teams
Make a team private
Business and Enterprise support private teams. To make an existing team private, go to Settings > Your teams > Team and then scroll down to the Danger Zone.
Join / leave / invite teams
Admins can add users to a team in Settings > Administration > Members.
Members can join and leave teams on their own, by hovering over the team name, then clicking the ··· and selecting to Join team or Leave team... To join a private team, members must be invited by the team owner.
Sub-teams
Refer to documentation on sub-teams here.
Retire a team
Team retirement lets you sunset a team without deleting its history. A retired team is frozen in time so past work stays accessible, while keeping your workspace focused on active teams.
Issues in retired teams continue to follow Linear’s archival behavior. Team retirement is not intended as a way to keep issues around indefinitely.
When to use team retirement
Use team retirement when you no longer want a team to receive new work, but you still want to keep:
- Historical issues and discussions for reference
- Past project context
- Reporting and analysis over previous work
If you want to permanently remove a team and everything associated with it, delete the team instead.
Retire a team
- Open Team settings for the team you want to retire.
- Select Retire team.
- Follow the prompts to resolve anything that must be handled before retirement.
- Choose what to do with active and backlog issues.
- Address any sub-teams.
- Confirm retirement.
What happens when a team is retired
- The team becomes read-only. Team settings are locked.
- Issues in the retired team are read-only. You can view issues, but you cannot create or edit issues in the retired team.
- Projects only associated with retired teams become read-only. If a project is also associated with an active team, it remains editable.
- Retired teams are removed from your sidebar to reduce clutter. On desktop, you typically only encounter a retired team when viewing an item that belongs to it.
Delete a team
Deleting the team will also permanently delete its issues. Once the grace period ends, this can’t be undone and your data cannot be recovered by Linear.
You will have 30 day grace period to restore the team under Recently deleted teams. Access this by opening Settings > Teams and selecting the Recently deleted option in the menu. Restore a team through its overflow menu on the far right of its row.
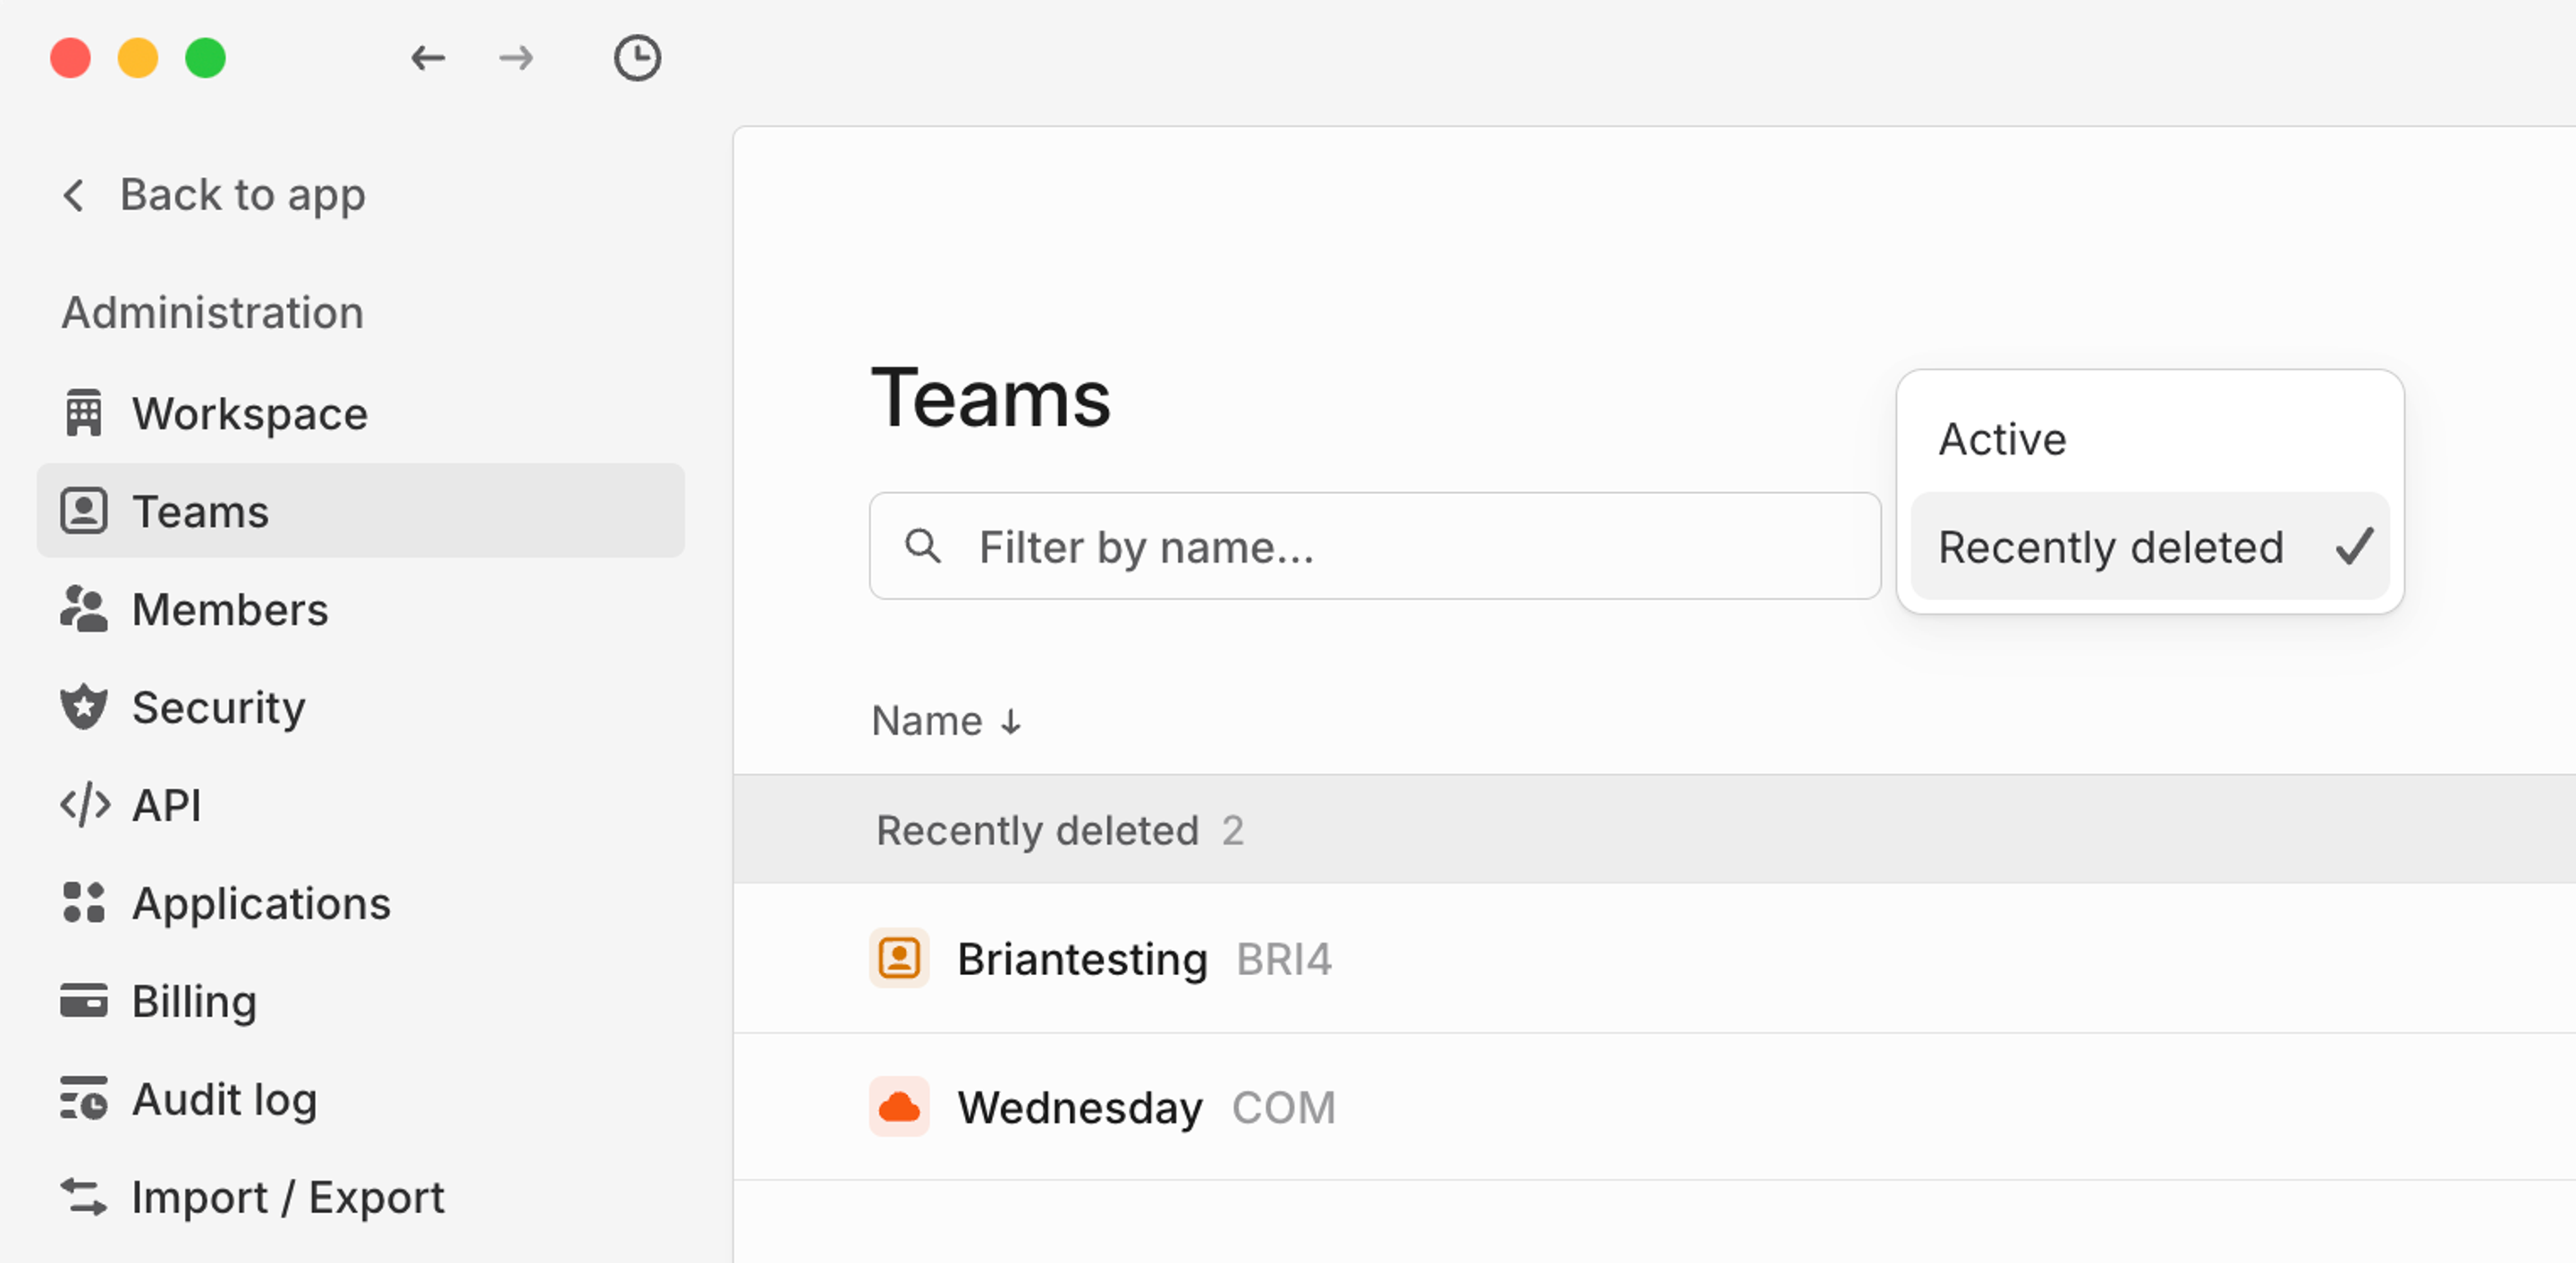
If you may need the data in the future, consider making the team private, exporting the team’s issues as a CSV before deleting, or moving the issues to a different team.
Restore a team
You can restore a retired team at any time, or a deleted team before it is permanently deleted.
To restore a retired or deleted team:
- Find the retired team in team settings.
- Select Restore team.