Loops
Available on paid plans. Loops that use Linear Agent draw from your workspace’s AI credits.
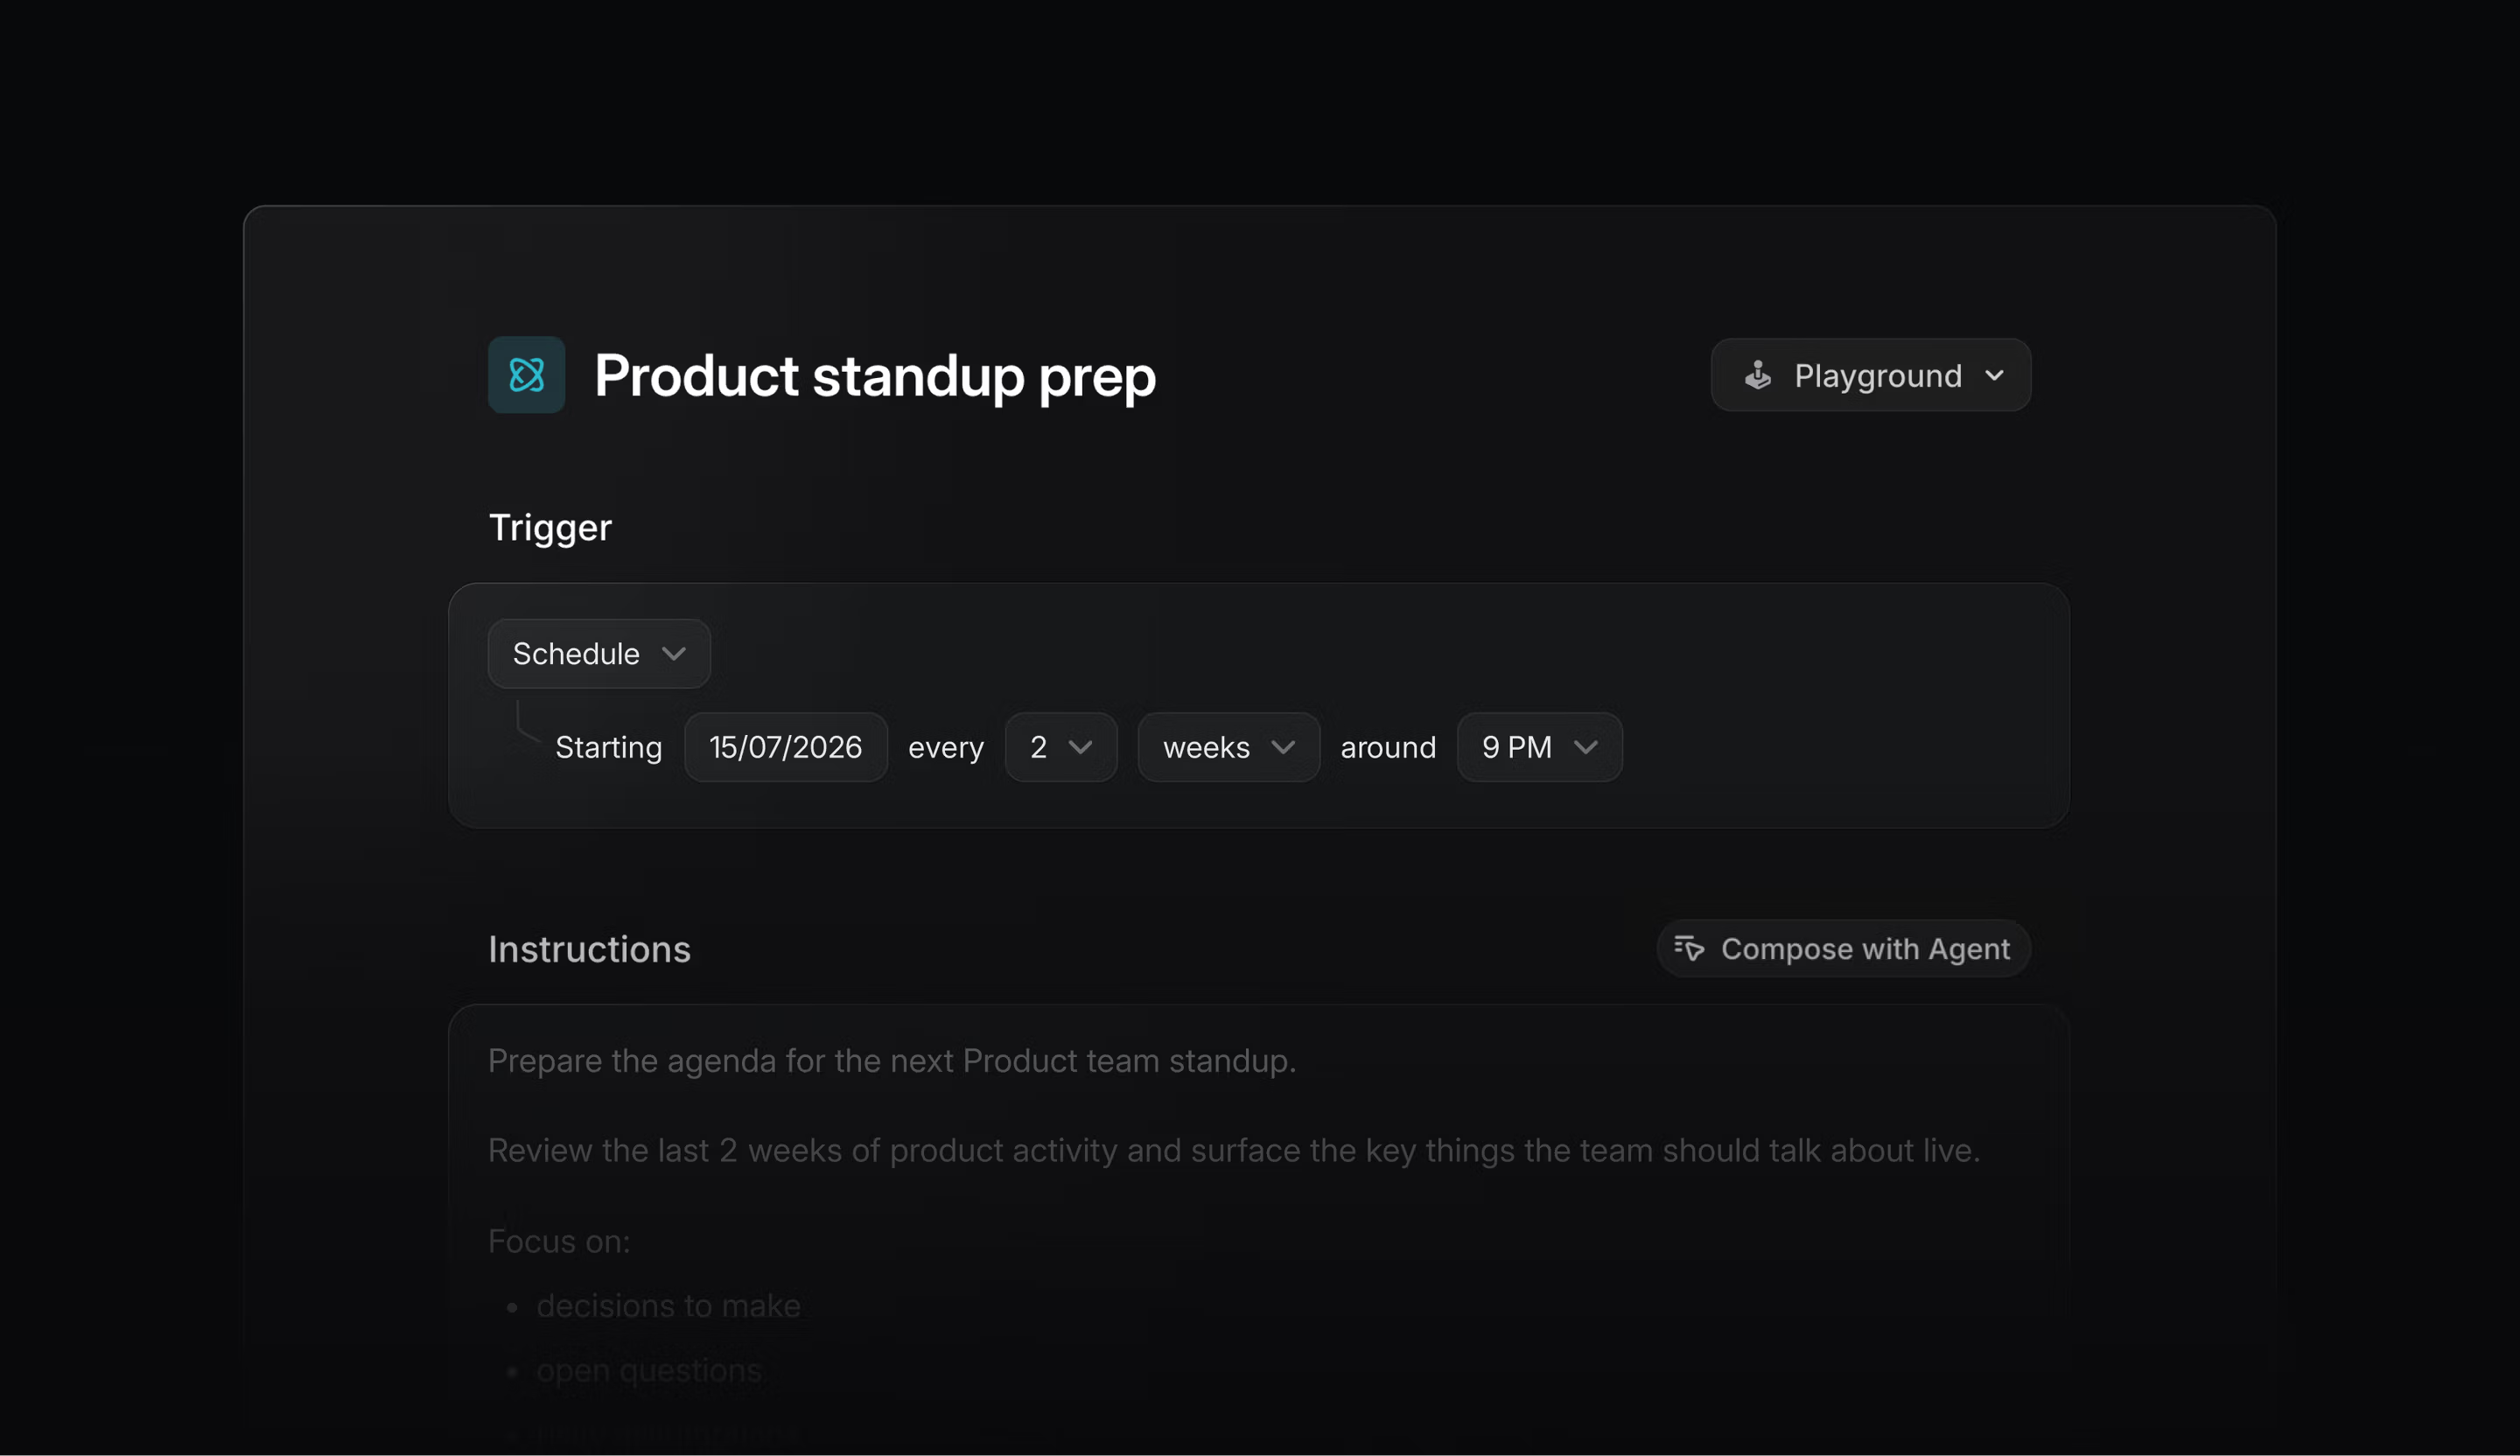
Overview
Loops use Linear Agent to drive your work forward automatically. Loops run on a schedule or in response to supported events on issues, projects, initiatives, cycles, releases, and pull requests. They can also run when a new message is posted in a selected public Slack channel.
Use loops to automate routine tasks and free up your attention. You can send weekly digests of your team’s work to Slack, populate project documents with customer feedback from customer requests, or direct Linear to open a coding session when well-scoped bugs hit Triage.
Loops work in your Slack workspace through Linear’s Slack integration, and you can extend their capabilities by adding other optional MCP connectors.
Example loops
Here are some basic loops that are useful for most workspaces. Create custom loops for your team by prompting Linear, or get started with one of these examples.
Investigate and delegate bug reports
When new bugs arrive in Triage, check the codebase for a root cause. Delegate the issue to Linear to fix if the cause is found. (Build this loop ↗)
Summarize weekly accomplishments
Every week, summarize the week’s accomplishments for a person or team and share the highlights. (Build this loop ↗)
Send the pre-filled request to start setting up this custom loop.
Create platform-specific versions of incoming requests
When a new incoming issue is created, determine if new issues also need to be created for multiple platforms. (Build this loop ↗)
Create user-facing messaging after issues close
After an issue closes, check the PR that closed it and generate user-facing messaging that Support can share with customers. (Build this loop ↗)
How Linear uses loops
Teams at Linear use loops to automate work. Learn more about some of our own use cases:
- Slow PostgreSQL queries are surfaced for review
- Technical sales questions get automatically answered in Slack
- Customer feedback is routinely collated for Product
- When help documentation falls out of date, a loop suggests changes
Create loops with Linear Agent
The best approach is to first achieve the outcome you want in a Linear Agent chat, then refine it into a loop. For example, you might be leading a project that has check-in meetings every Thursday morning. You’re about to write the agenda, but realize you could automate this instead.
- Press ⌘/Ctrl + J to open a Linear Agent chat
- Give Linear Agent a prompt such as:
Review the project’s Slack channel, the open questions in the latest project update, and any relevant issue threads. Add Open questions, Relevant issue threads, and Next steps sections to the Meetings project document. Summarize your findings under each heading and include links to the relevant messages or issues.
- Review the result to make sure it looks right. If it doesn’t, continue prompting Linear until the agenda looks complete, and in the desired format.
- Then, ask Linear to create the loop. You’ll be prompted to add any missing details.
Create loops manually
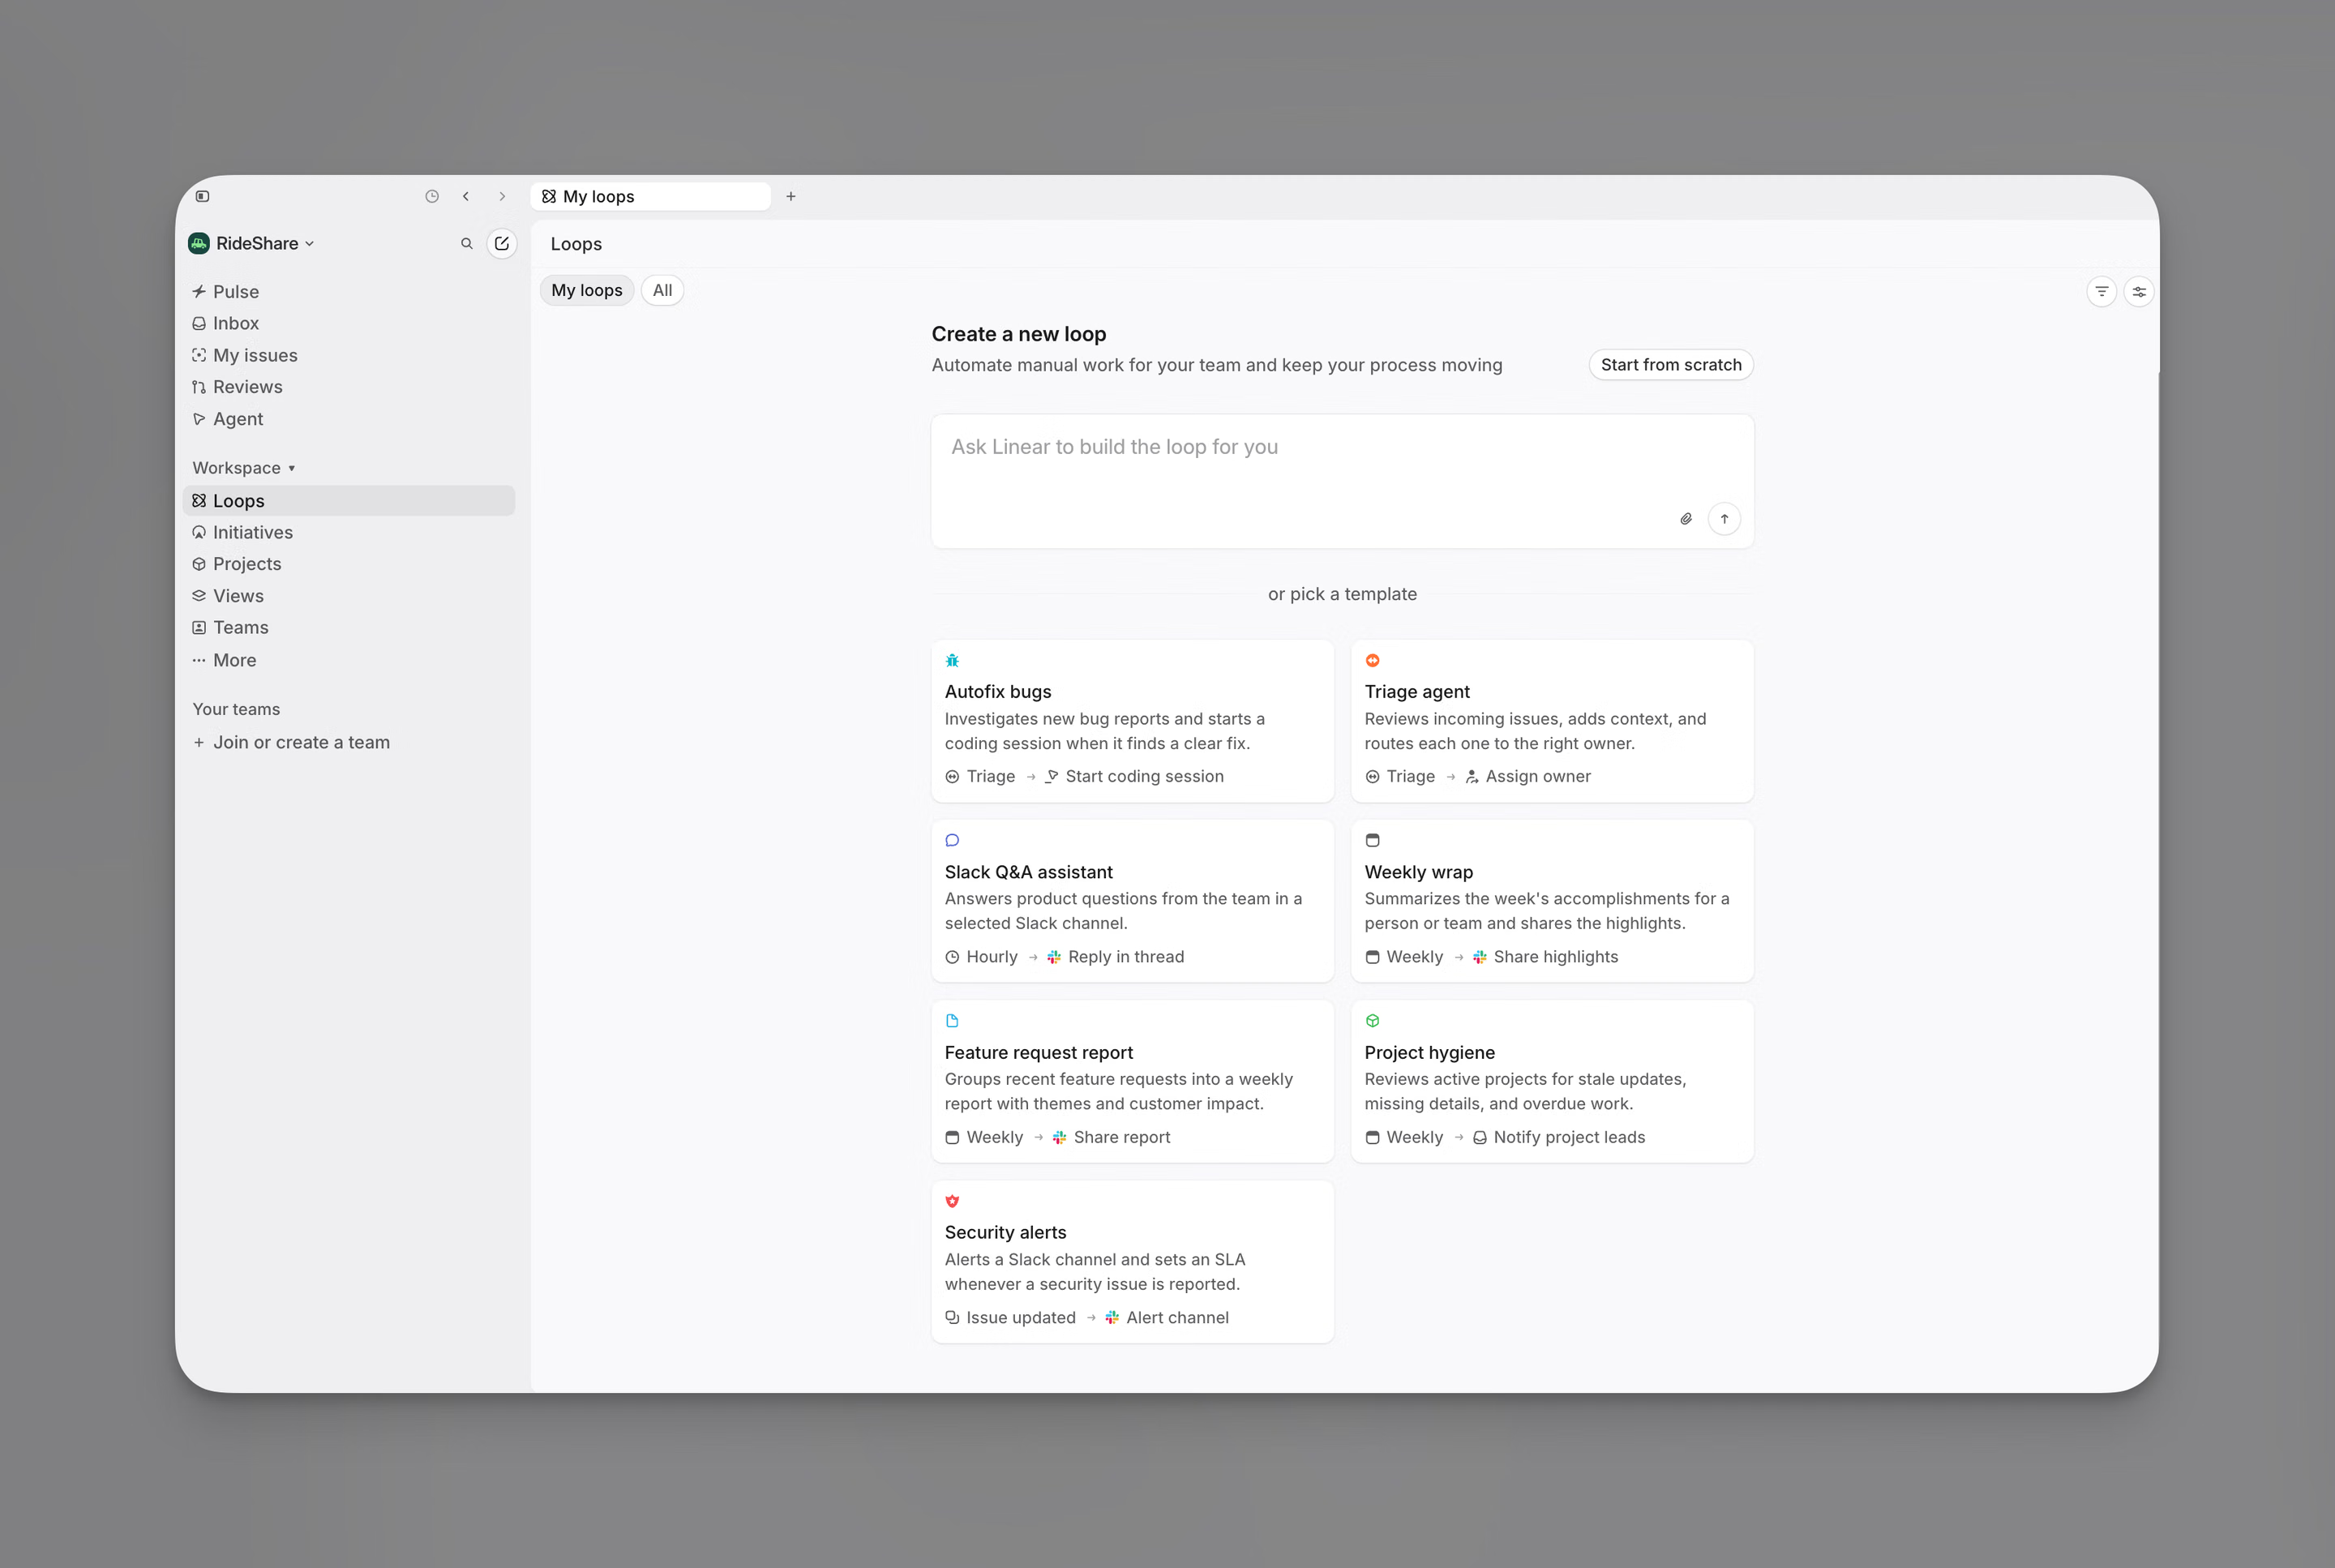
Create a loop from a template, describe what you want Linear to automate, or start from scratch.
- Open Loops in the workspace sidebar, or open a team and select its Loops tab
- Select New loop
- Choose a template, enter a prompt, or select Start from scratch
- Choose where the loop belongs if prompted
To configure a loop from scratch:
- Choose a trigger and configure its schedule, conditions, repositories, or Slack channels
- Add instructions describing the outcome you want
- Add any required connectors
- Under Capabilities & access, review the loop’s scope, reasoning level, and permissions
- Select Create loop

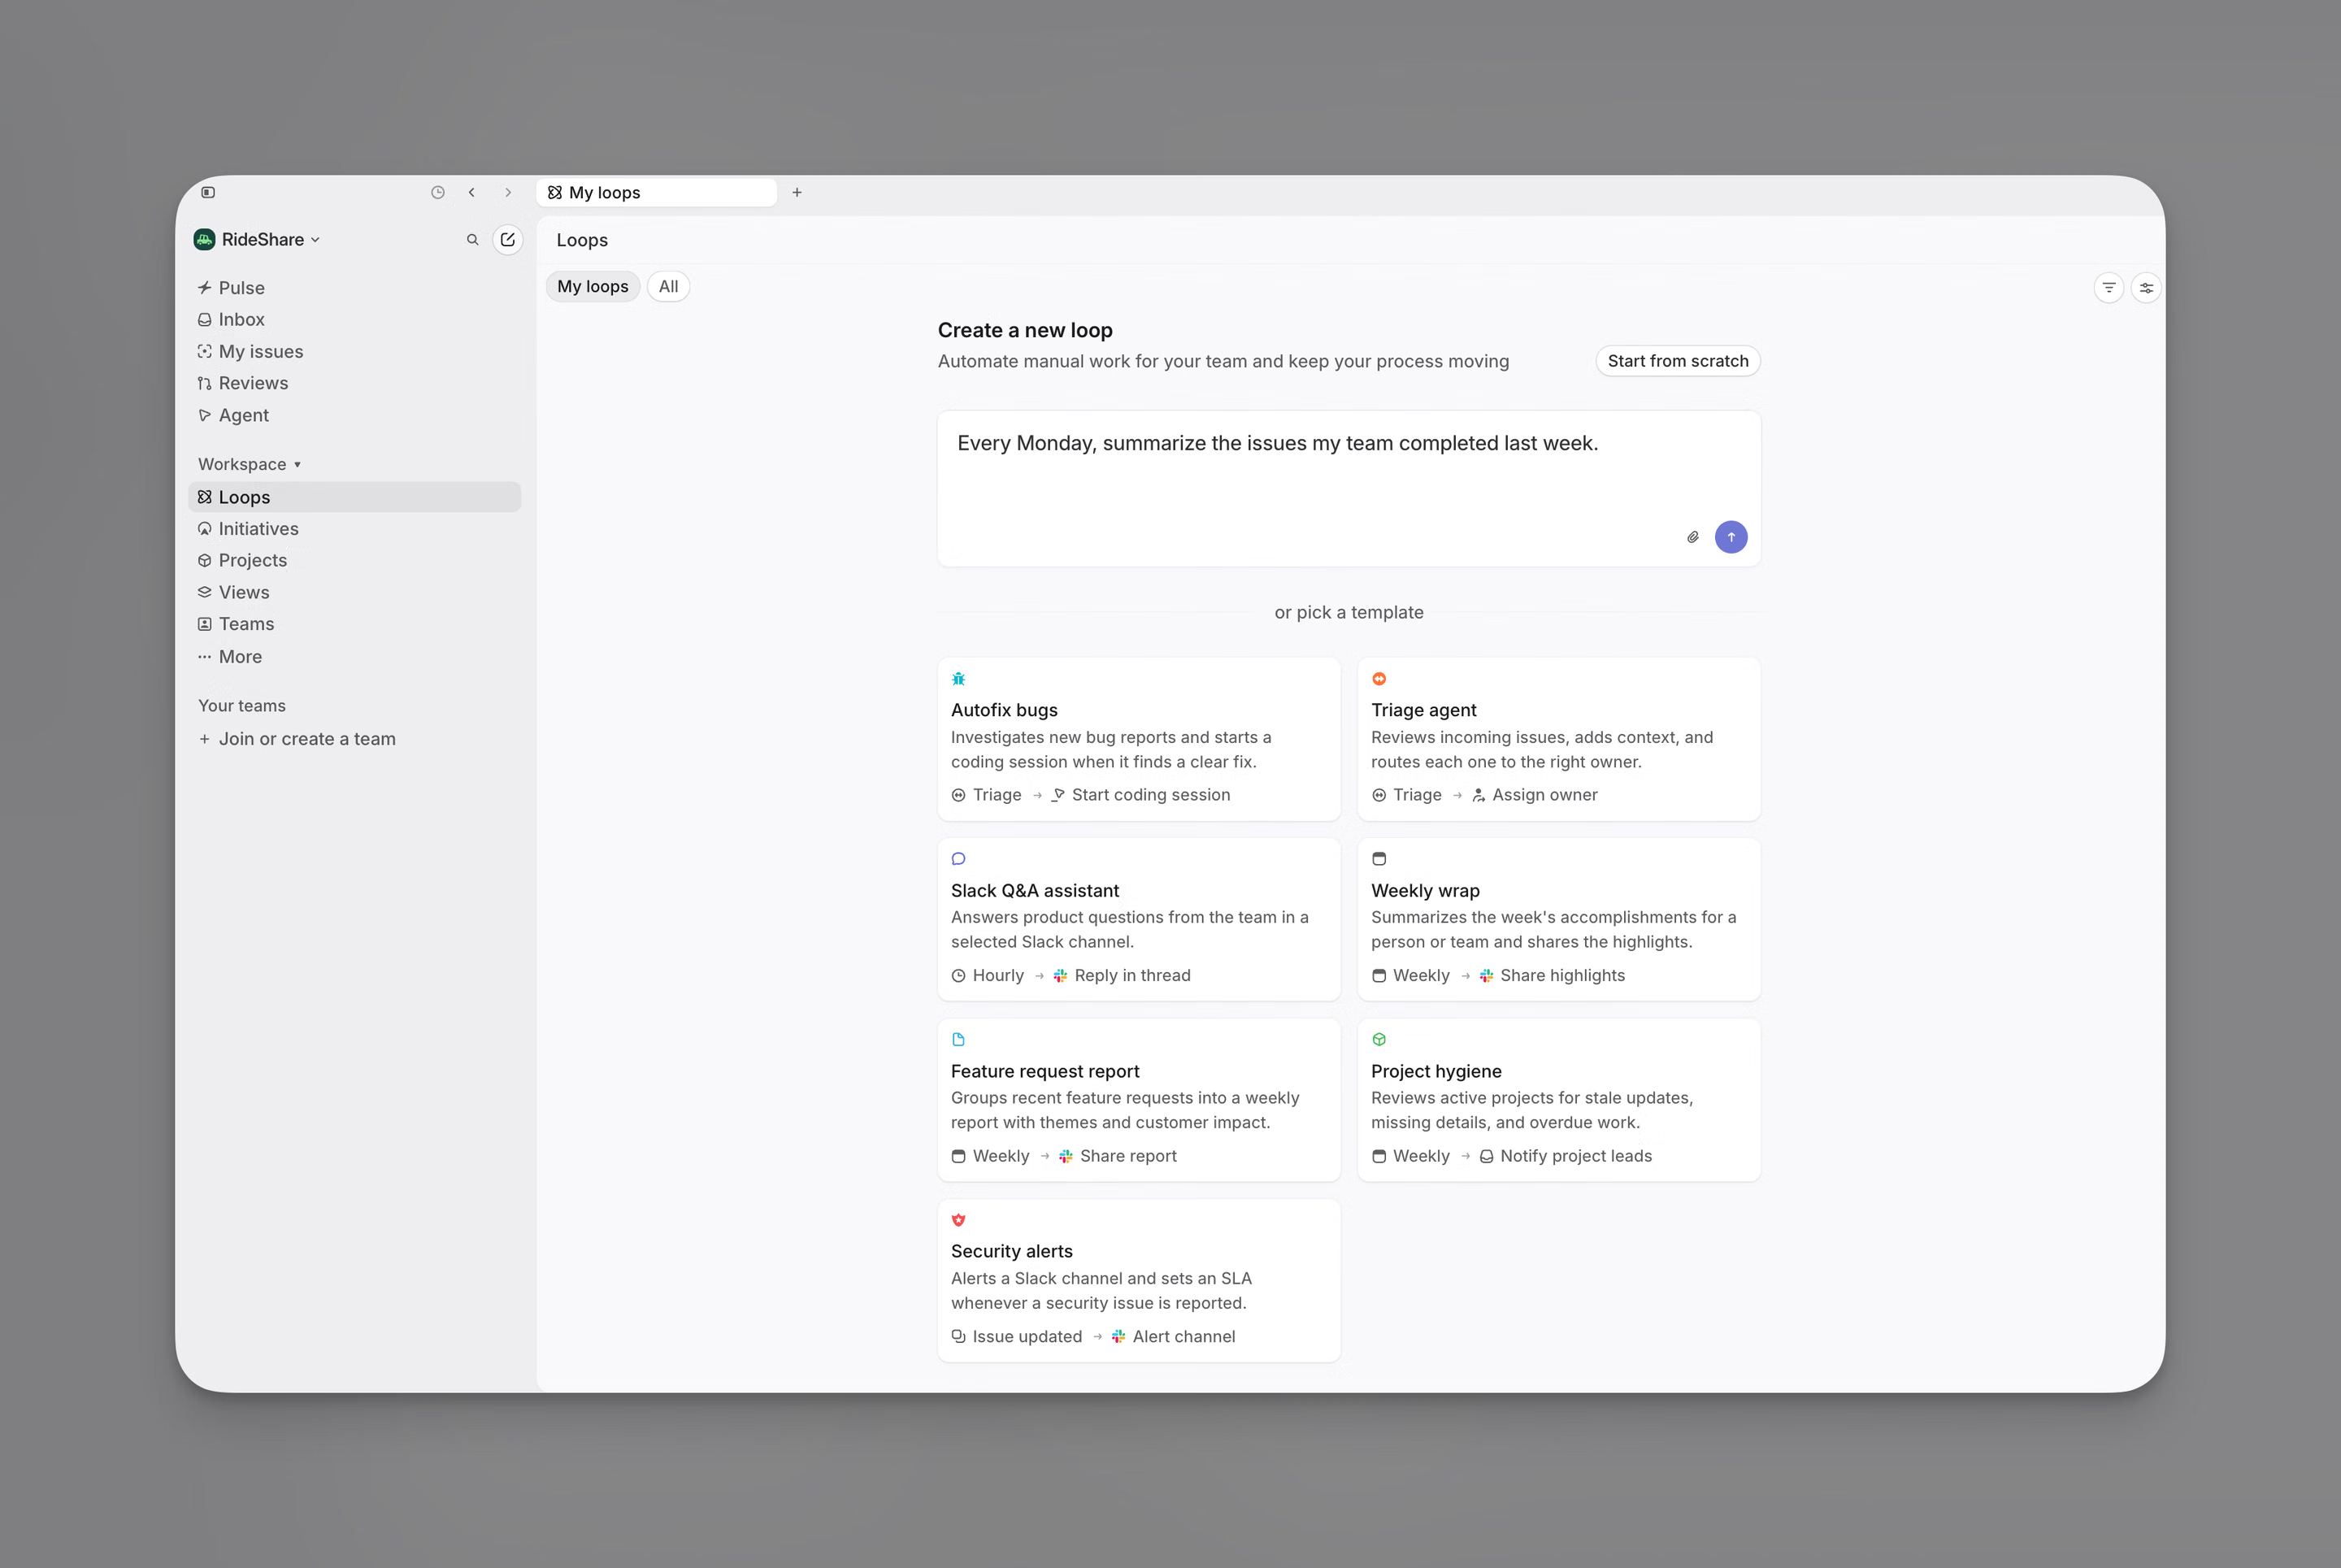
Create from a prompt
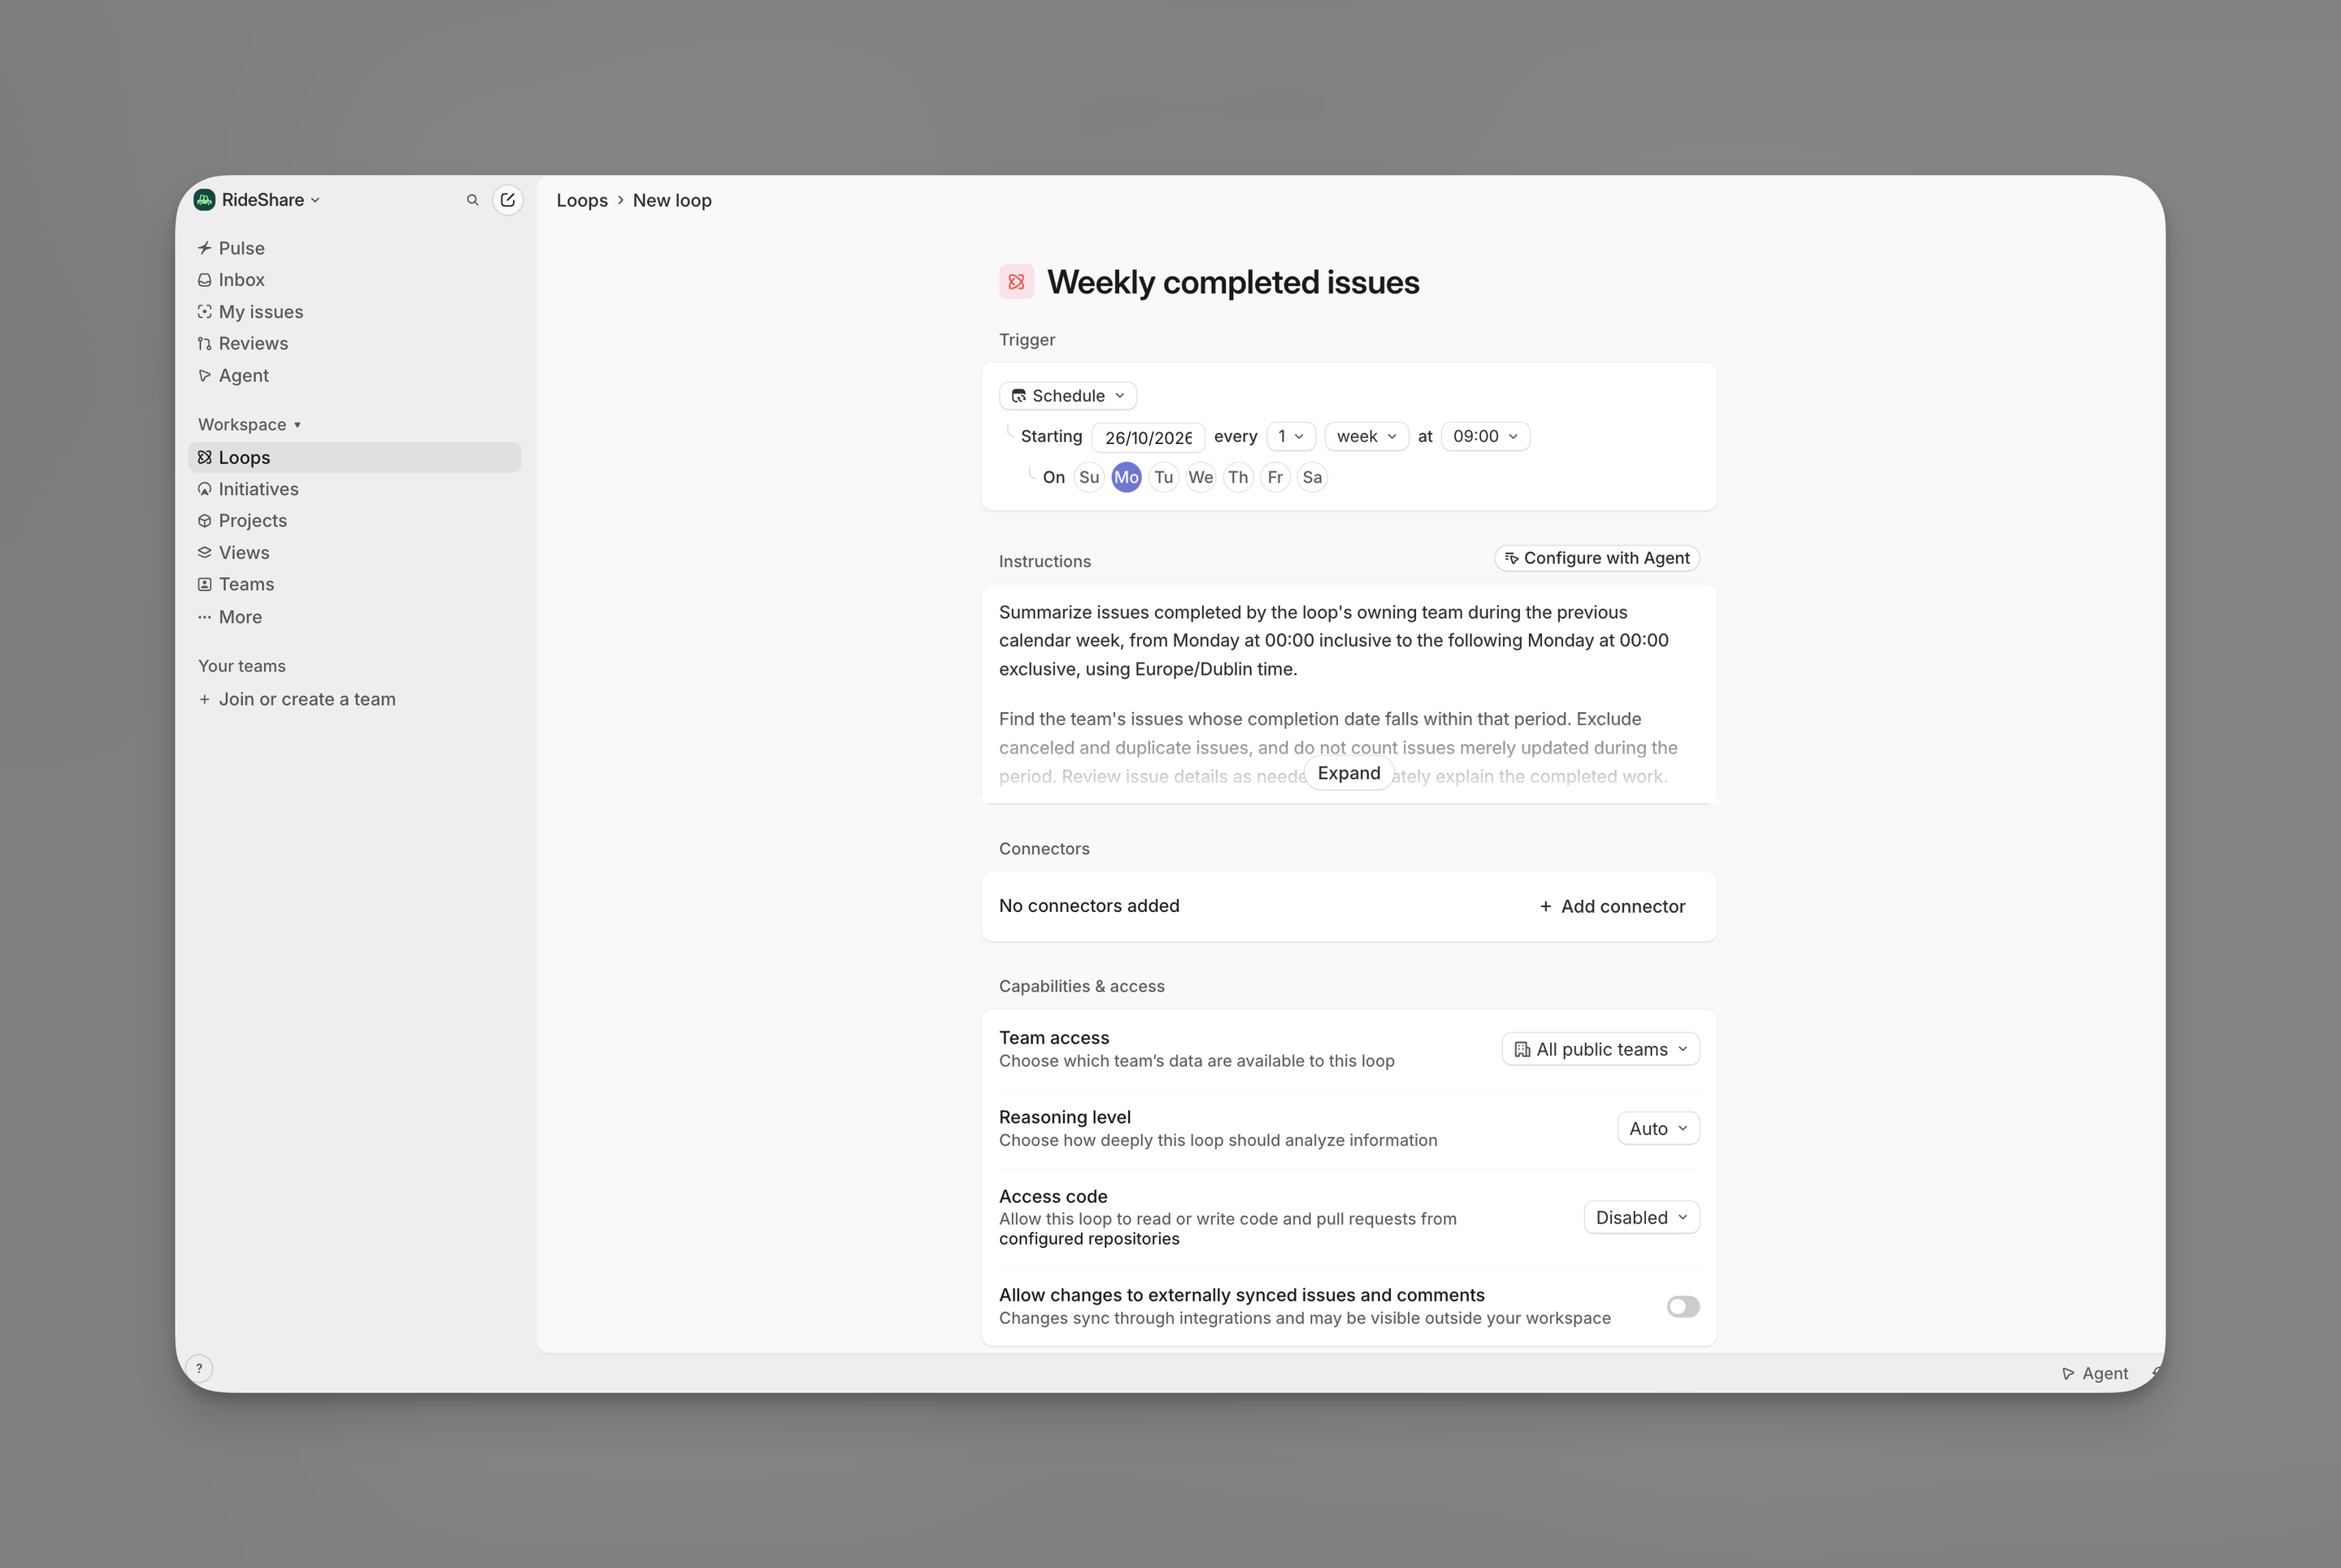
In the new loop dialog, describe what you want to automate. Linear prepares a draft with instructions and a suggested trigger. Review the draft, adjust its configuration, and select Create loop when it is ready.

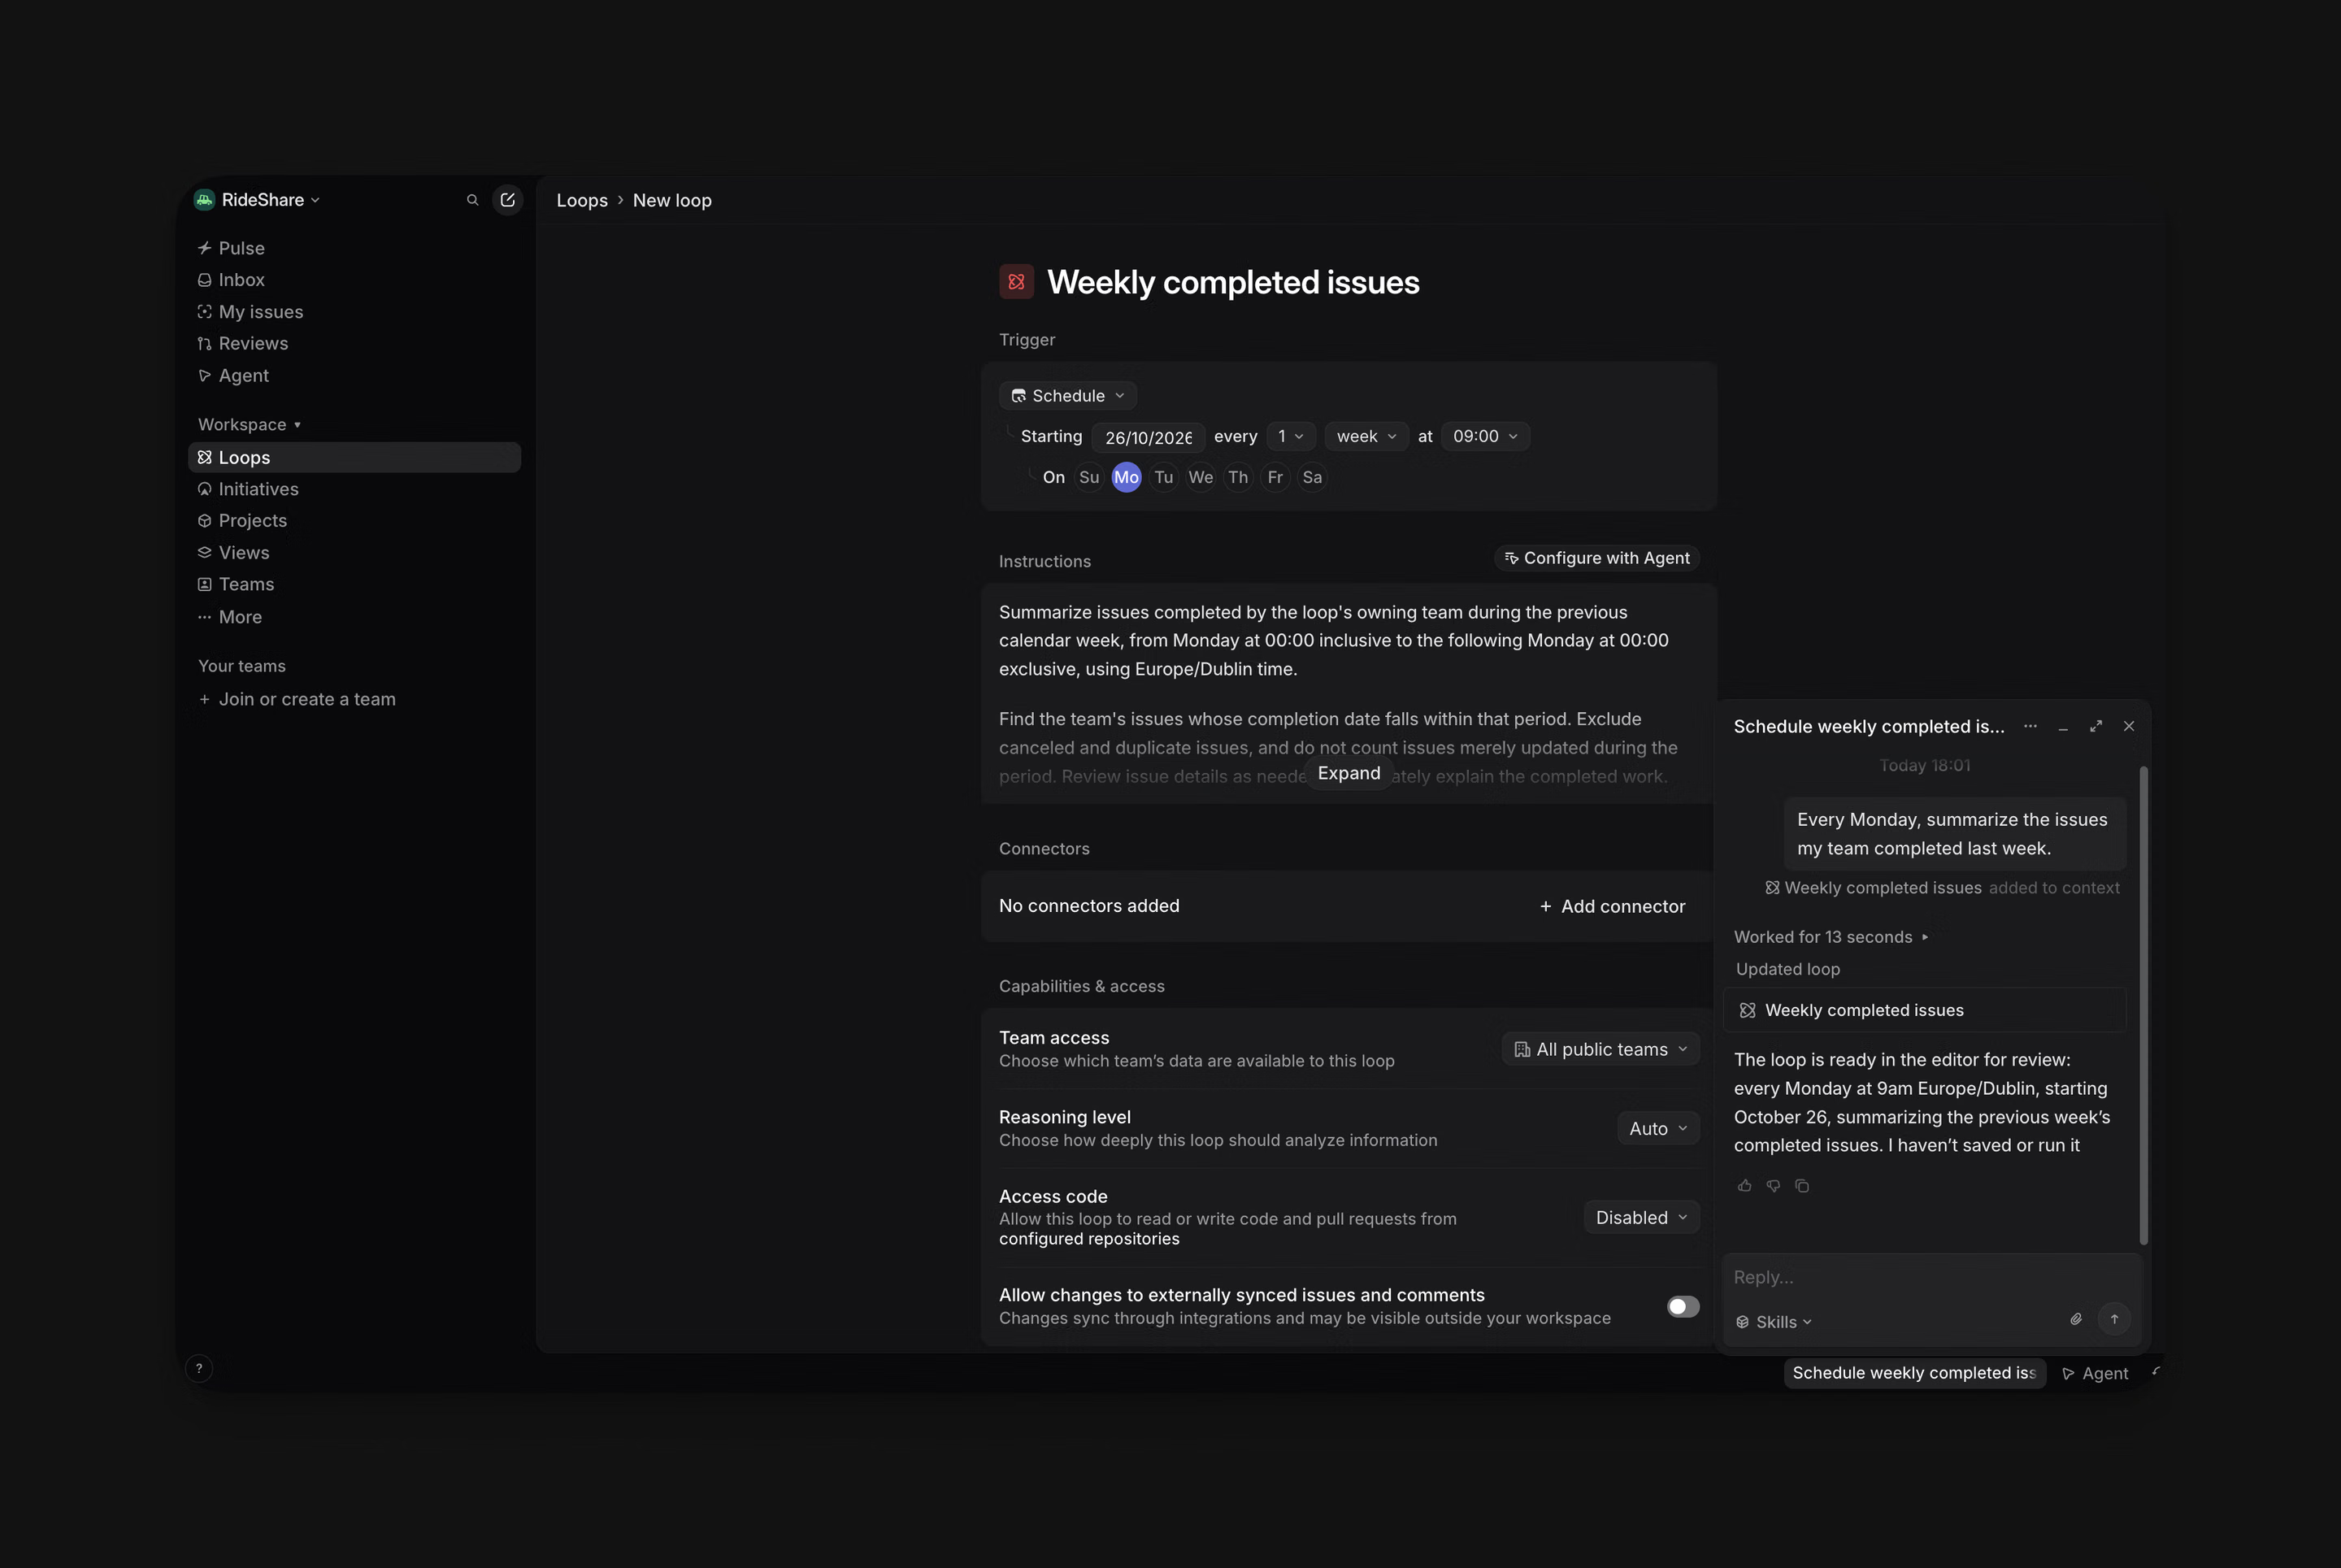
Start from a template
Select a template to start with a predefined workflow. Answer Linear’s setup questions to adapt it to your workspace, and review the instructions, trigger, and permissions as part of setup.
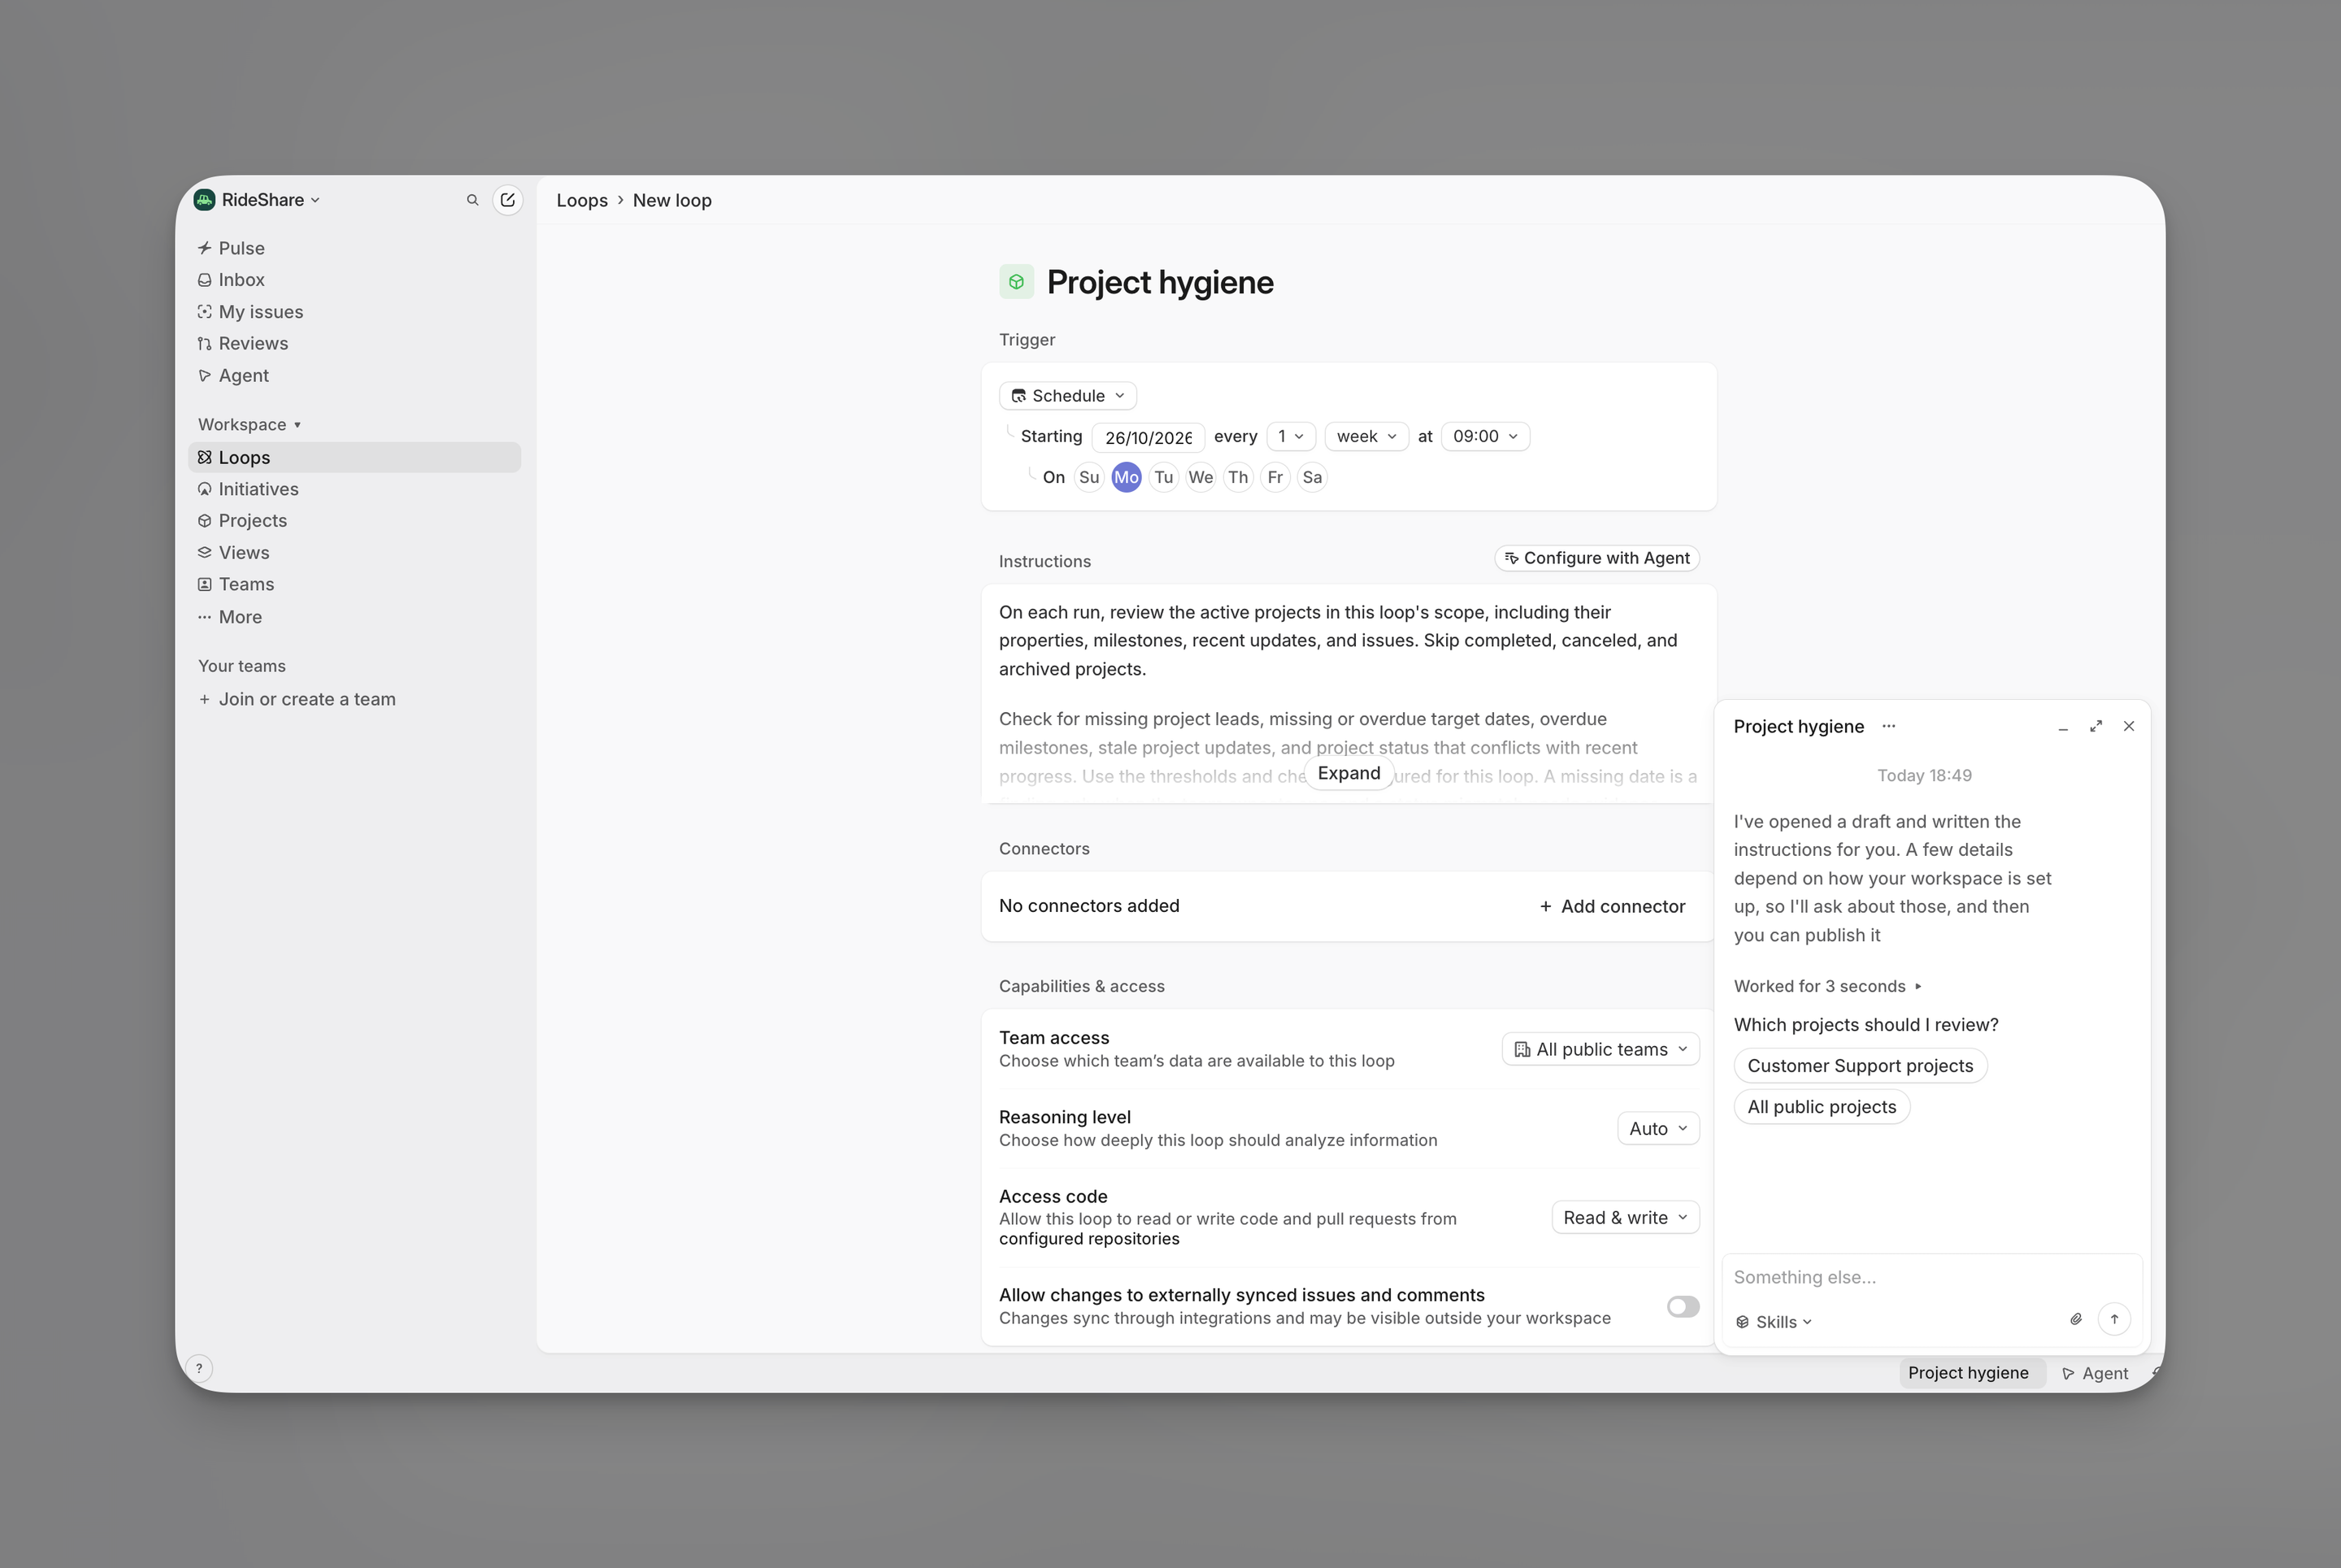

Workspace templates
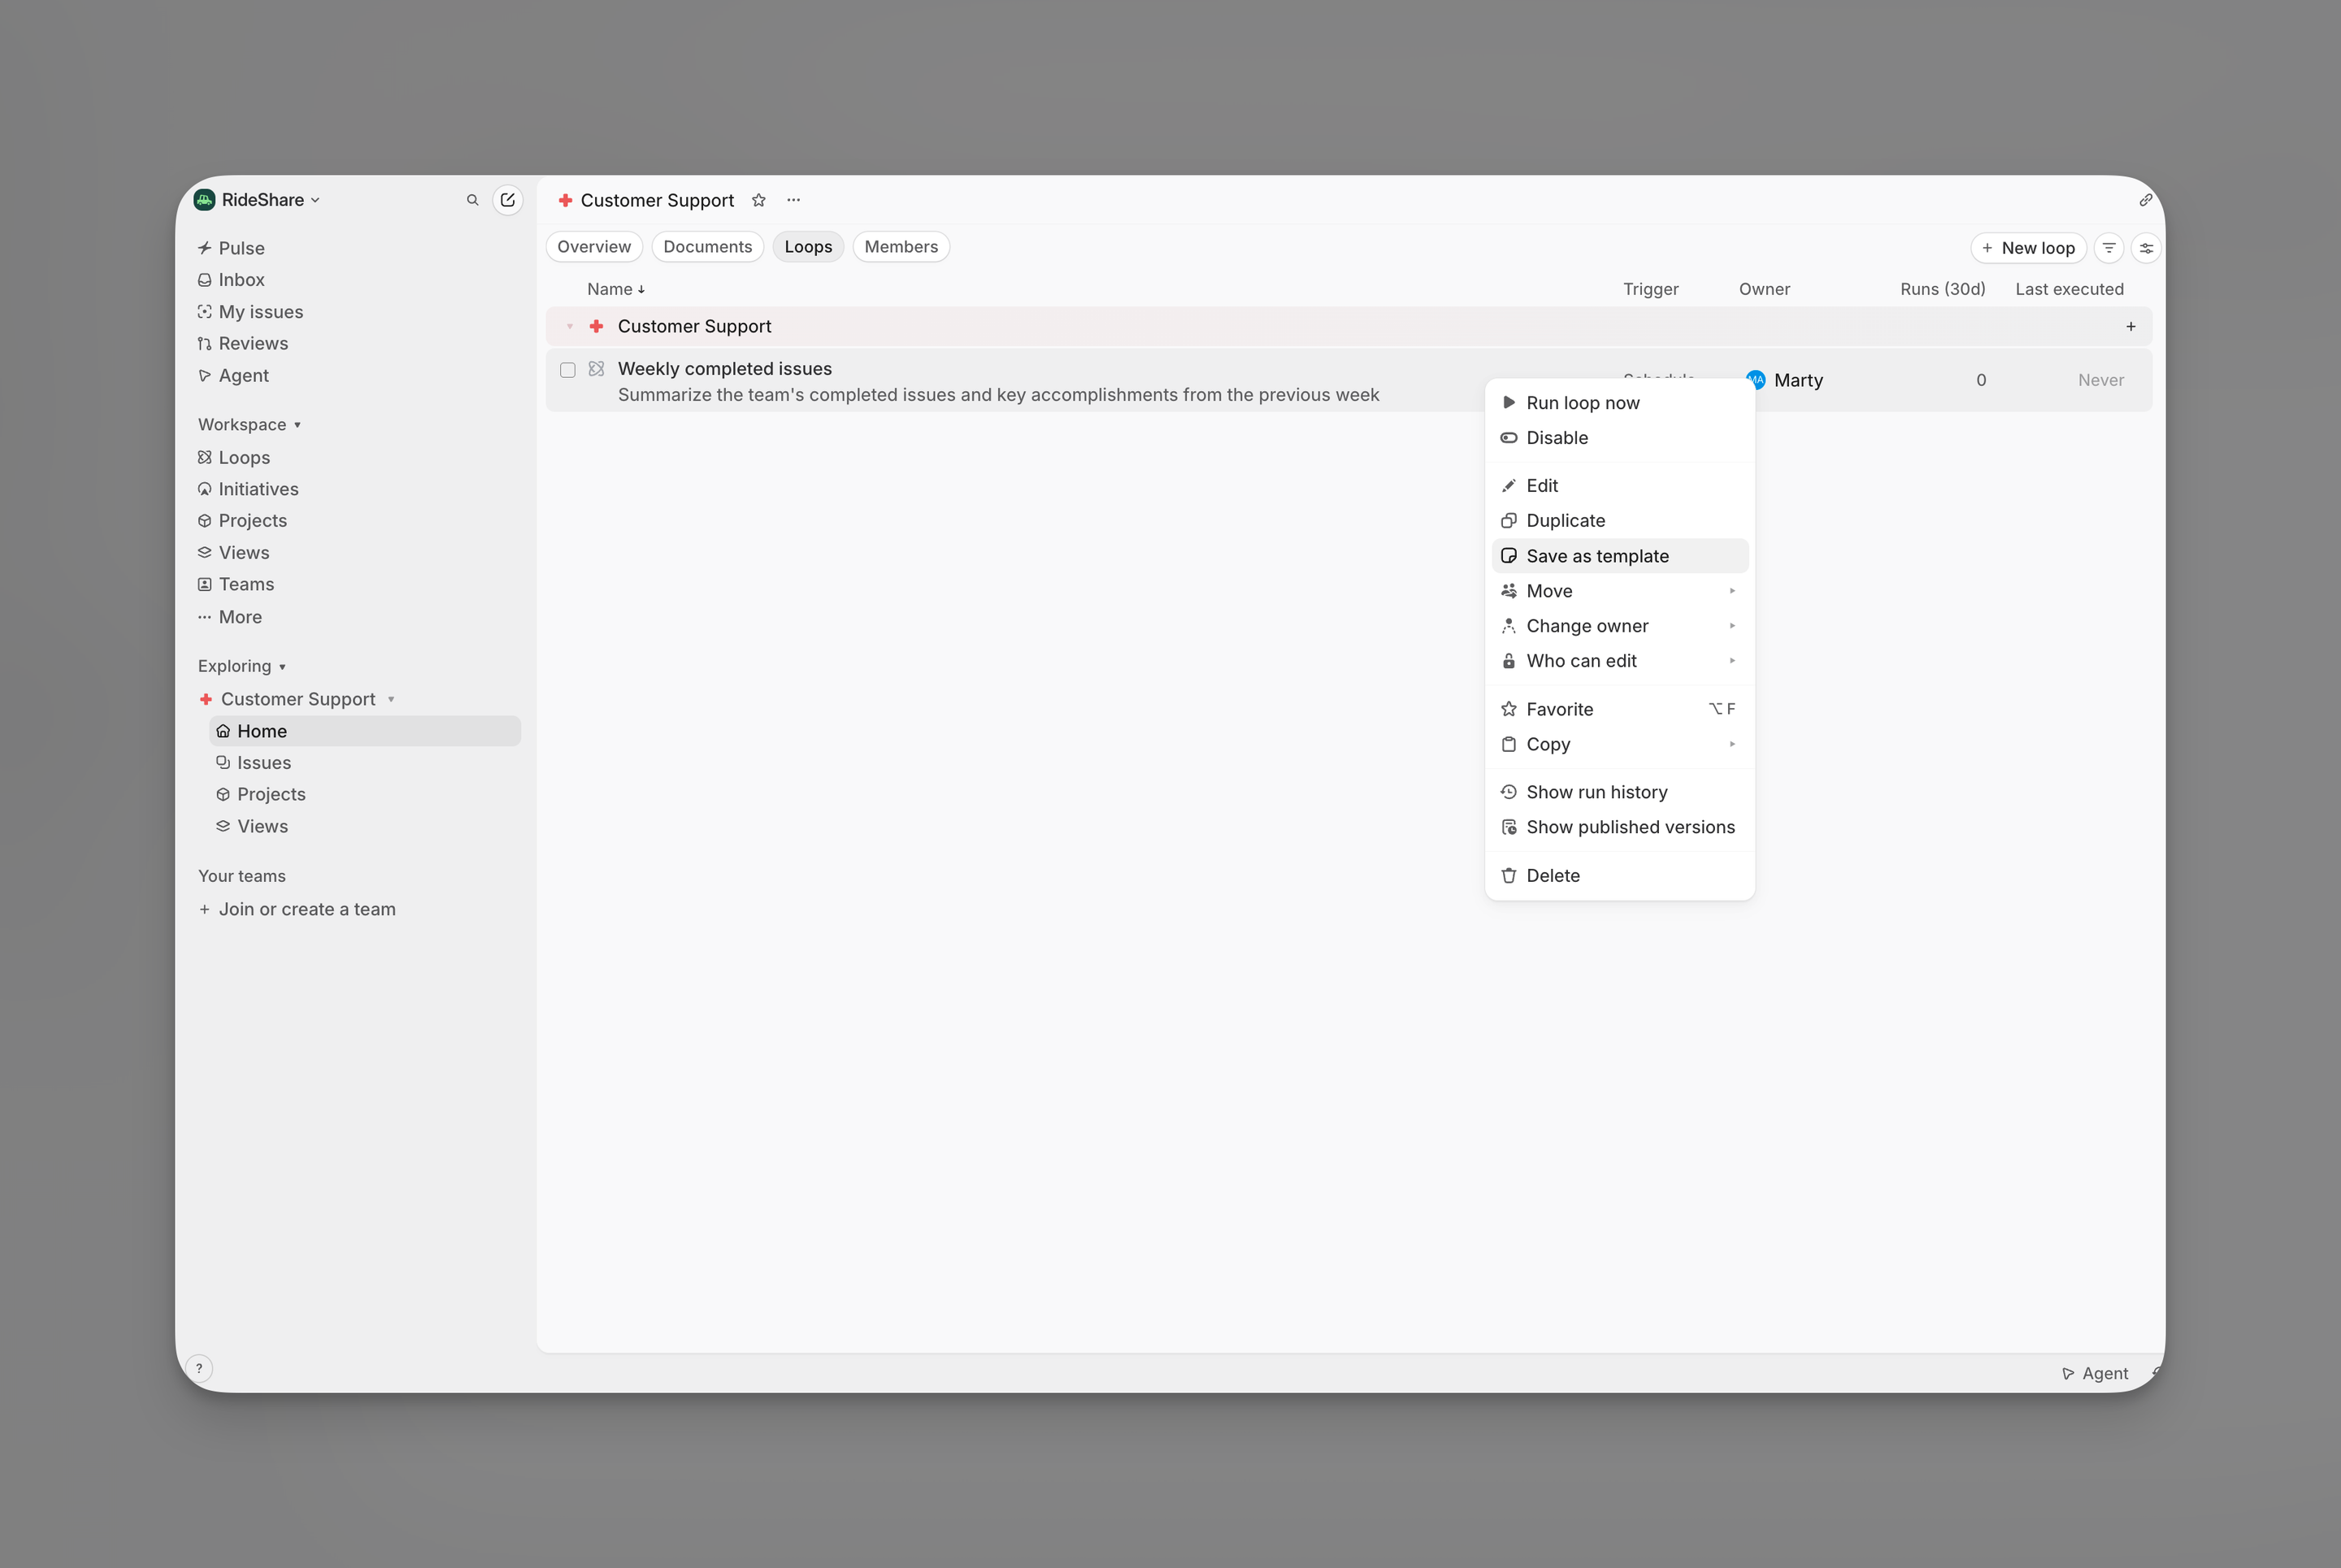
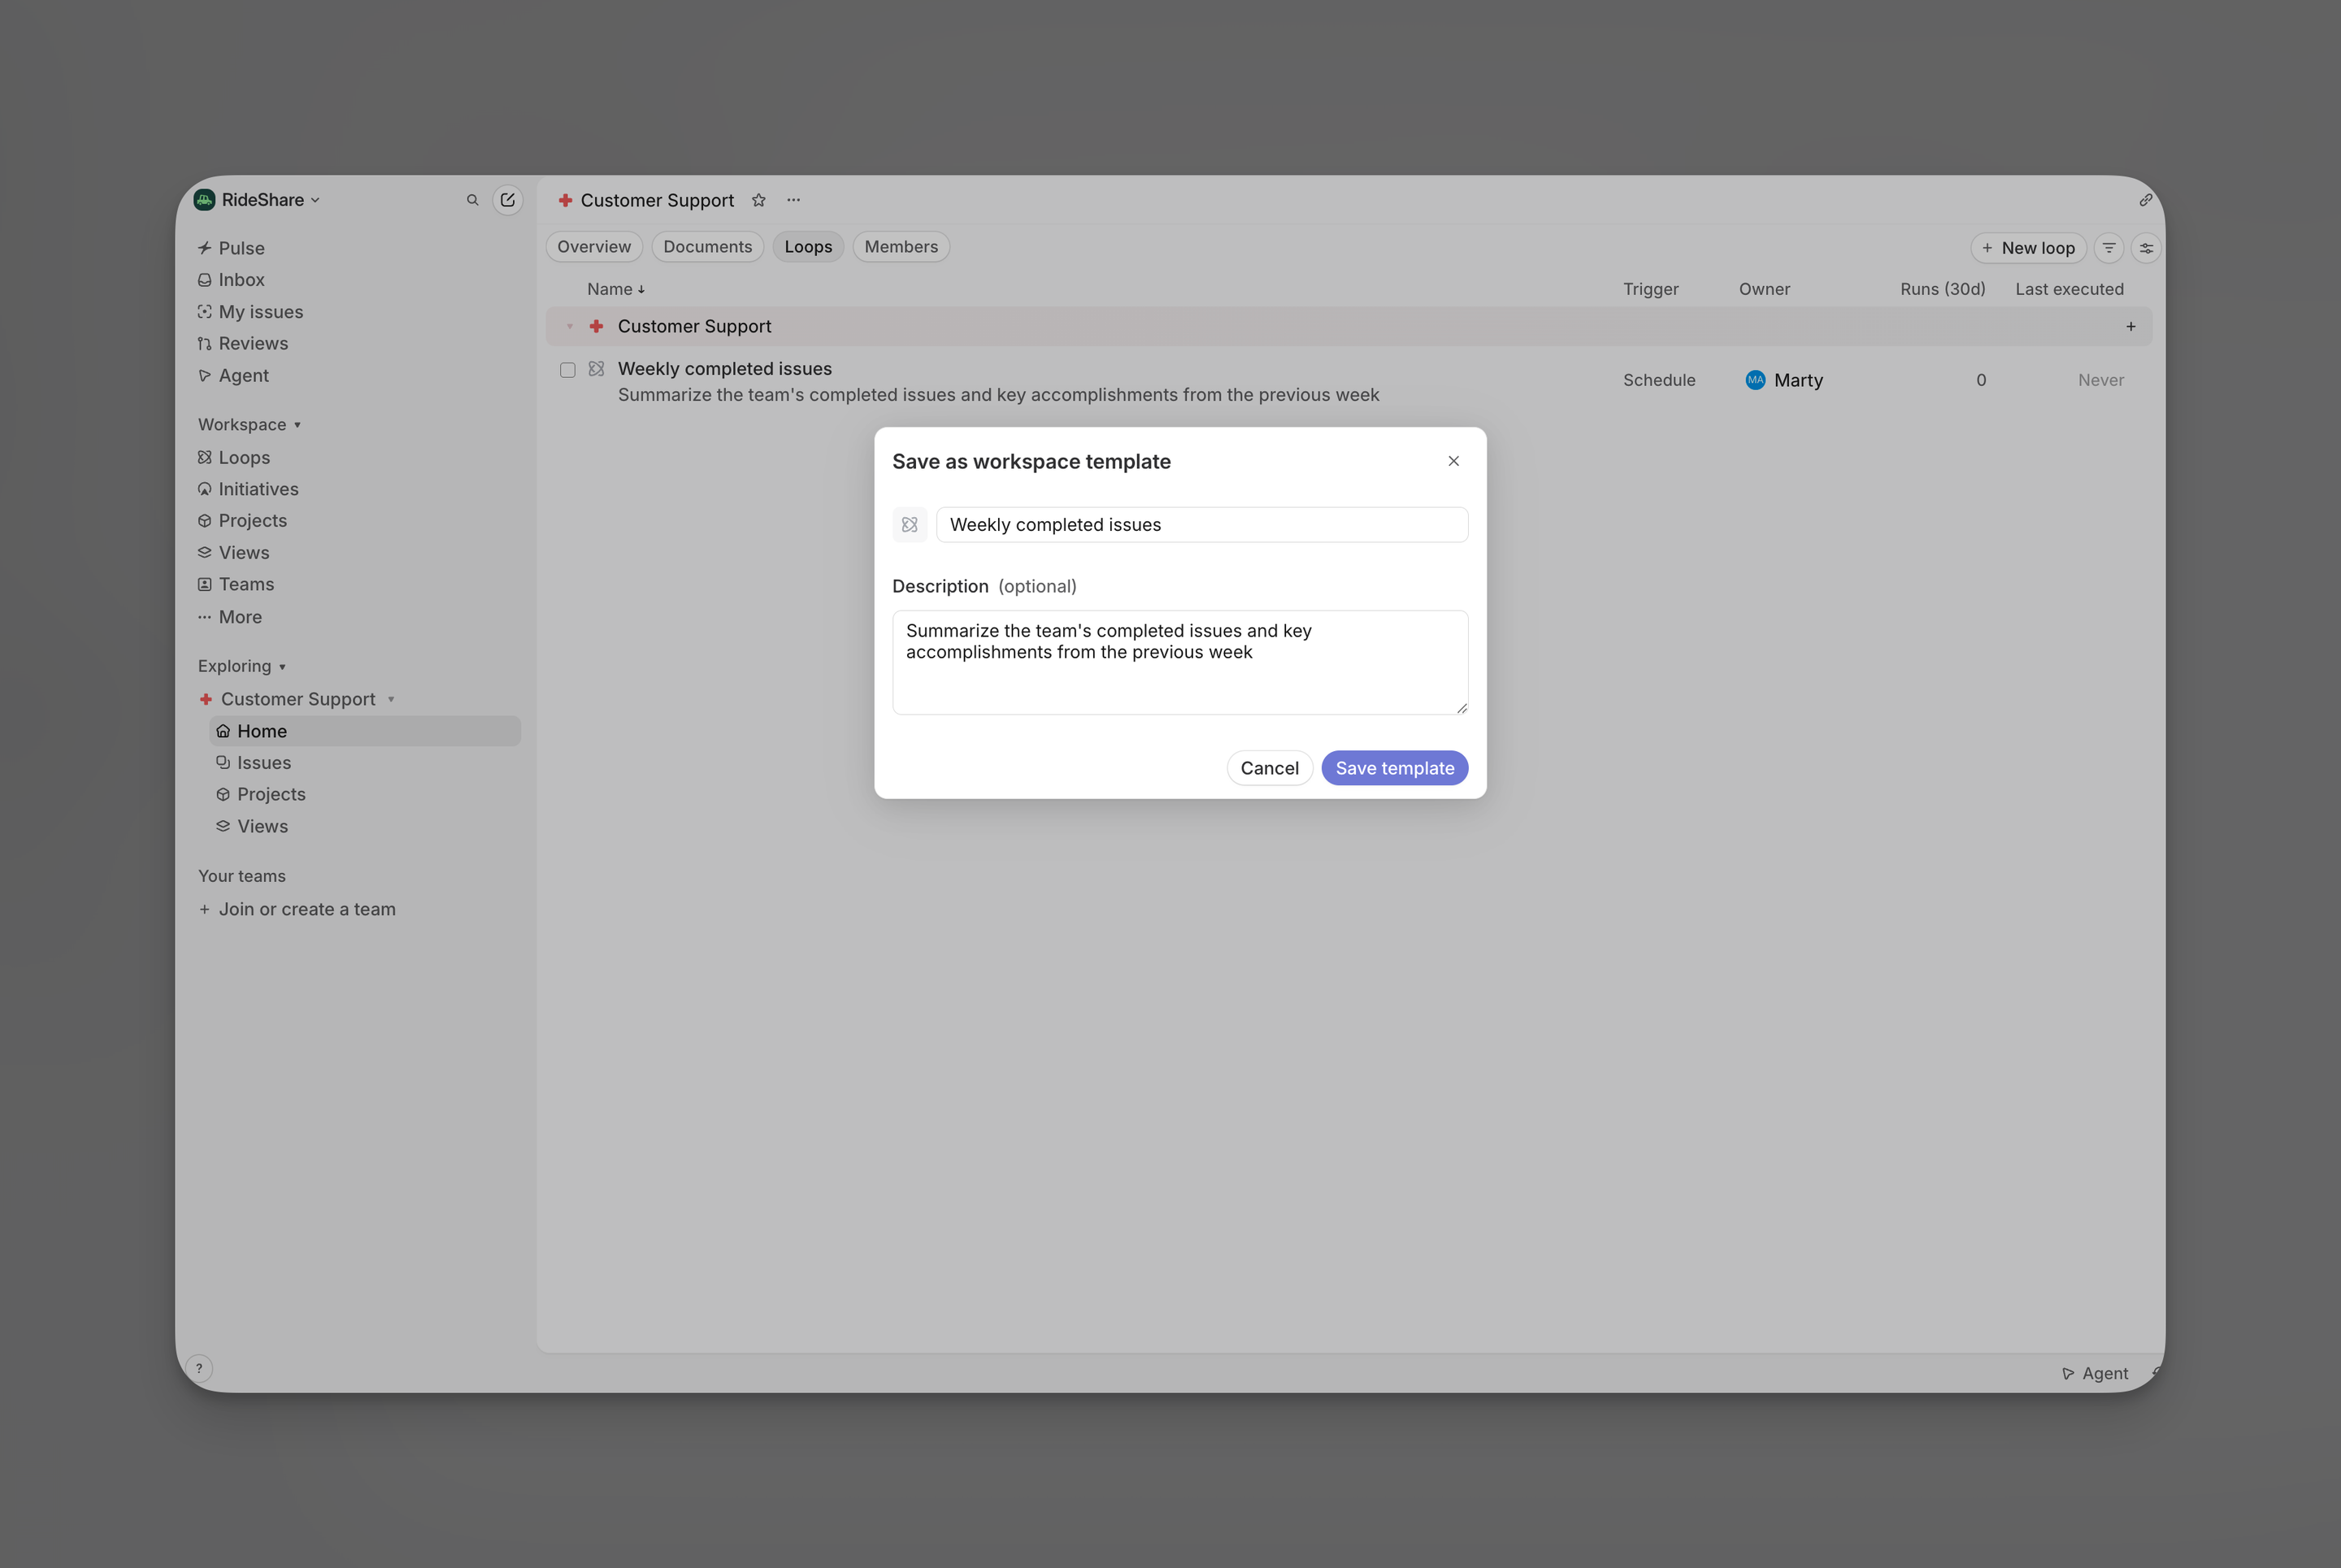
Save a configured loop as a workspace template to reuse its workflow when creating other loops.
- Open an eligible loop
- Open the more menu and select Save as template
- Set a name, icon, and optional description
- Select Save template
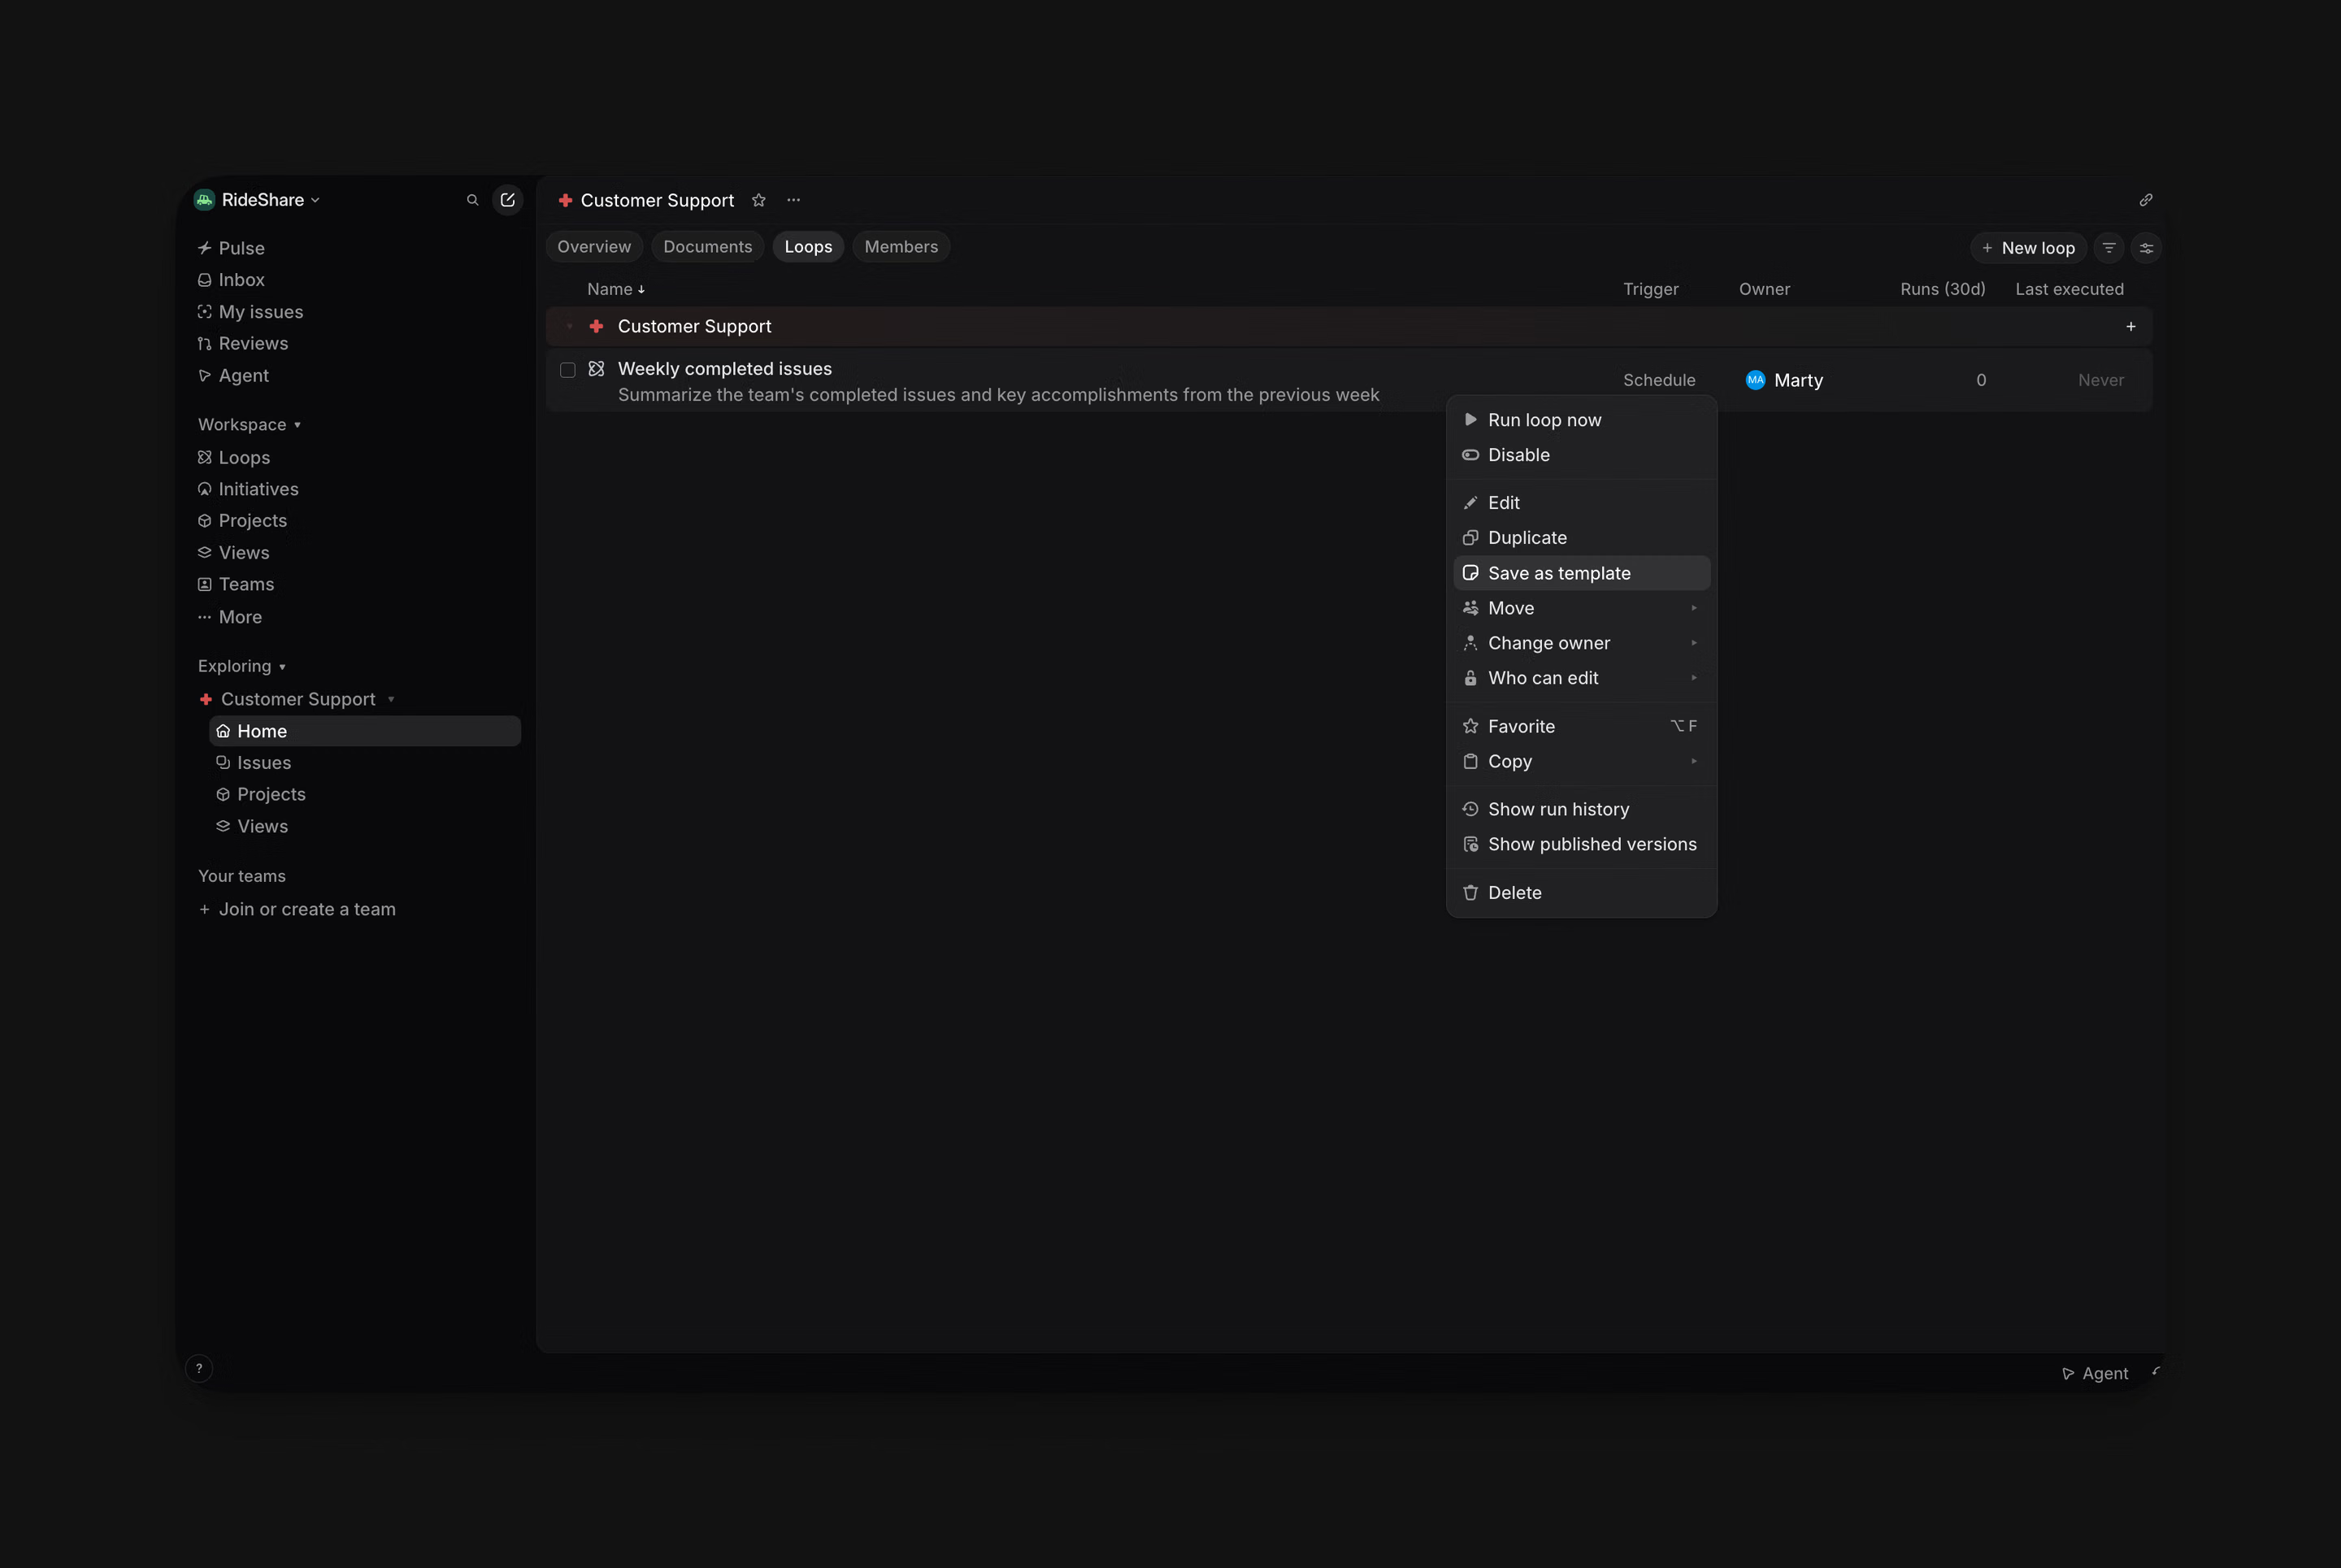
To use a workspace template, open New loop and select its card. Linear creates a separate draft and helps adapt it to the destination. Review the configuration and permissions before creating the loop.
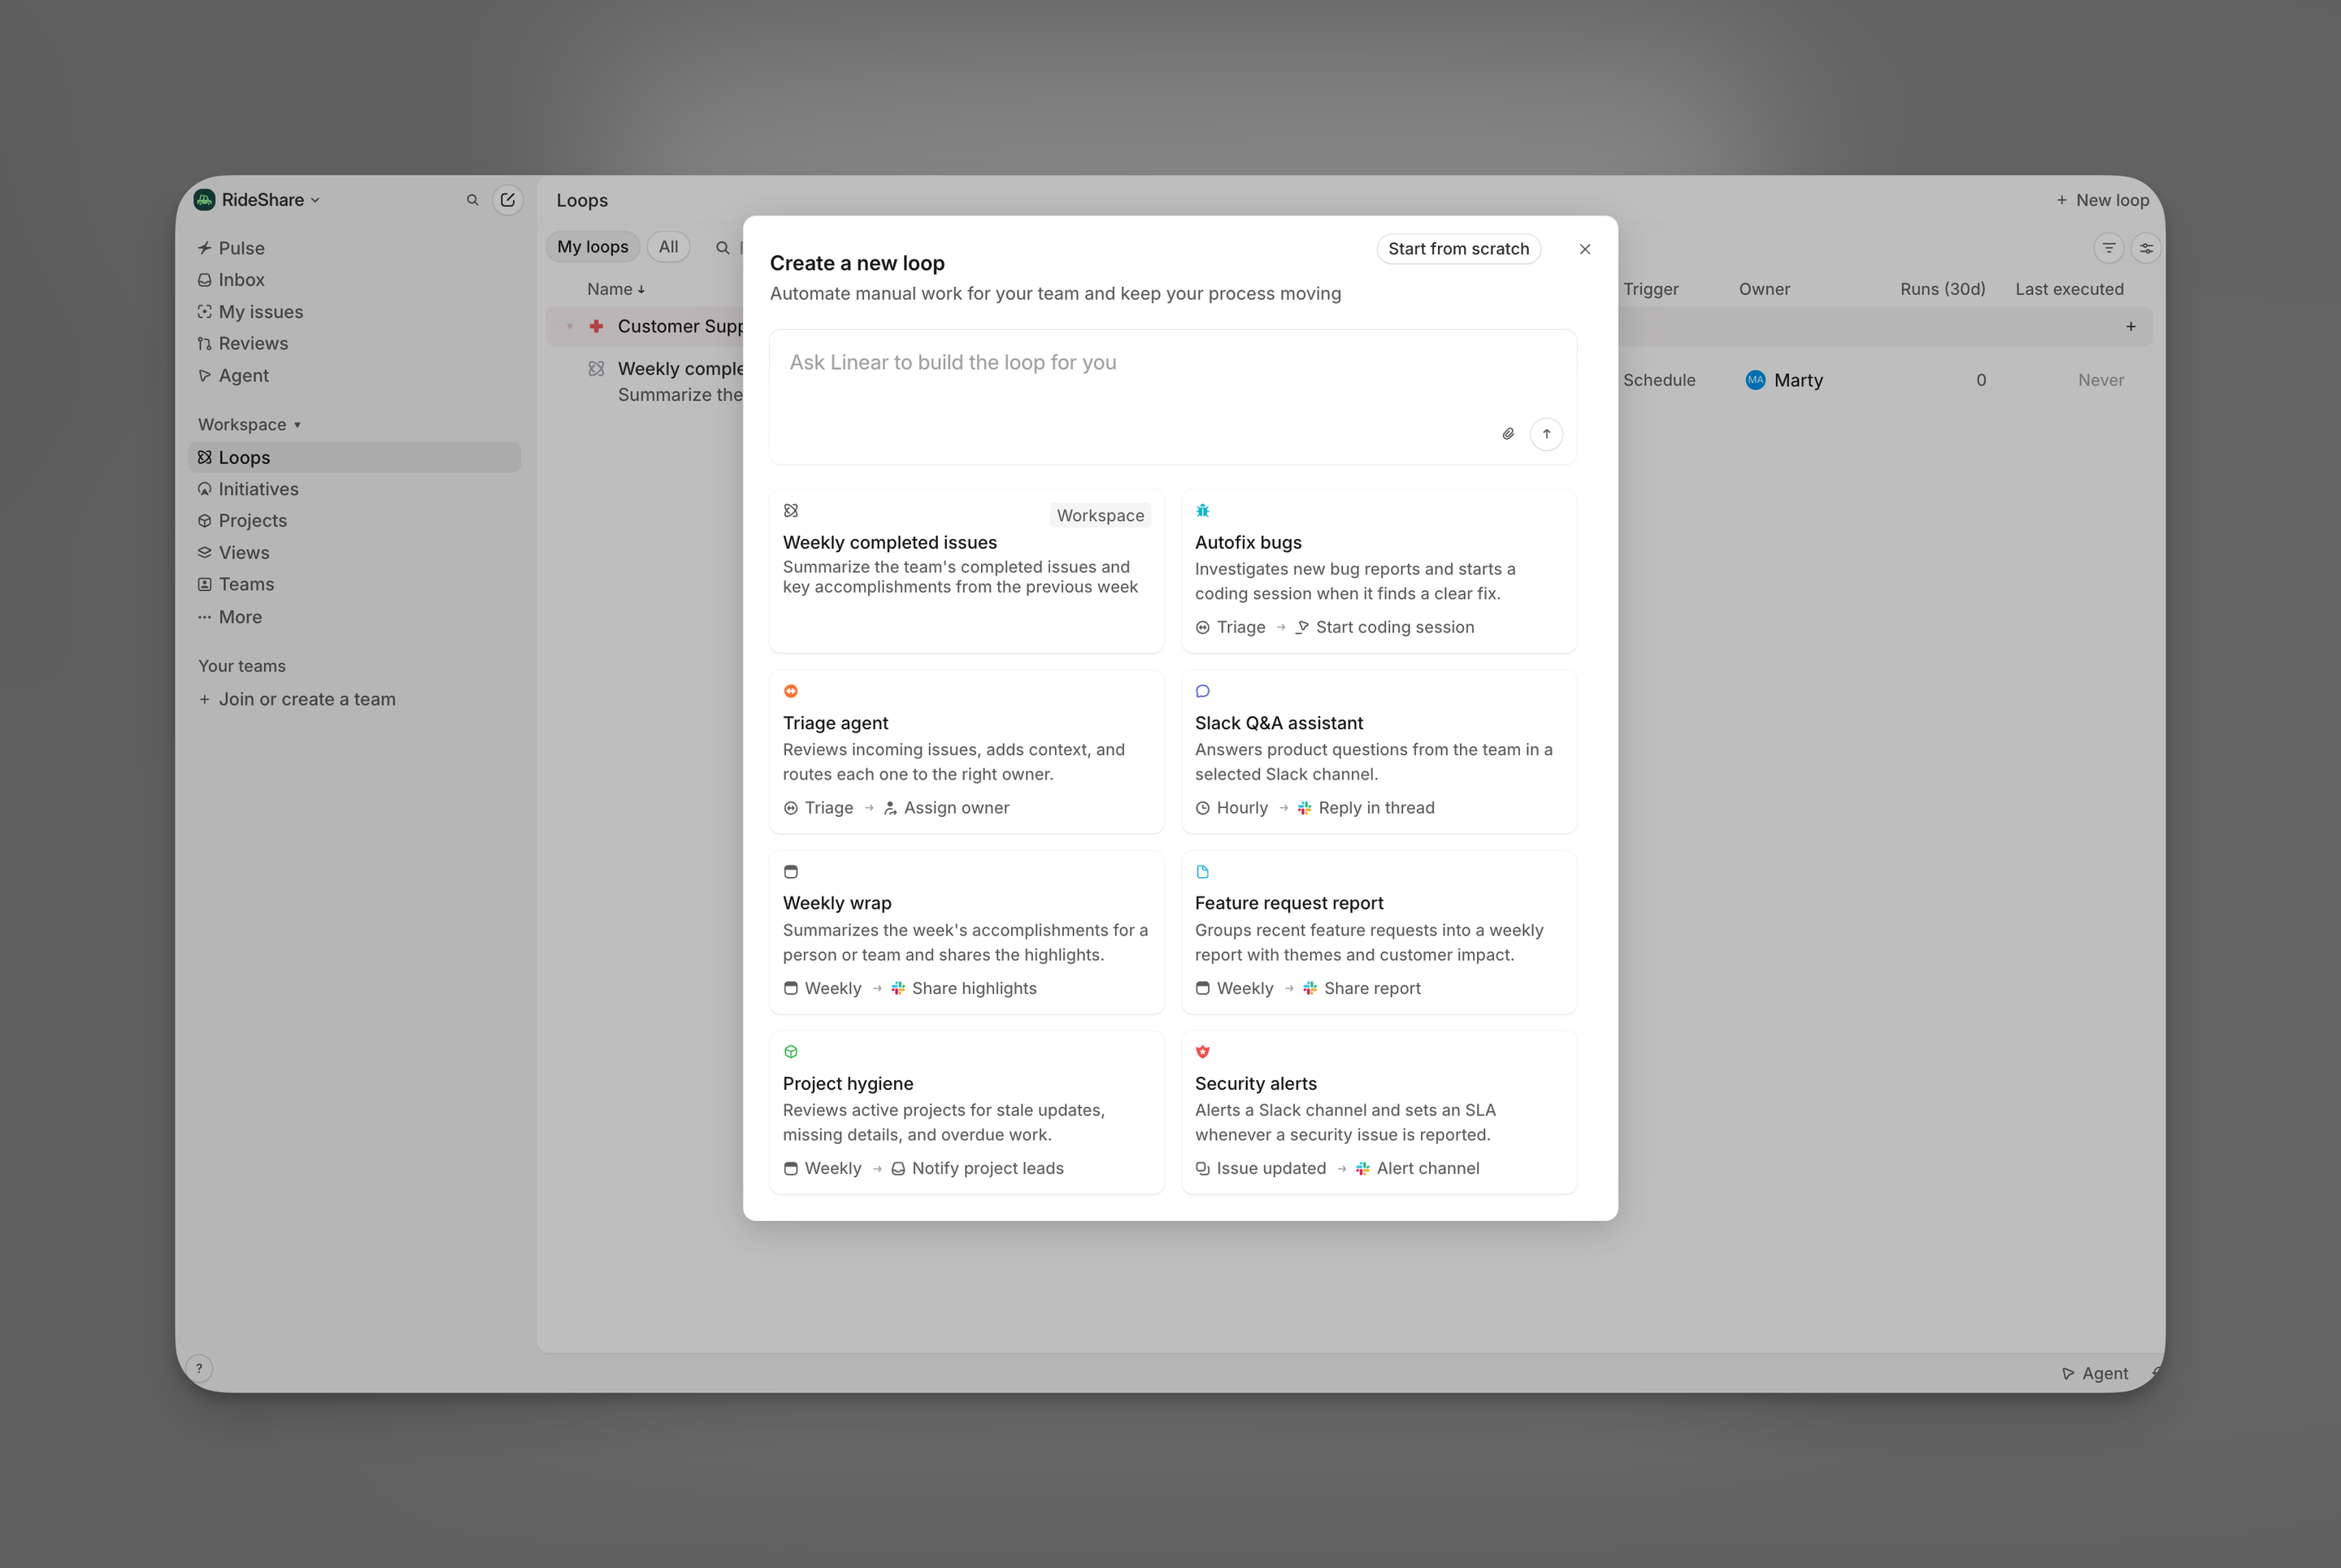

Templates reuse instructions, supported trigger configuration, schedules, and compatible settings. They do not copy the source loop’s owner, enabled state, team access, trusted external sources, or connector authorizations. Review references in the instructions and configure the access and connections required by the new loop.
Only eligible loops can be saved as templates. Slack/chat, pull request, and webhook triggers are not supported. Triage templates require a destination team with triage enabled.
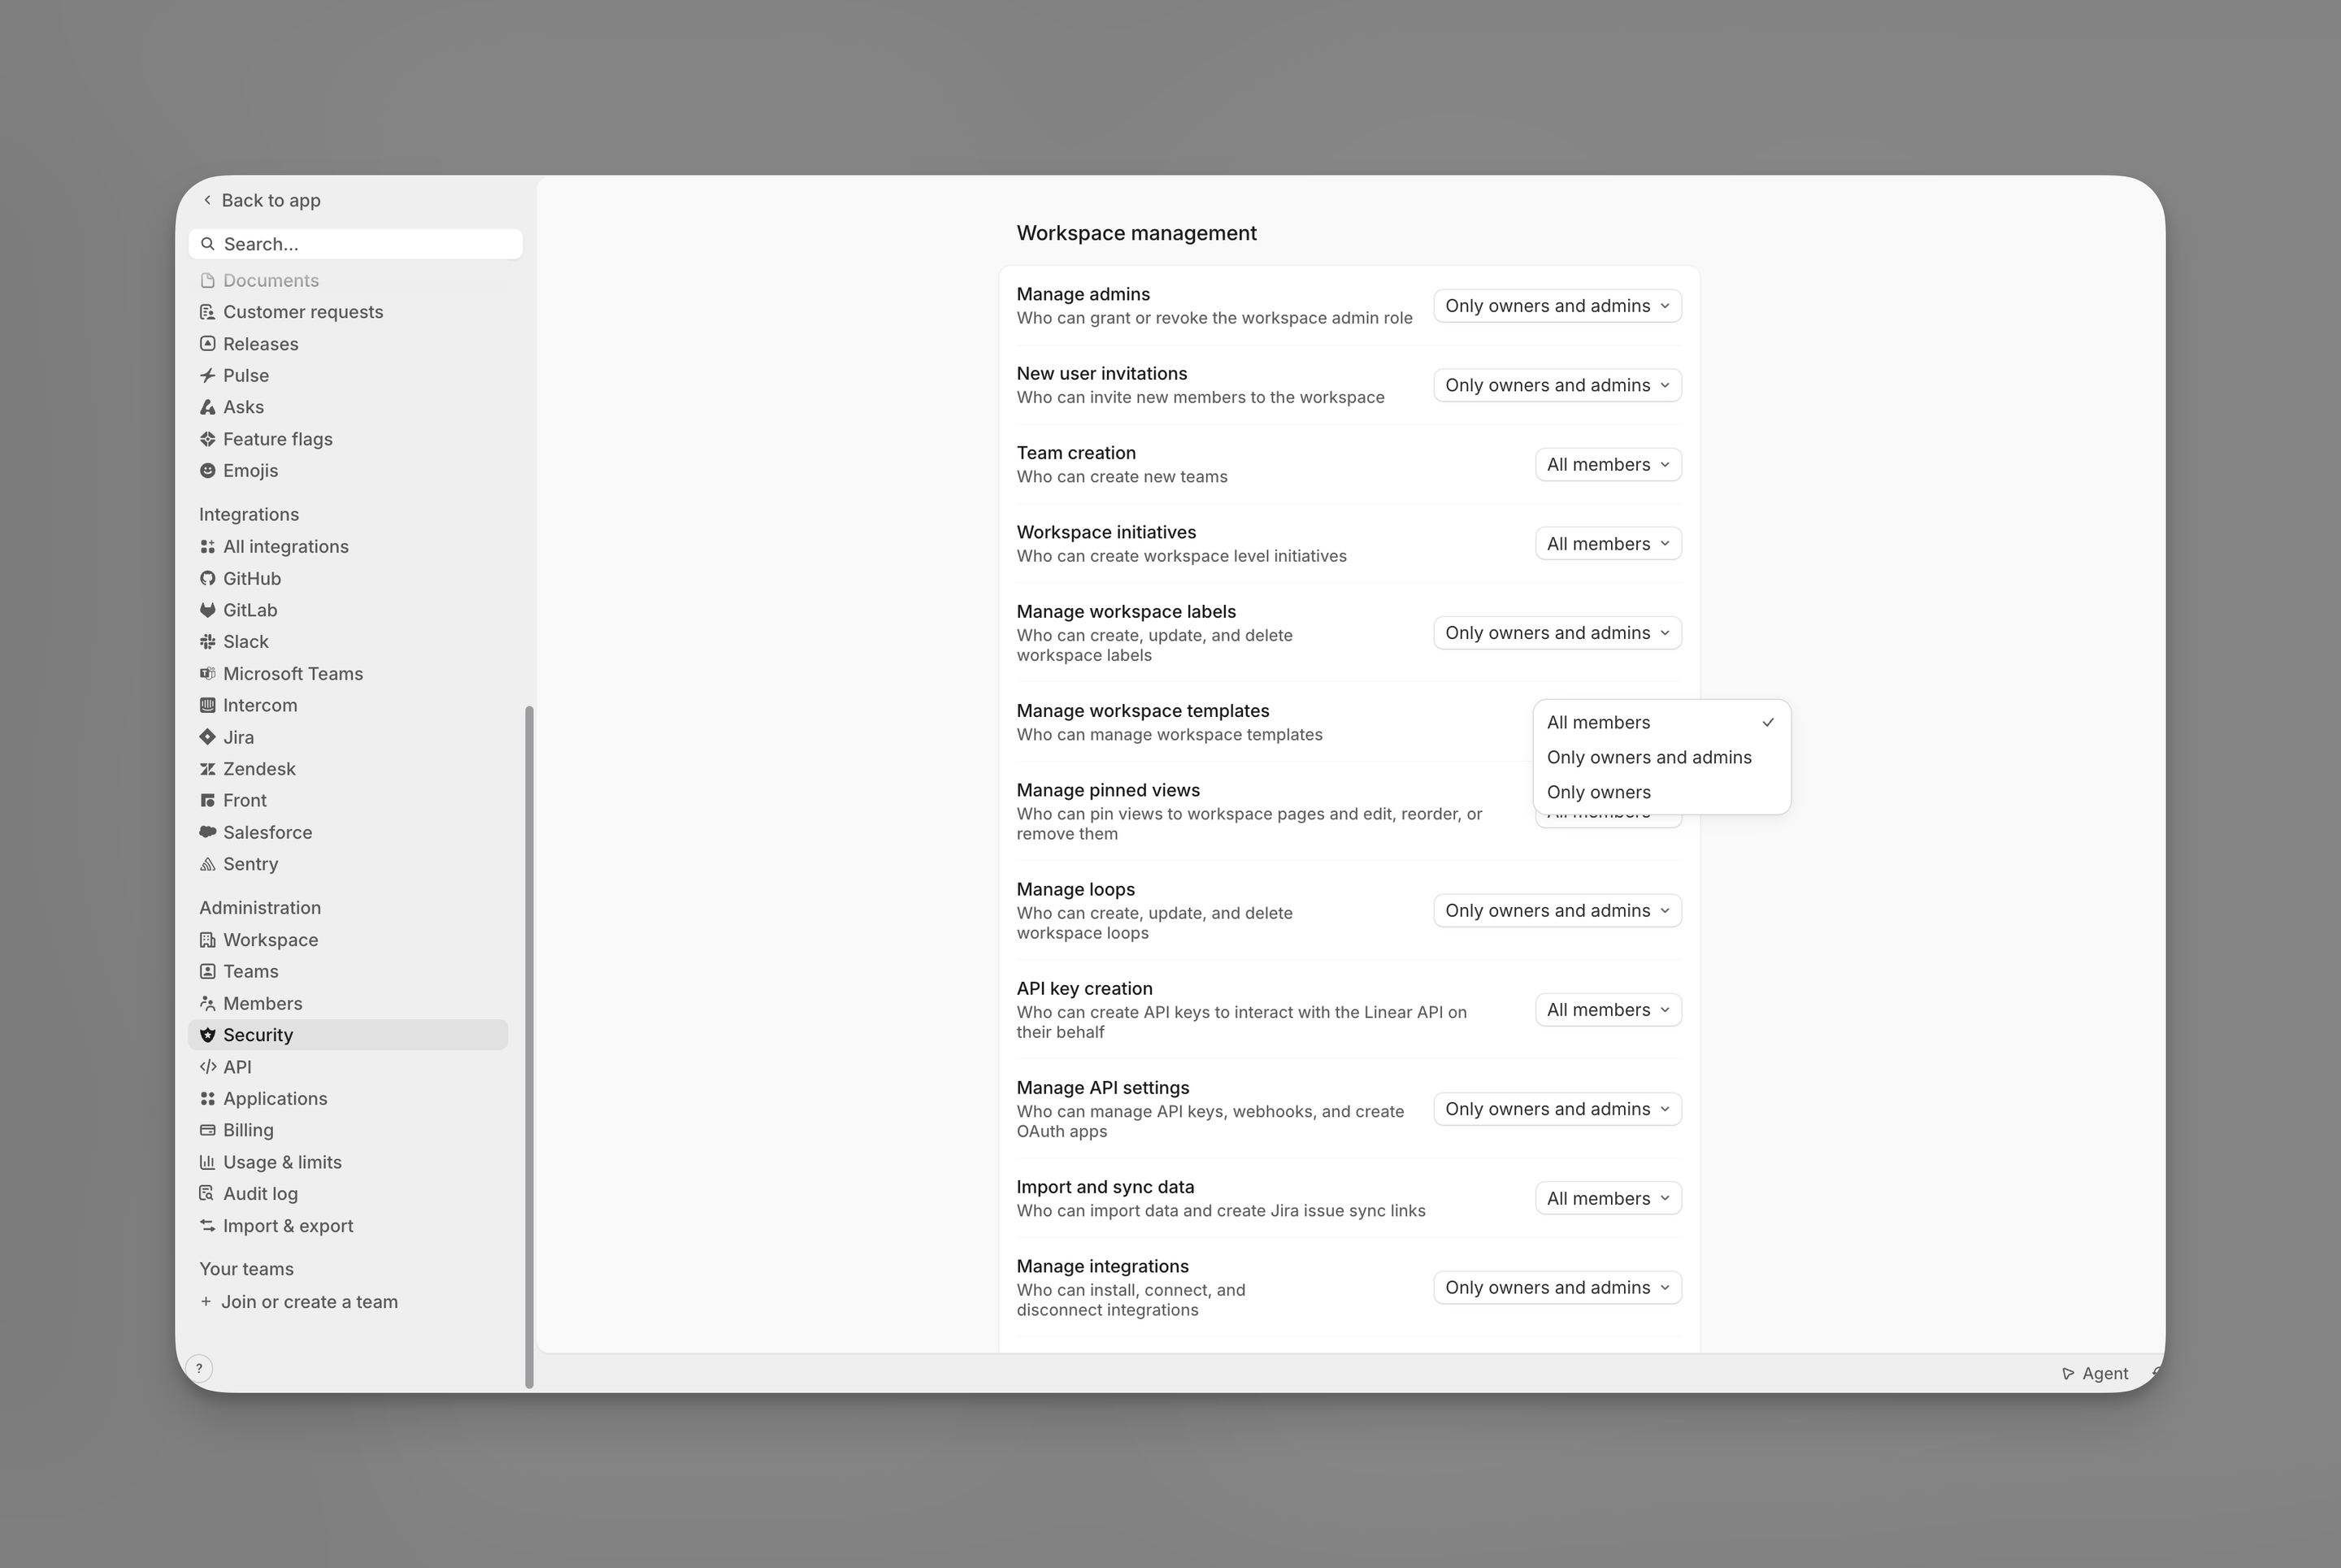
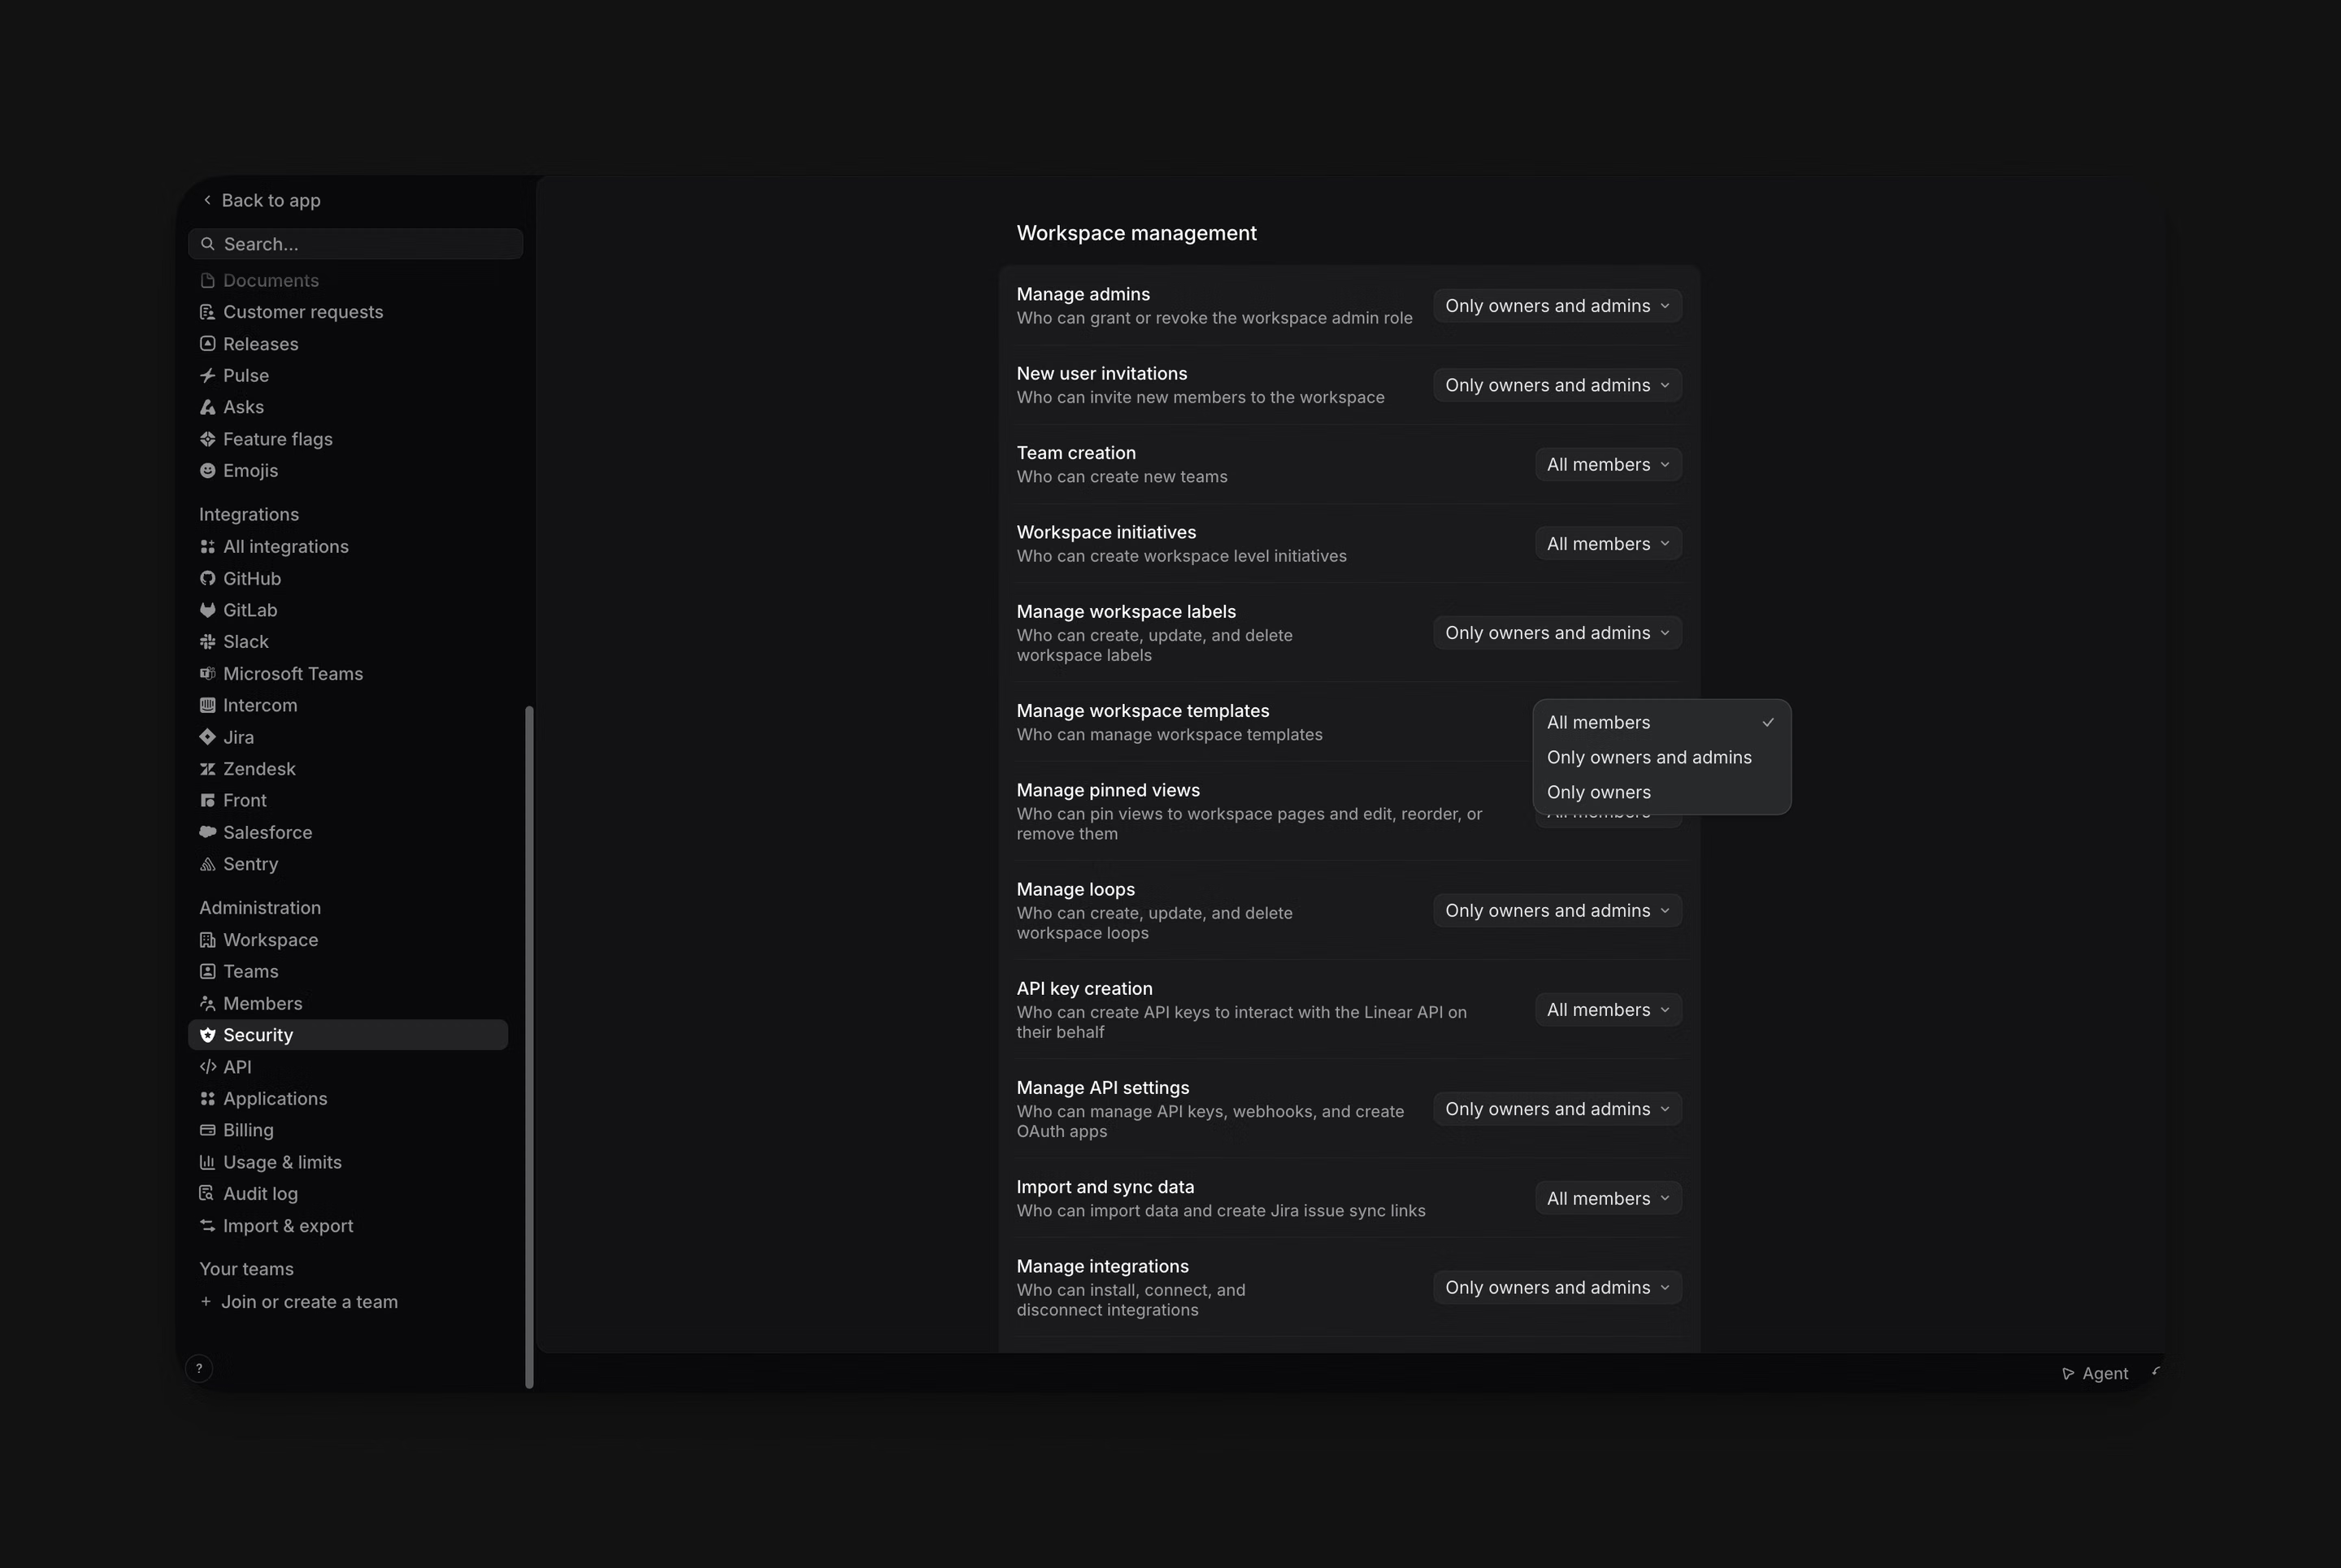
Workspace owners can control who manages workspace templates in Settings → Security → Workspace management → Manage workspace templates. Saving a loop as a template also requires permission to edit that loop.
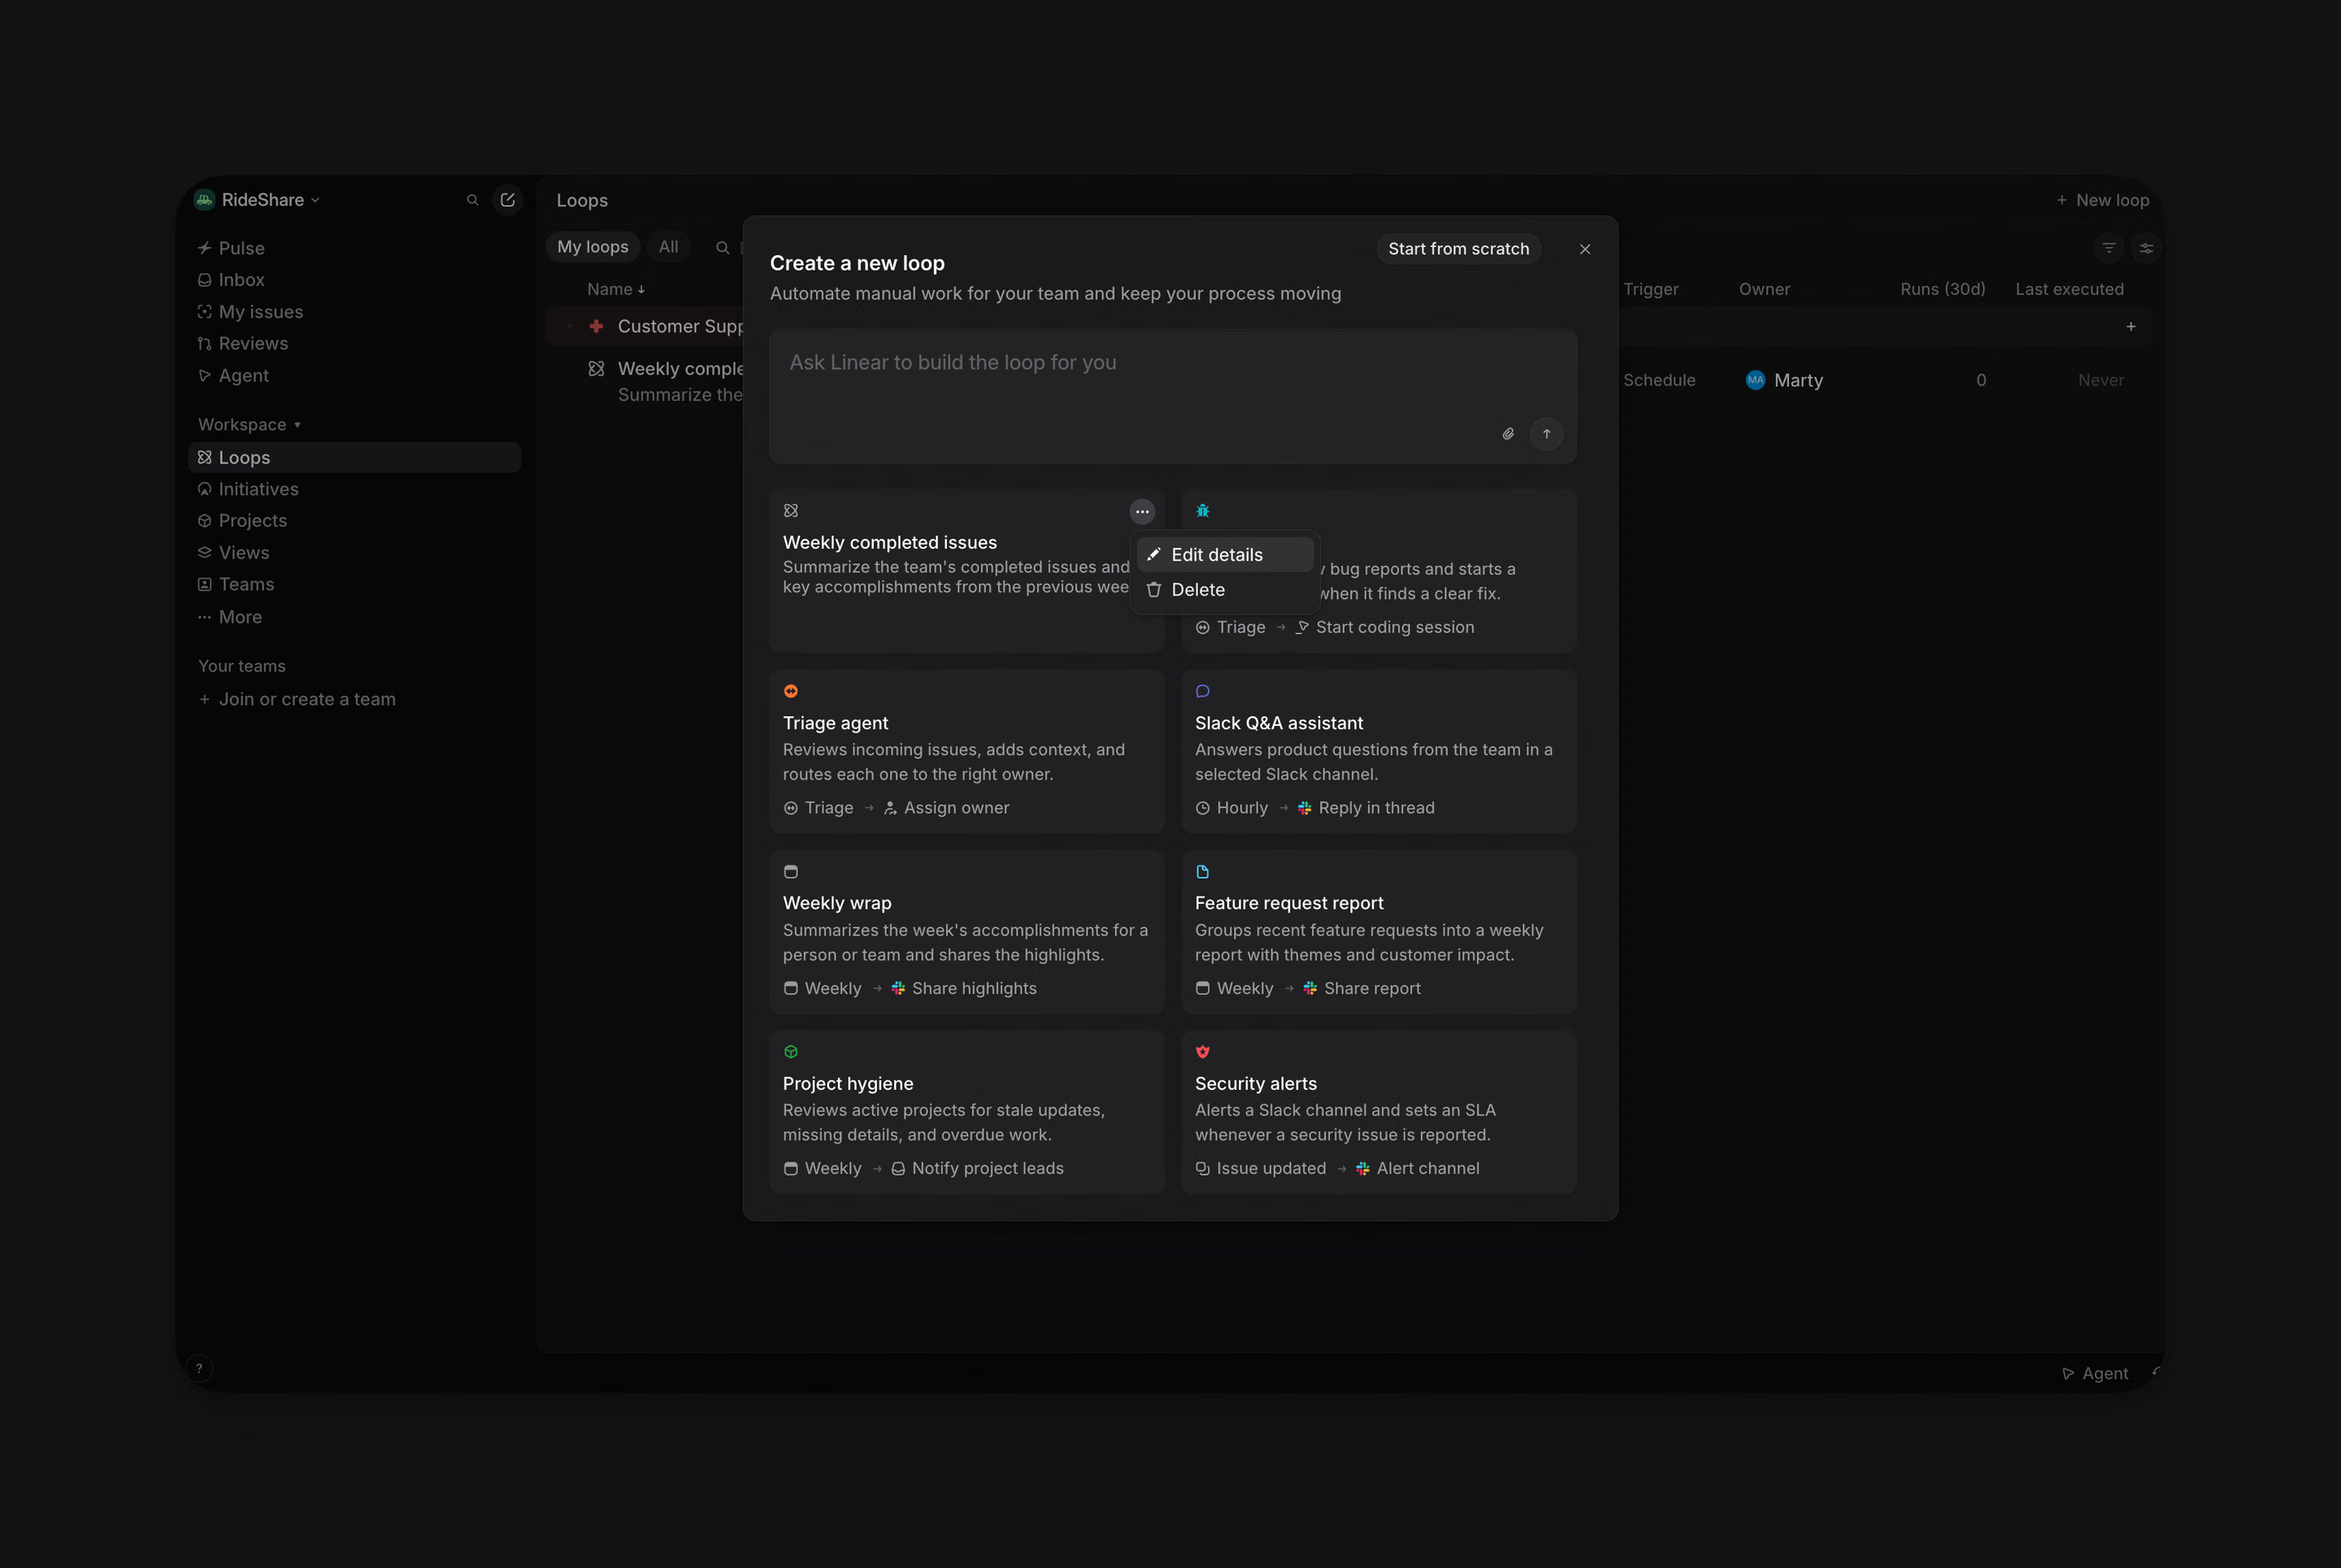
To manage a saved template, open the more menu on its card in the new loop chooser. Select Edit details to change its name, icon, or description, or Delete to remove it. Edit details does not change the saved workflow configuration. To save different instructions or settings, create another template from a configured loop.

Pull request triggers
Pull request triggers run a loop when selected activity occurs in connected GitHub repositories.
Pull request triggers require a connected GitHub repository that your workspace allows loops to access. Enable code-reading access for the loop and select at least one repository. Personal GitHub access alone does not grant a loop access to a repository.
- In the loop editor, open Trigger → Pull request and choose an event
- Select the repositories to monitor
- Add filters to narrow the pull requests that can trigger the loop
- Add instructions and review the loop’s access before creating it
Supported events include pull request creation, ready for review, status changes, reviewers added or removed, GitHub team reviewers added or removed, GitHub labels added or removed, commits pushed, checks passed or failed, reviews submitted, new comments, and resolved comments.
To run a loop after a pull request is merged, choose Trigger → Pull request → Status → Merged. The loop runs when a pull request in the selected repositories changes to Merged and matches its filters.
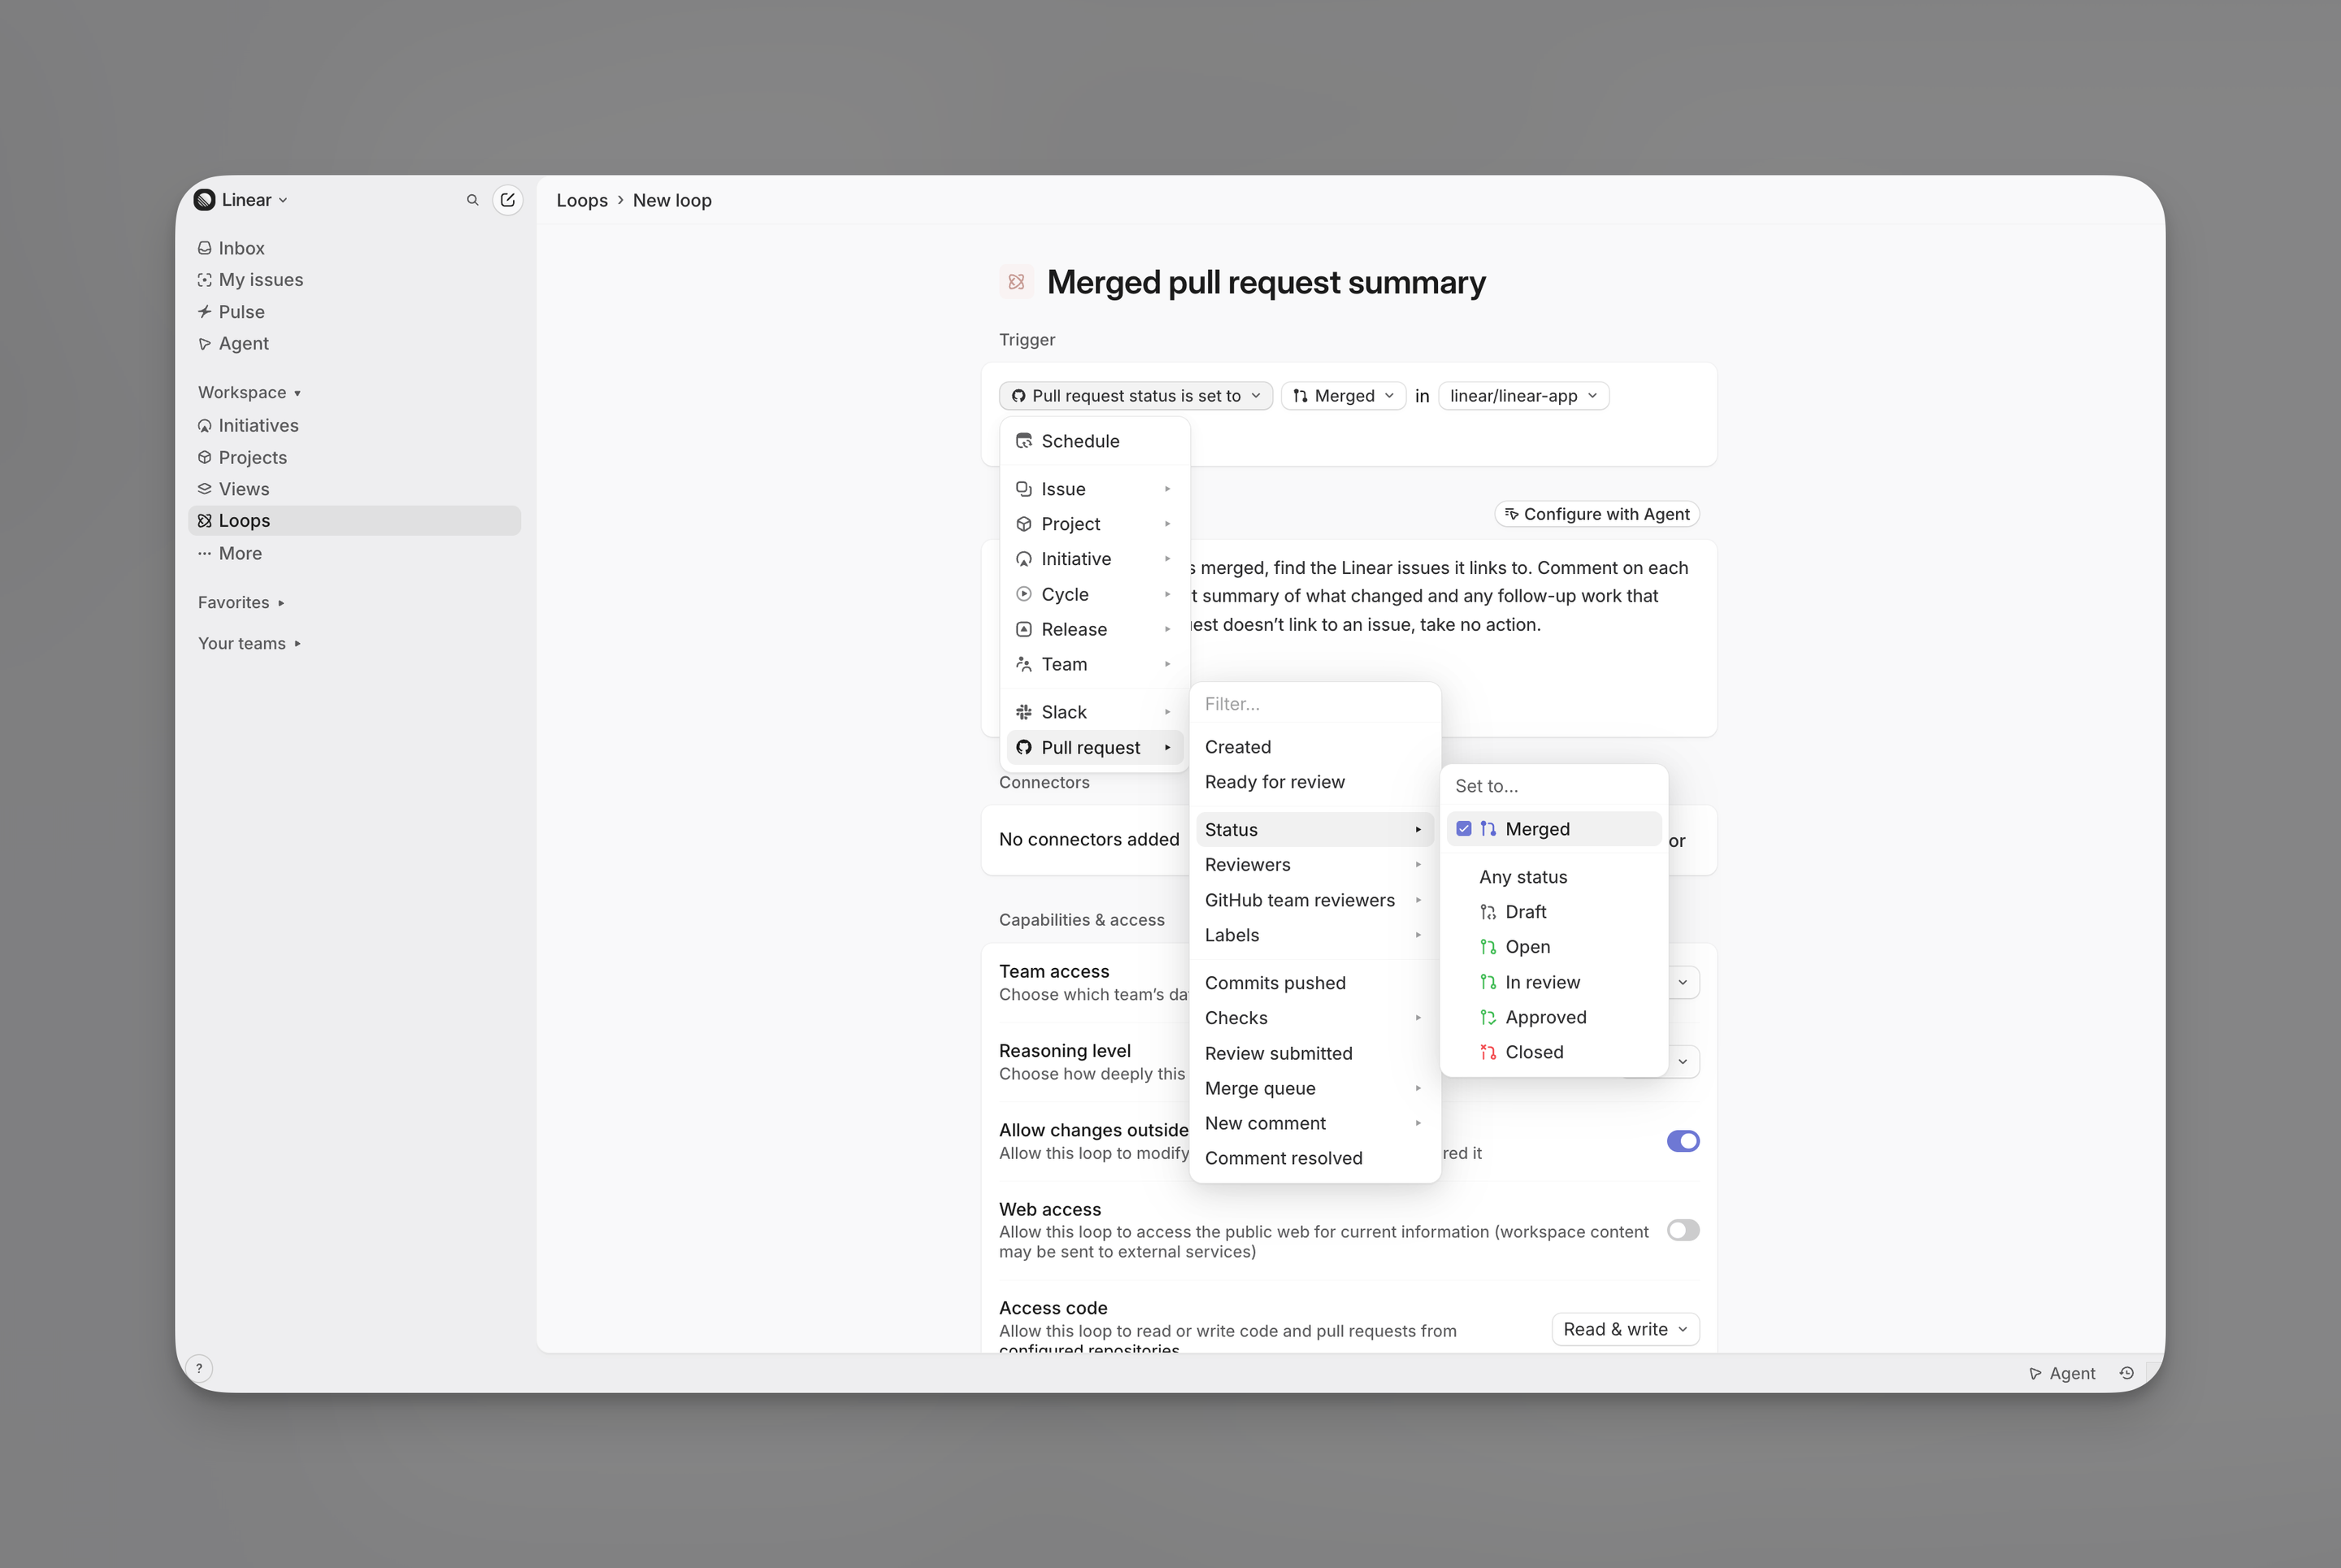

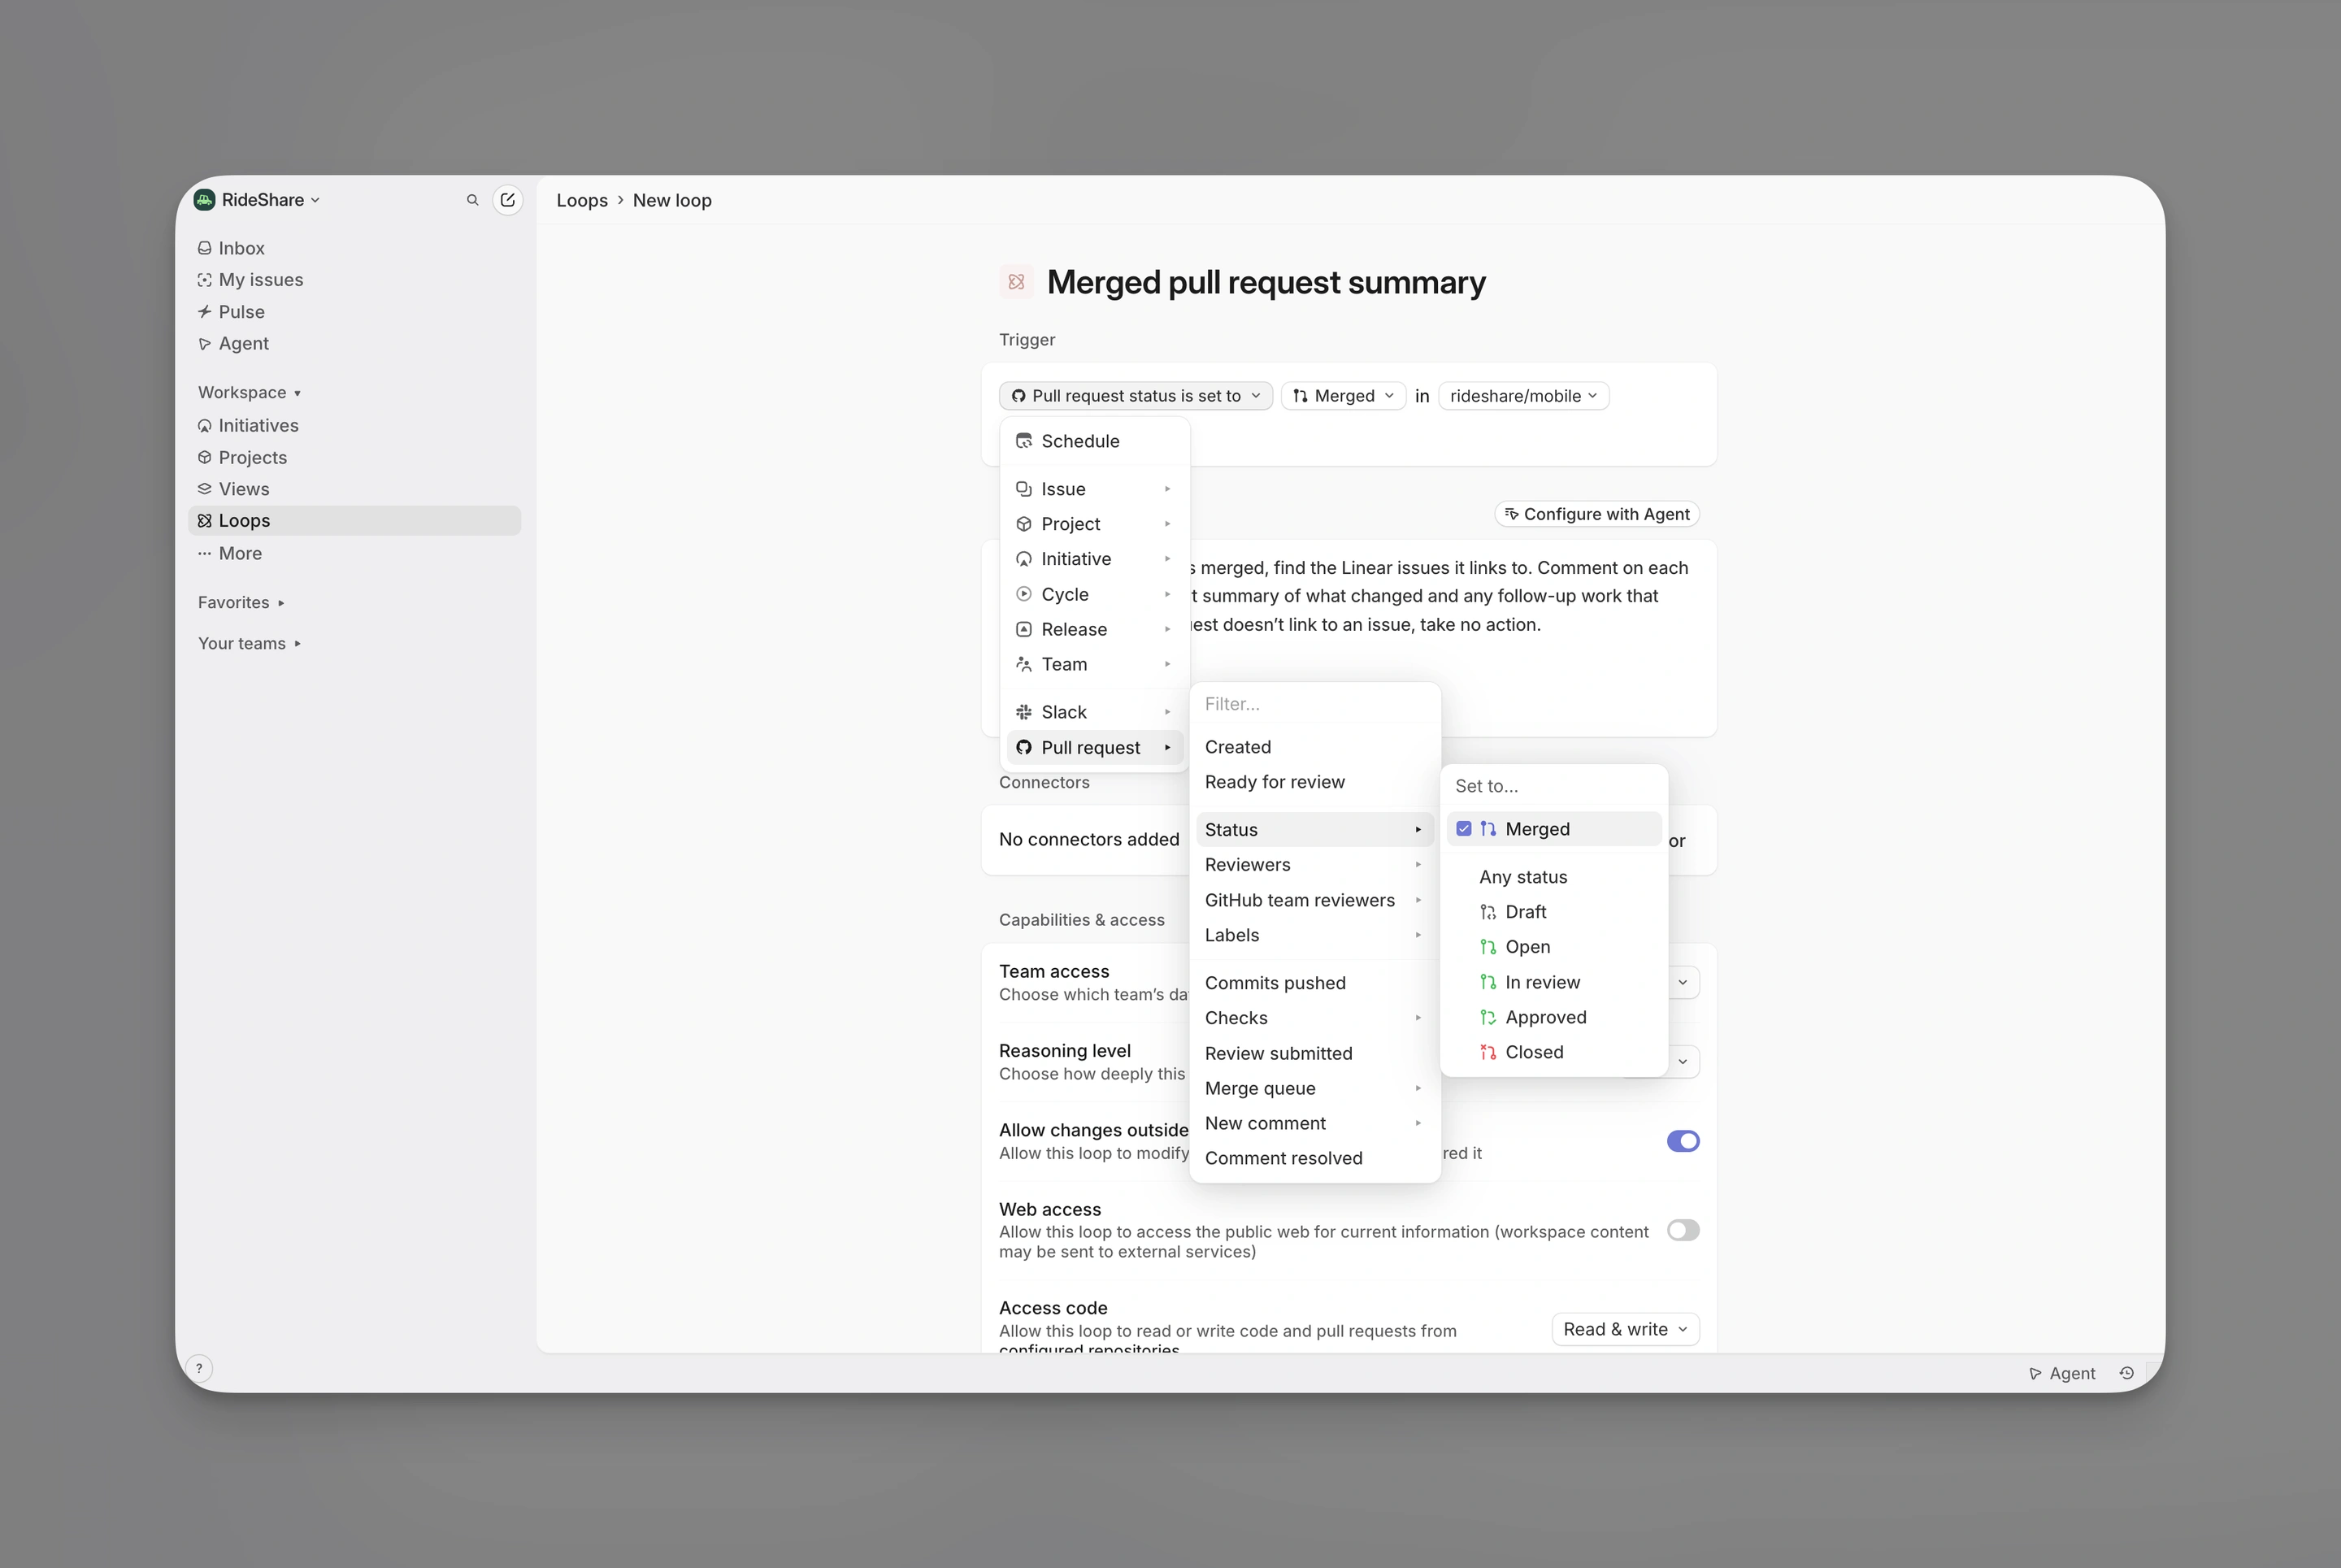
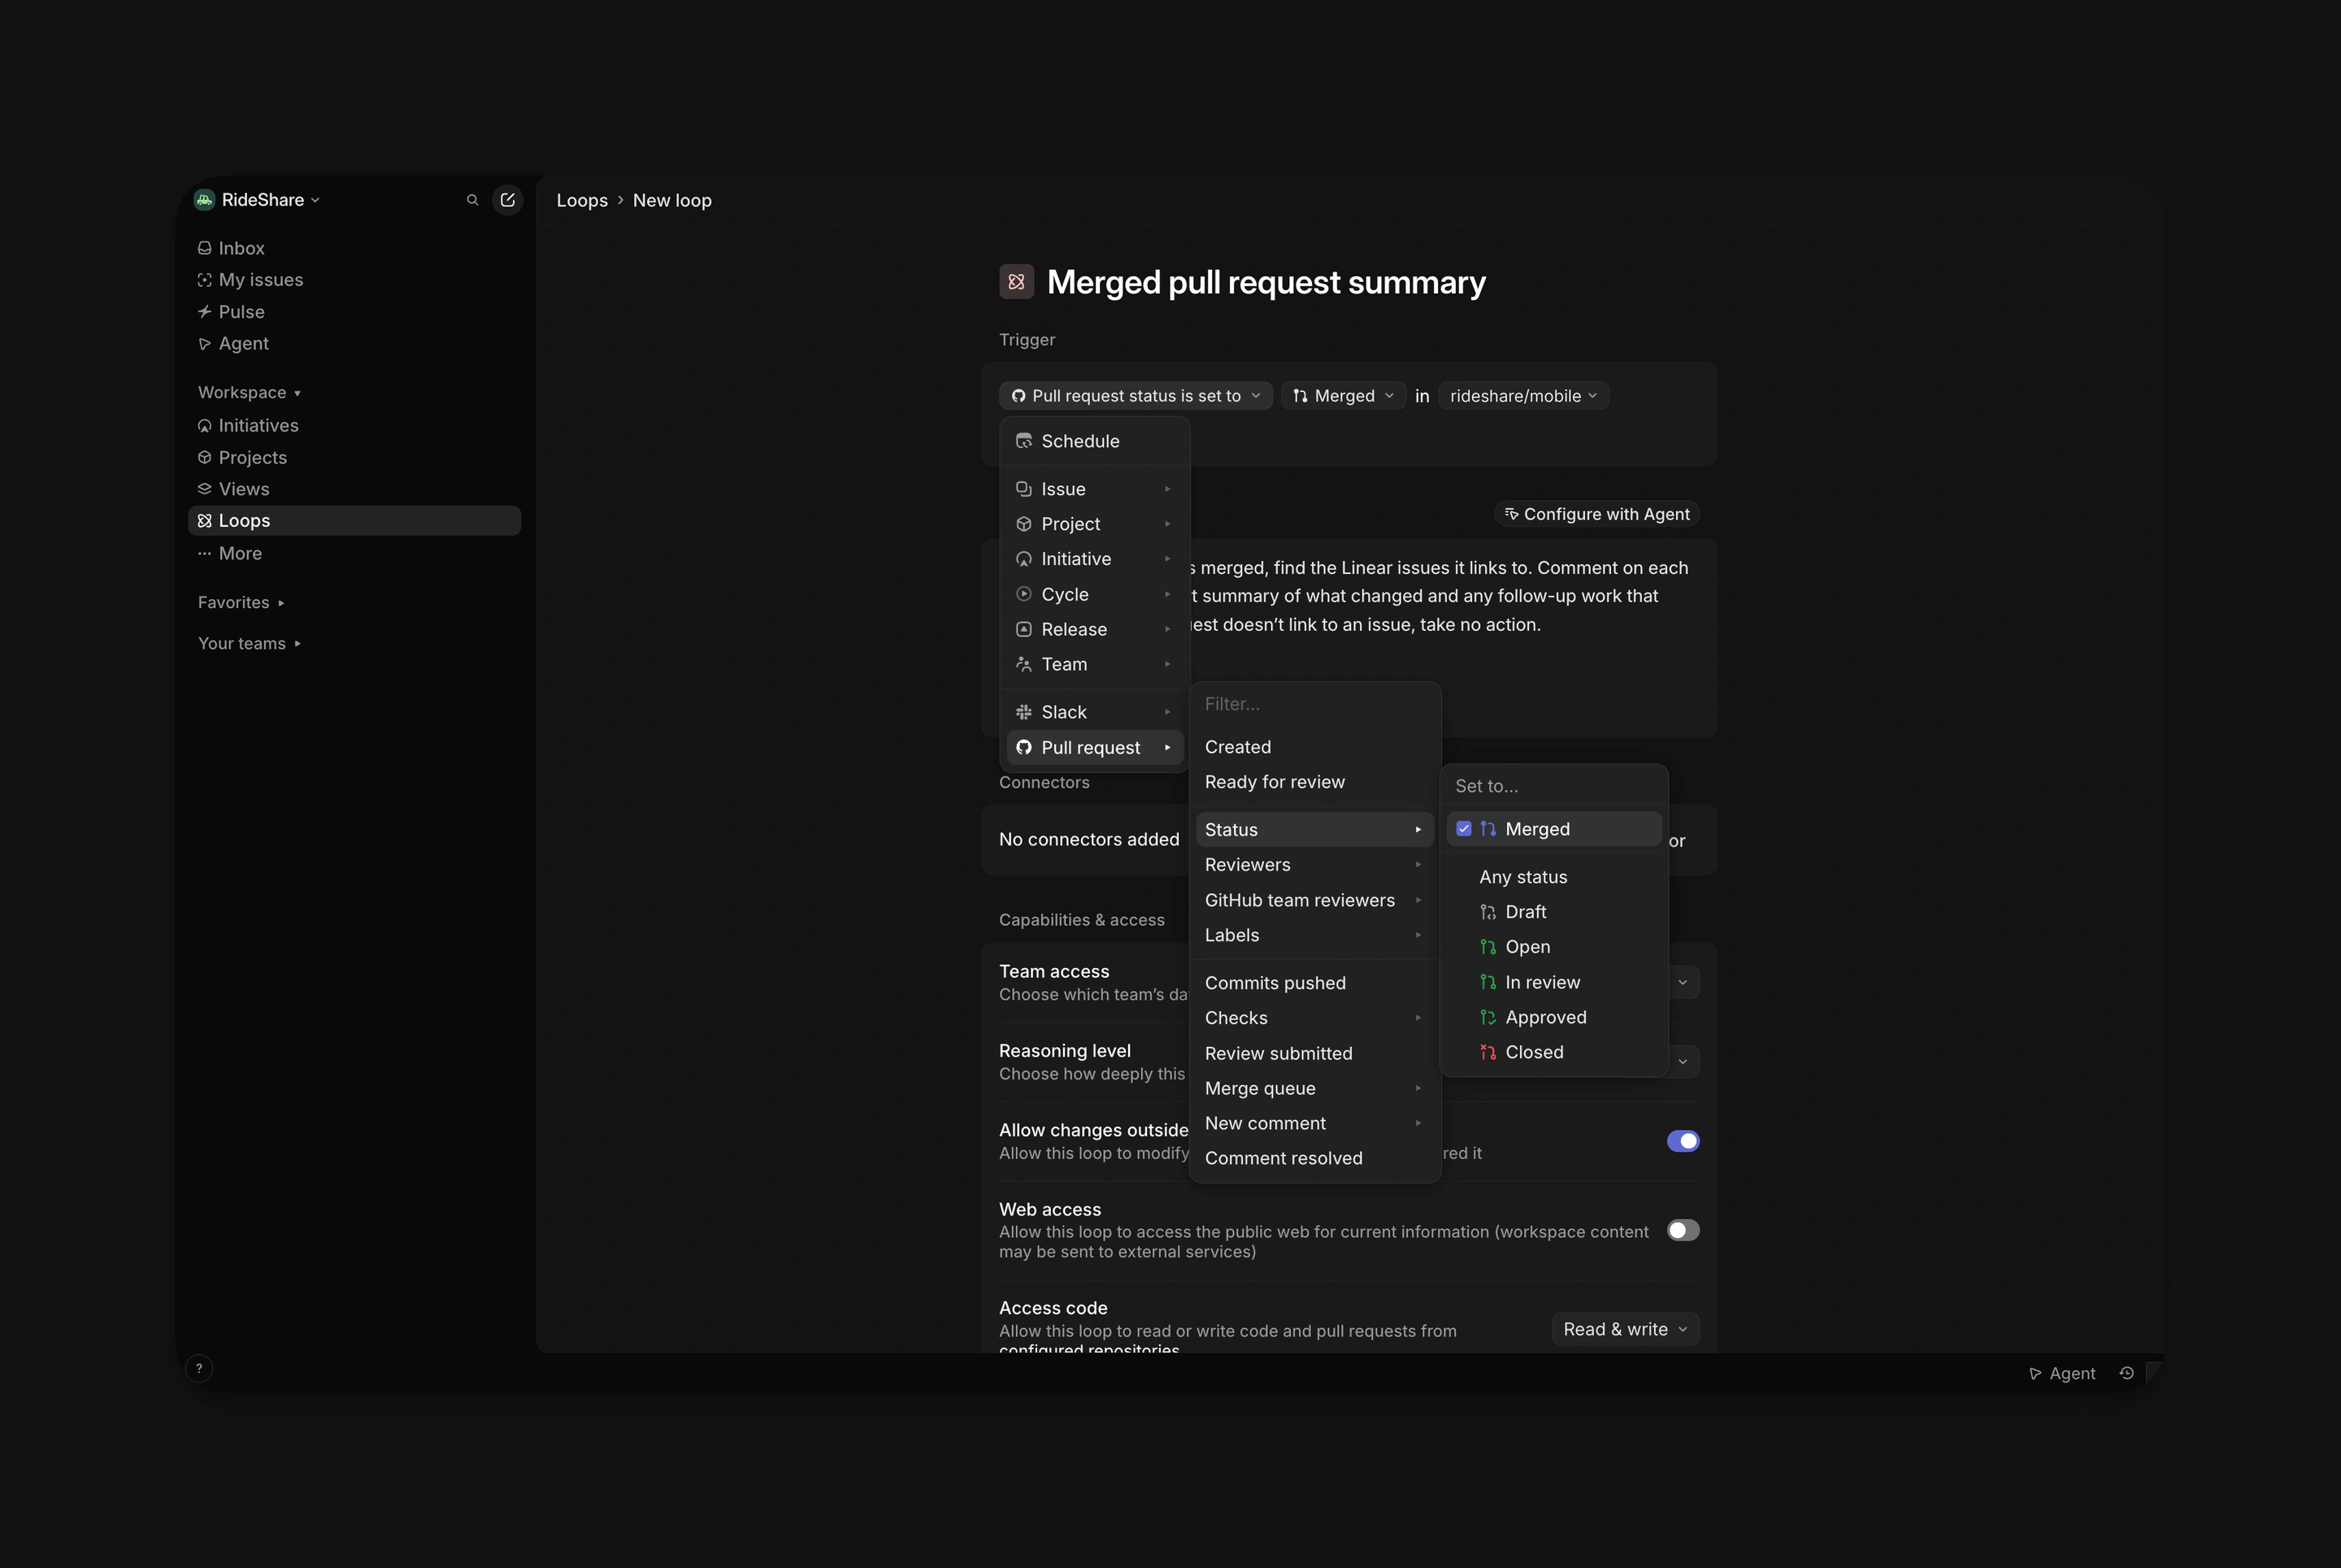
Merged is a pull request status transition, not a deployment event. Later updates to an already merged pull request do not retrigger it, and checks passing does not mean every individual successful check produces a run.
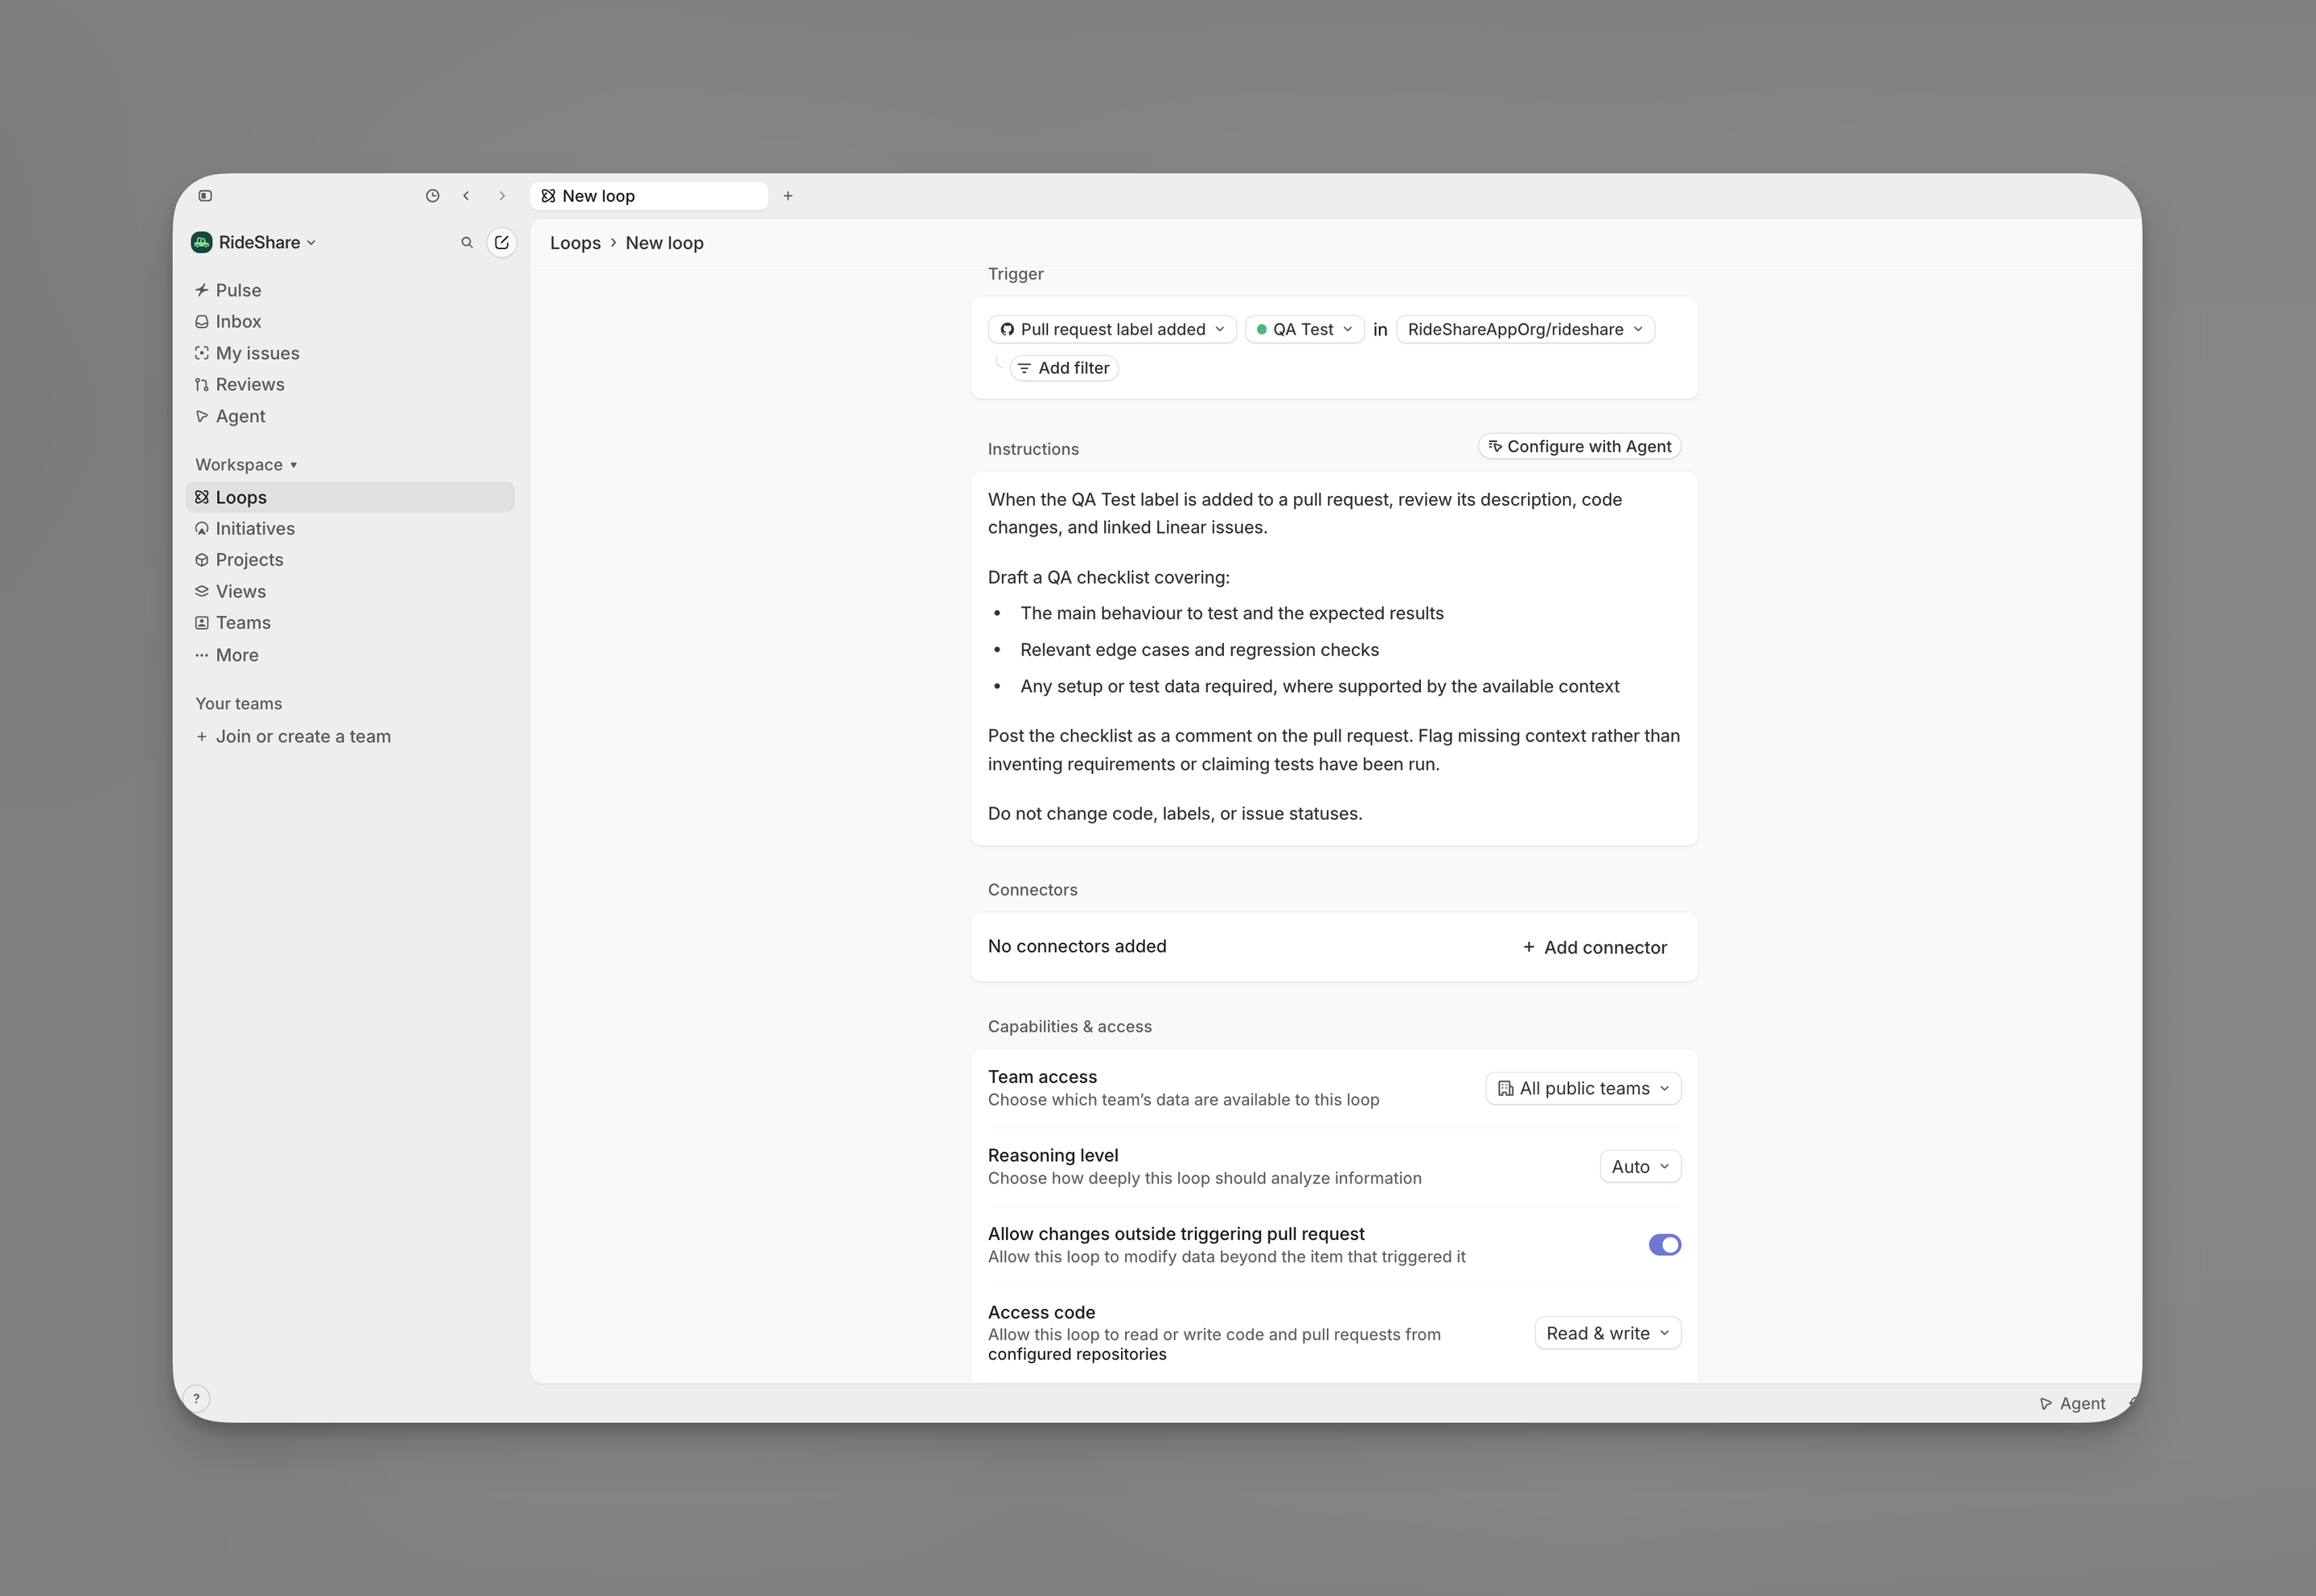
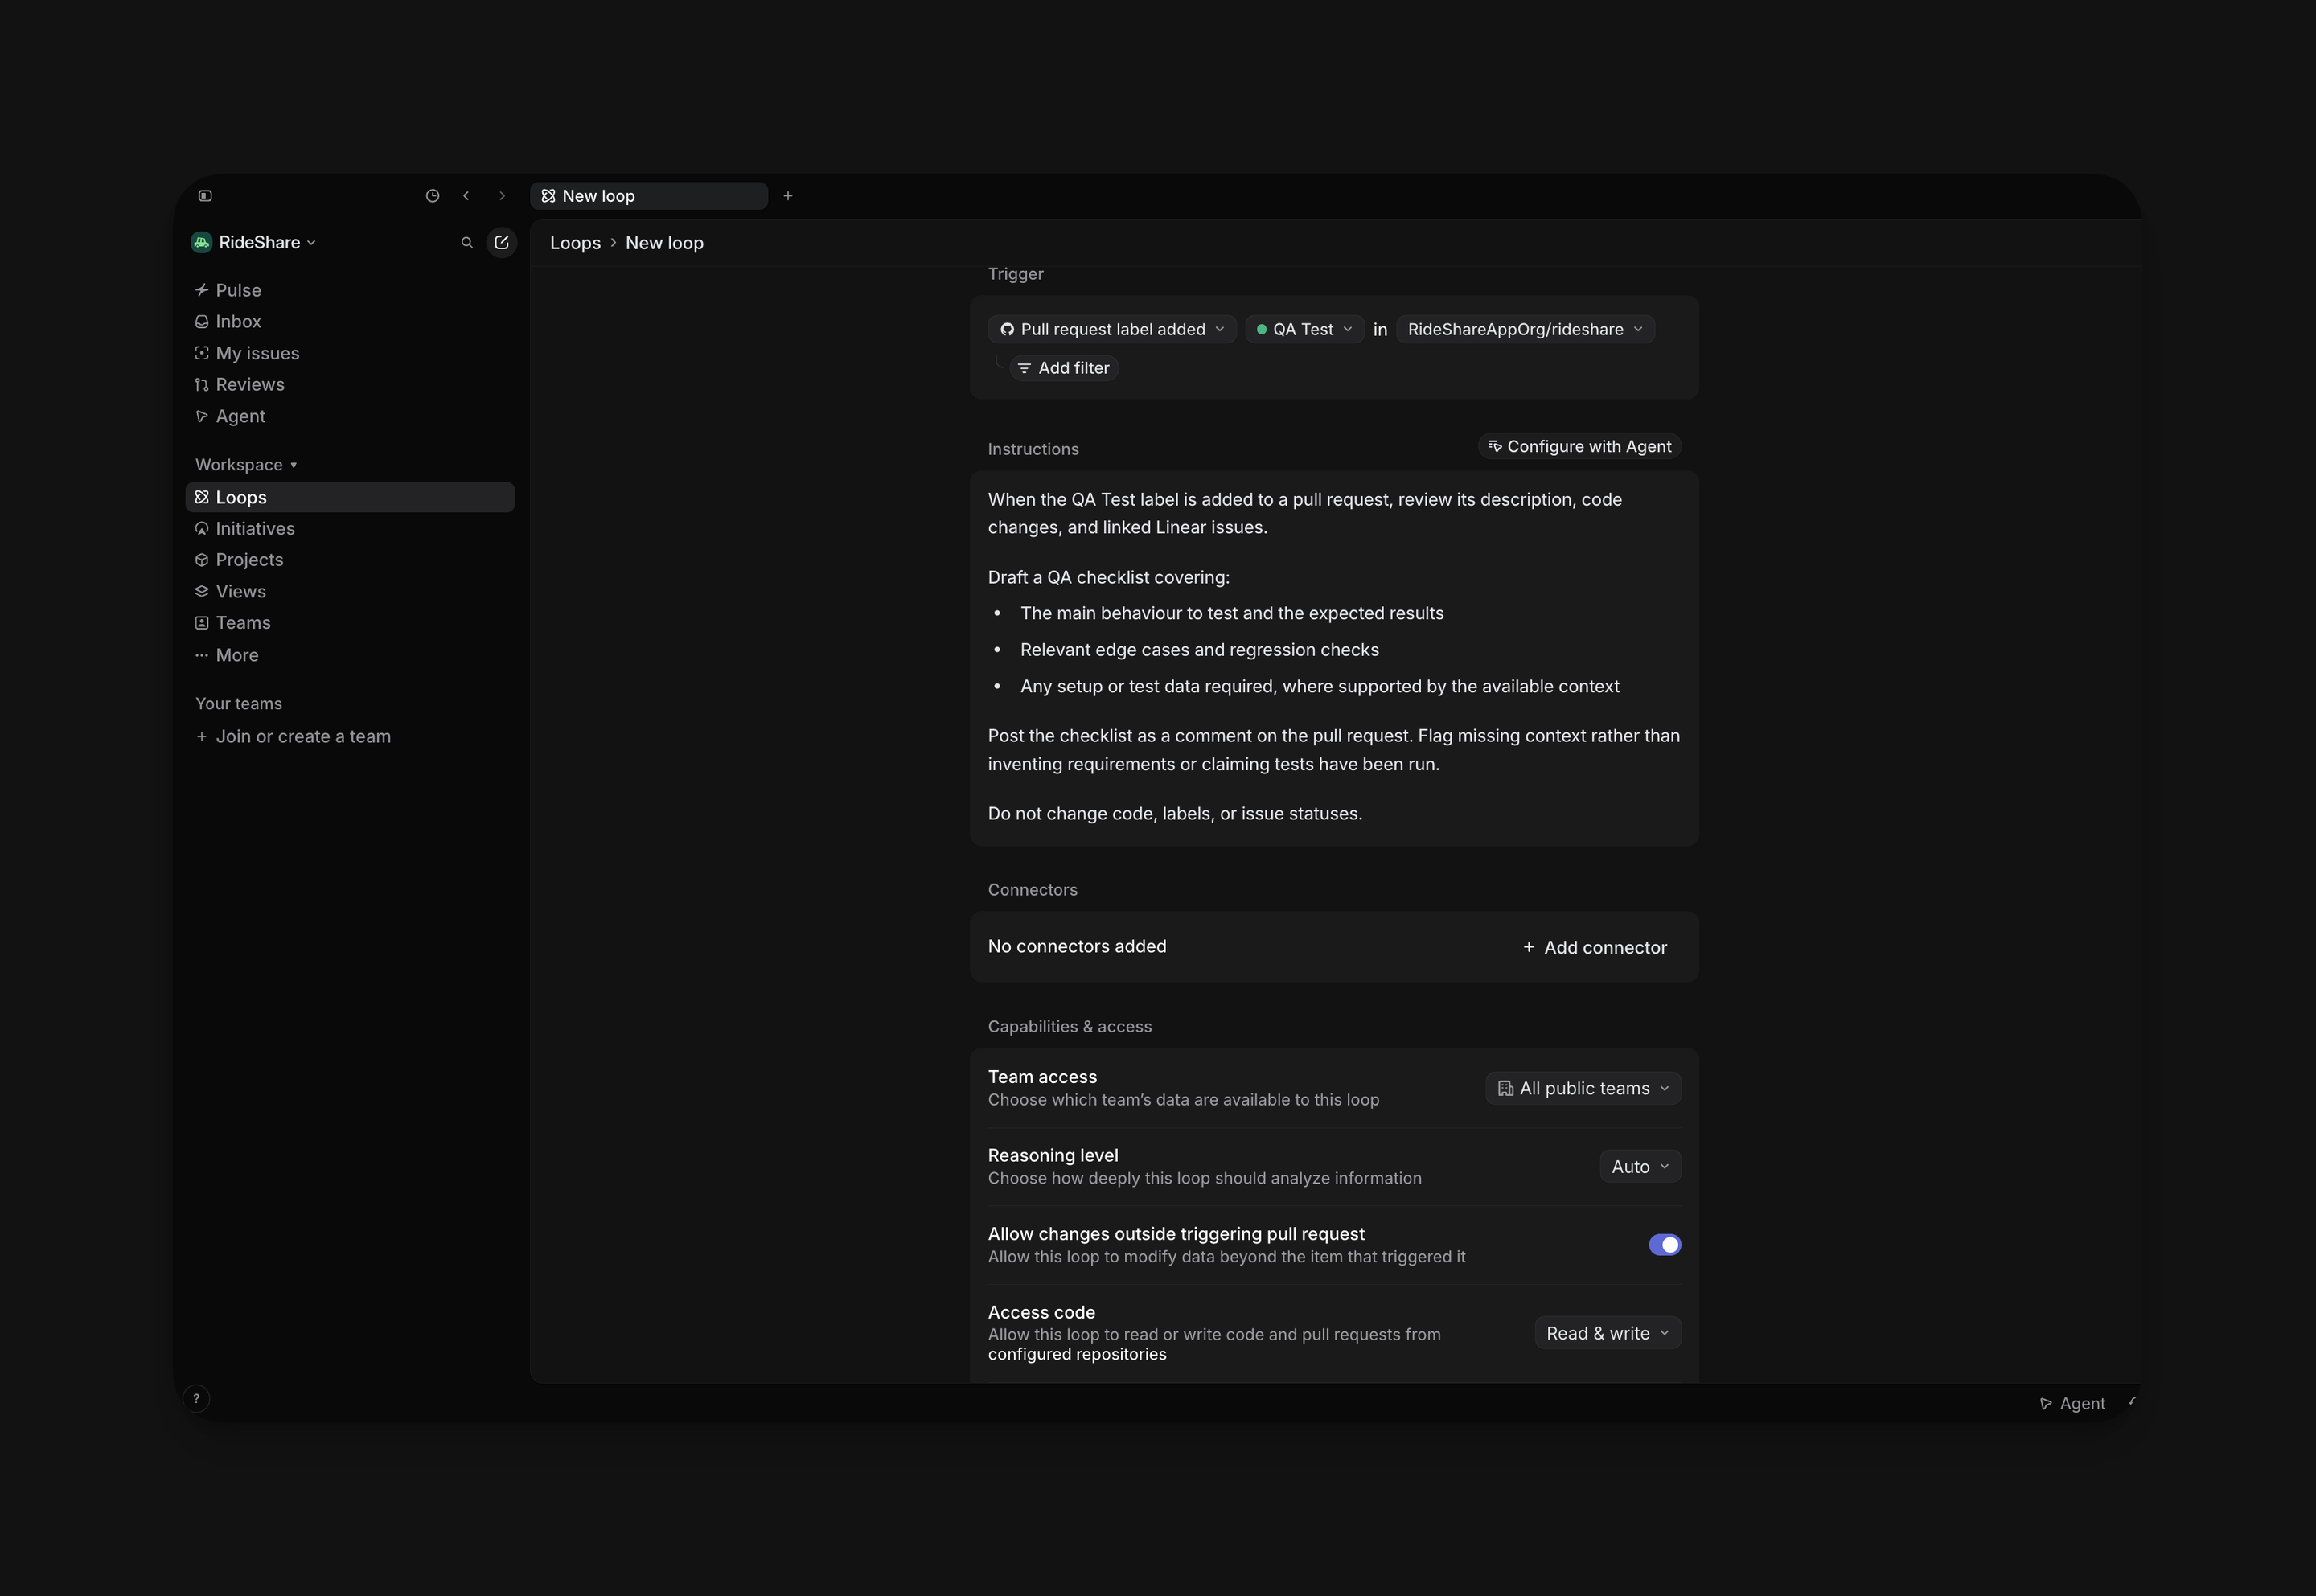
For example, run a loop when the GitHub label QA Test is added, and have it review the pull request’s changes and draft a QA checklist.
Choose Trigger → Pull request → Labels → Added, then select QA Test. This matches the label being added. A separate Labels filter checks which labels are on the pull request after the change—use it to narrow the workflow further, such as requiring a mobile label.
For a removal trigger, select the label under Labels → Removed. Don’t also require that same label in a Labels filter, because it is no longer on the pull request.
If the required repository is unavailable, ask a workspace admin to configure the GitHub integration and repository code access. Workspace repository access for loops is controlled in Settings → Loops → Allow loops to access code. In the loop editor, review Capabilities & access → Access code and allow Read or Read & write as appropriate.
Loops that use a pull request trigger cannot be saved as workspace templates.
Update loops
Open the loop and make your changes. Select Save in the bar at the bottom of the editor. Only people with permission to edit the loop can save changes.
Review a loop’s runs
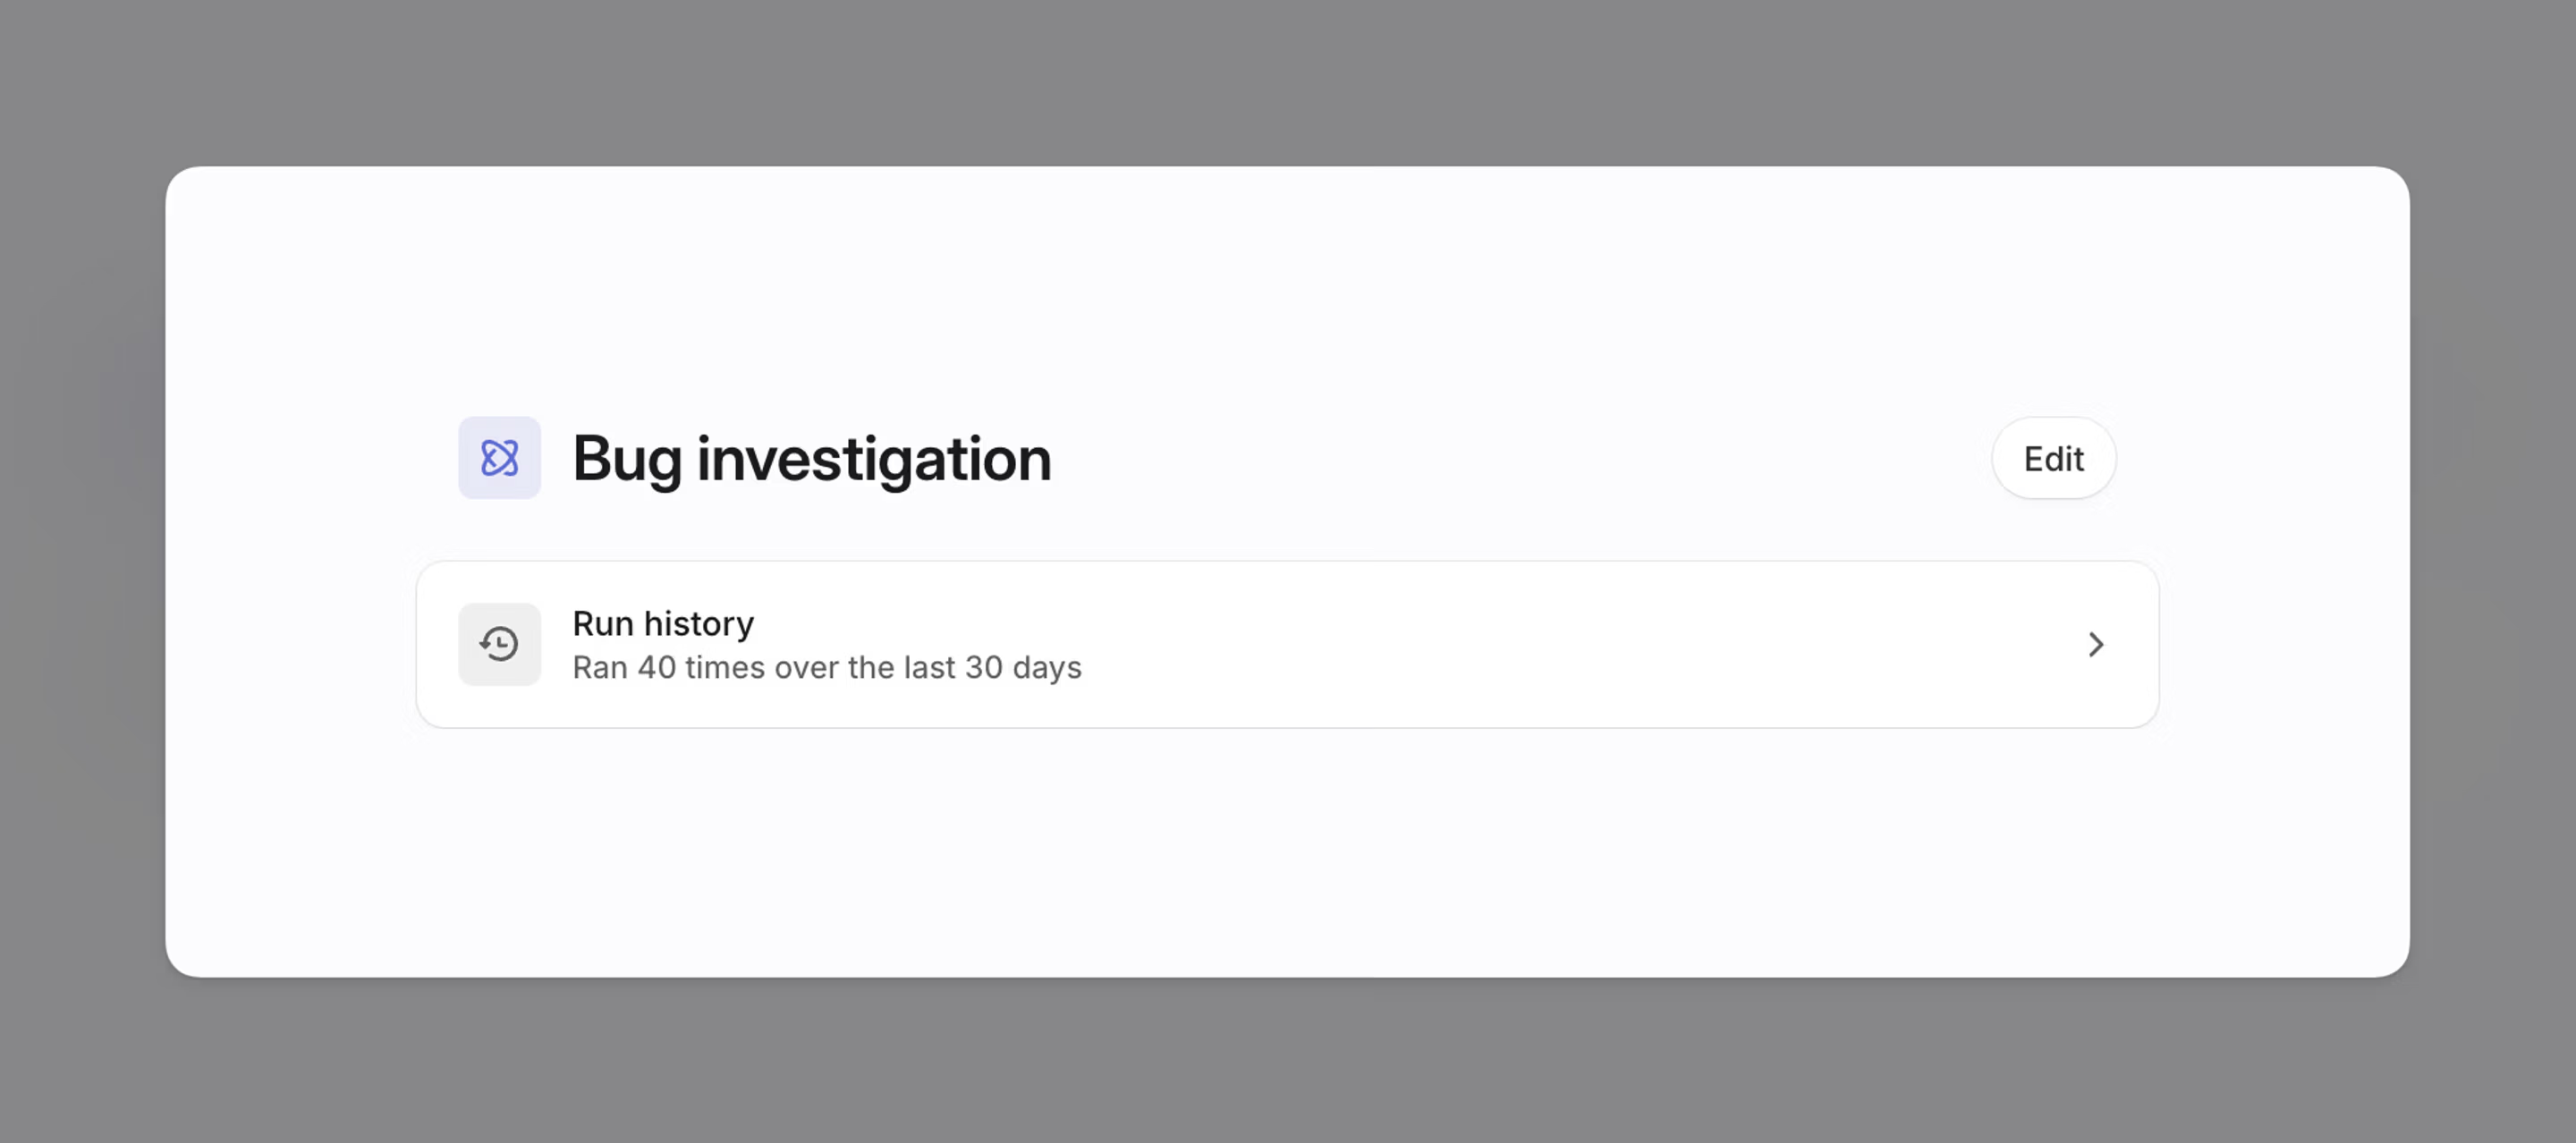
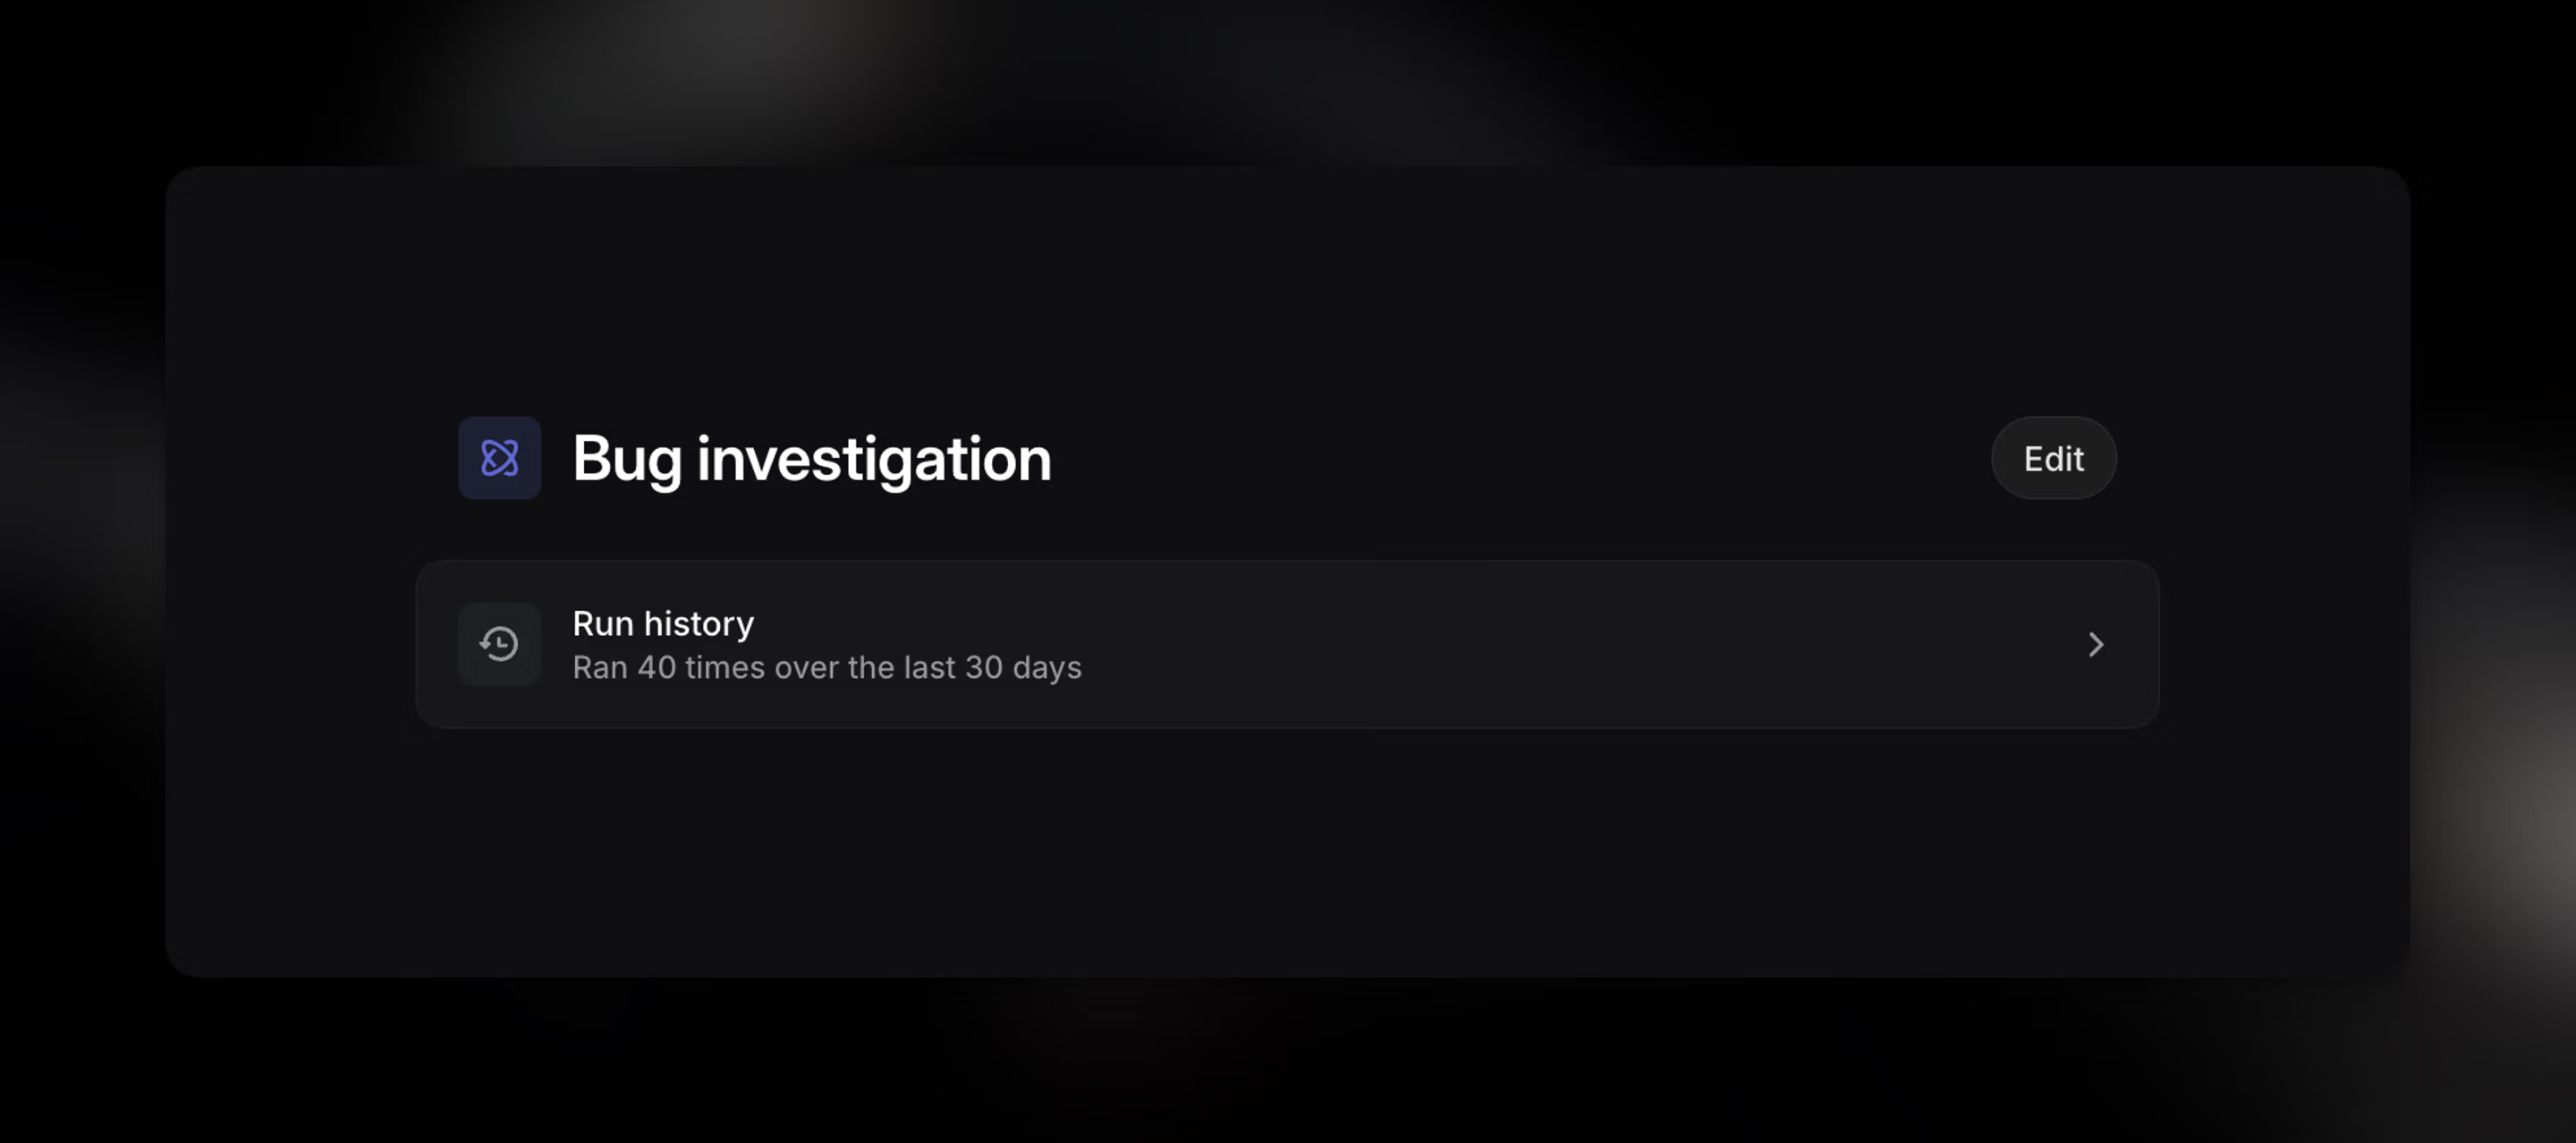
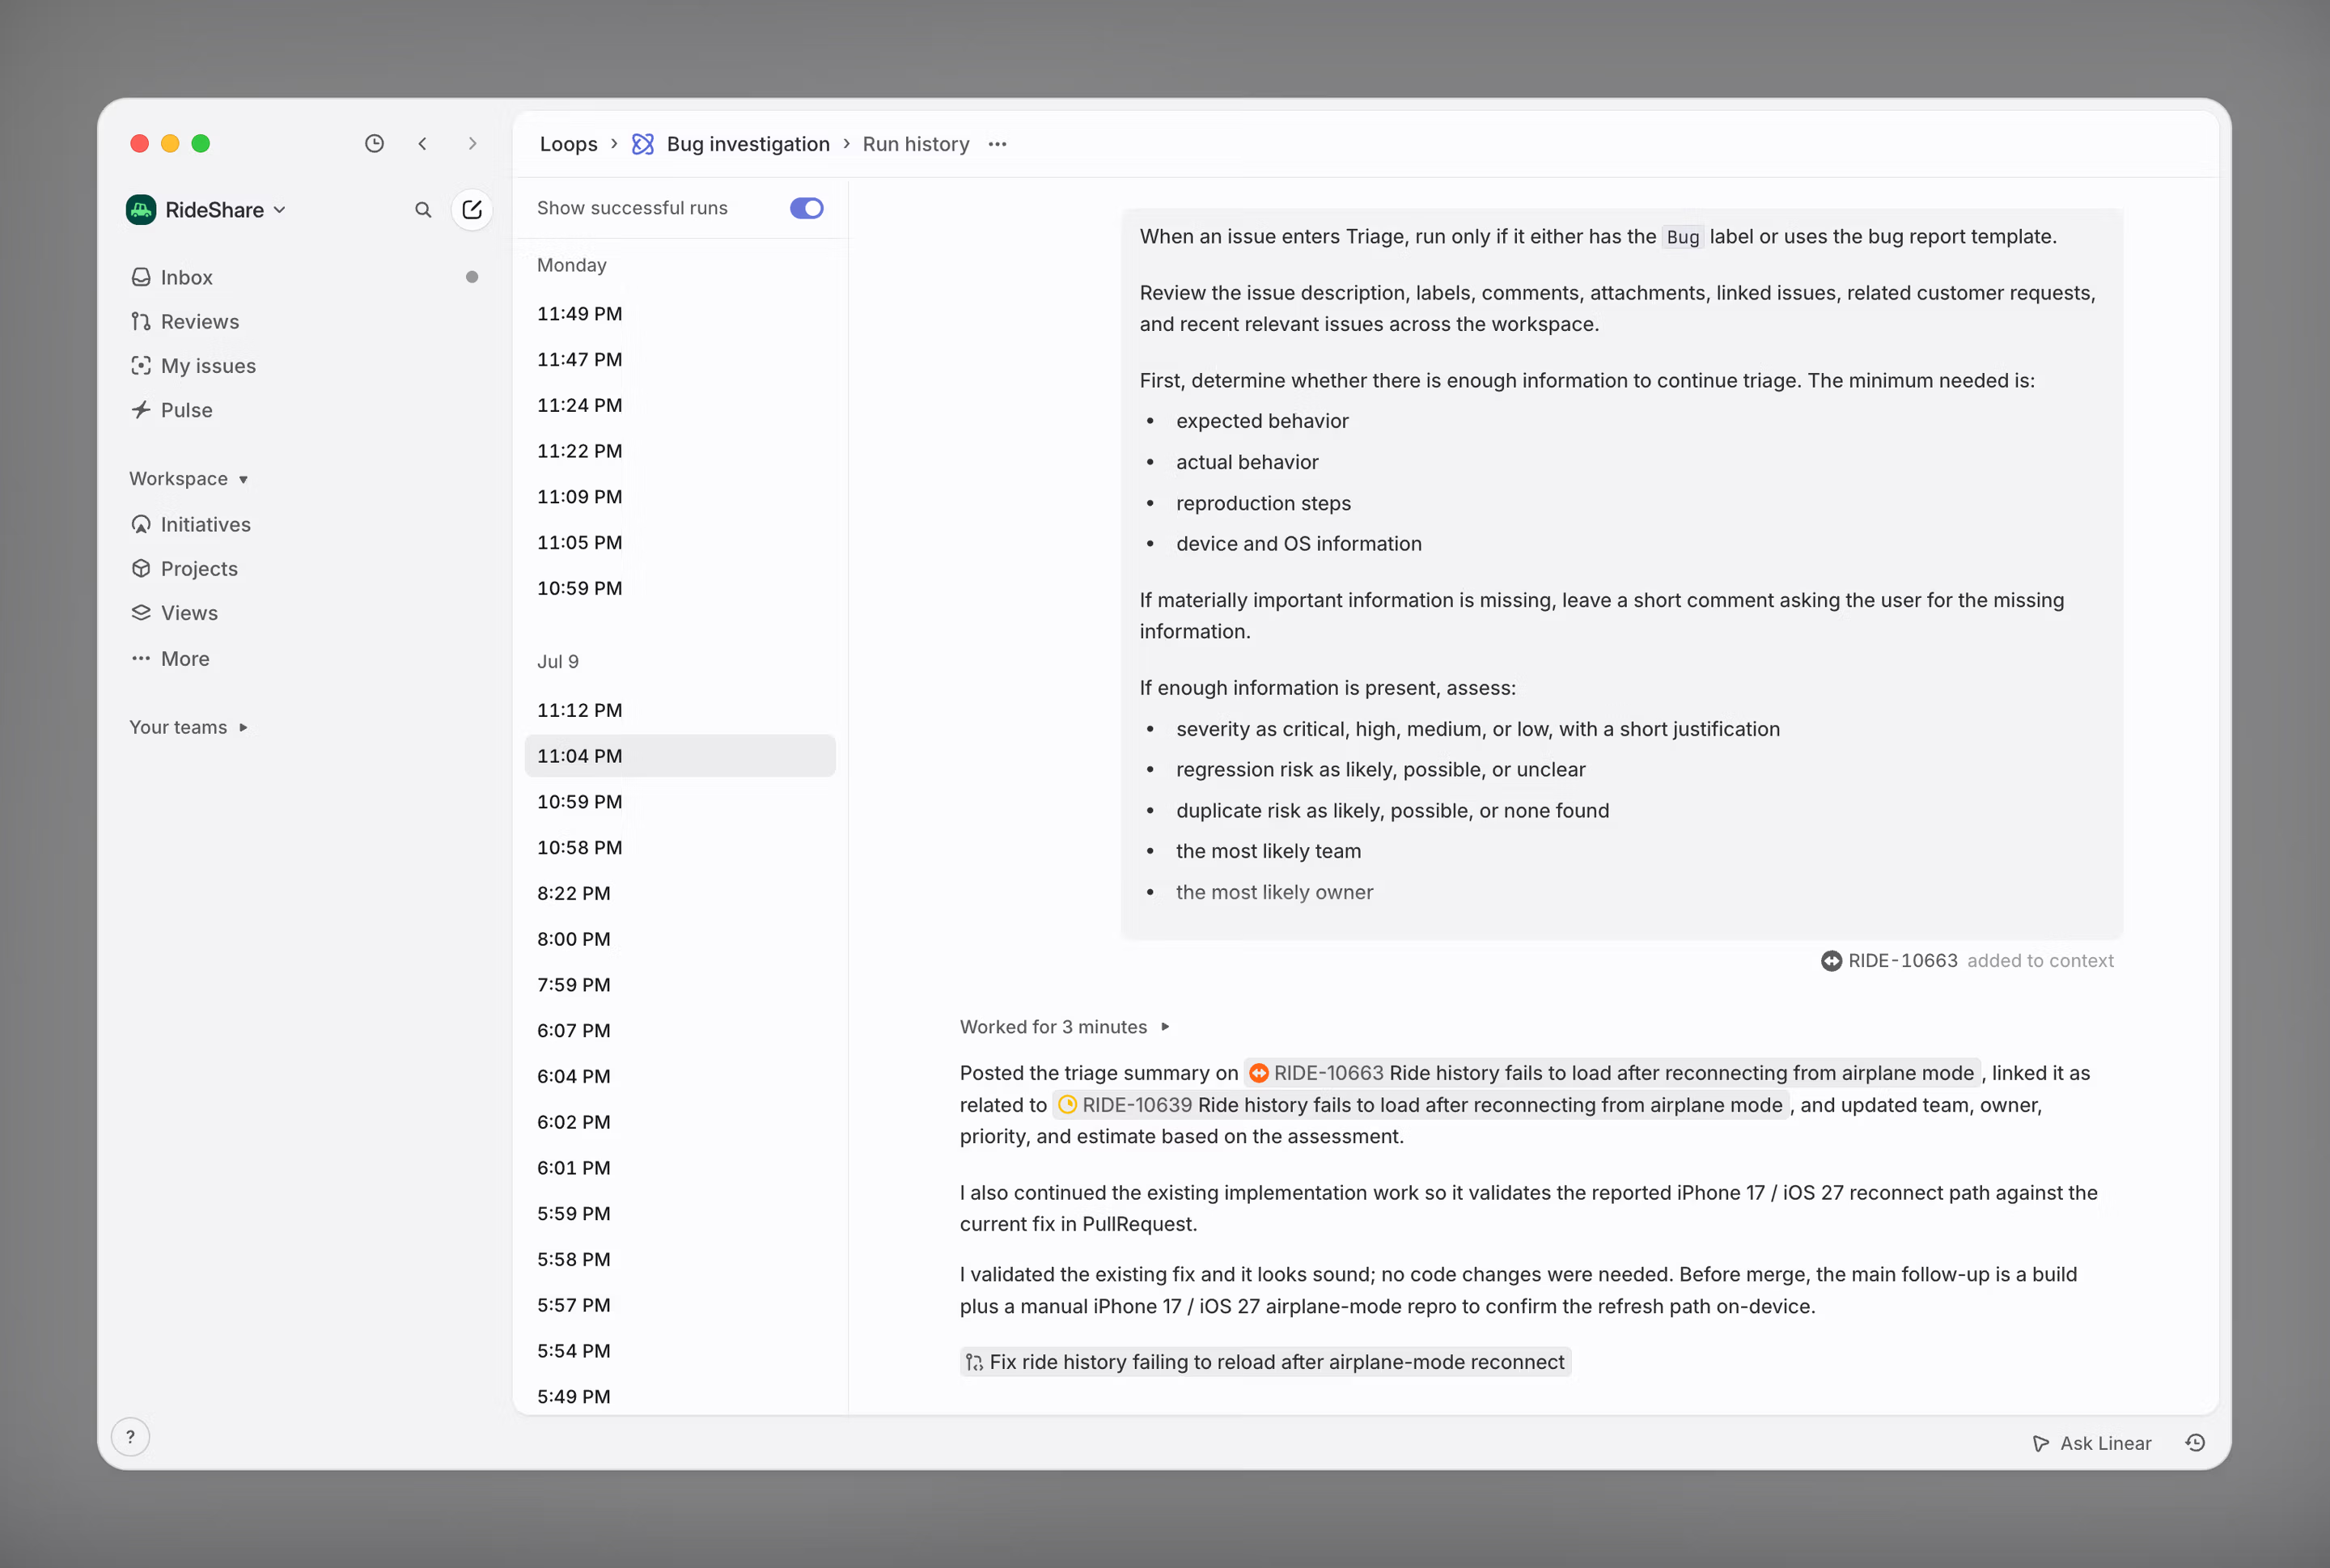
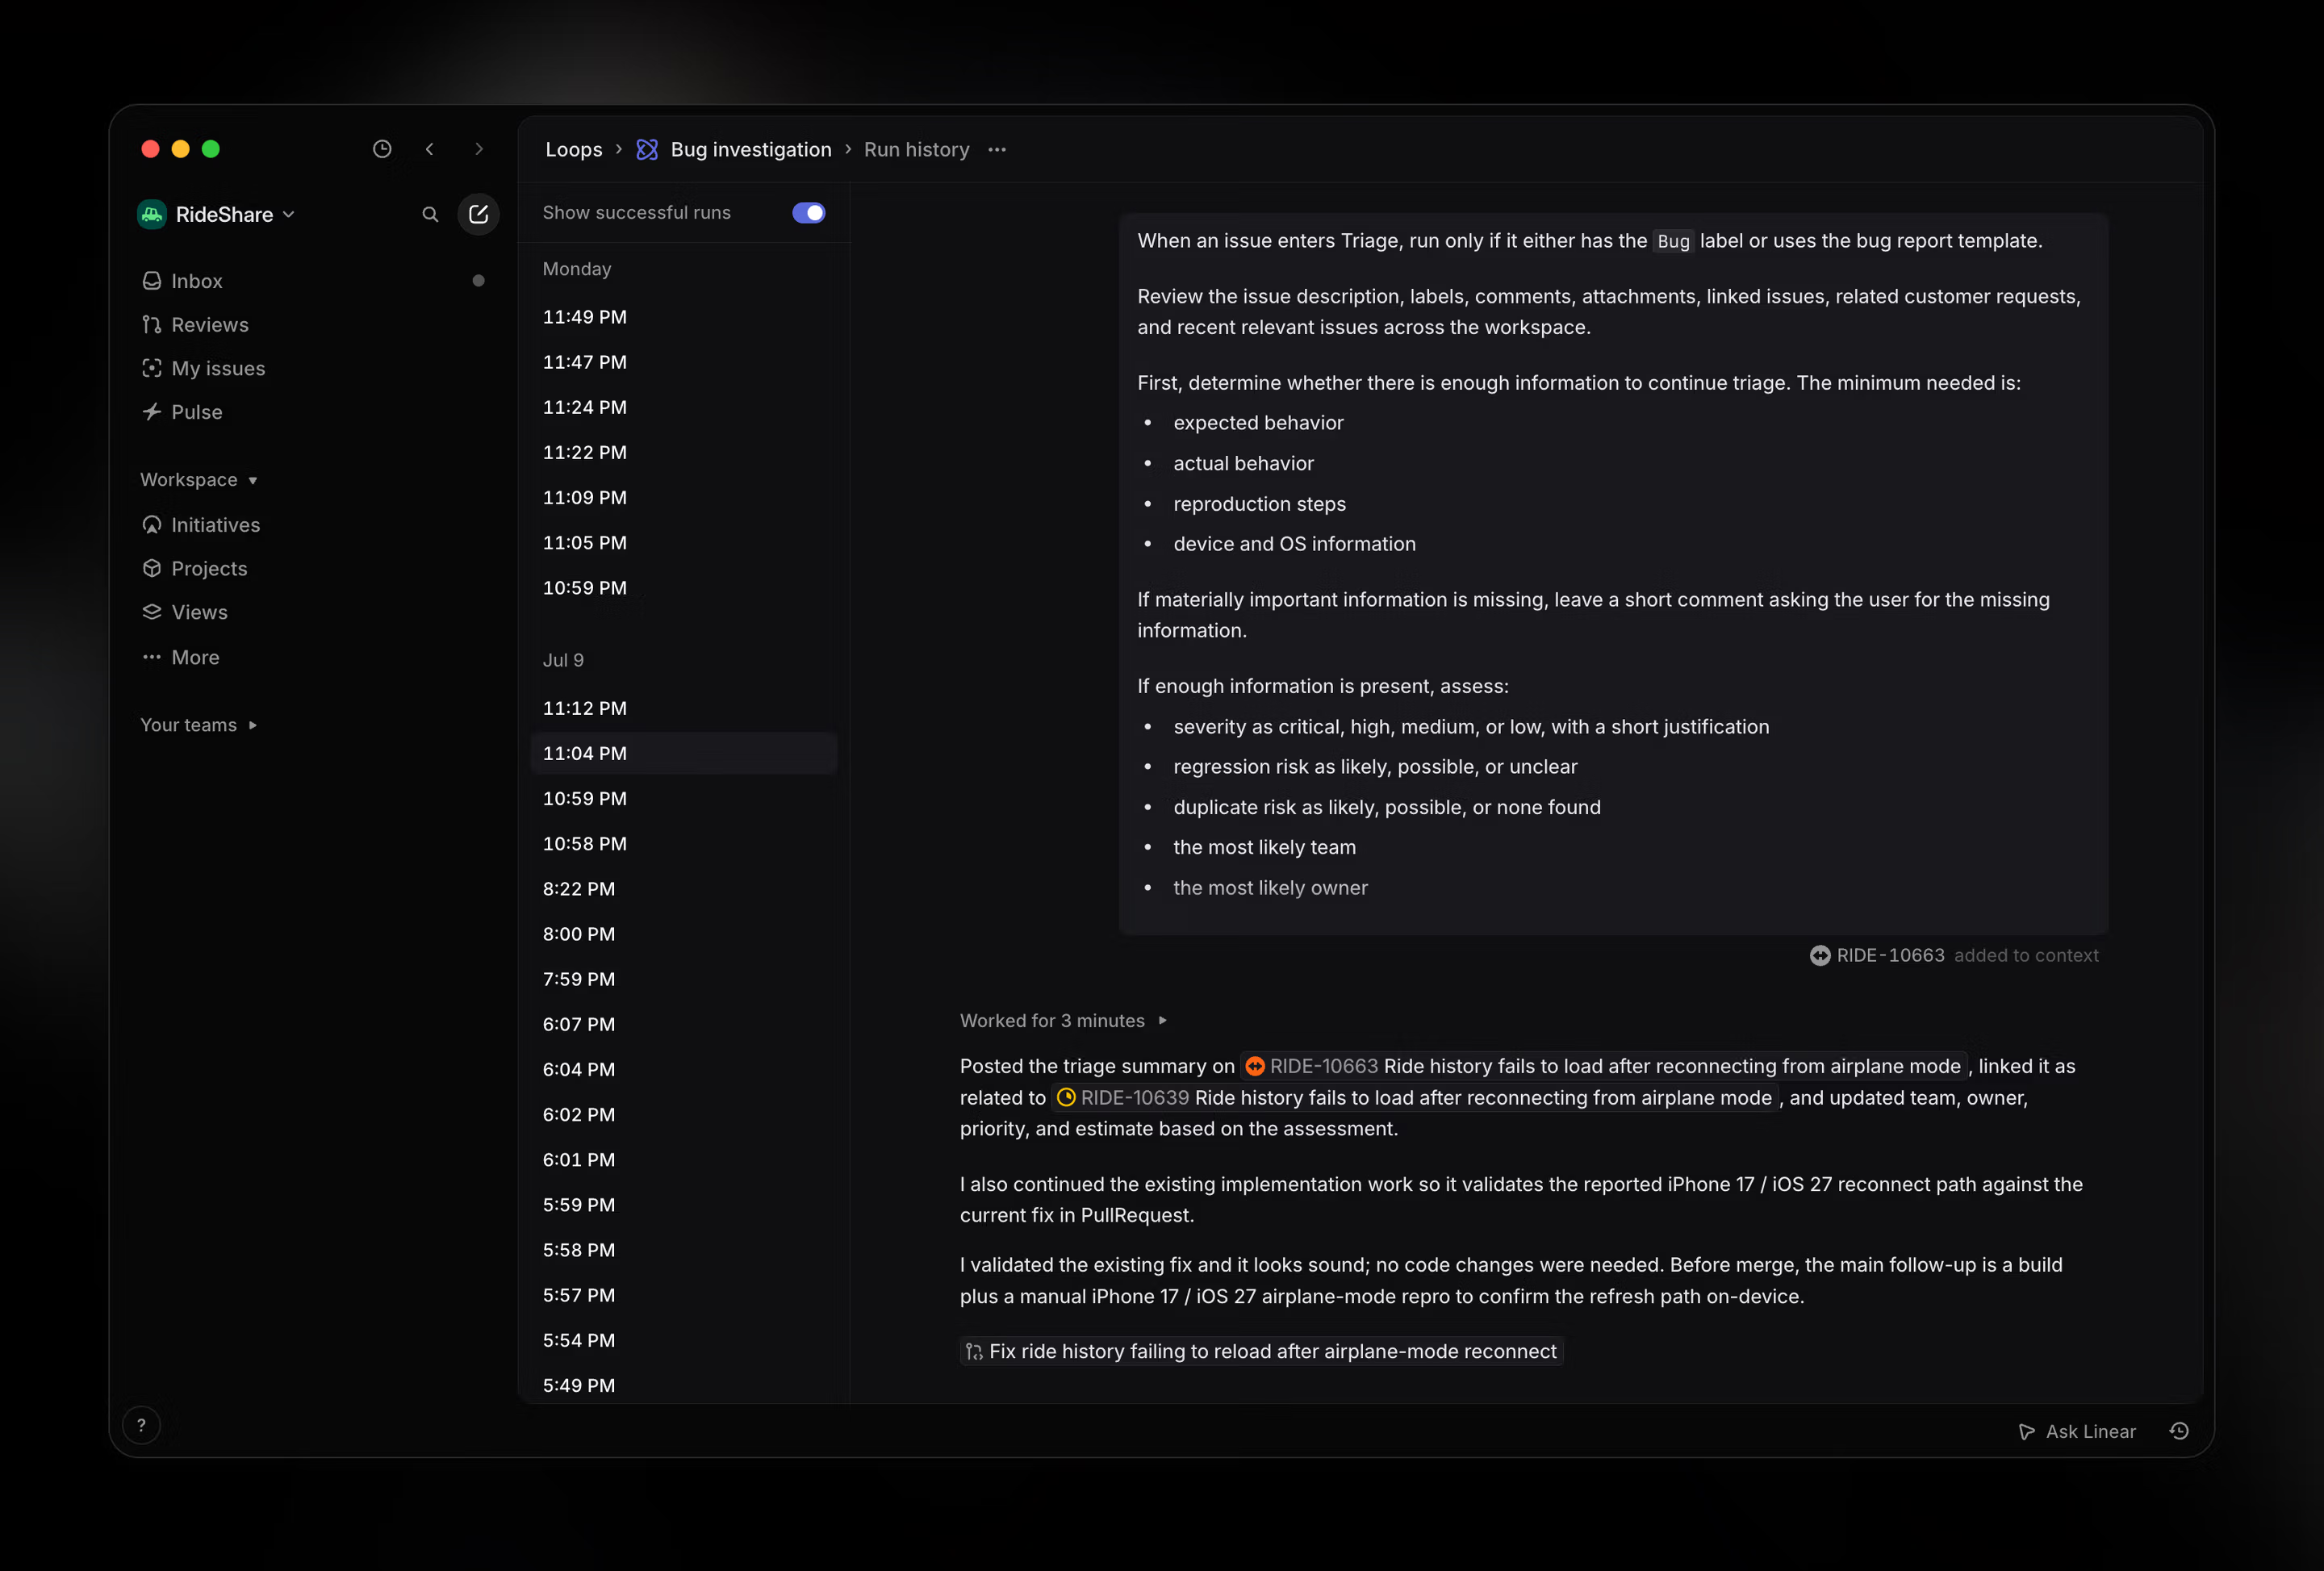
Each loop has a run history to let you audit its behavior.
Open a loop’s Run history to ask Linear Agent follow-up questions or request additional actions using the run’s context.
- Open Loops from the workspace or team that contains the loop
- Open the loop you want to review
- Select Run history
- Review recent runs to see when the loop executed and what actions it took
Restore a previous version
All published versions of a loop are saved and can be restored. Removed connectors must be added and authenticated again.
- Open the loop for editing
- Select Published versions
- Choose the version to restore
- Select Restore version
Slack message triggers
Run a loop when a new top-level message is posted in selected public Slack channels.
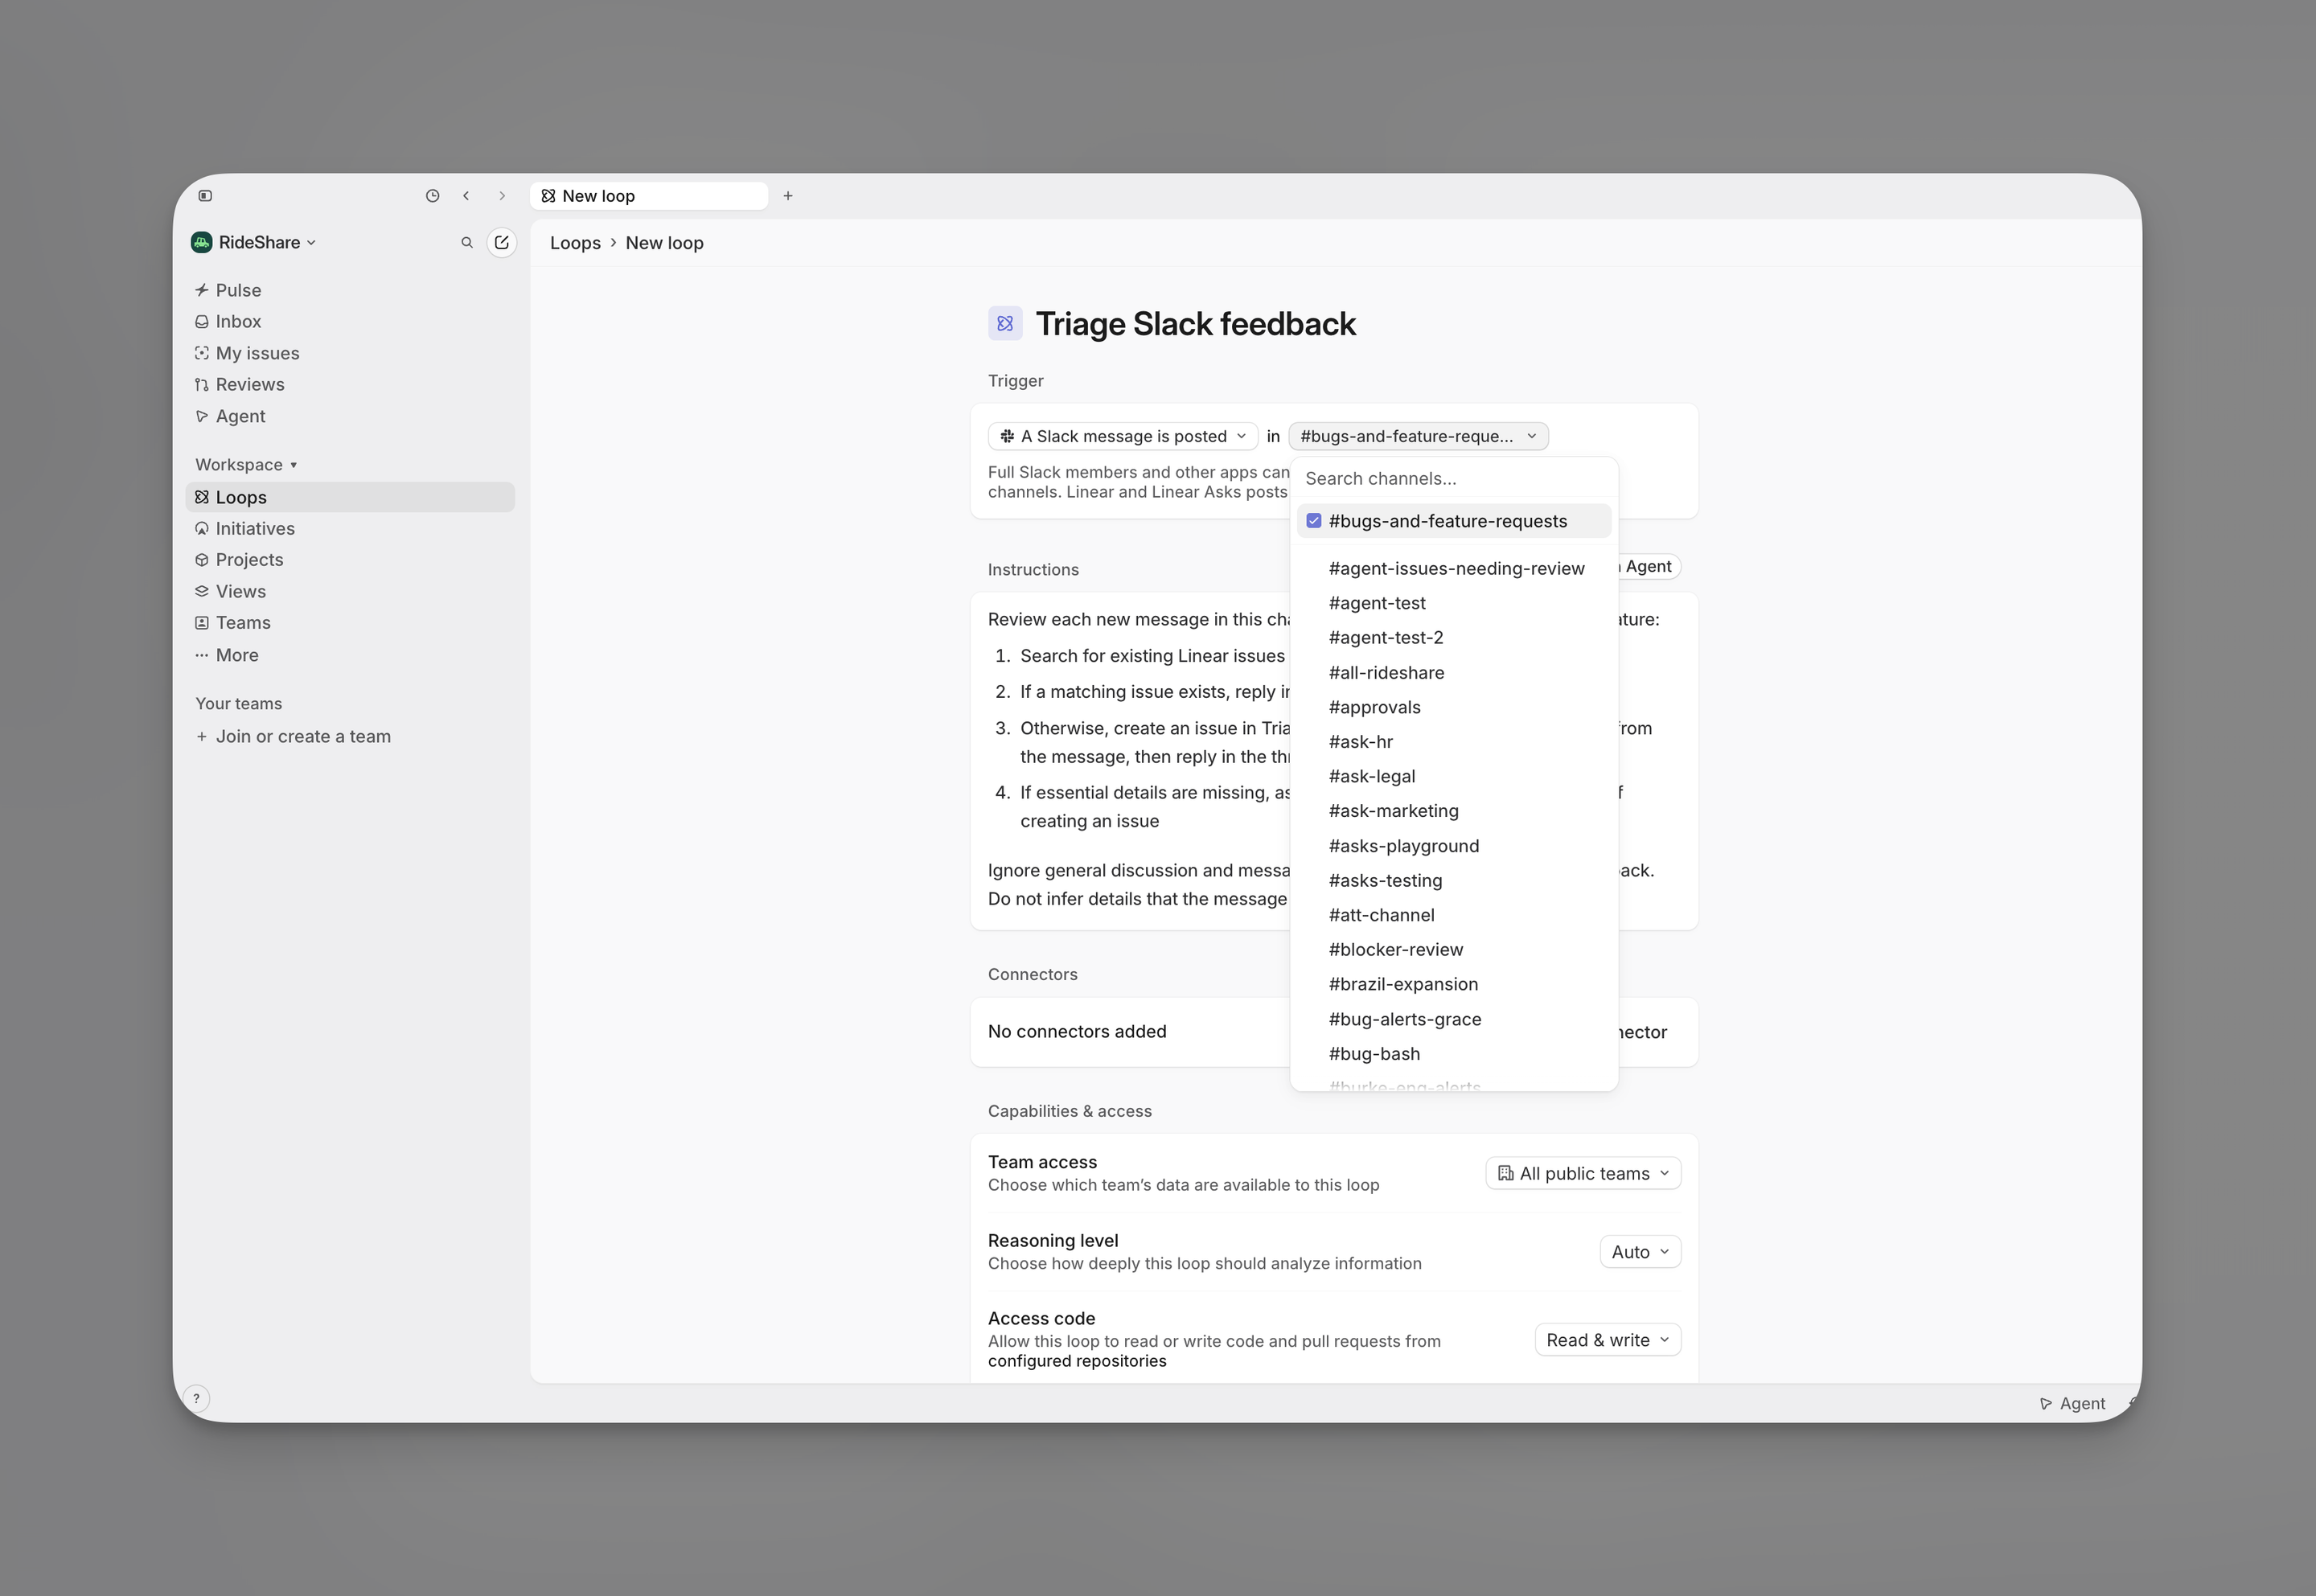
- In the loop editor, choose Trigger → Slack → Message posted
- Select the Slack workspace and channels to monitor
- Add instructions describing when the loop should act and what it should do
- Review its connectors and Capabilities & access, then create the loop
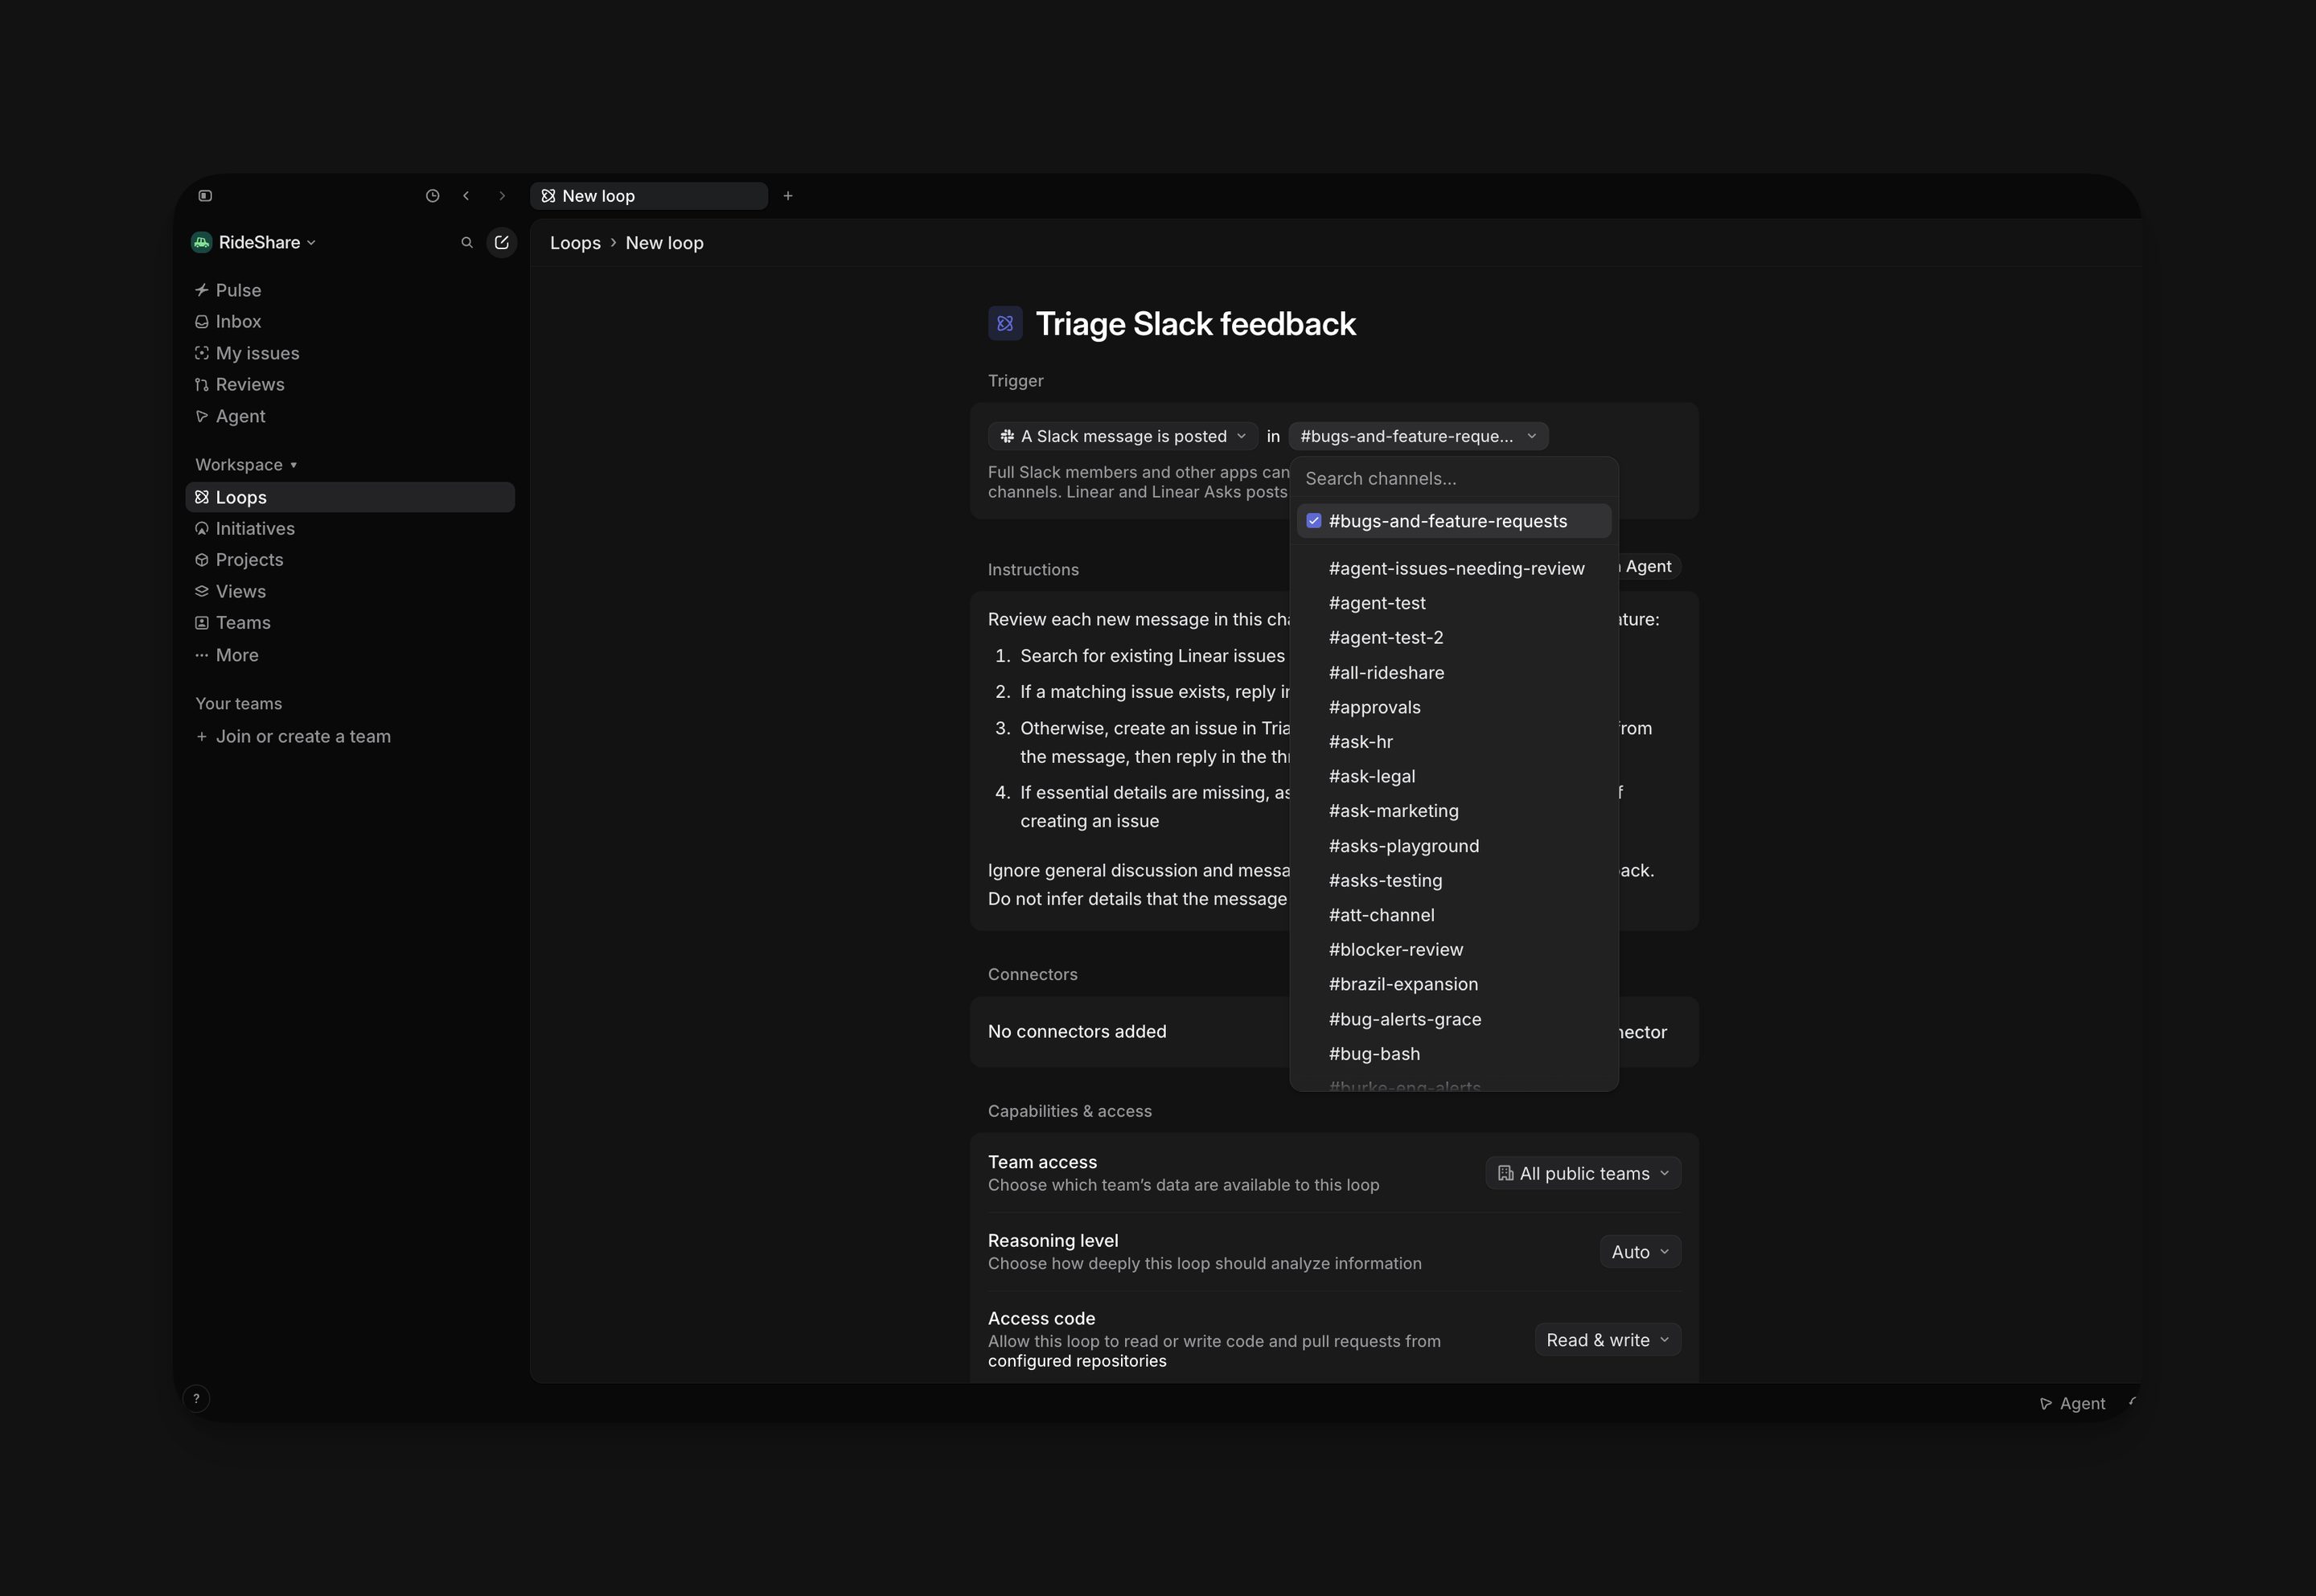
A workspace admin must turn on Enable Linear Agent and Allow Loops access in Settings → Integrations → Slack → workspace. You must also connect your Slack account and be a full member of that Slack workspace.
Slack message triggers do not support externally shared channels, private channels, direct messages, thread replies, or message edits. Messages from guests, posts from Linear or Linear Asks, and messages mentioning Linear’s bots do not trigger runs.
Message-history access must be enabled. If automatic channel joining is disabled, invite Linear to each selected channel before creating the loop.
Use Slack with loops
Connect a Loop to your workspace’s Slack integration to let it work in Slack as Linear. A Loop can use one connected Slack workspace. You must link your Slack account to Linear and be a full member of the workspace to connect.
To connect Slack to a Loop:
- A workspace admin must first turn on Enable Linear Agent and Allow Loops access in Settings → Integrations → Slack → workspace
- In the Loop draft, open the connector menu and select Slack
- Select the appropriate Slack workspace
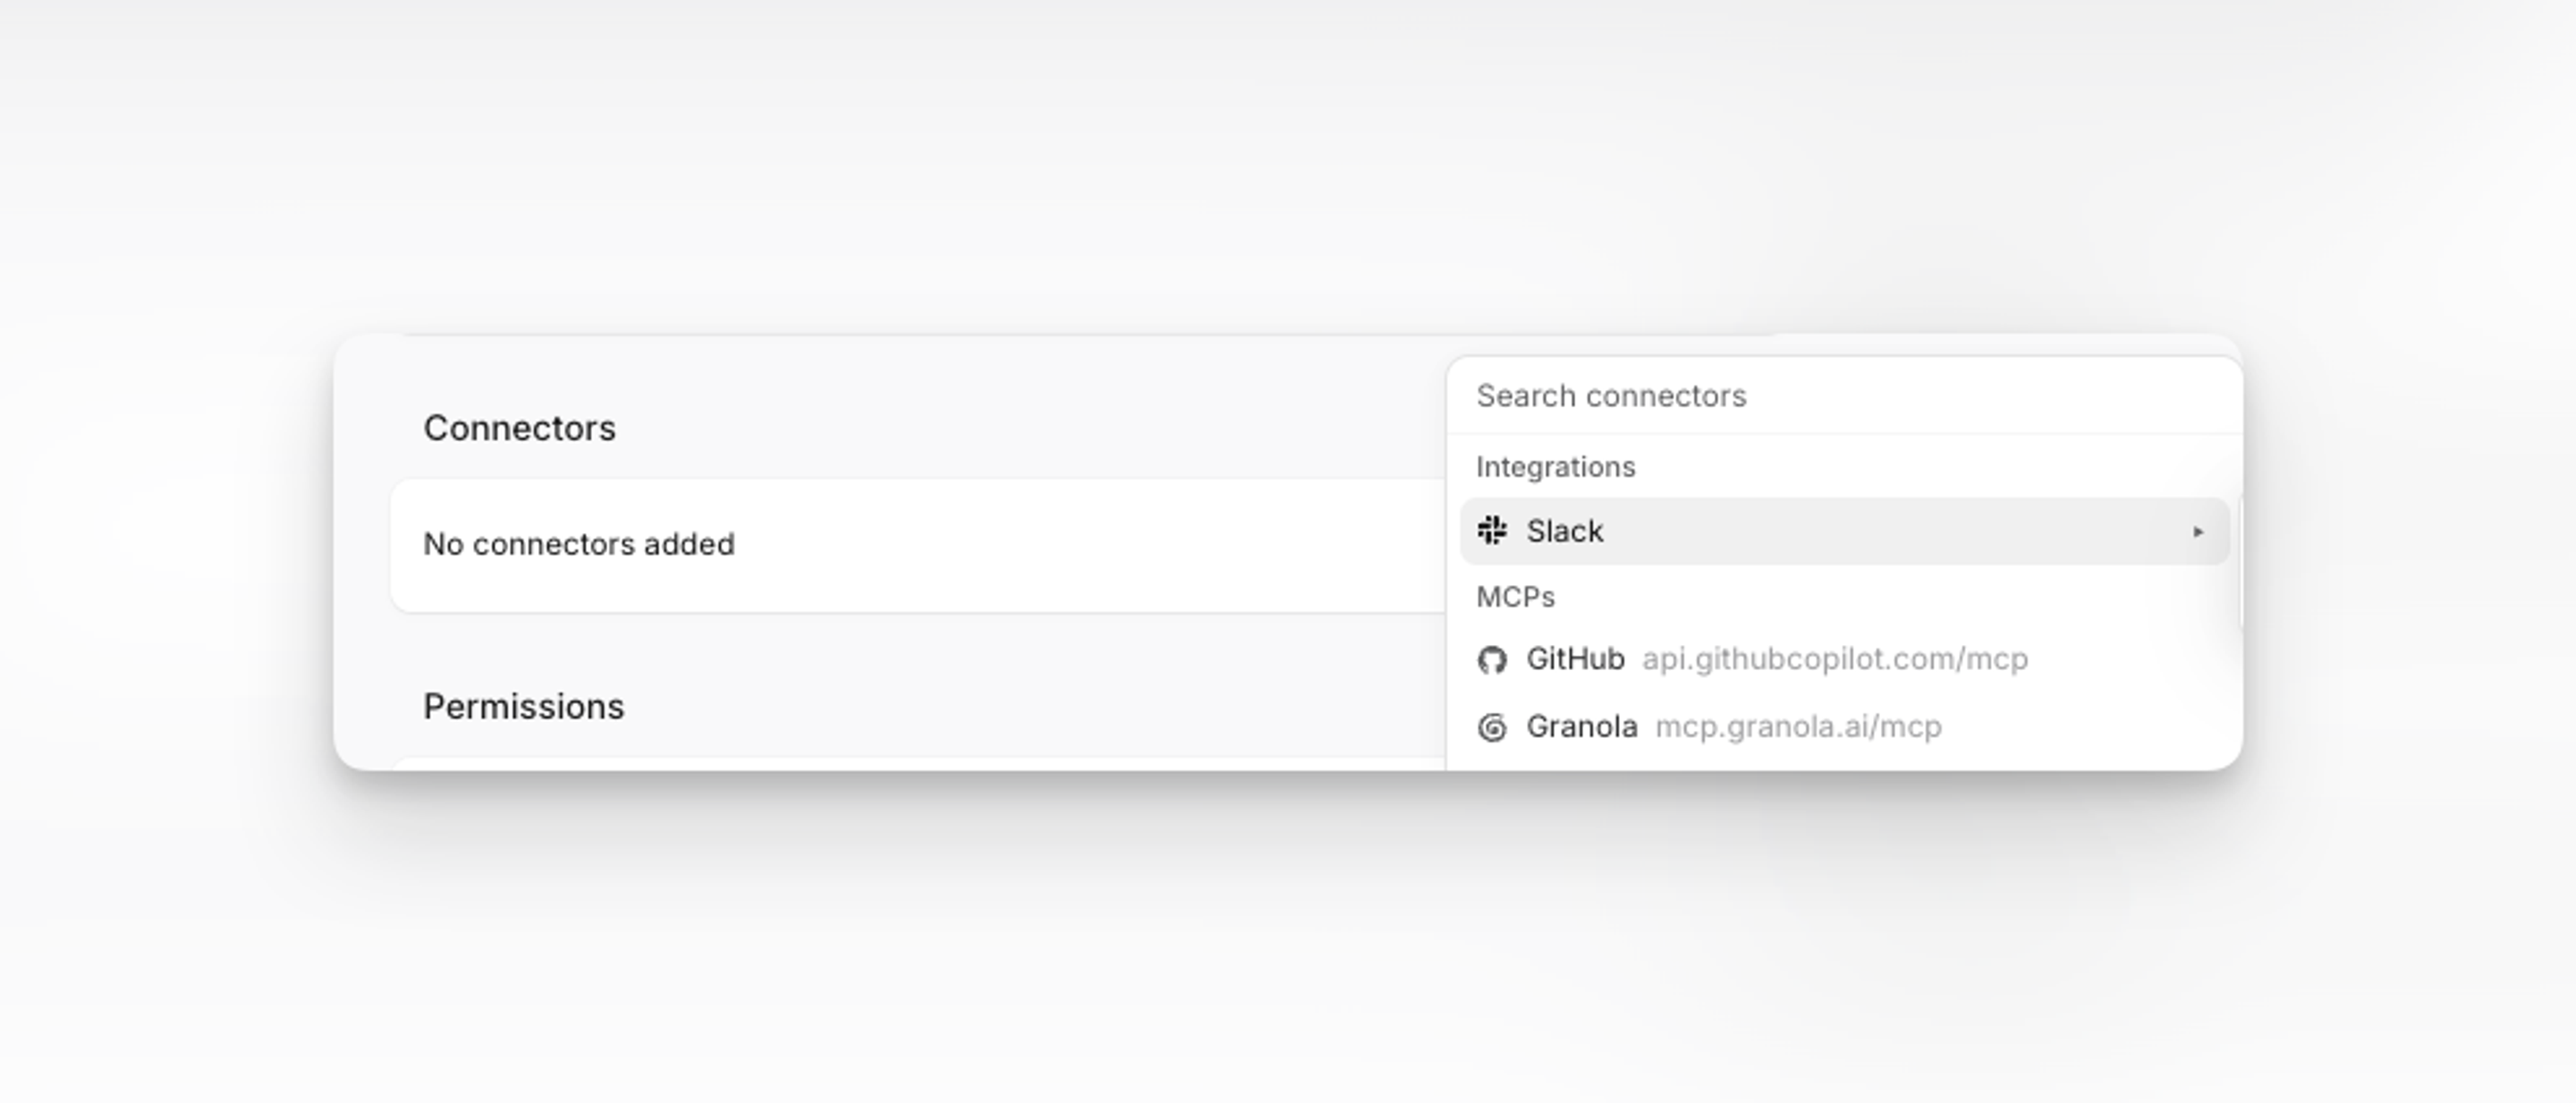
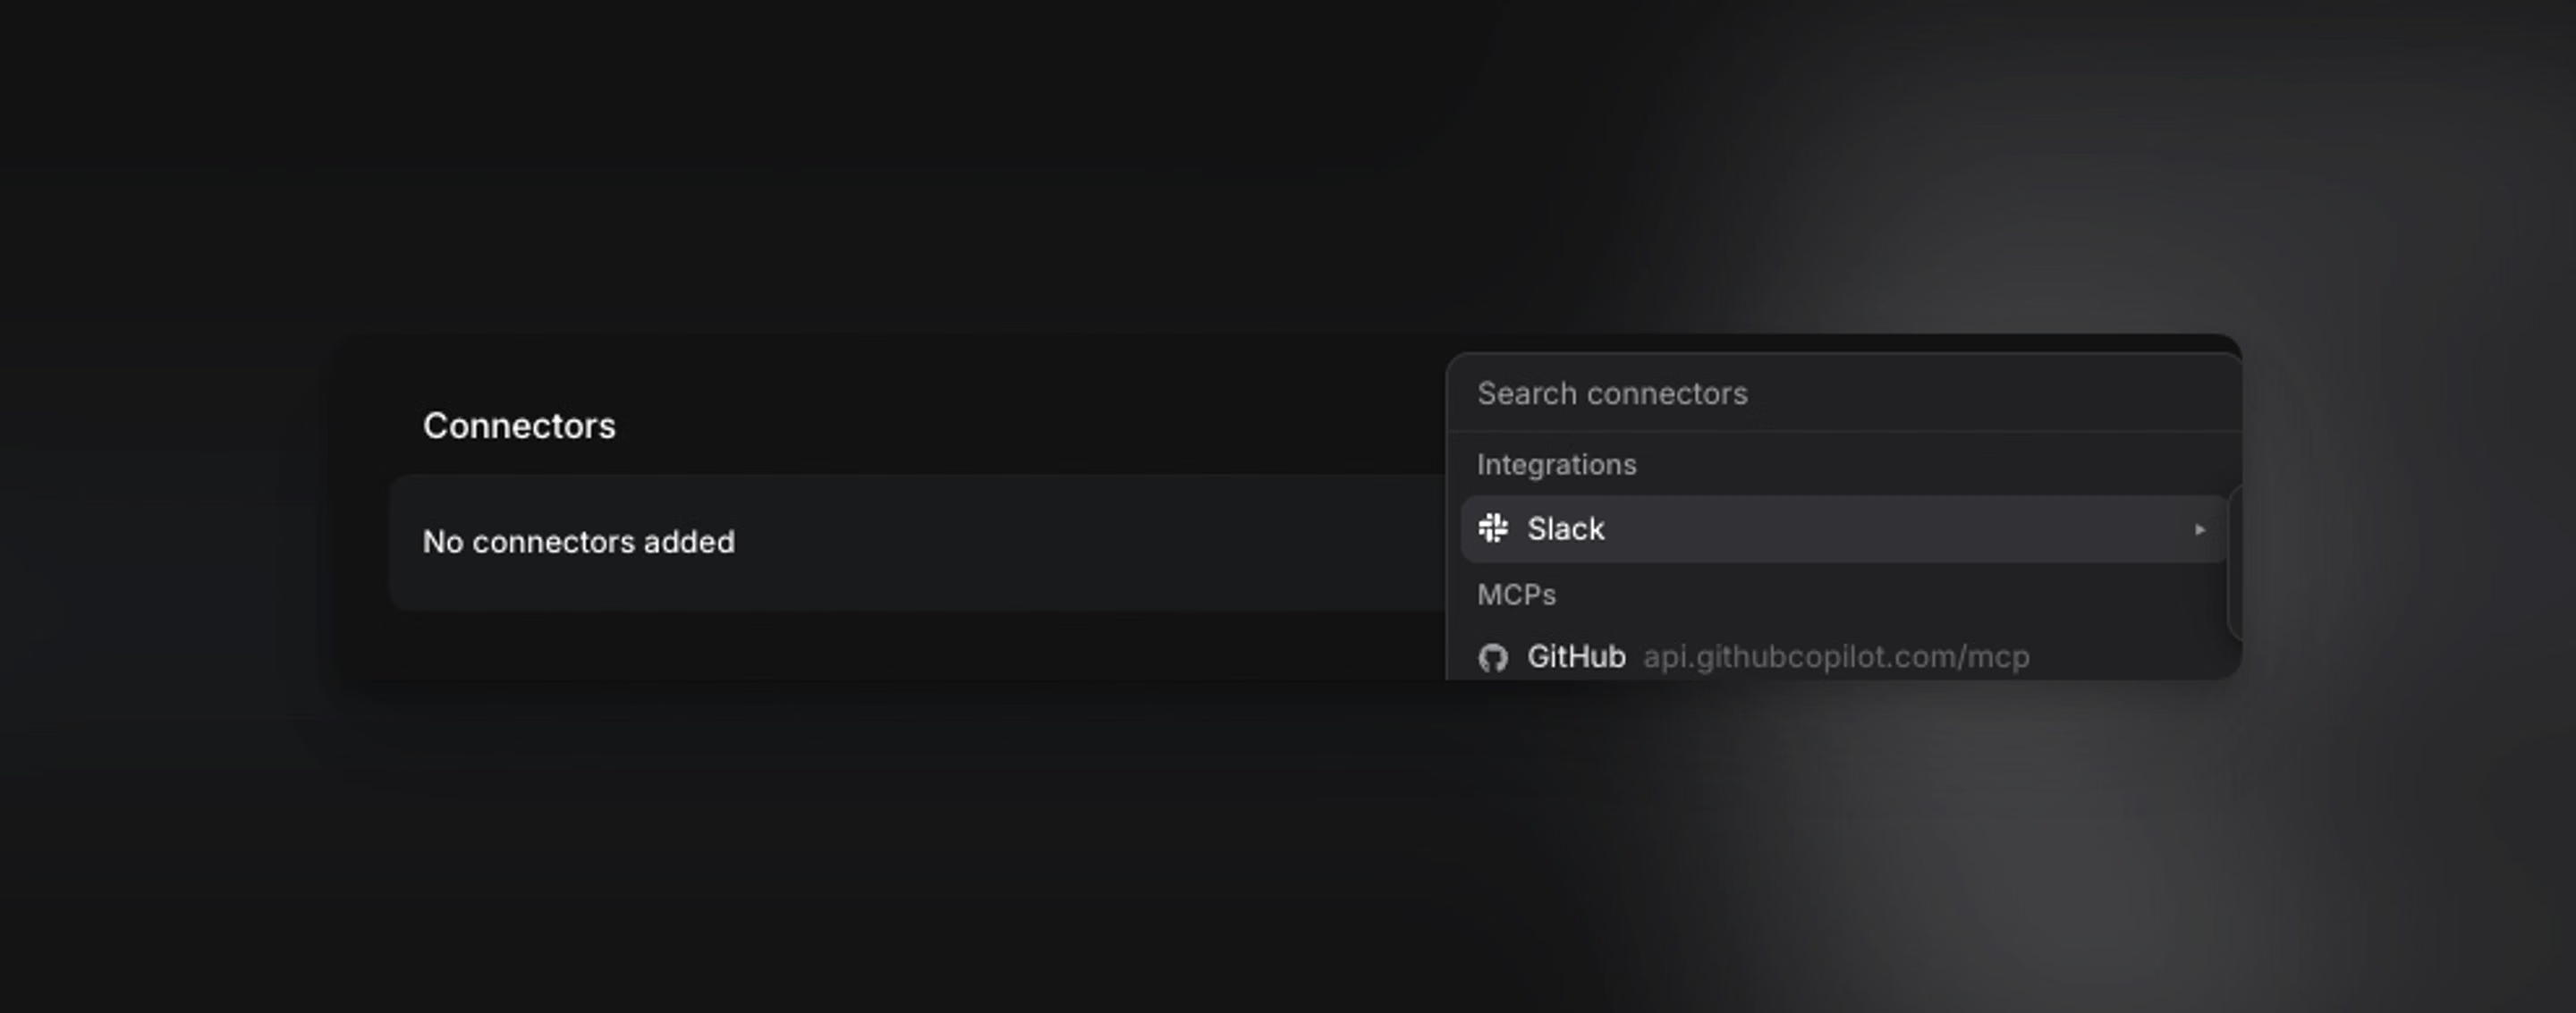
The Slack integration uses your workspace’s shared Slack connection, rather than a personal Slack MCP connection. It is intended for shared automation with defined public-channel access. You should use a personal Slack MCP connector when a Loop needs access based on an individual’s Slack authorization or broader Slack tools.
What loops can do in Slack
- Loops can find public channels by name, including Slack Connect channels, and read their message history. They can also read messages from Slack links, post new messages, and add or remove emoji reactions. Messages posted to Slack by a loop are identifiable by a direct link to its run.
- Loops can send direct messages to full members in Slack, and those messages are one-way
- In a public-channel thread started by a Loop, anyone with access to the loop run can reply from there to continue the conversation
- Loops can send broadcast mentions such as
@hereand@channelin Slack messages
Slack access and limitations
- Loops cannot access private channels, direct-message history, or group direct messages
- Loops cannot search messages across the workspace, create channels, edit or delete messages, upload files, or manage Slack canvas documents
- Replies in Slack Connect channels, direct messages, or unrelated threads do not continue the loop conversation
- When automatic channel joining is disabled in Slack, Loops can only use public channels that Linear has already joined. If message history is unavailable, Loops can send messages into those channels but cannot read their history, or continue conversations through replies.
MCP connectors
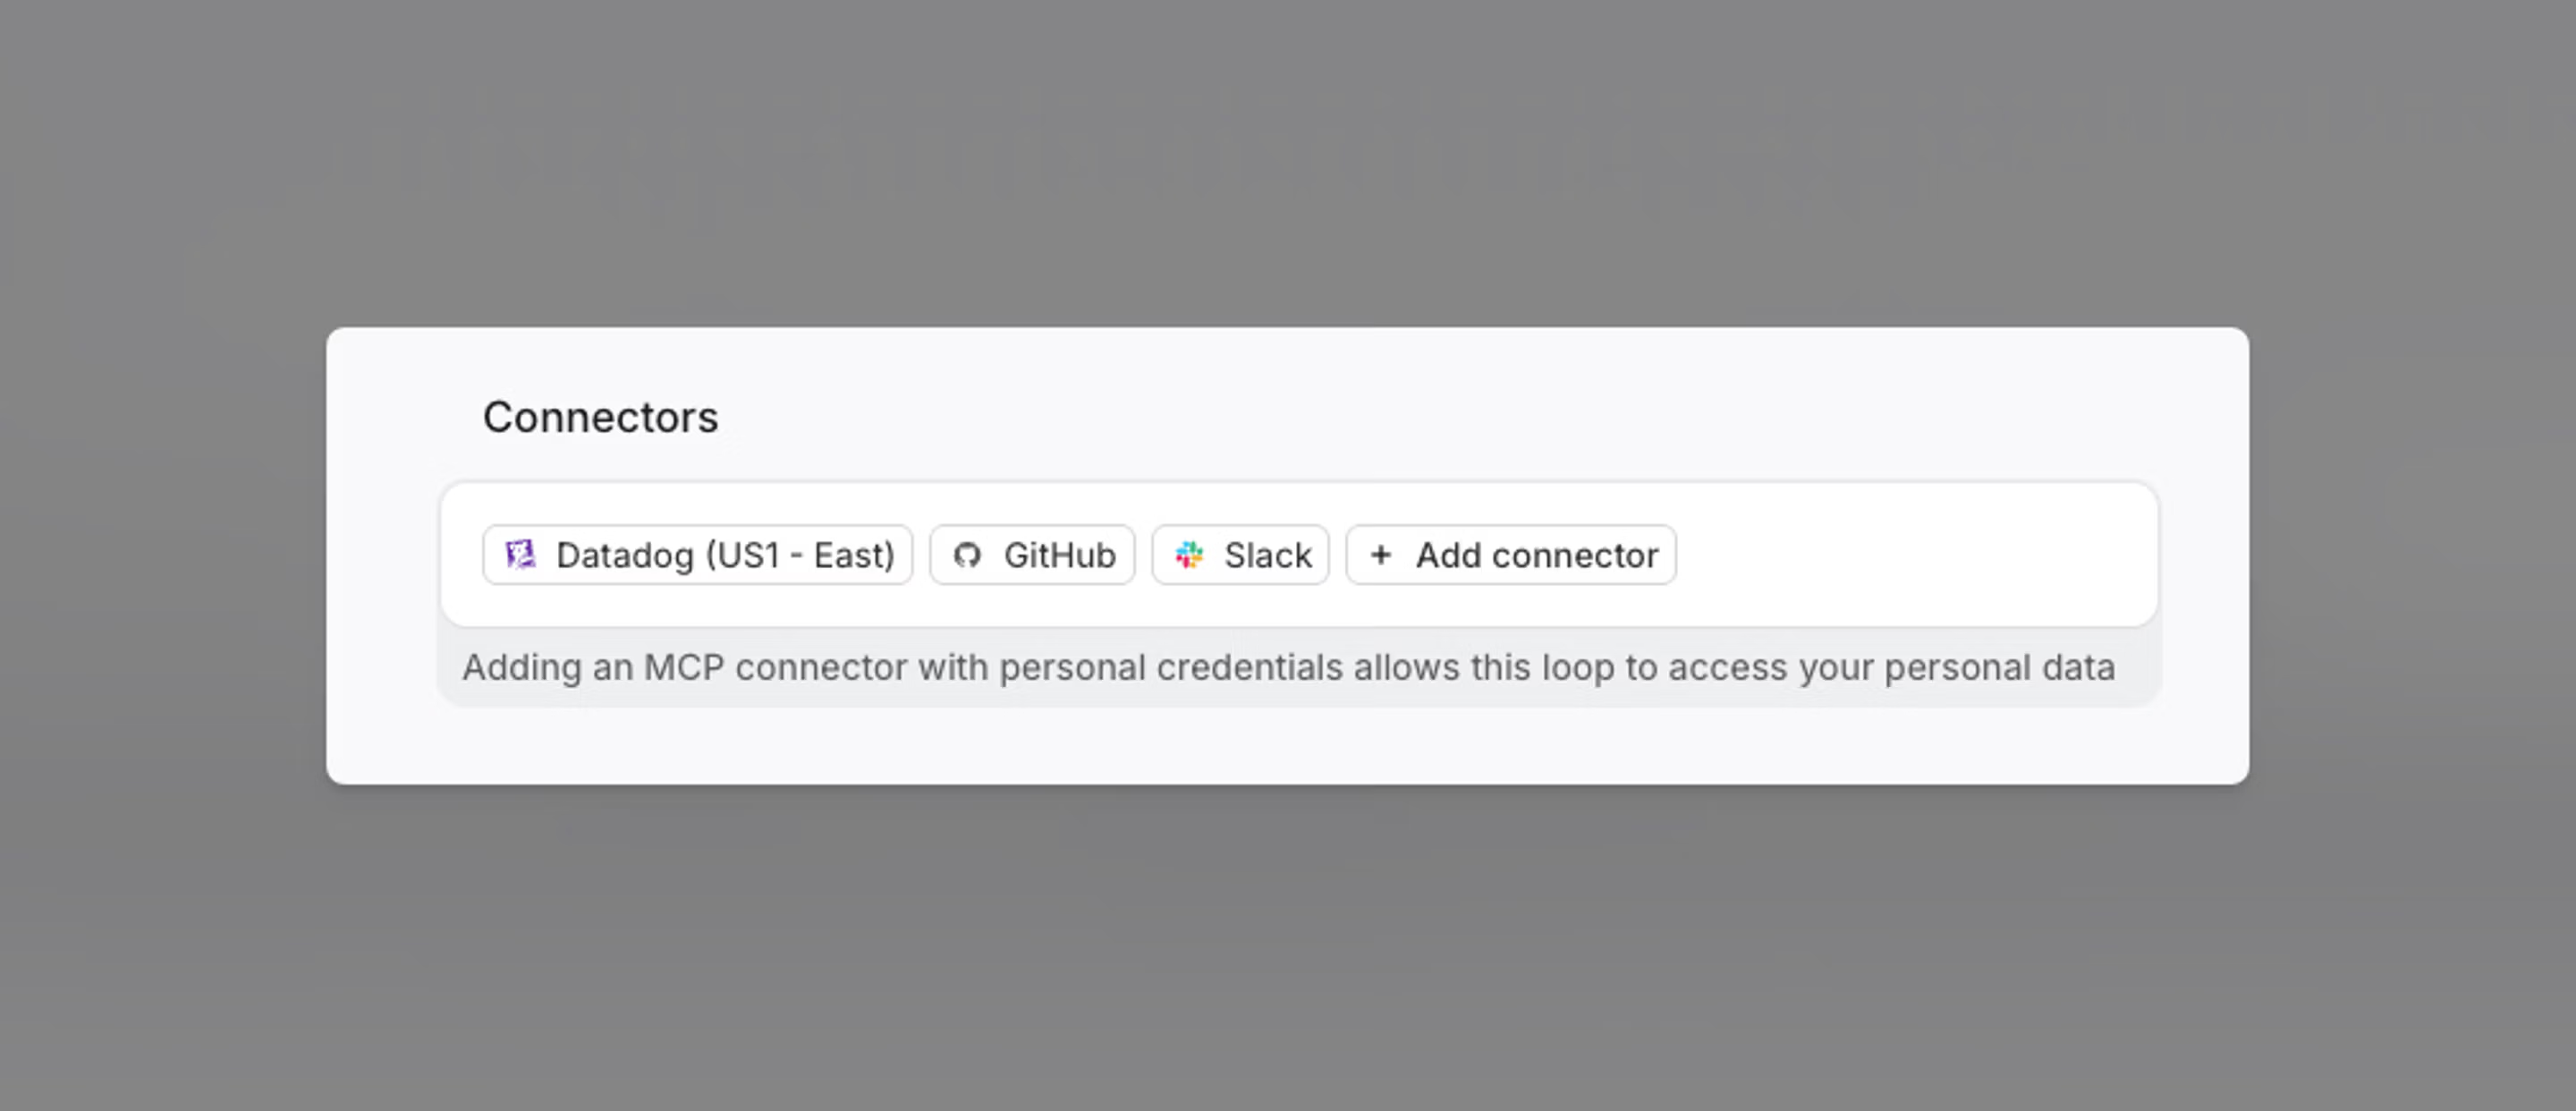
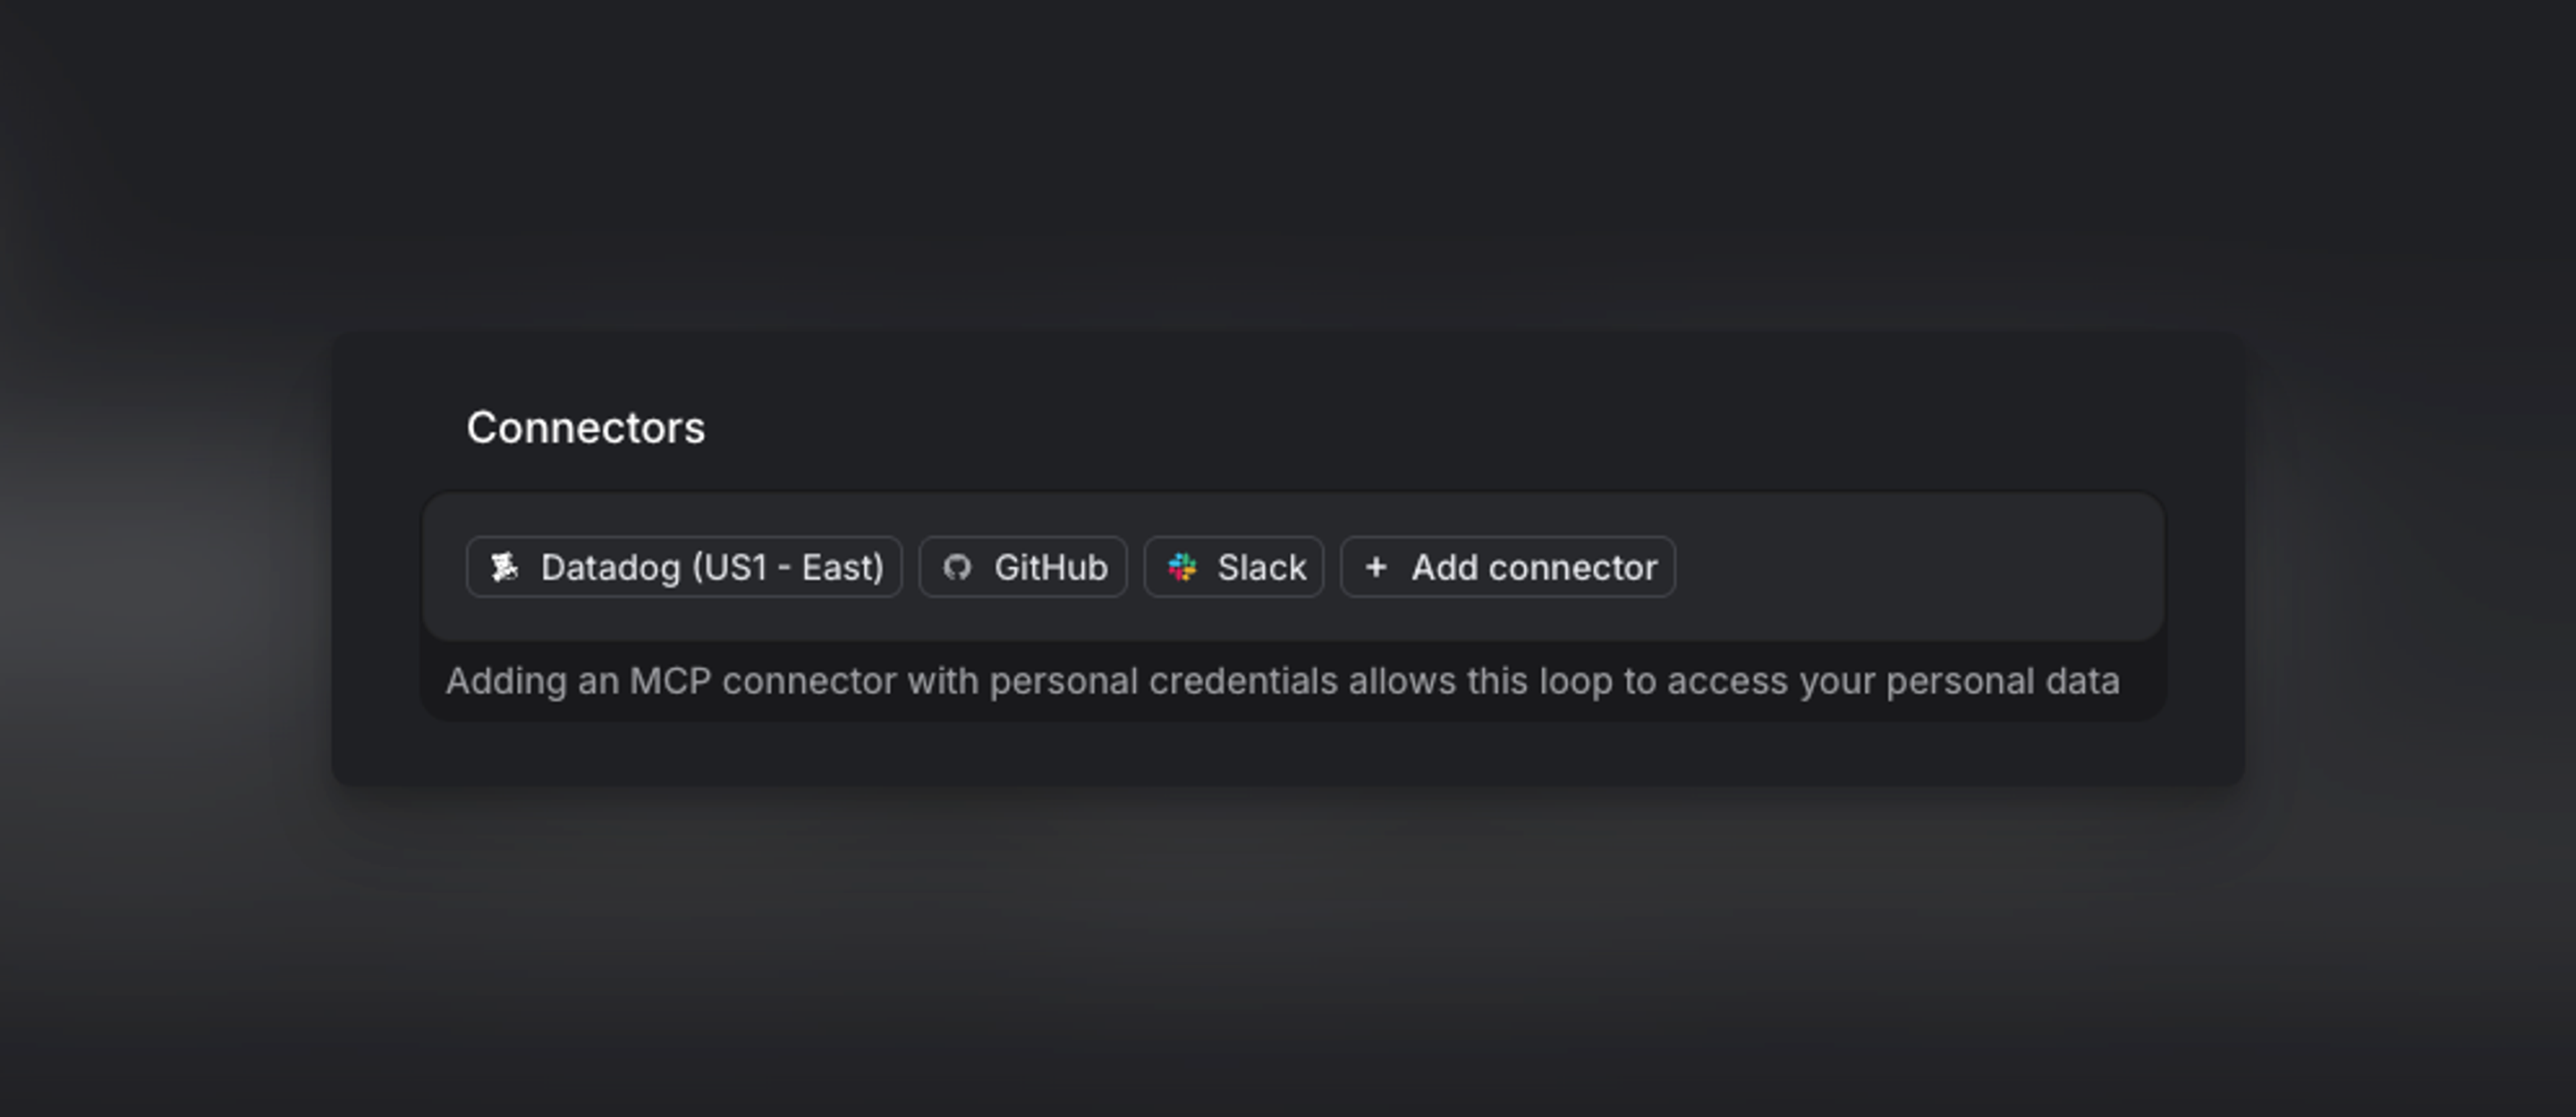
MCP connectors extend what Linear Agent can do during a loop run. When a connected MCP is available to a loop, Linear can use it to gather context or take supported actions in other services. For example:
- Search or retrieve content from connected sources such as GitHub, Notion, or Sentry
- Post comments or updates to external services like Slack
- Fetch documentation, pull request details, or error reports to enrich an issue
An MCP connector can only access data and perform actions that are permitted by the available MCP’s configuration and the loop’s data scope. When a user connects an MCP to a loop, they authorize that loop to act in the other service, so connector access should be granted thoughtfully.
Managing available Connectors
Owners (Enterprise) or workspace Admins (Business) can elect to let users connect any MCP connector, or only allowlisted servers.
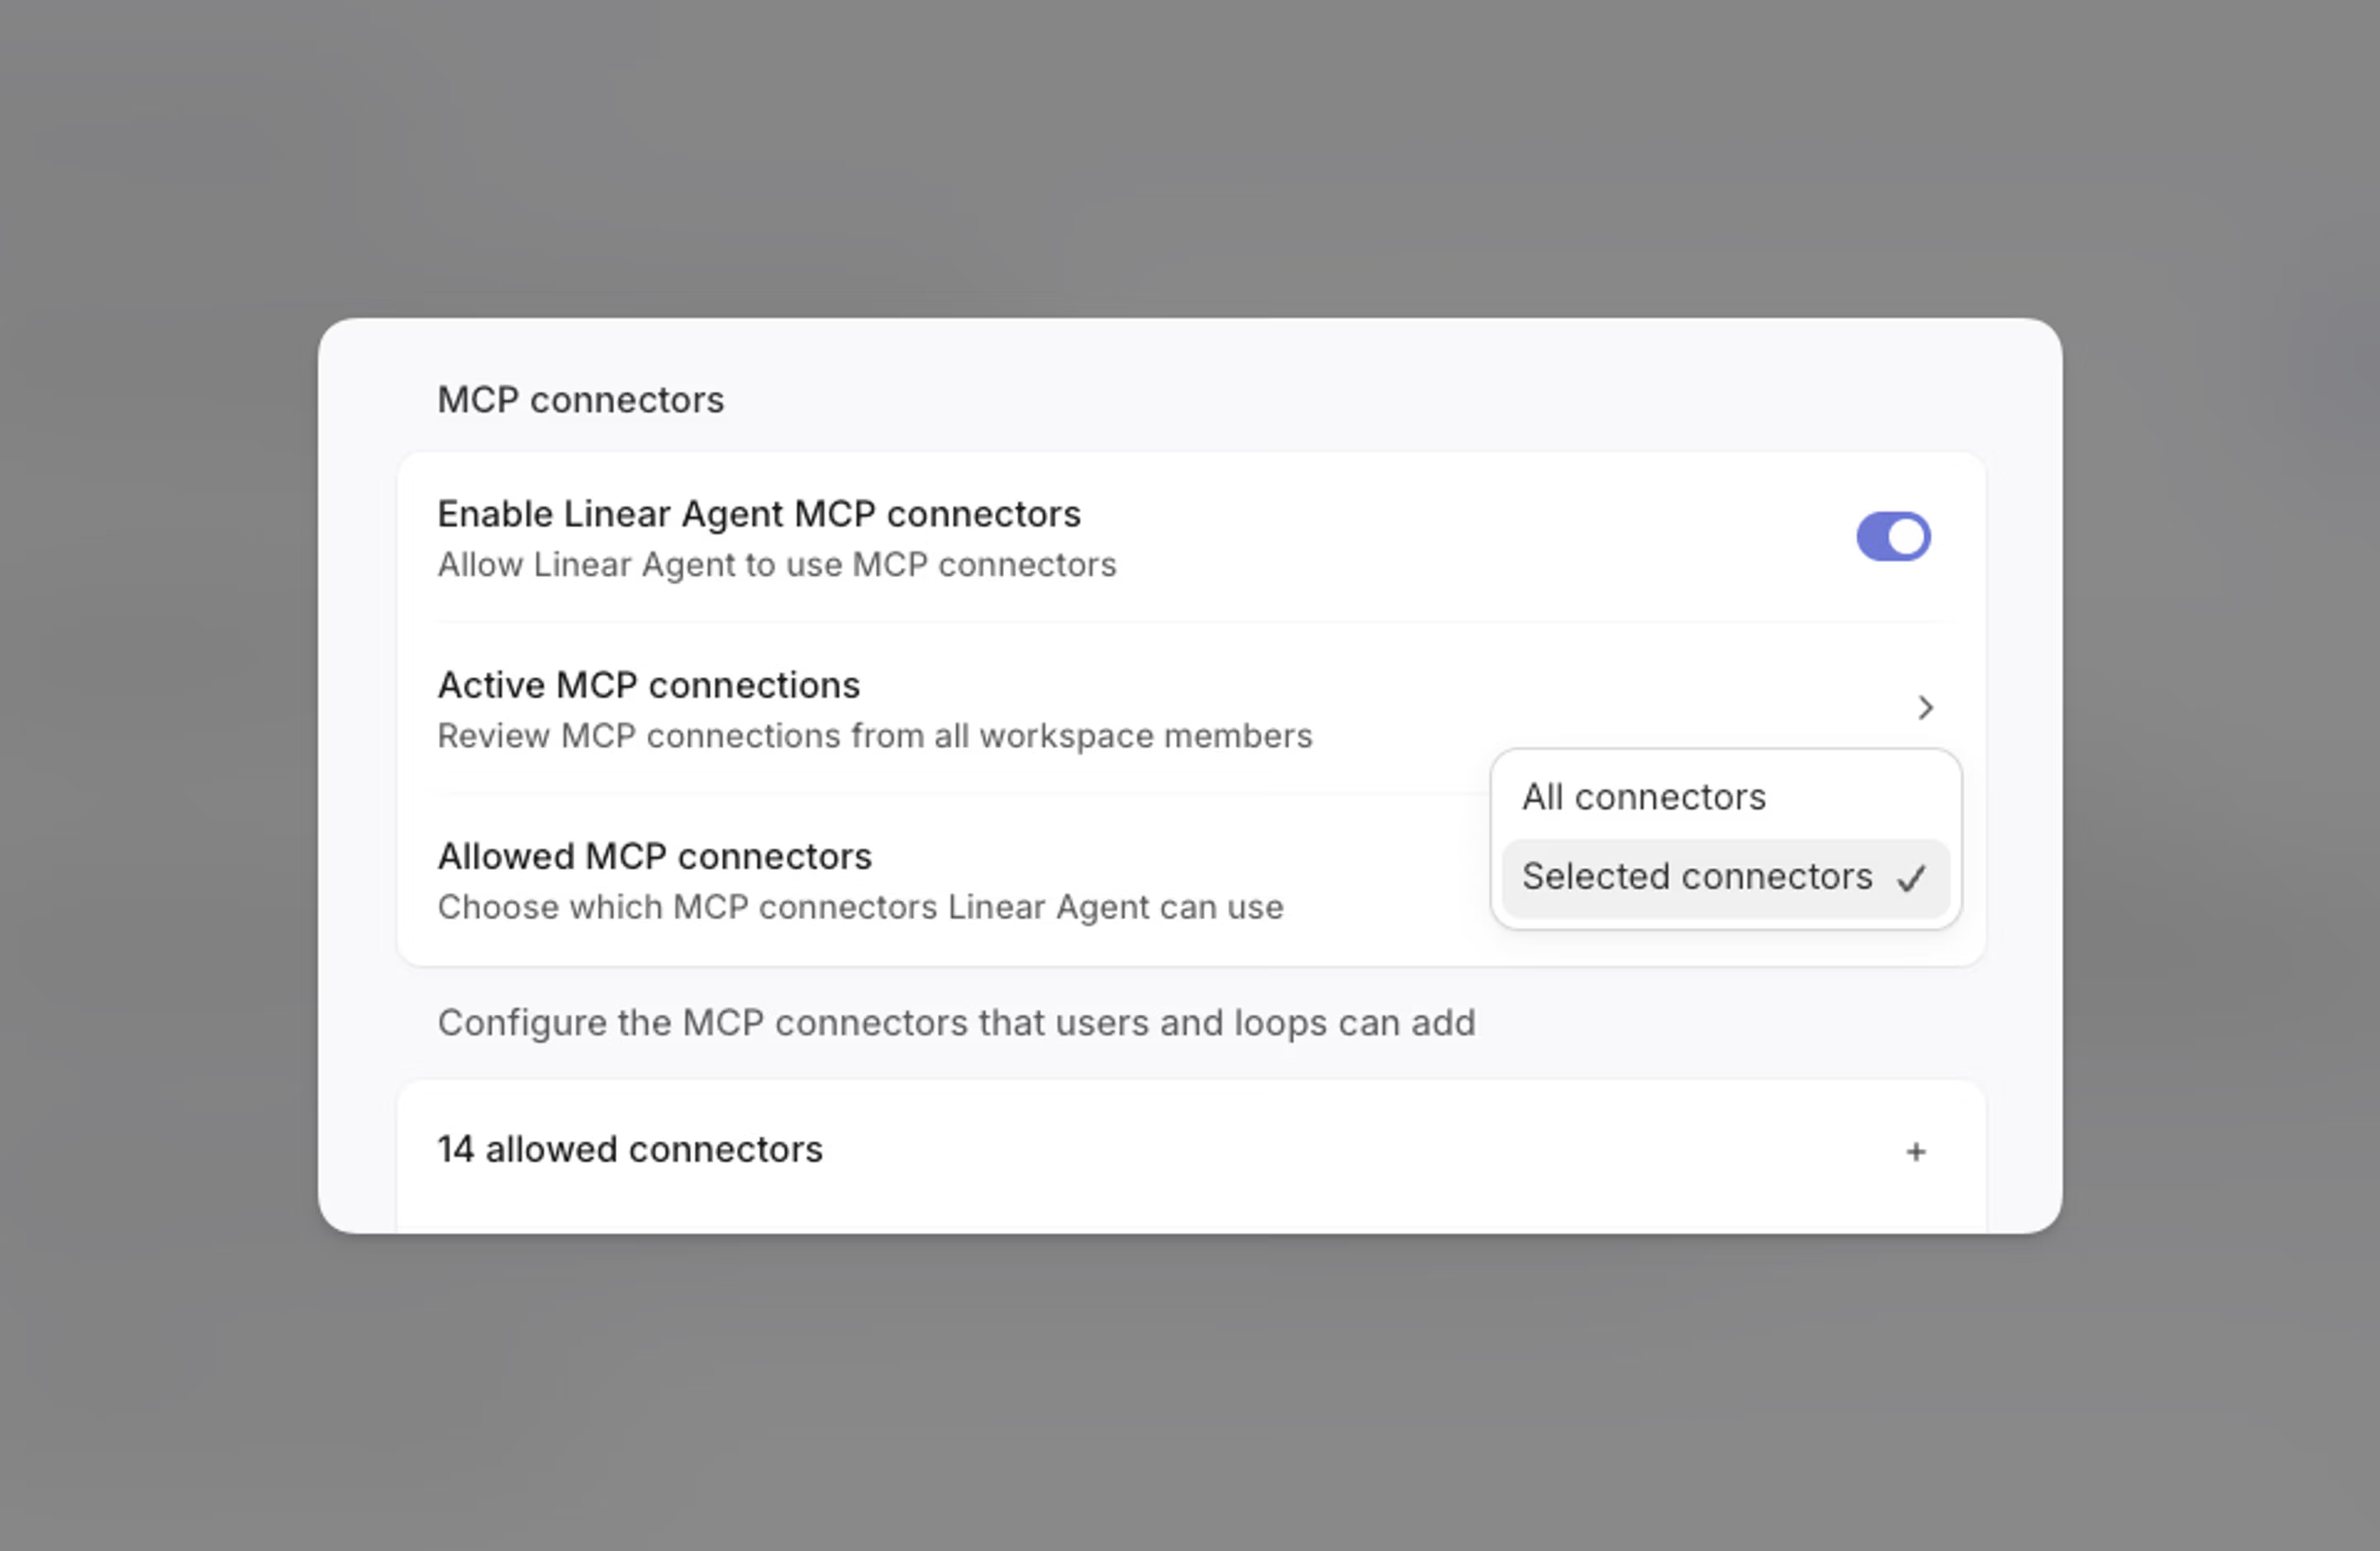
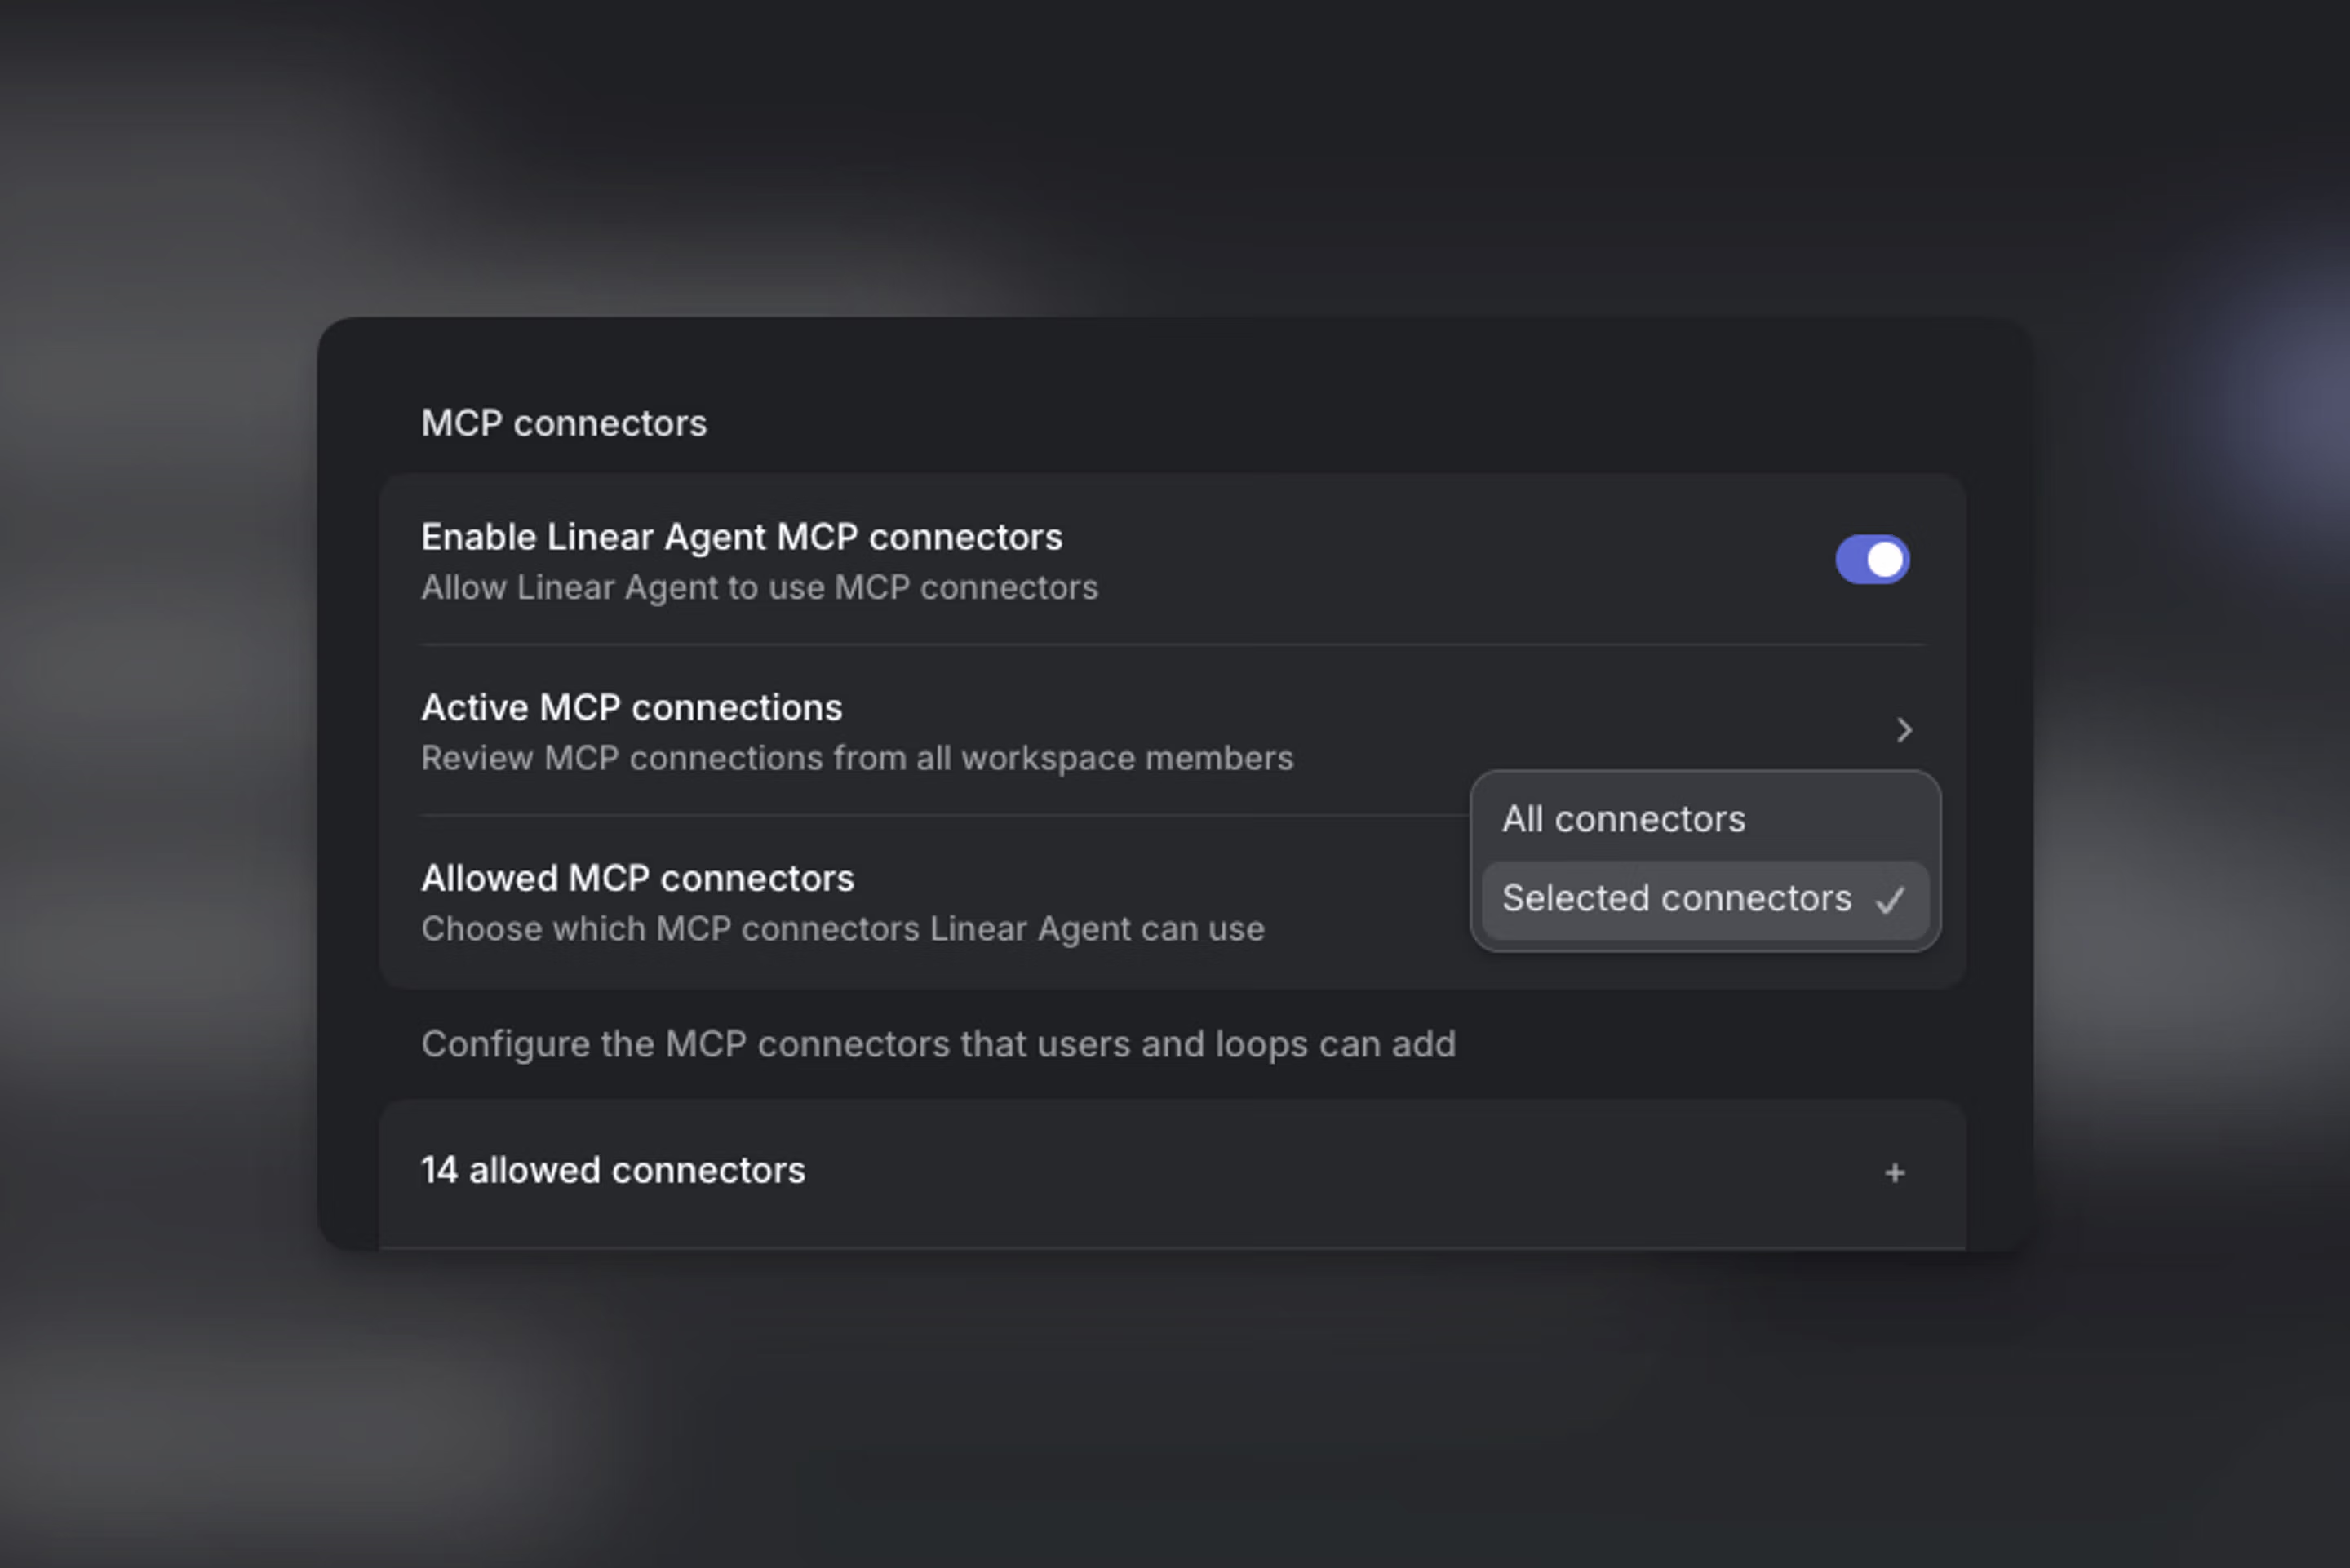
When access is limited to Selected connectors, a workspace admin must add a connector to the allowlist before it can be used in a loop.
Workspace admins and owners can configure the full set of MCP connectors allowed in a workspace in Security settings. Once an MCP server has been added, users can add it when creating or updating a loop. Adding one directly to a loop requires the configuring user to authenticate with the connector, and it will use their personal account’s connection.
MCP approvals
To choose which tools a loop can use, edit the loop, open the MCP connector’s ⋯ menu, and select Manage tools…. Select the tools you want to make available to the loop.
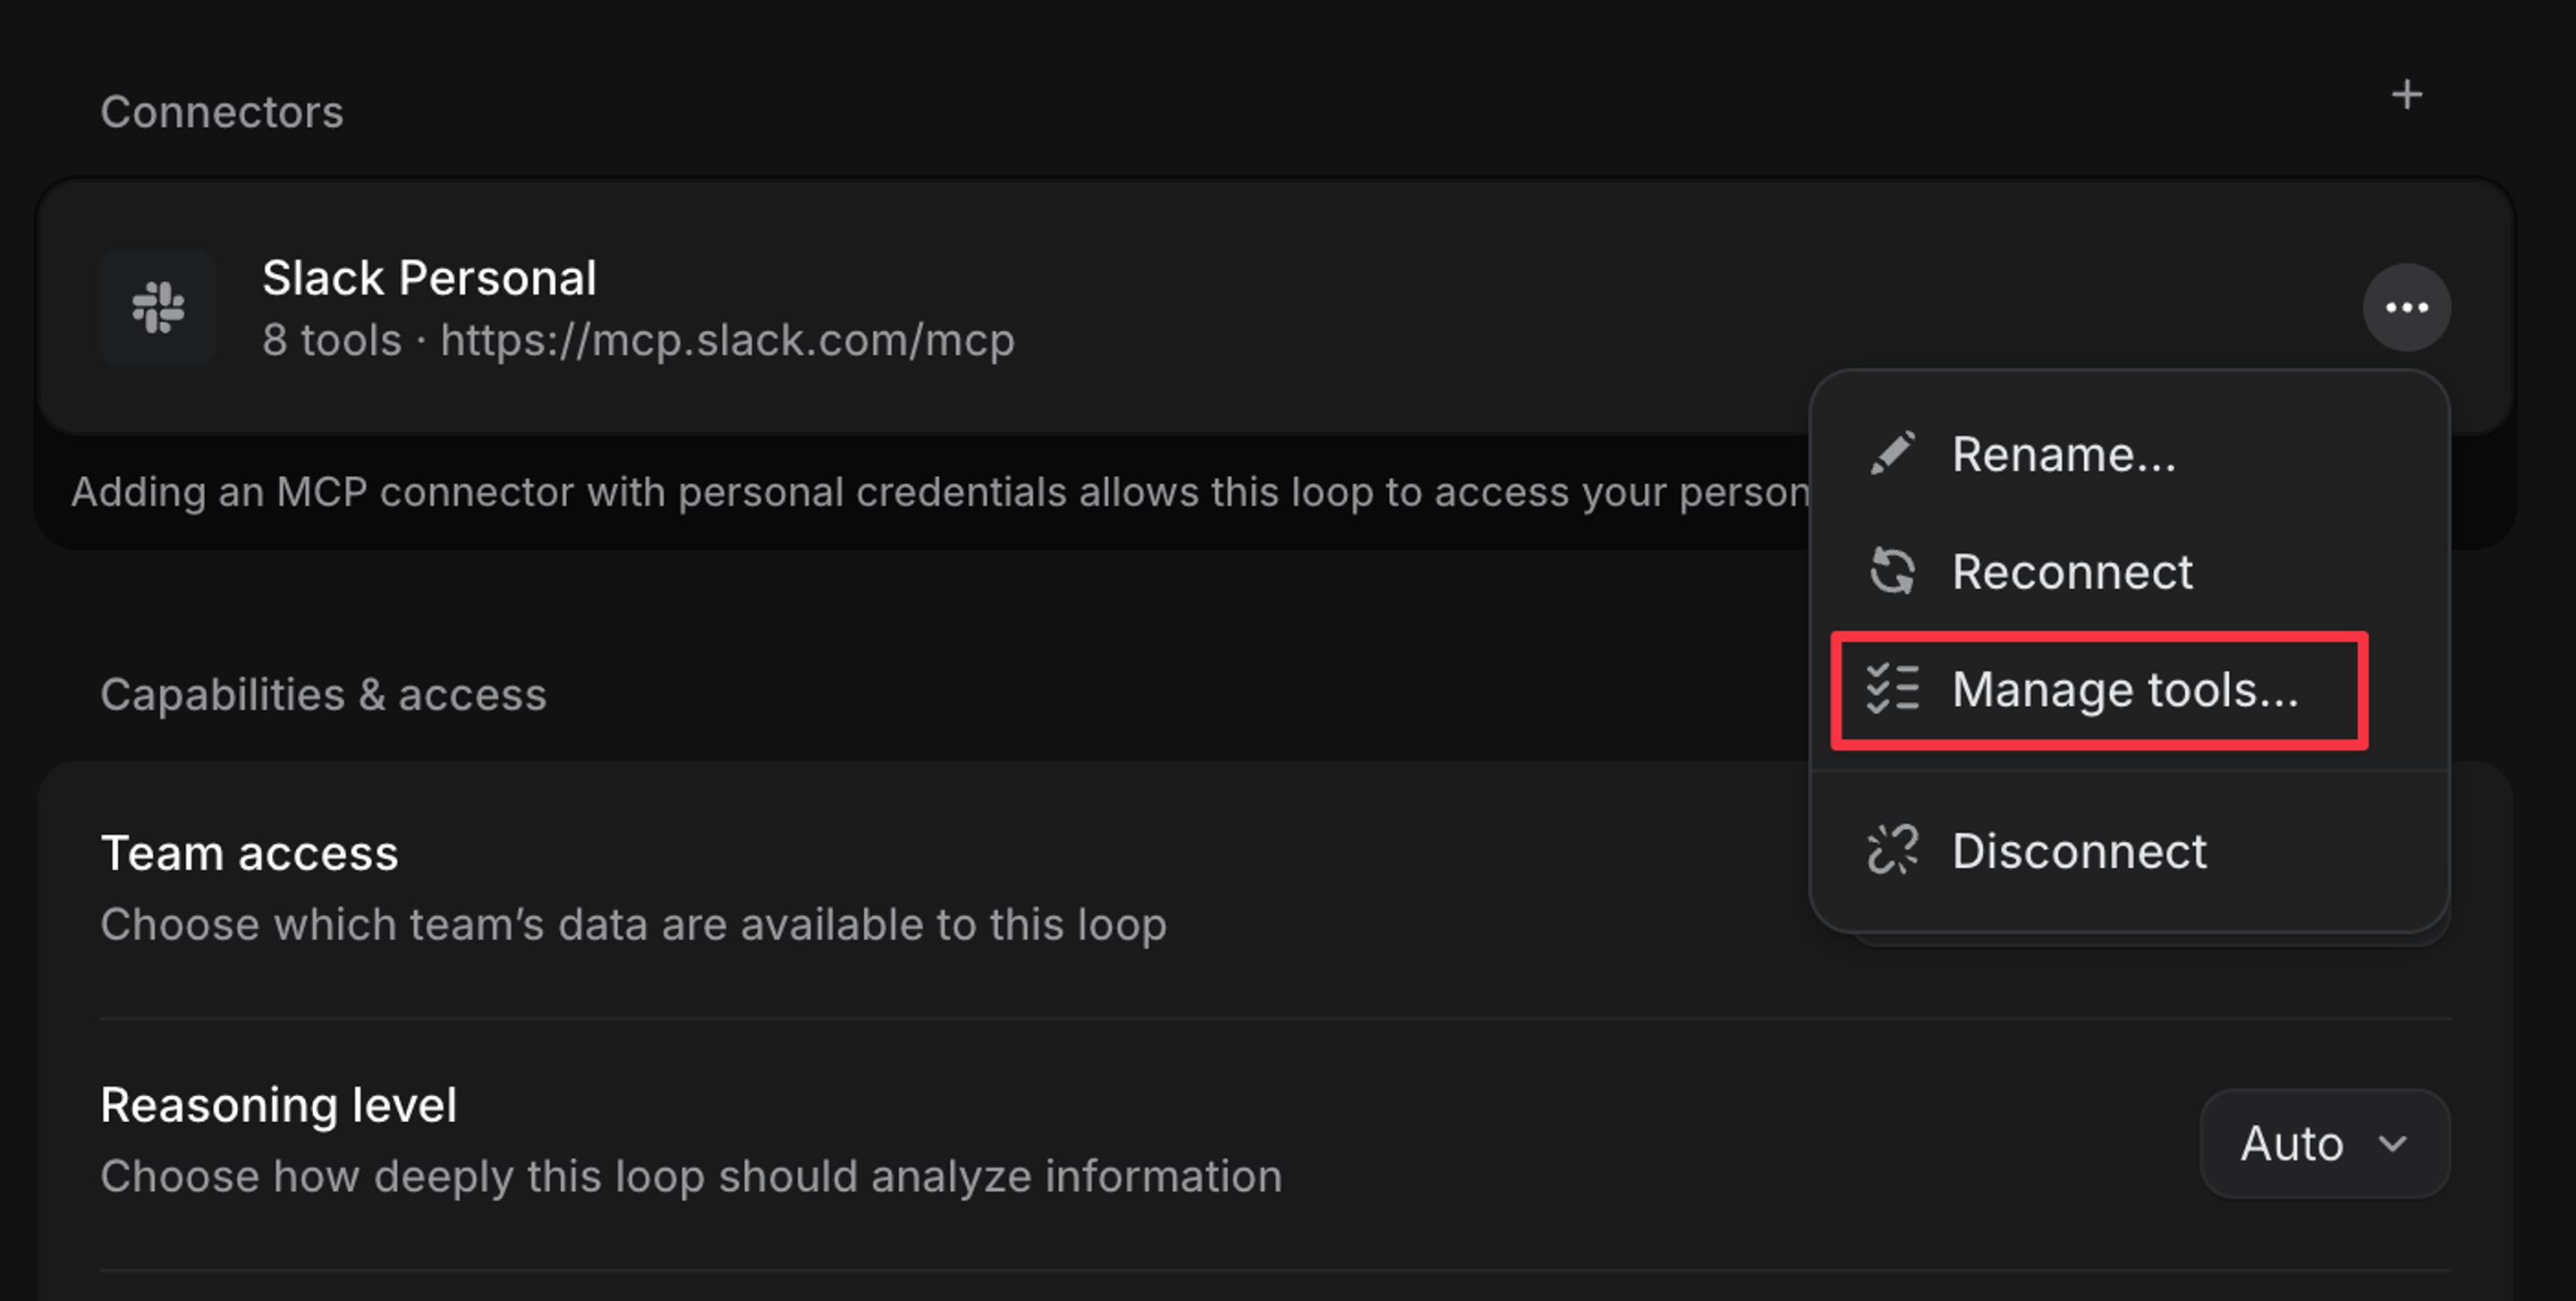
Enable Automatically approve all tool calls to skip approval requests from that connector. To automatically approve individual tools instead, leave this setting off and enable Always approved for each tool you want to approve automatically.
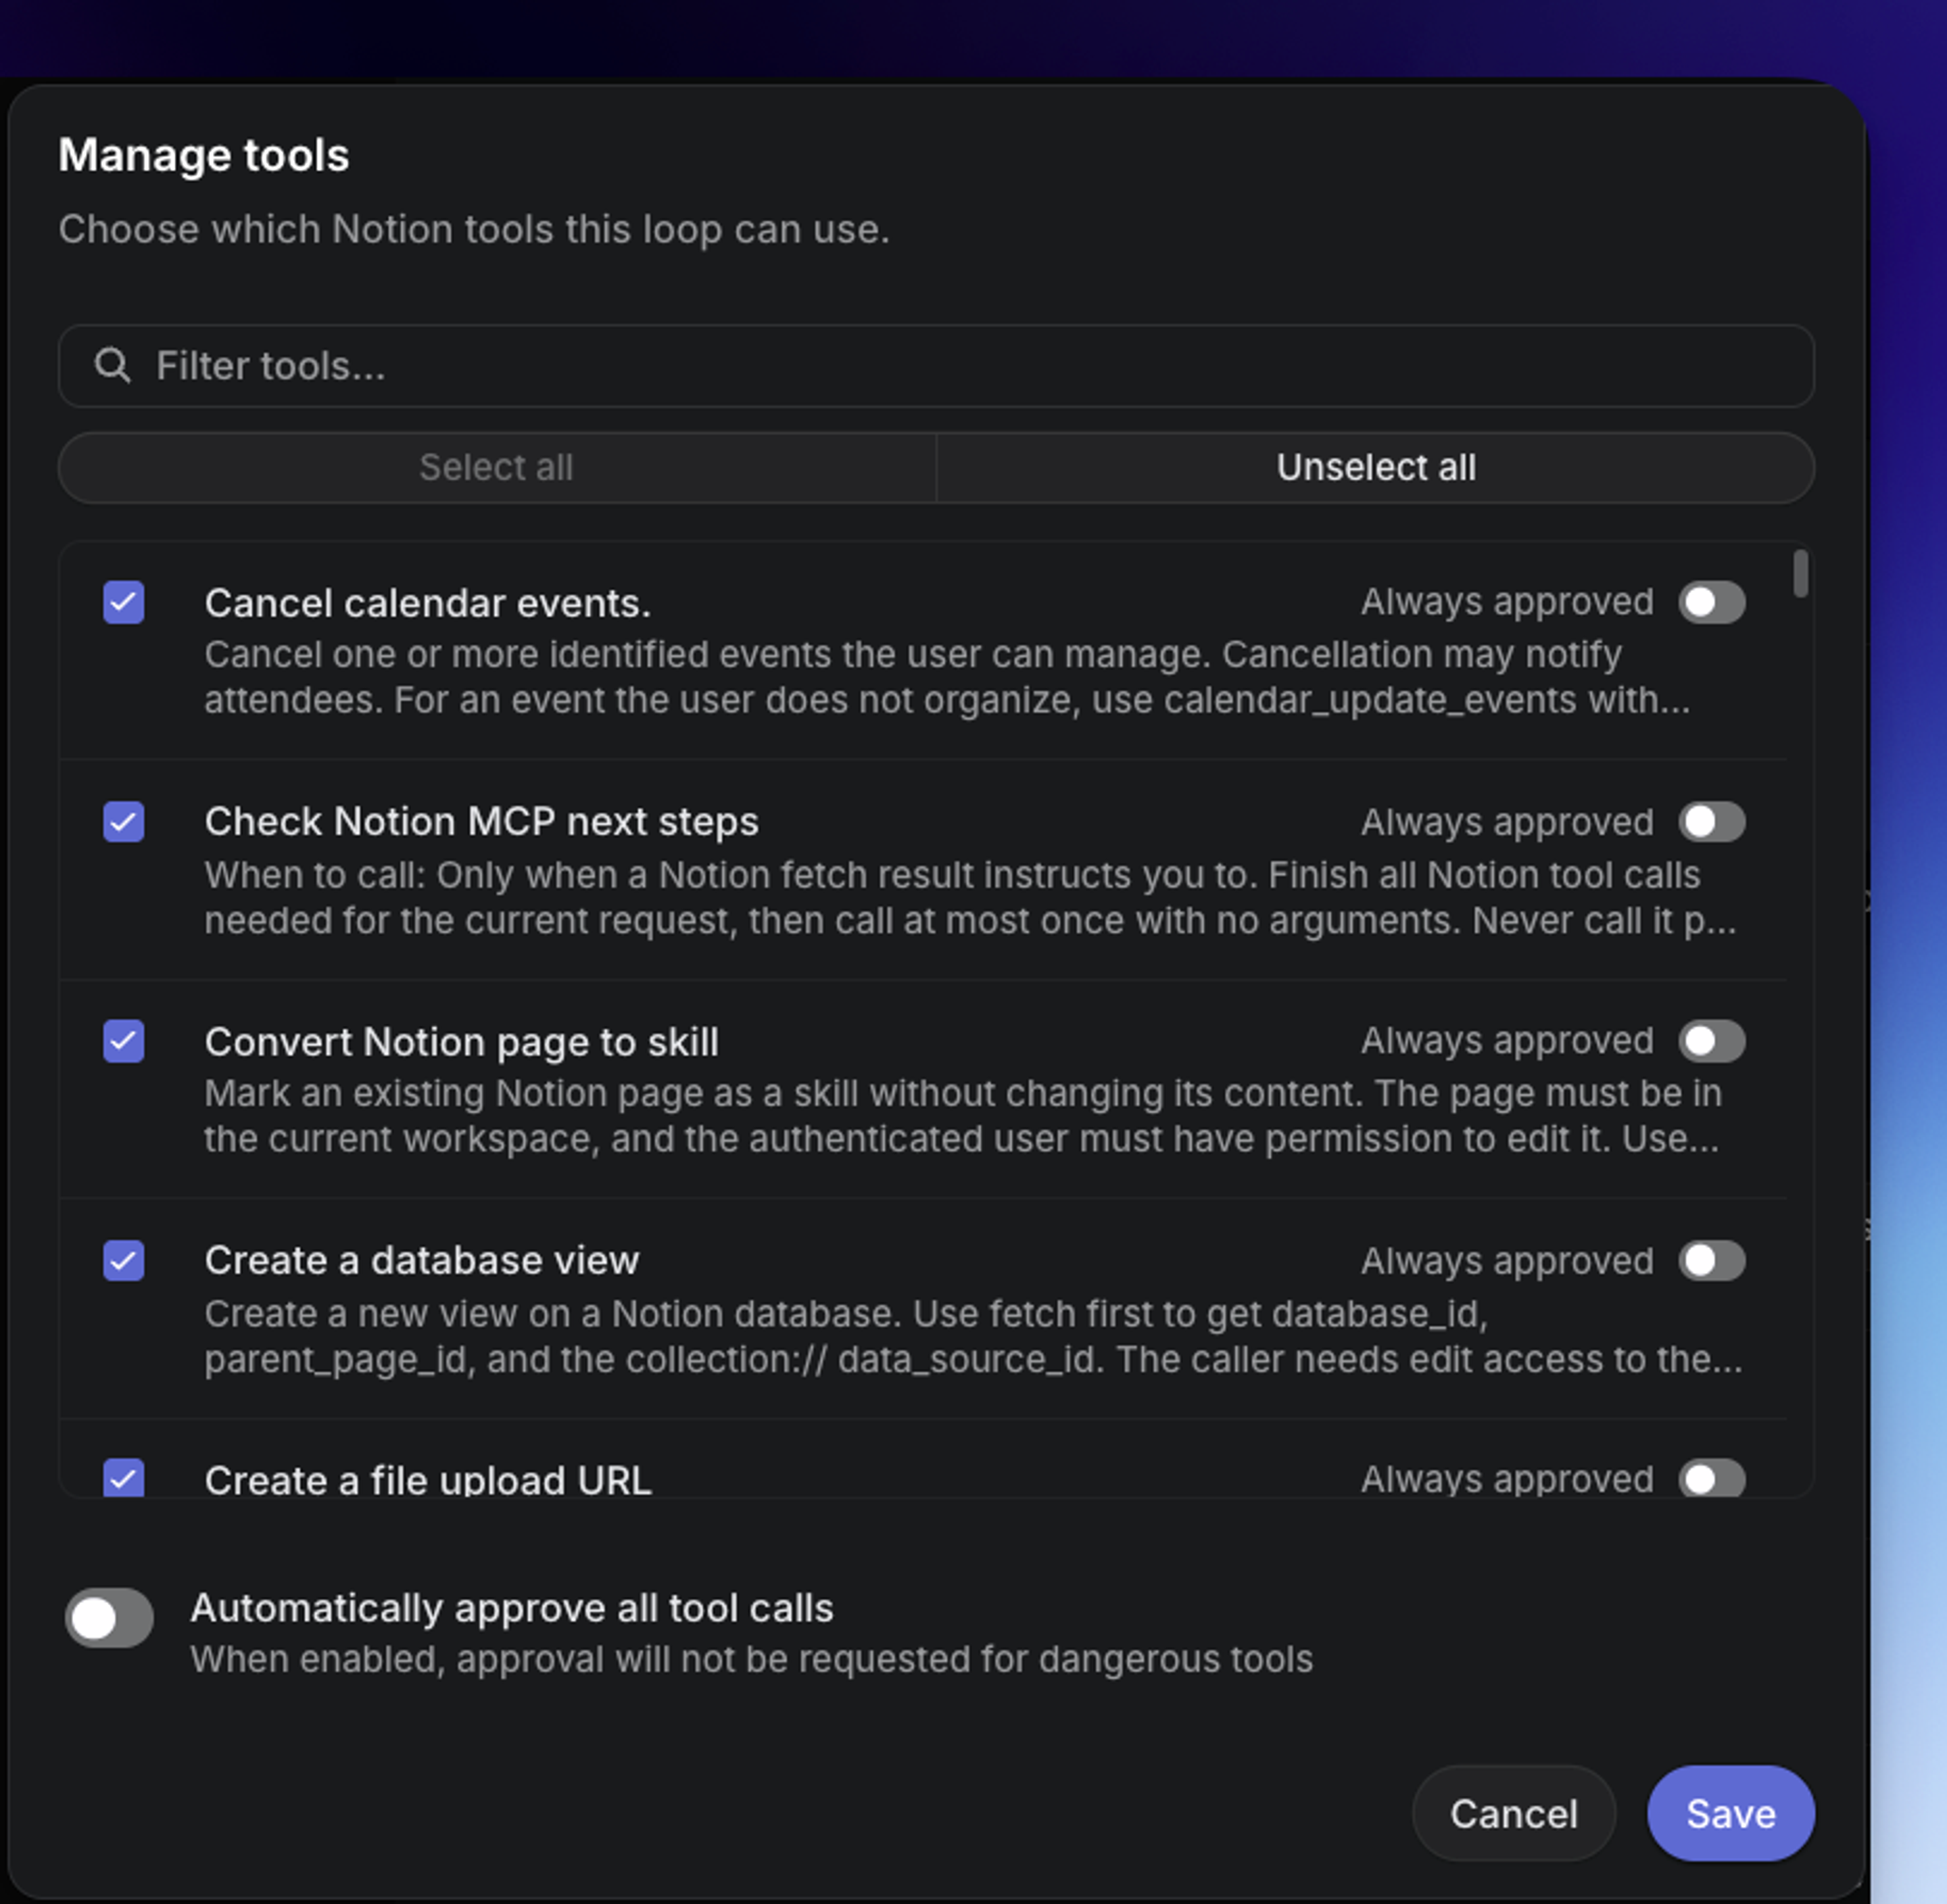
Tool selection controls which tools the loop can use. Automatic approval controls whether tool calls require approval; it does not grant additional access in the connected service. Enable automatic approval only for tools you trust the loop to use without individual review.
Setup
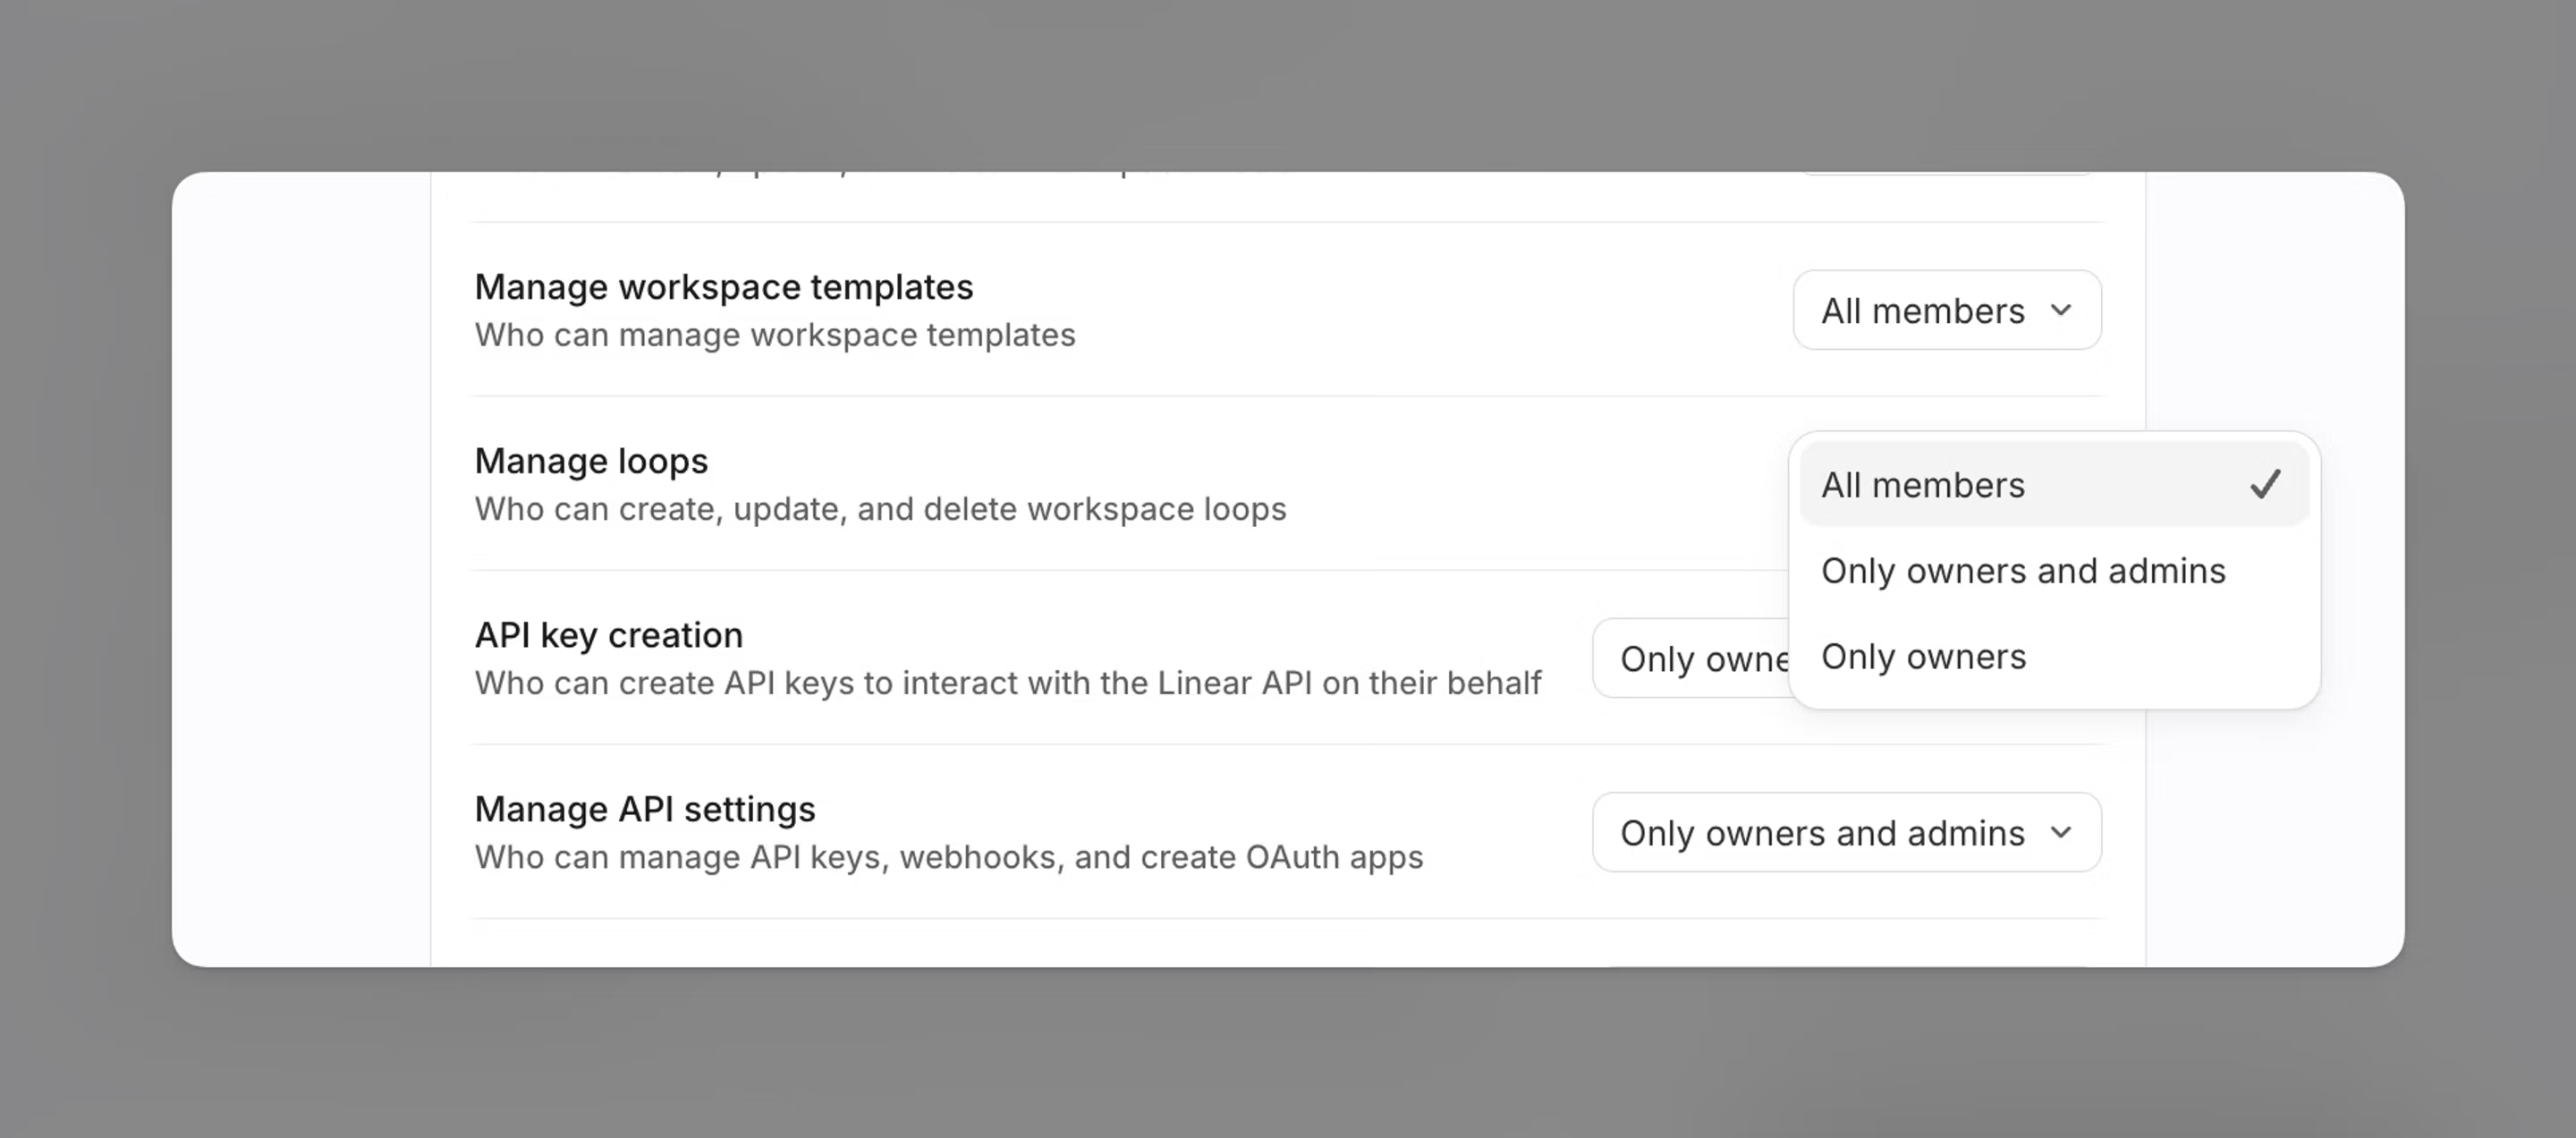
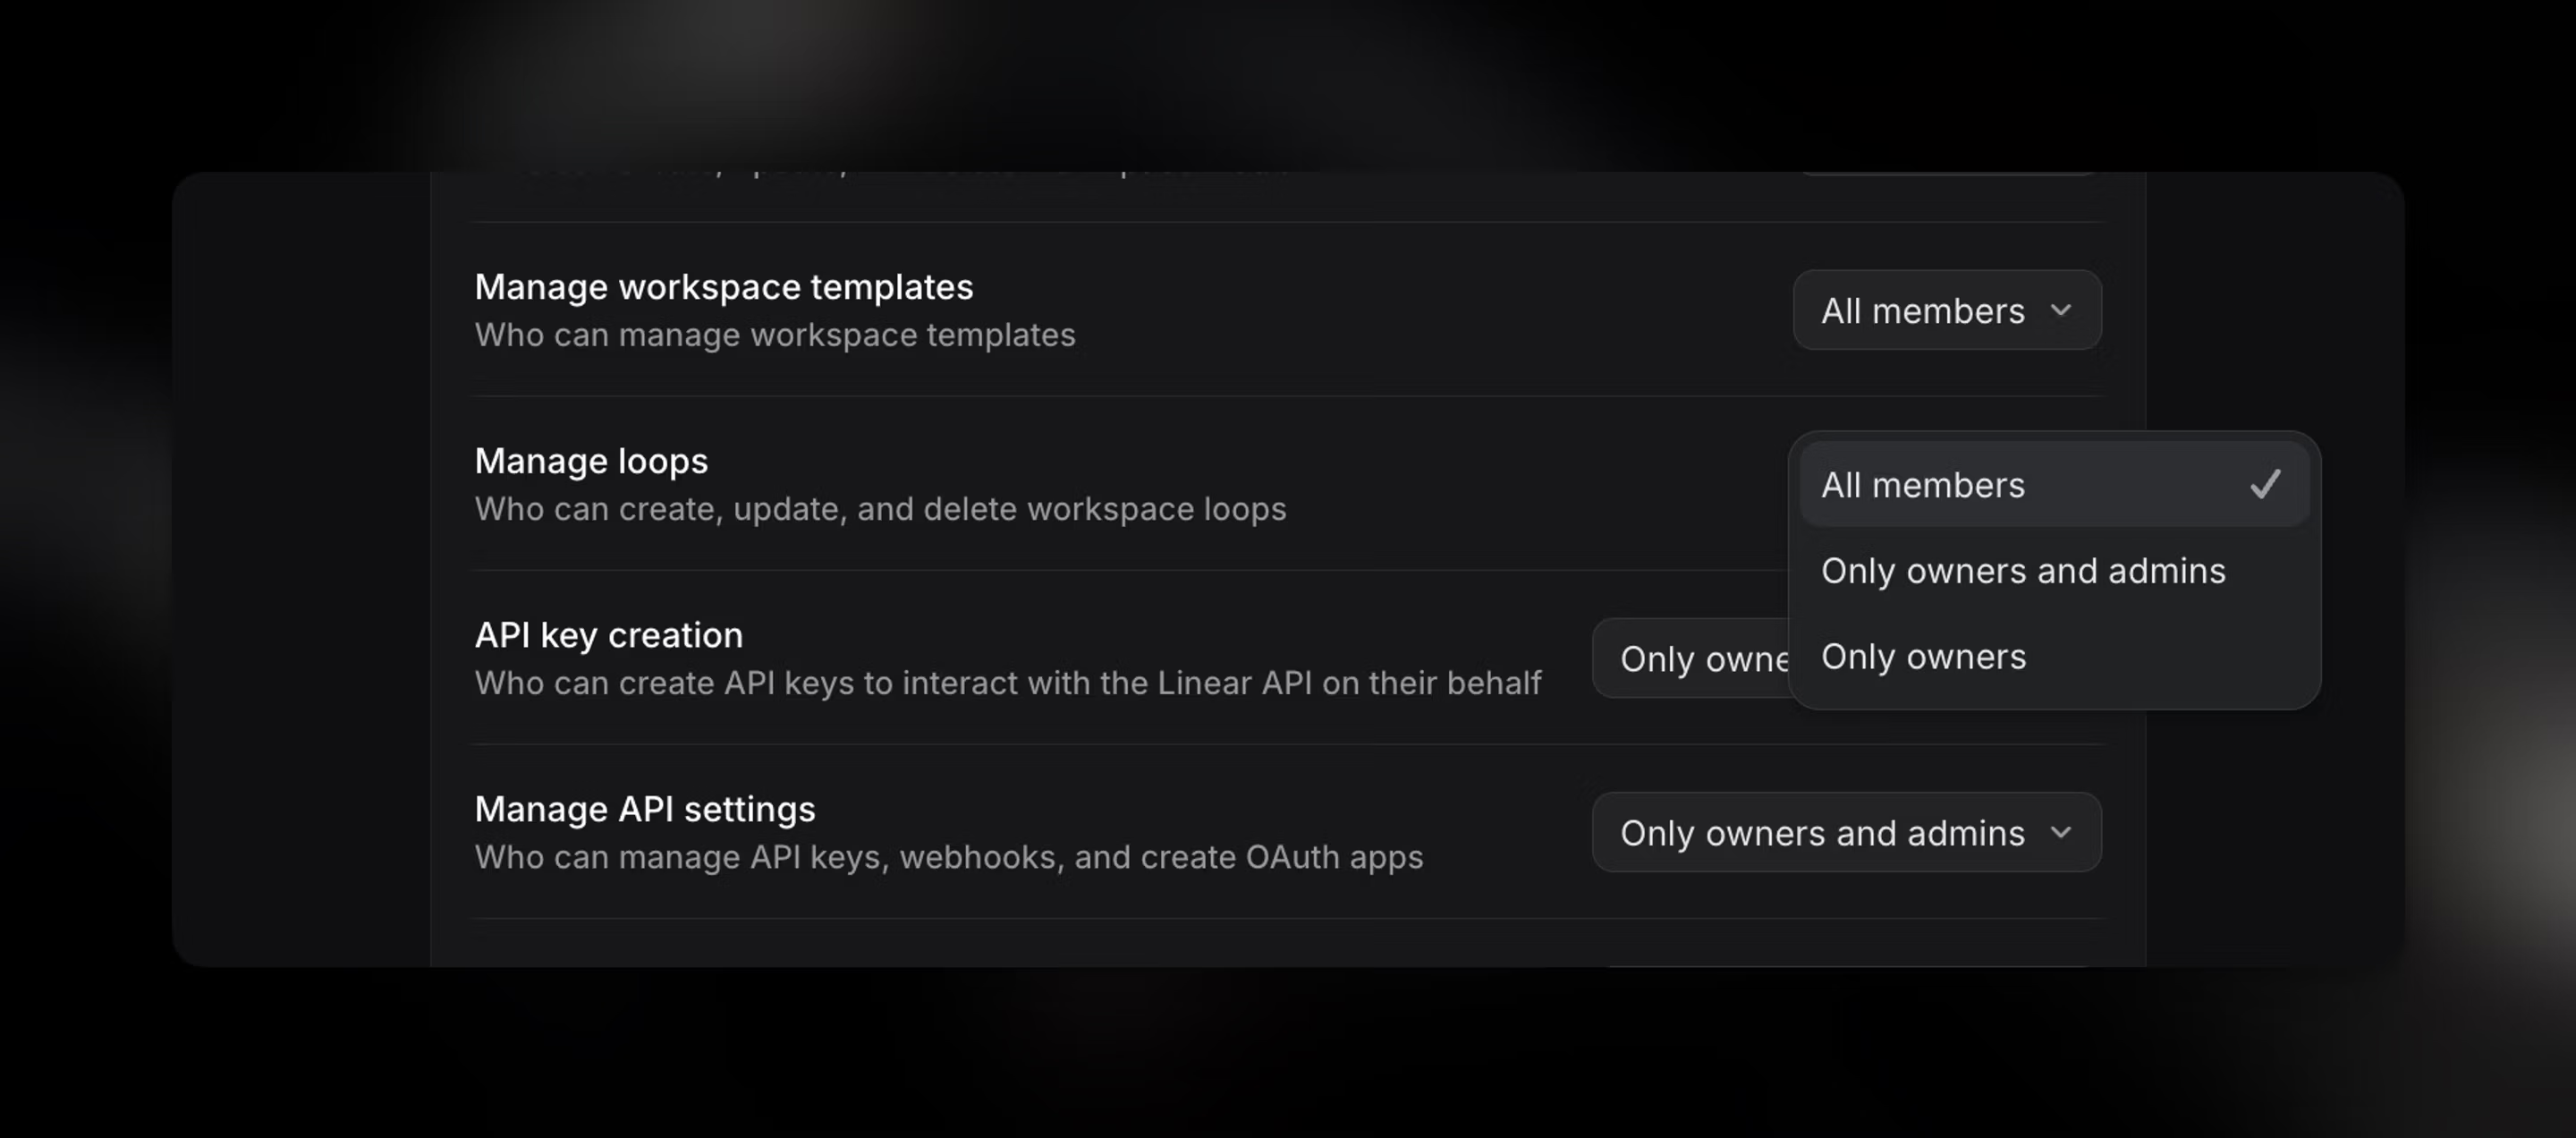
- Workspace owners can manage who can create and manage workspace loops in Settings → Security → Workspace management → Manage loops
- Workspace owners can manage who can save and manage workspace templates in Settings → Security → Workspace management → Manage workspace templates
- Team owners can control who can create and manage loops in Settings → Teams → [Team name] → Access and permissions → Loop management
- To change who can edit a specific loop, open it and then select Who can edit. Choose between all members, workspace admins or team owners, or only the loop owner.
Capabilities & access
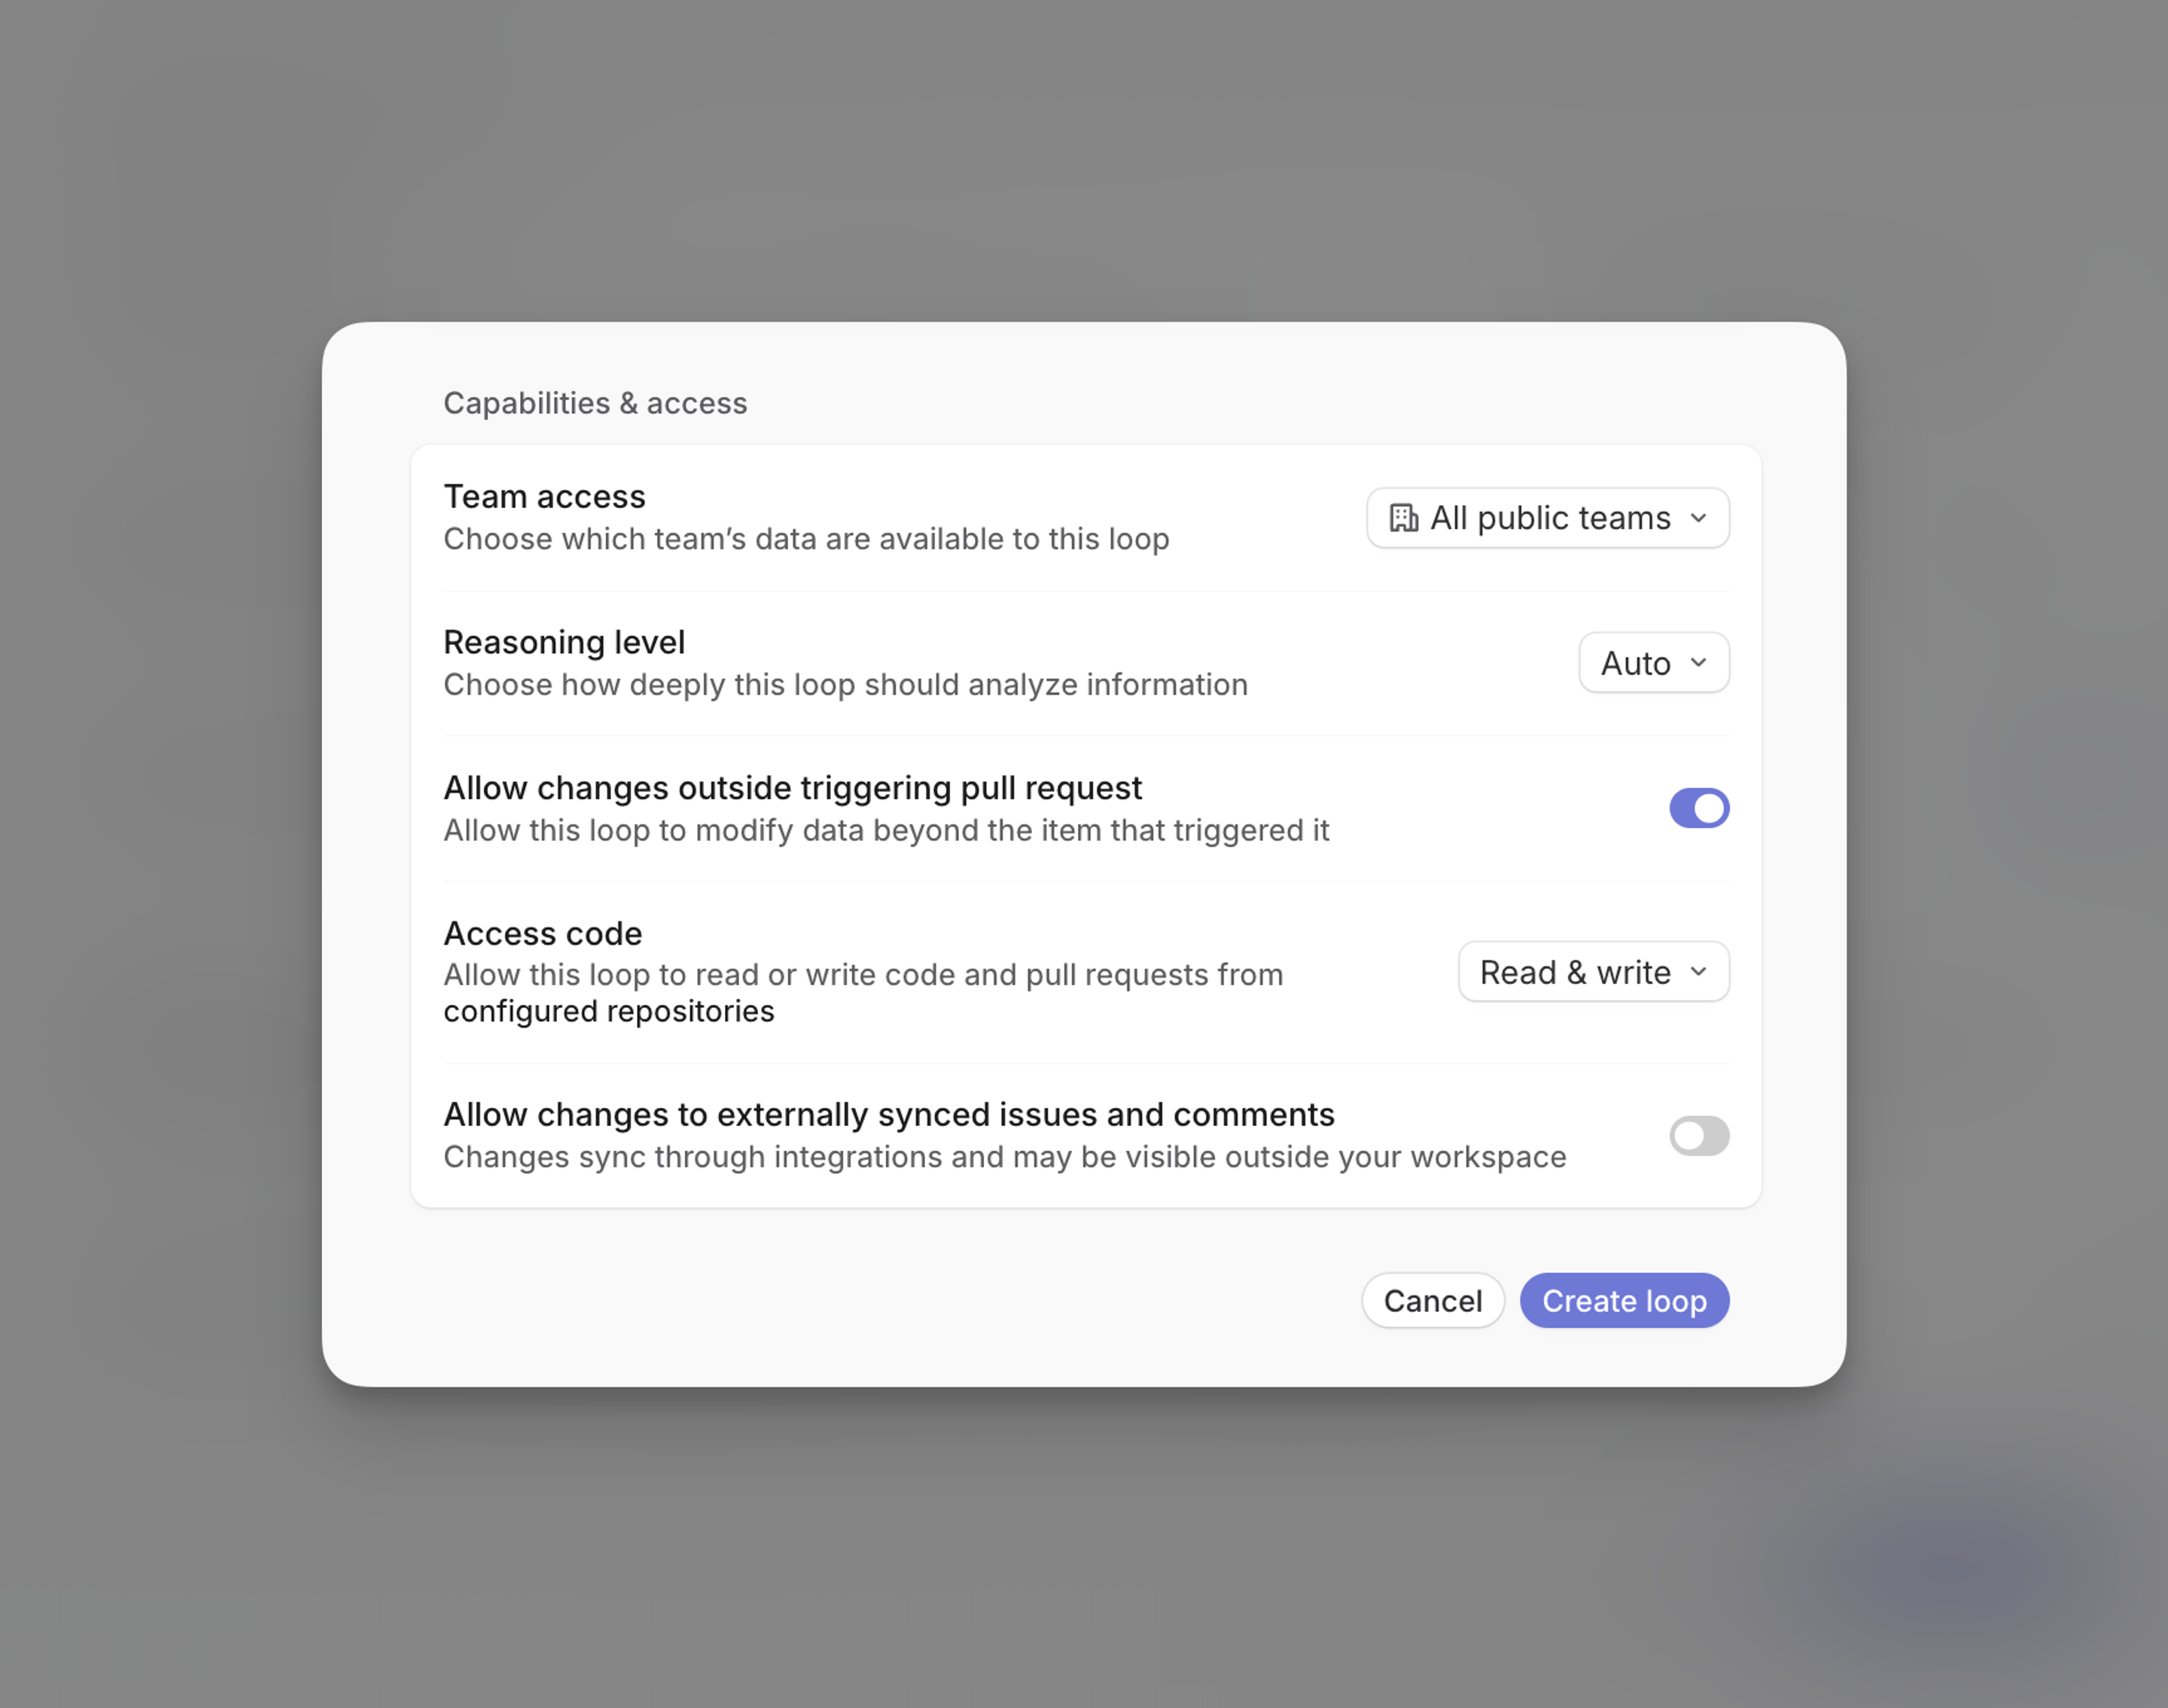
Configure the loop’s scope, reasoning level, and permissions under Capabilities & access. Enable only the access it needs, and consider the impact before allowing changes or connecting external services.
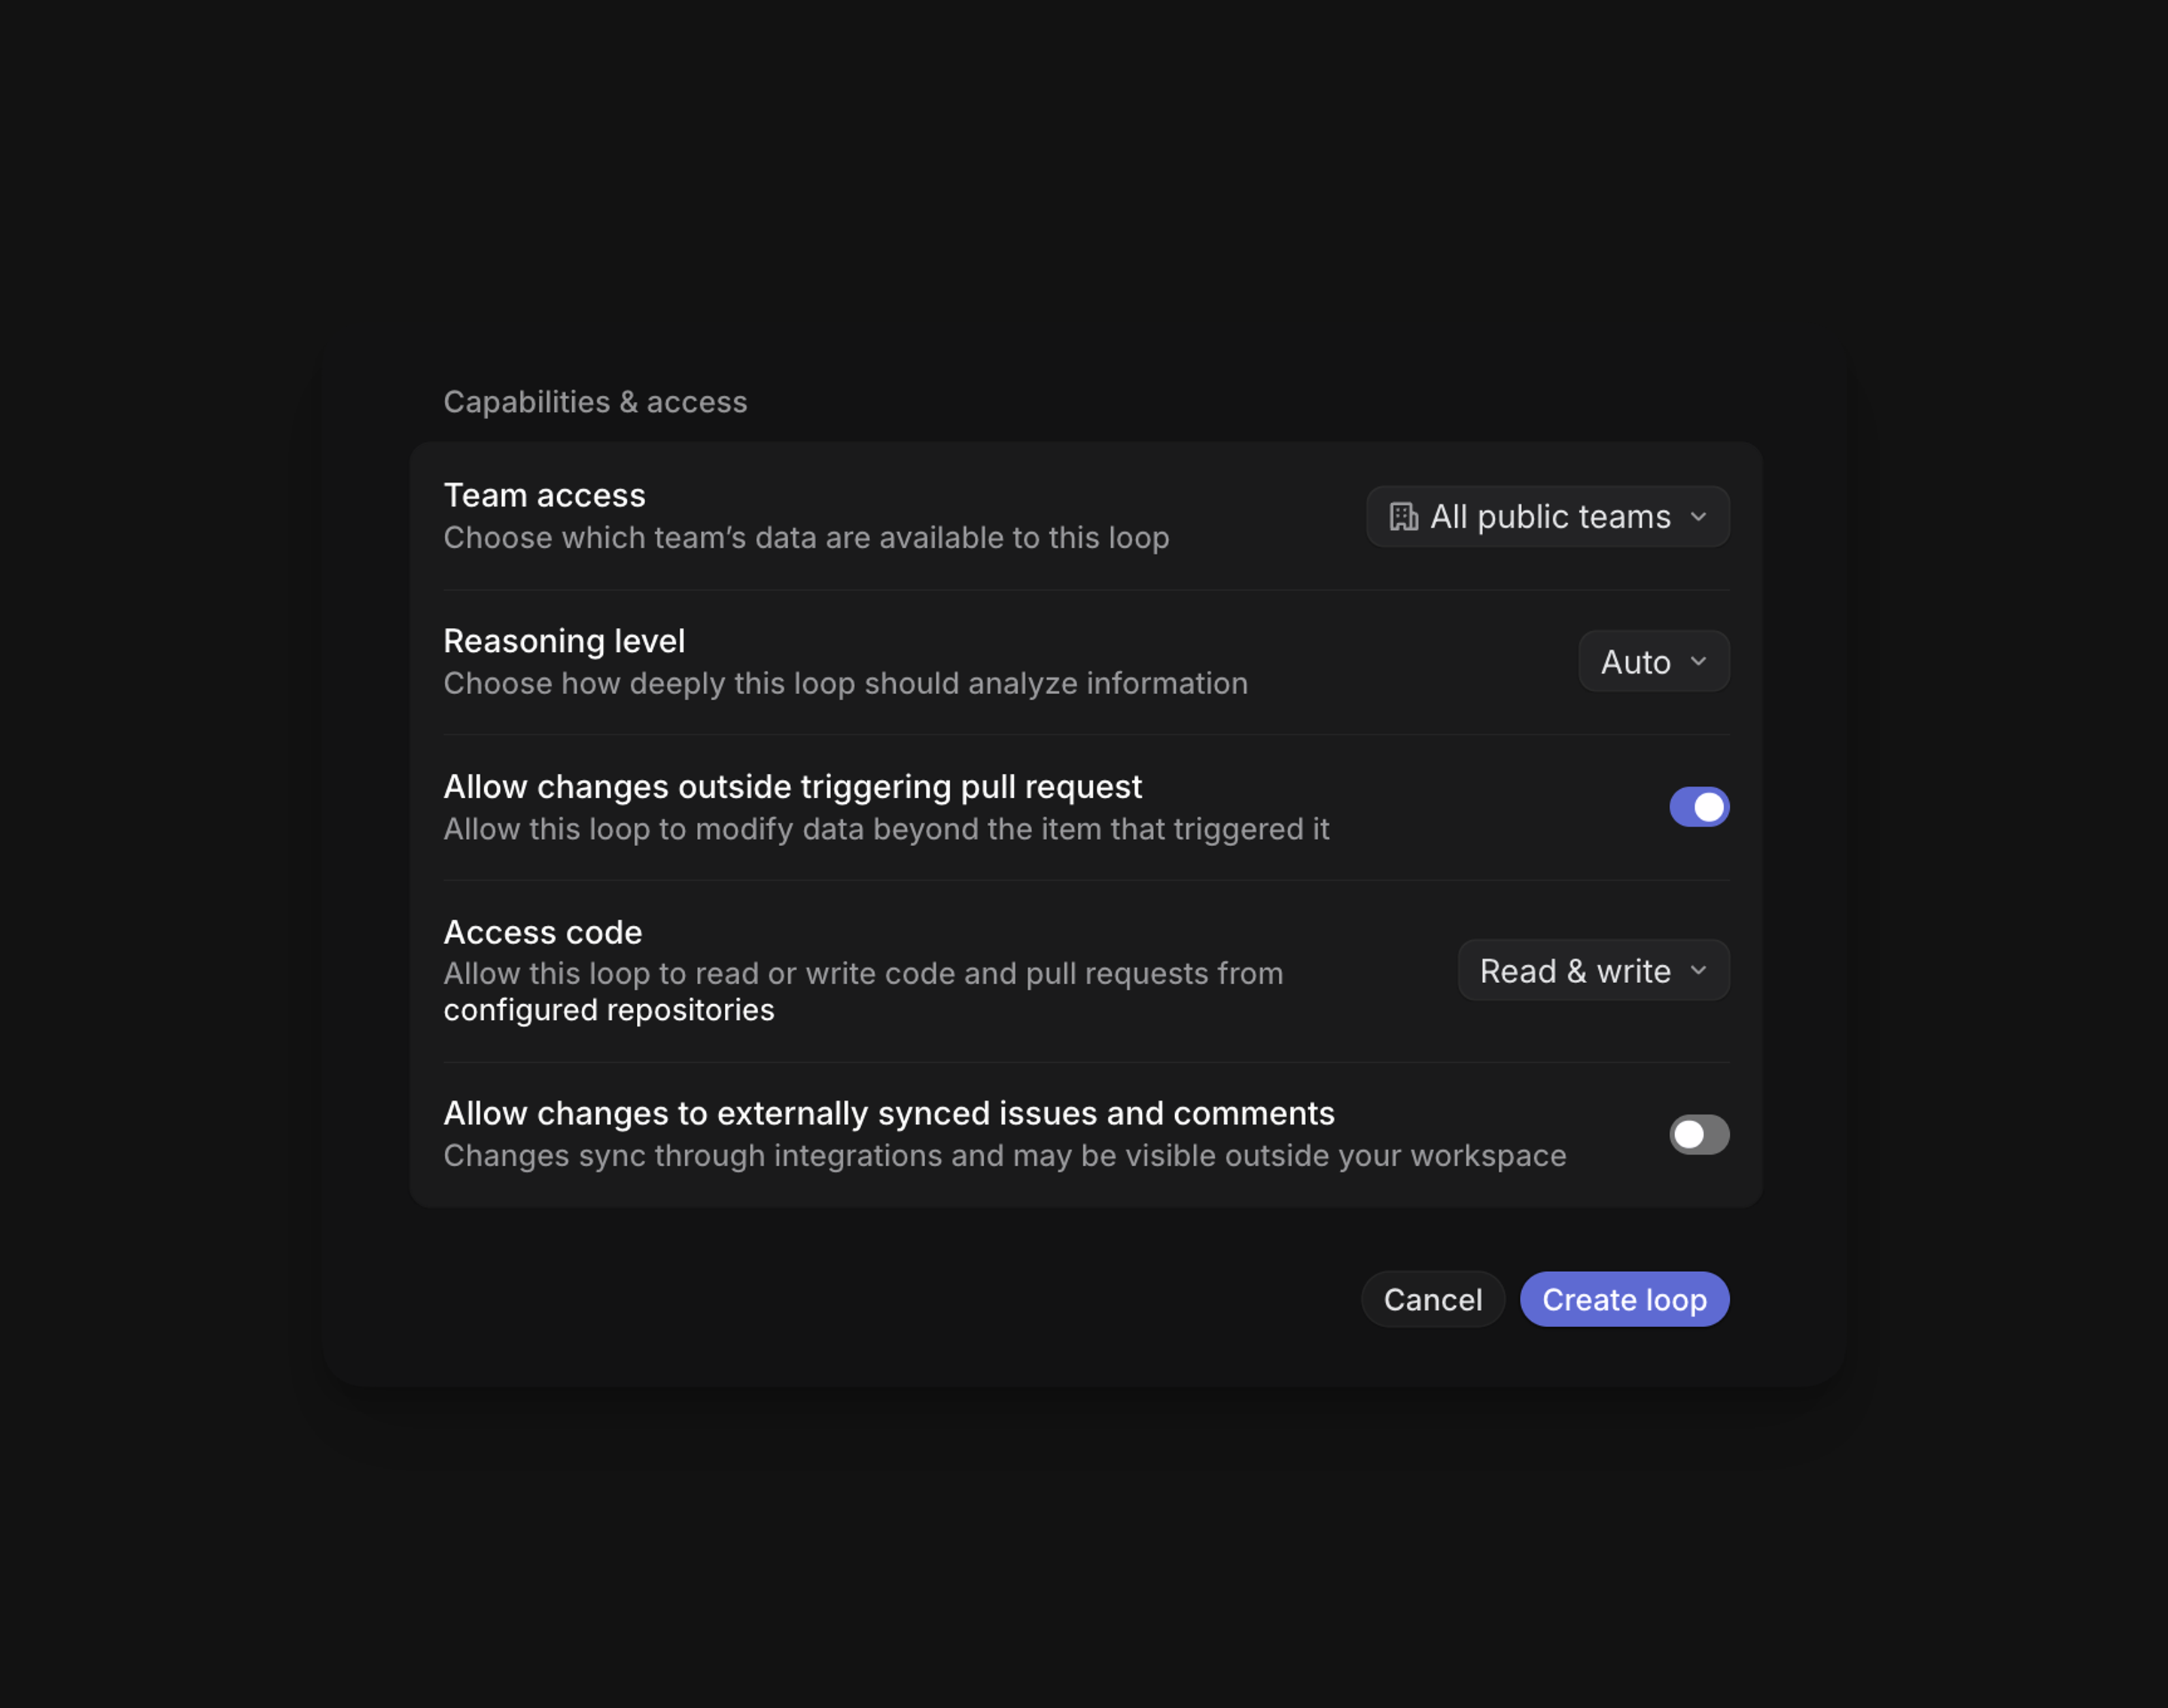
Team access
Controls which teams the loop can access. It can read and write data only in those teams. By default, a loop at the workspace level or in a public team will have access to all public teams, while a loop inside a private team will have access only to that team.
Loops that can access all public teams can also access workspace-level objects like Initiatives and Customers.
Reasoning level
Choose how deeply the loop should analyze information under Capabilities & access → Reasoning level.
- Auto lets Linear select the reasoning level
- Low prioritizes speed and lower cost for simple tasks
- Medium balances speed and depth for everyday tasks
- High provides more thorough reasoning for complex tasks and costs more
Web access
If enabled, the loop can query any website. You can use this to set up loops that can take actions like researching competitor announcements, or checking the documentation of services your product integrates with.
Use caution when enabling web access. Web access can send workspace content to external services. Do not enable it for loops that may process sensitive data unless you are comfortable with that data leaving Linear.
Access code
Under Capabilities & access → Access code, choose how the loop can use configured repositories:
- Disabled prevents code access
- Read allows the loop to inspect code and pull requests
- Read & write also allows the loop to make changes through coding sessions
A workspace admin must configure repository access in Settings → Loops → Allow loops to access code. Coding sessions must also be enabled to use Read & write.
Externally synced issues and comments
If enabled, the loop will be able to write data on issues or comment threads that are synced with external applications, like issues created from Slack with bi-directionally synced threads.
Enable this with care, as some synced threads may be visible outside your workspace - if you use GitHub sync in a public repo for instance, the loop would be able to post comments to that repo’s GitHub Issues.
External sources
Issues can be created from sources outside Linear, such as Slack messages or emails received at a particular address. By default, issue-triggered loops run only on issues created within Linear.
To run an issue-triggered loop on issues created from external sources, enable the relevant sources for that loop. Workspace owners can configure the allowed external sources in Security settings, then enable them for individual loops.
Slack message triggers are configured separately.
Allow changes outside of triggering entity
If enabled, the loop can write data to other entities within its Team access scope. If disabled, it can change only the entity that triggered the run. This setting does not apply to scheduled or Slack-triggered loops.
AI credits
Loops use AI credits, which workspace admins can purchase and manage in Settings. Purchased credits expire 12 months after the purchase date. If a workspace runs out of credits, Loops pause unless an admin purchases more credits or enables auto top-ups. Workspaces are charged automatically only when auto top-ups are enabled.
Promotional Loops AI credits
Some workspaces may receive promotional Loops AI credits with separate expiration terms. Eligible workspaces will be notified by email.
FAQ
Clearly describe the intended outcome and any actions Linear Agent should avoid.
For example:
Investigate the issue using the available context. Add a comment summarizing the likely cause and recommend the next action. Do not change the issue’s assignee or status.
For best results:
- Use Linear Agent chat to help build your instructions. See Create loops with Linear Agent for guidance.
- Describe the outcome, not only an action
- Specify which context or connected tools Linear Agent should use
- State which changes are permitted
A loop can only use MCP connectors that are connected to your workspace, enabled for Linear Agent, and allowed by your workspace admins. Access also depends on the loop’s scope and permissions.
Enable web access only when a loop needs information from external websites.
A good fit is research on public information, like competitor announcements, documentation, or API references, where the loop does not need to send sensitive workspace content to external services.
Enable this intentionally, since allowing external web access can increase the risk of exposing workspace data outside Linear.
A workspace admin must configure repository access in Settings → Loops → Allow loops to access code. In the loop editor, select Capabilities & access → Access code → Read. Read & write also includes code-reading access.
A workspace admin must enable coding sessions and allow the required repositories in Settings → Loops → Allow loops to access code. In the loop editor, select Capabilities & access → Access code → Read & write.
Open Settings → Usage & limits to review AI credit usage. Loop spend includes the loop’s own work and any coding sessions it starts. Learn more about usage and spend limits.
If your workspace runs out of AI credits, loops stop running until more credits are added.
To troubleshoot, open the loop’s Run history to check recent runs and any visible failures.
Common causes a loop run might fail include missing permissions, untrusted external sources, or your workspace running out of AI credits.
To get a more detailed description of what went wrong, you can also ask Linear. Press ⌘/Ctrl + J while looking at the run history and ask for a detailed description of why the loop run failed.
You can use Run now for enabled loops that use Linear Agent and have a schedule, issue, project, or initiative trigger.
For issue, project, and initiative triggers, choose the entity you want to use for the run. Run now is not available for cycle triggers.
Run now is not available for pull request triggers. These loops run when a matching pull request event occurs.
Scheduled loops can run hourly, daily, weekly, monthly, or yearly. Choose the timezone and when the loop should first run.
Weekly schedules can run on one or more days of the week. The first run date cannot be in the past.
Triage loops are created for a specific team and require triage to be enabled for that team. They run when an issue enters the team’s triage queue and begins matching the configured conditions.
Triage loops do not support schedules or non-issue triggers.
Teams can create up to 100 loops, and workspaces can create up to 500 workspace-level loops. Each person can keep up to 100 unpublished loop drafts.
Loop names can be up to 64 characters, and descriptions can be up to 255 characters. A loop can include up to eight conditions.
Deleting a loop is permanent and cannot be undone. Consider disabling the loop instead if you may need to restore it in the future.
A loop triggered when conditions start matching runs when an item begins matching those conditions. Further updates do not trigger another run while the same conditions remain matched.
Event-triggered loops run whenever the selected event occurs and any configured filters match. For example, adding the QA Test label can trigger a run even if other labels on the pull request have not changed.