Connect MCP Servers to Linear Agent
Overview
Linear Agent can connect to MCP servers to access tools and data outside of Linear.
This lets the agent bring external context into your workflows to investigate issues, plan projects, write specs, and draft updates grounded in your full context.
MCP works across Linear Agent chat, comments, and automations, and is enabled at the workspace level by Admins.
Available MCP servers
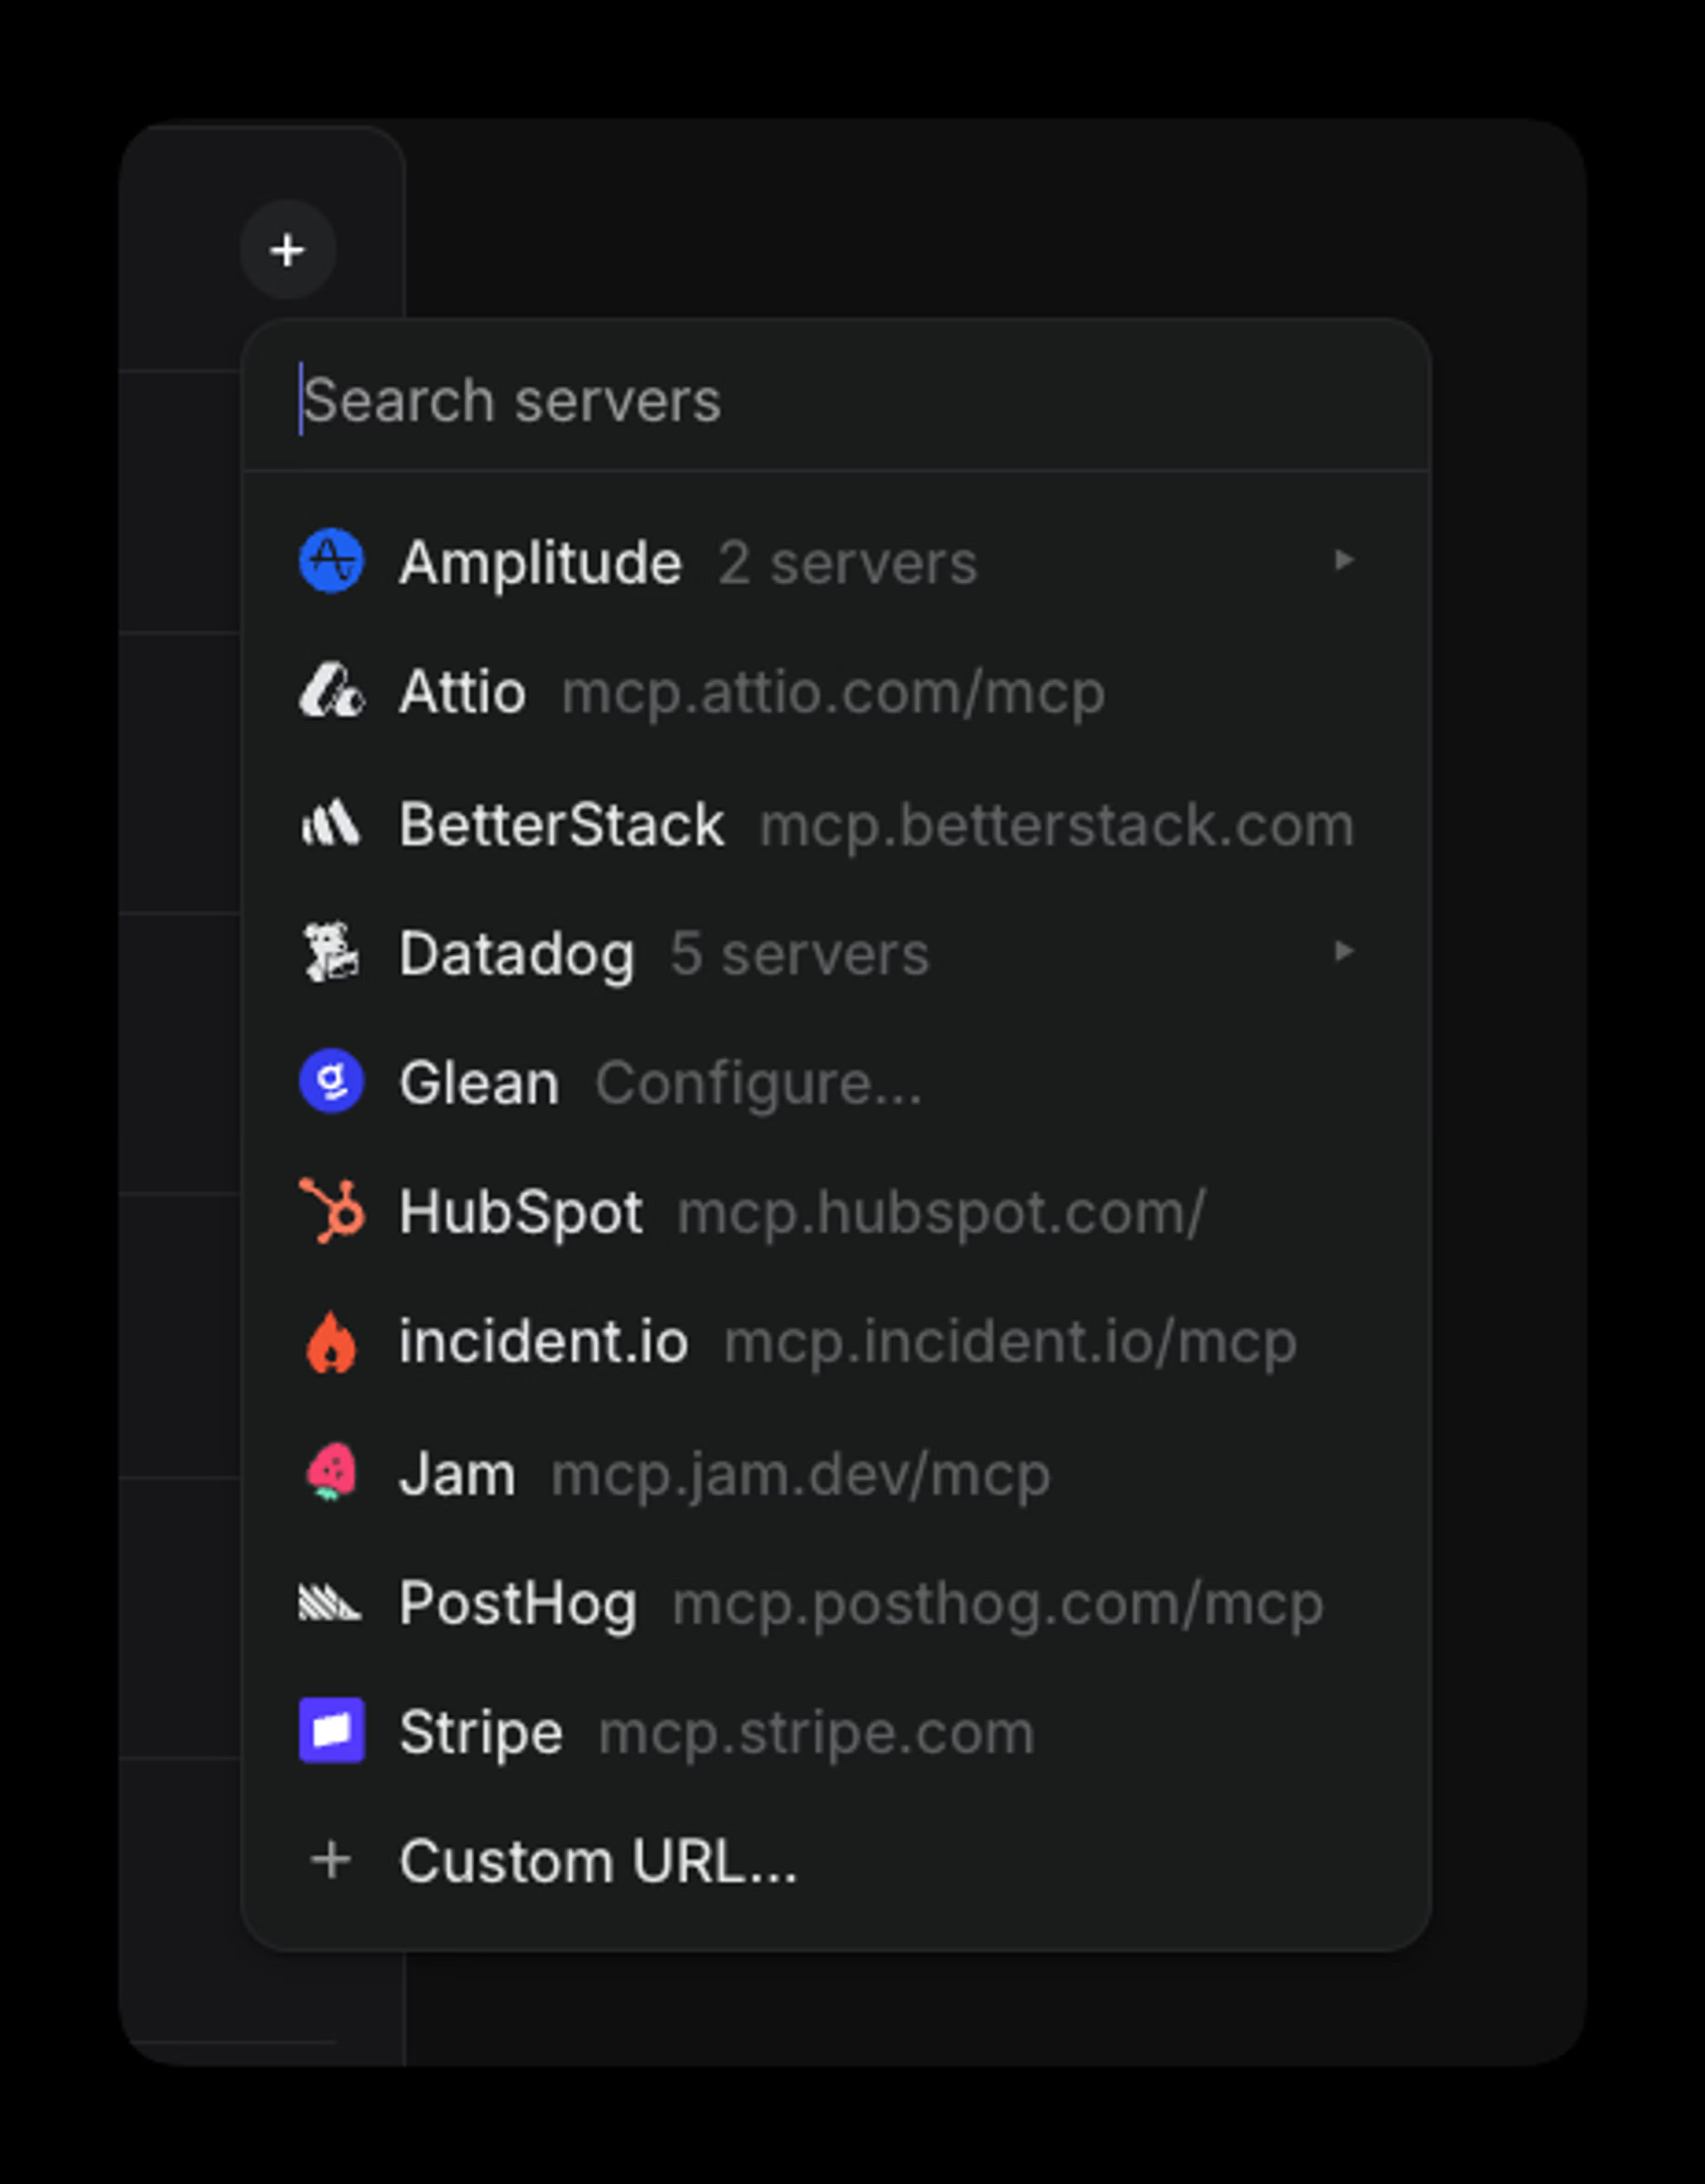
- Amplitude
- Attio
- Better Stack
- Datadog
- GitHub
- Glean
- Granola
- HubSpot
- incident.io
- Intercom
- Jam
- Notion
- PostHog
- Sentry
- Slack
- Stripe
Setup
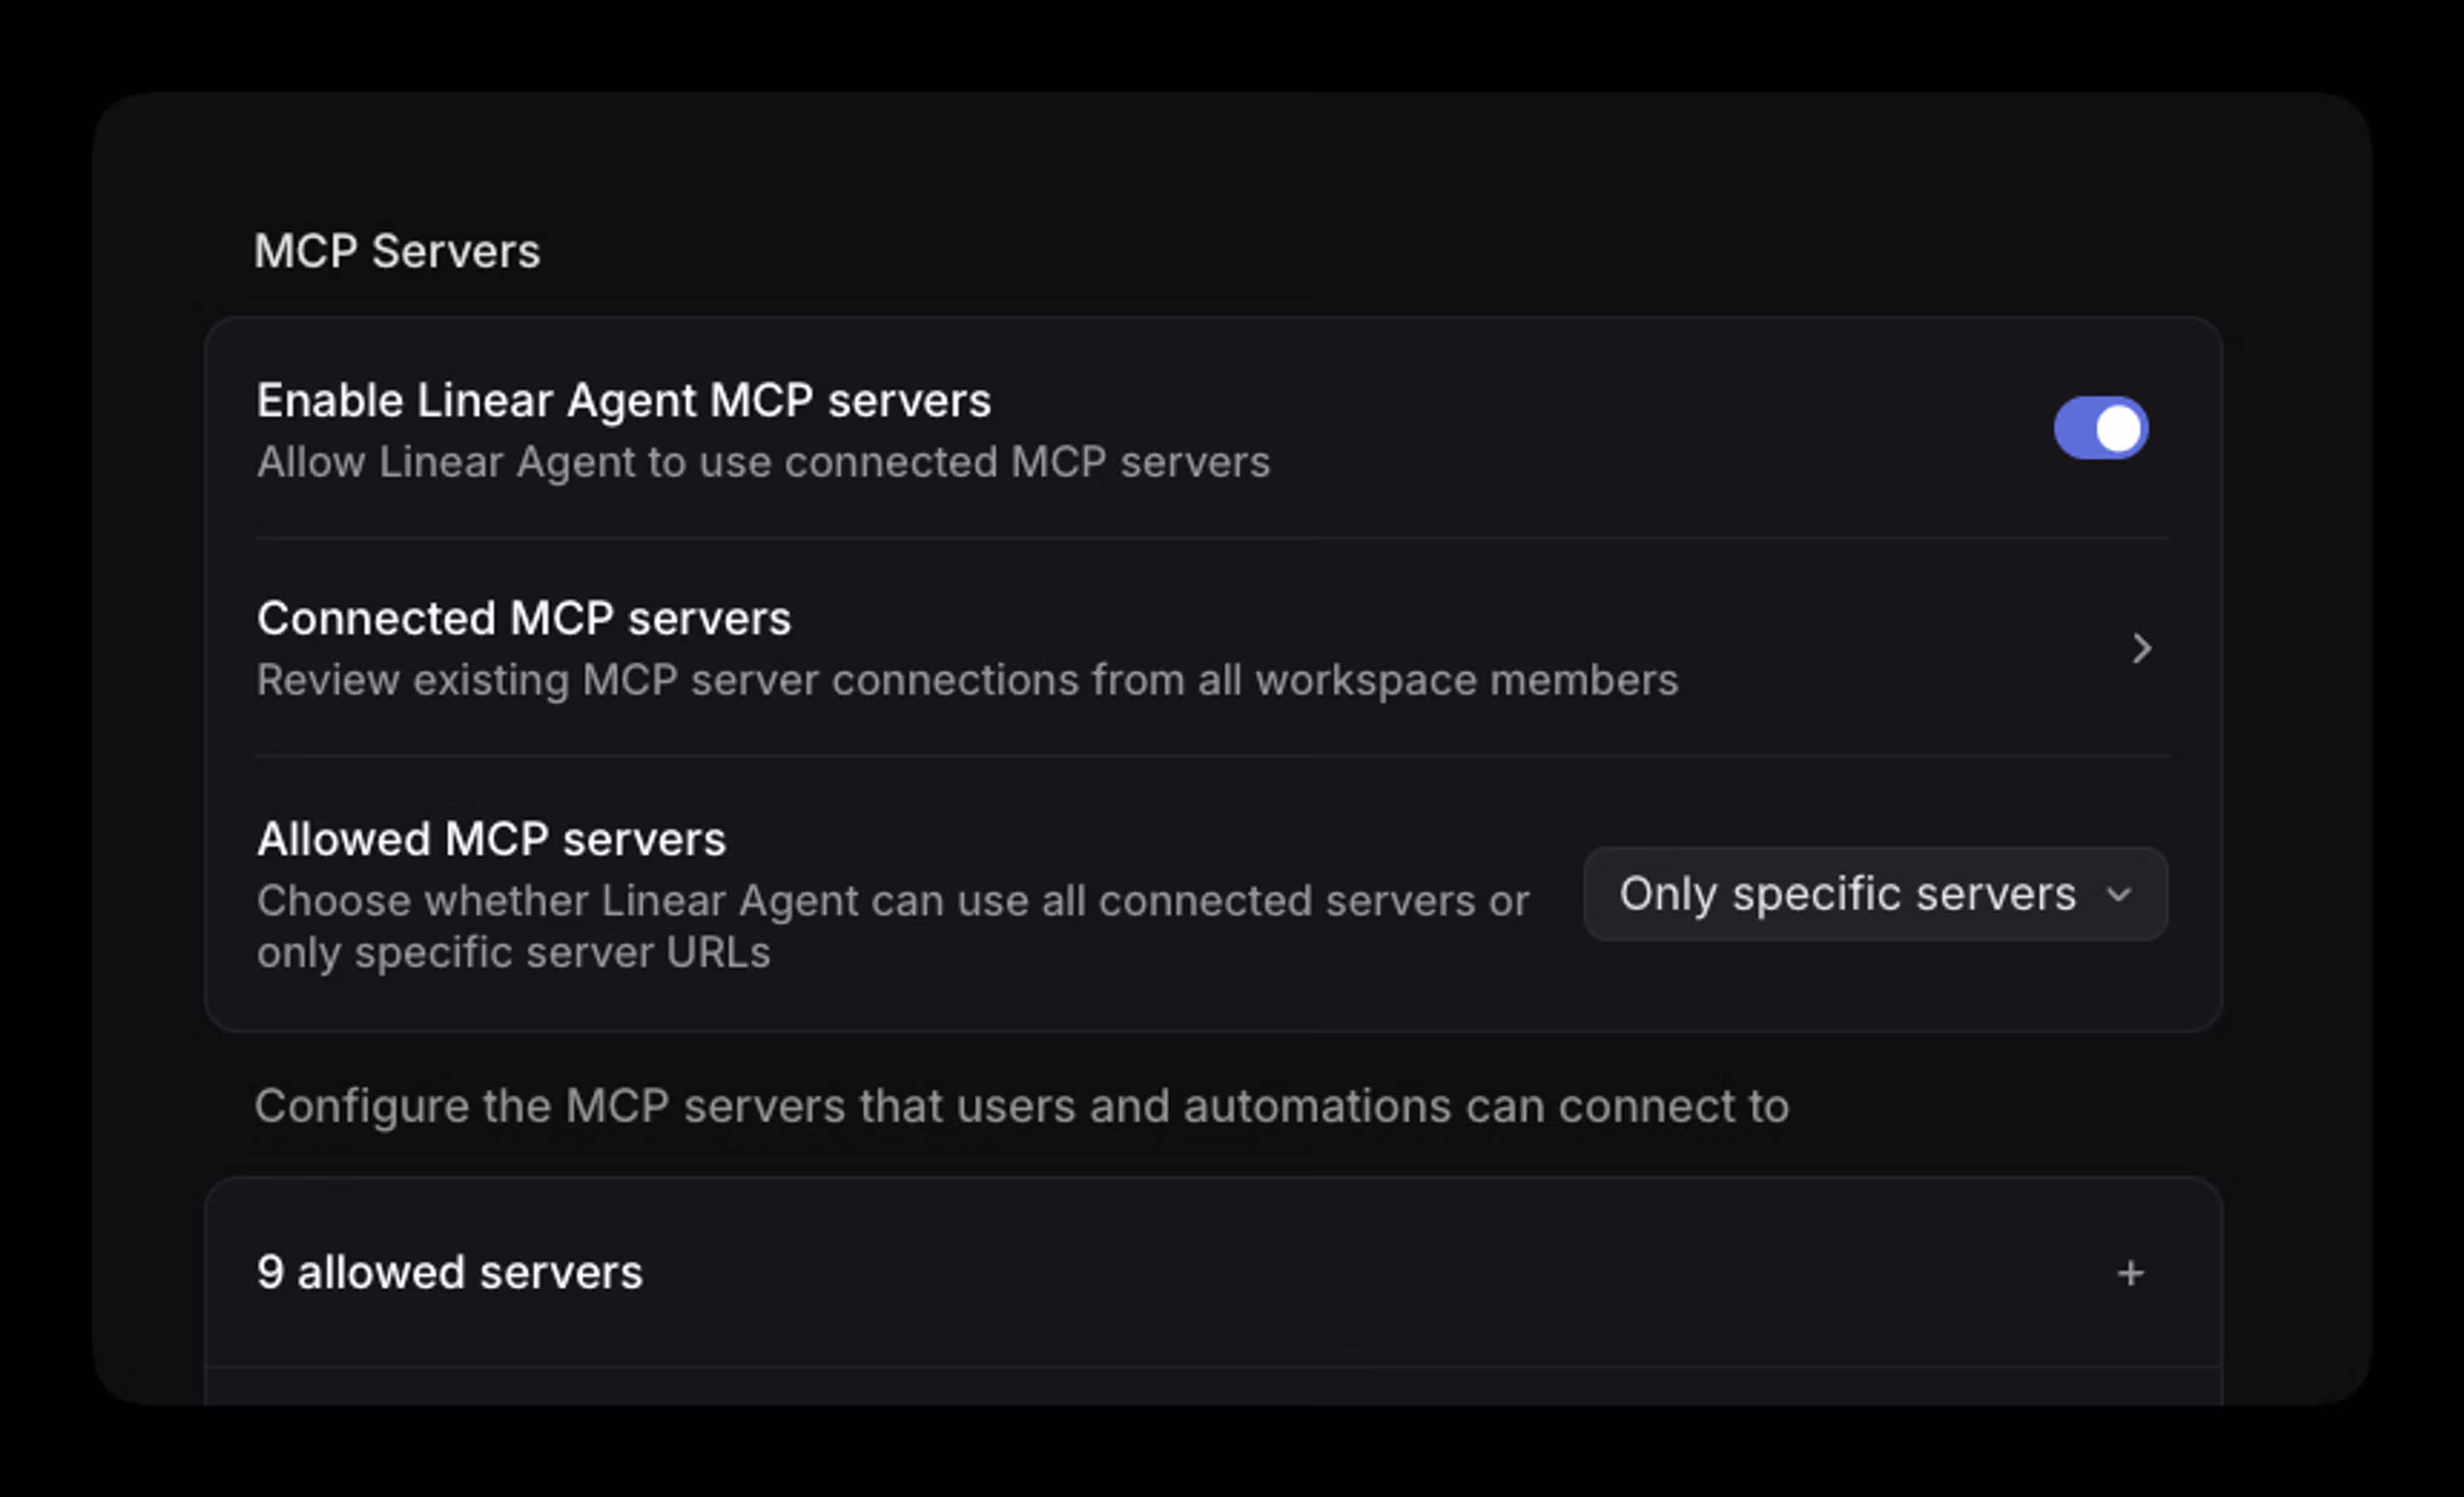
A workspace owner or admin can enable or disable MCP support for the workspace, restrict usage to approved MCP servers, and manage workspace-connected MCP servers.
Inherited from workspace-level settings, users can then configure their preferred MCP servers to leverage when collaborating with Linear Agent.
Workspace configuration
- Open Workspace settings > Security
- Beside Enable MCP servers toggle it to “On”
- Under Allowed MCP servers, choose All servers or Only specific servers
- Scroll down to MCP servers and select any that users and automations can connect to via Linear Agent
Individual server connection
Each user in your Linear workspace can configure their preferred MCP servers, based on restrictions defined at the workspace-level.
- Open Settings > Agent personalization
- Under MCP servers click on the “+” (Add server) button
- Choose a server and start the connection flow
- Complete authentication with the provider
- Return to Linear and confirm the server shows as connected

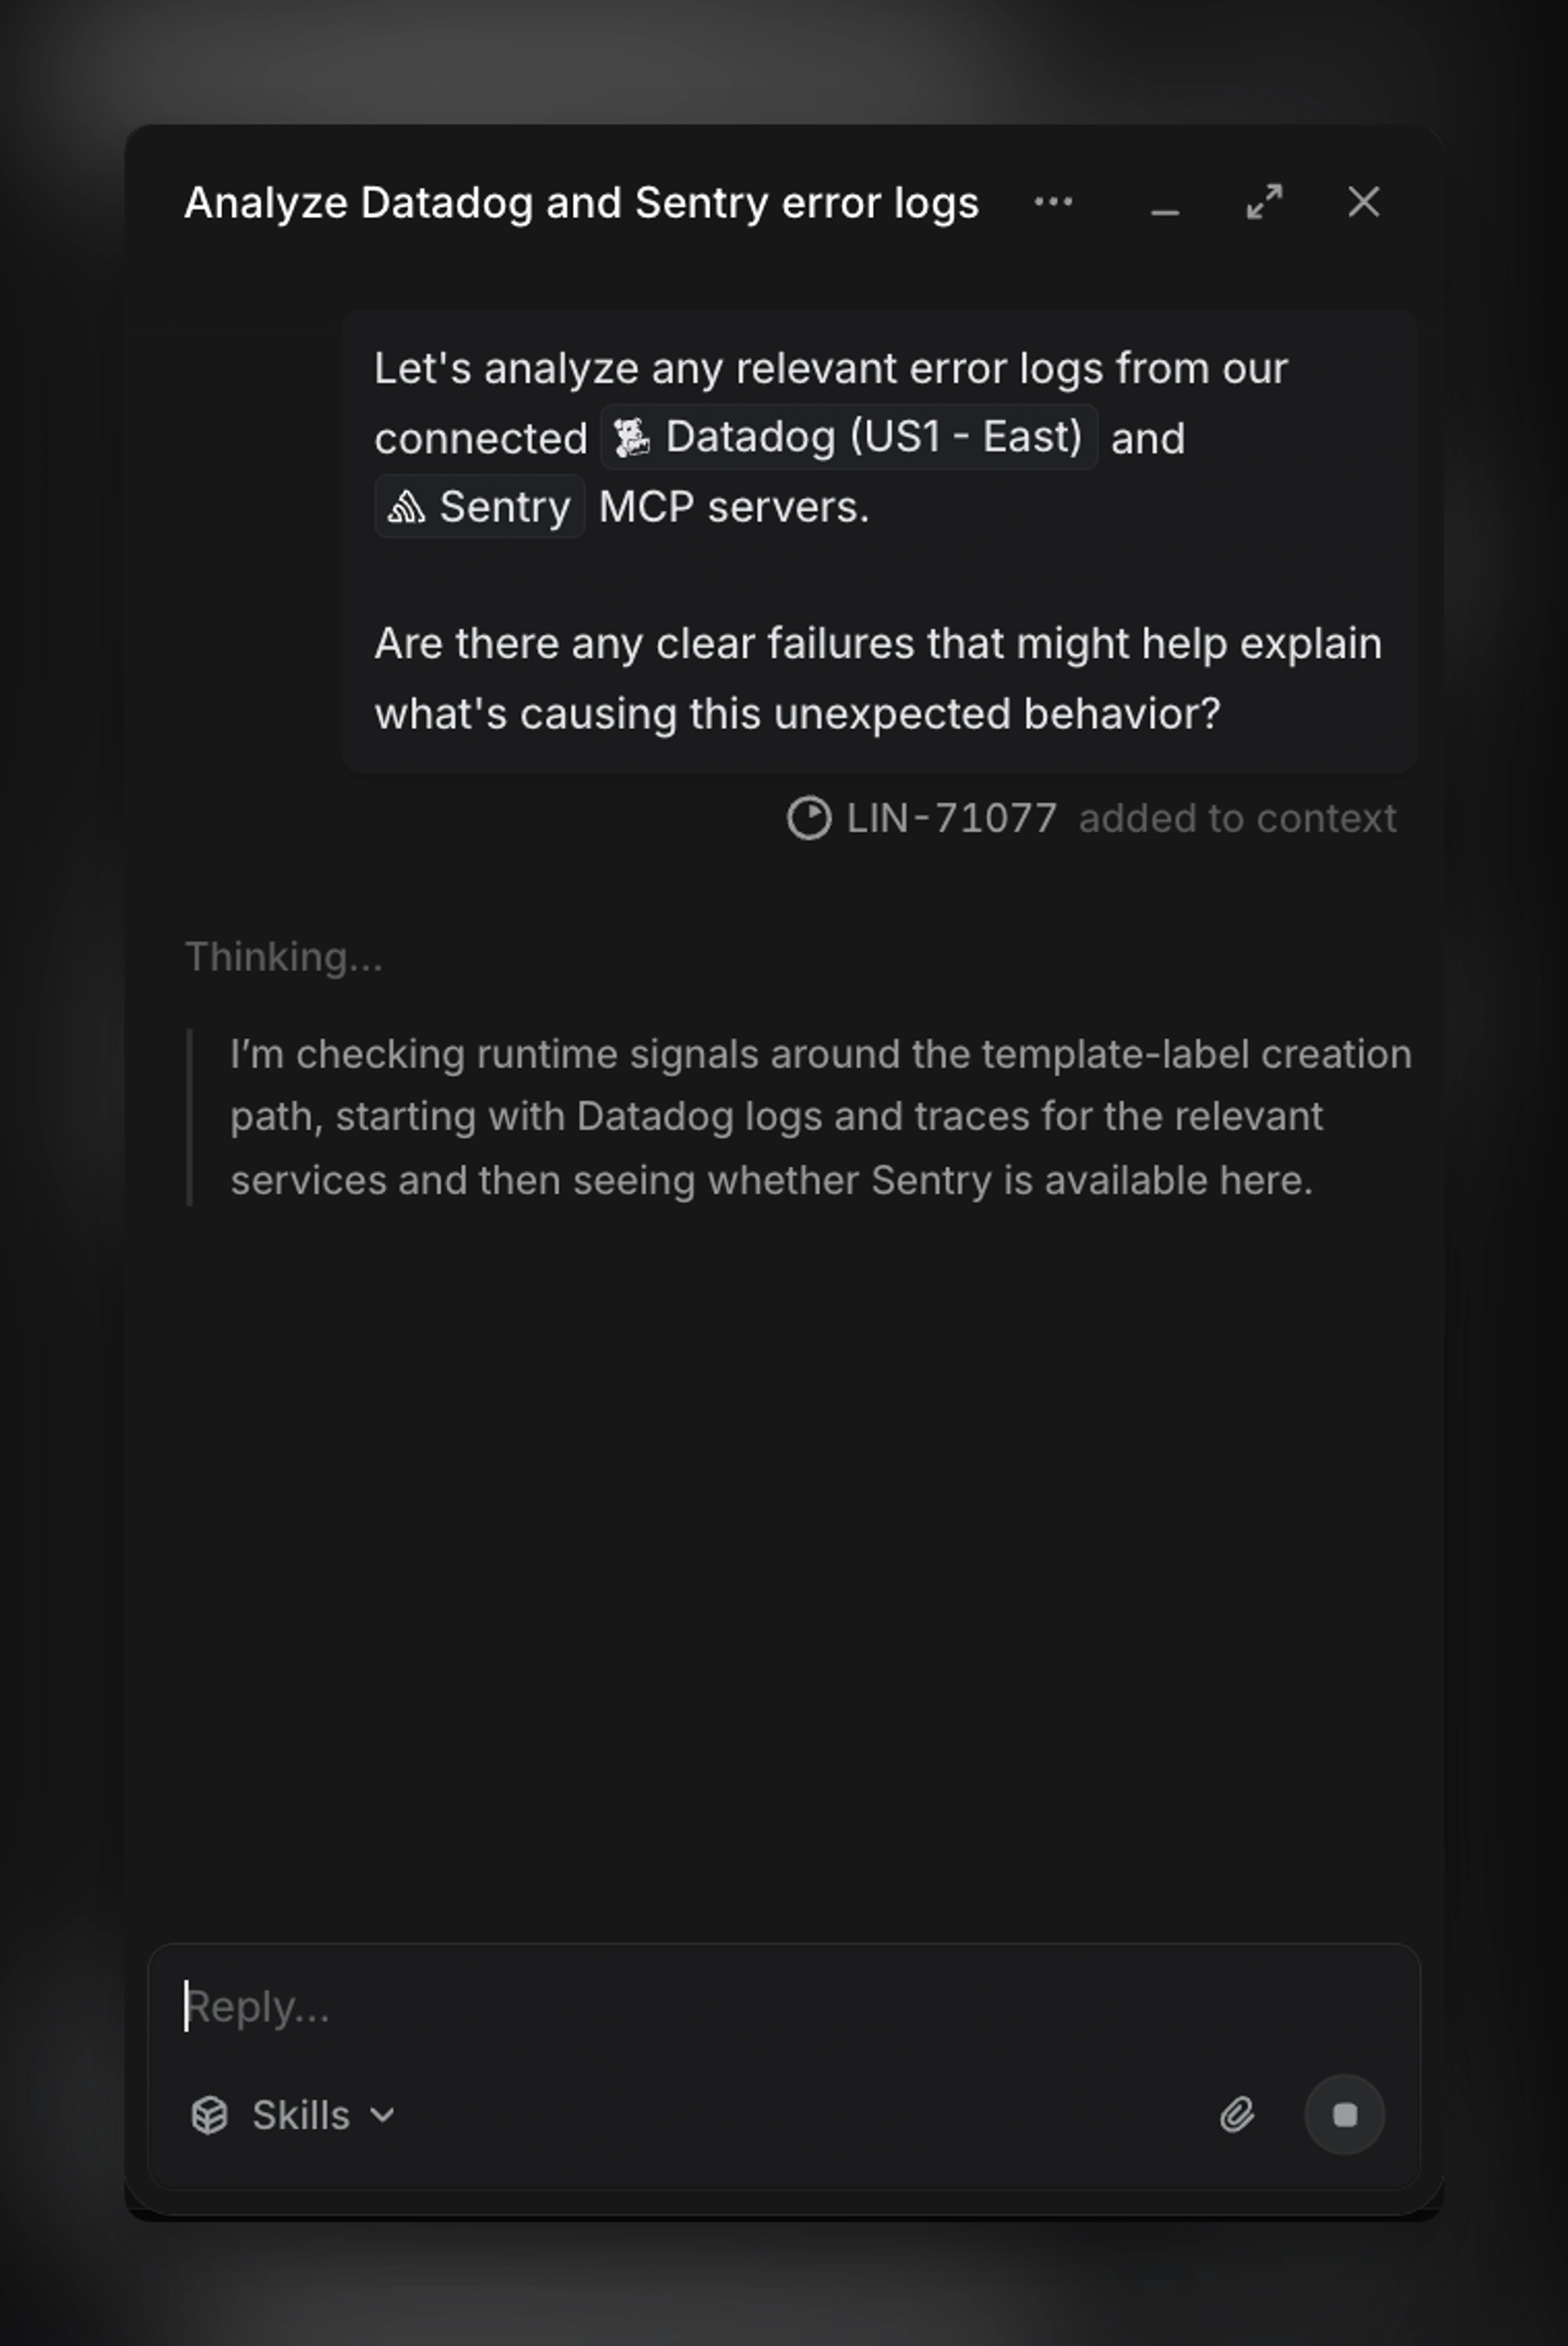
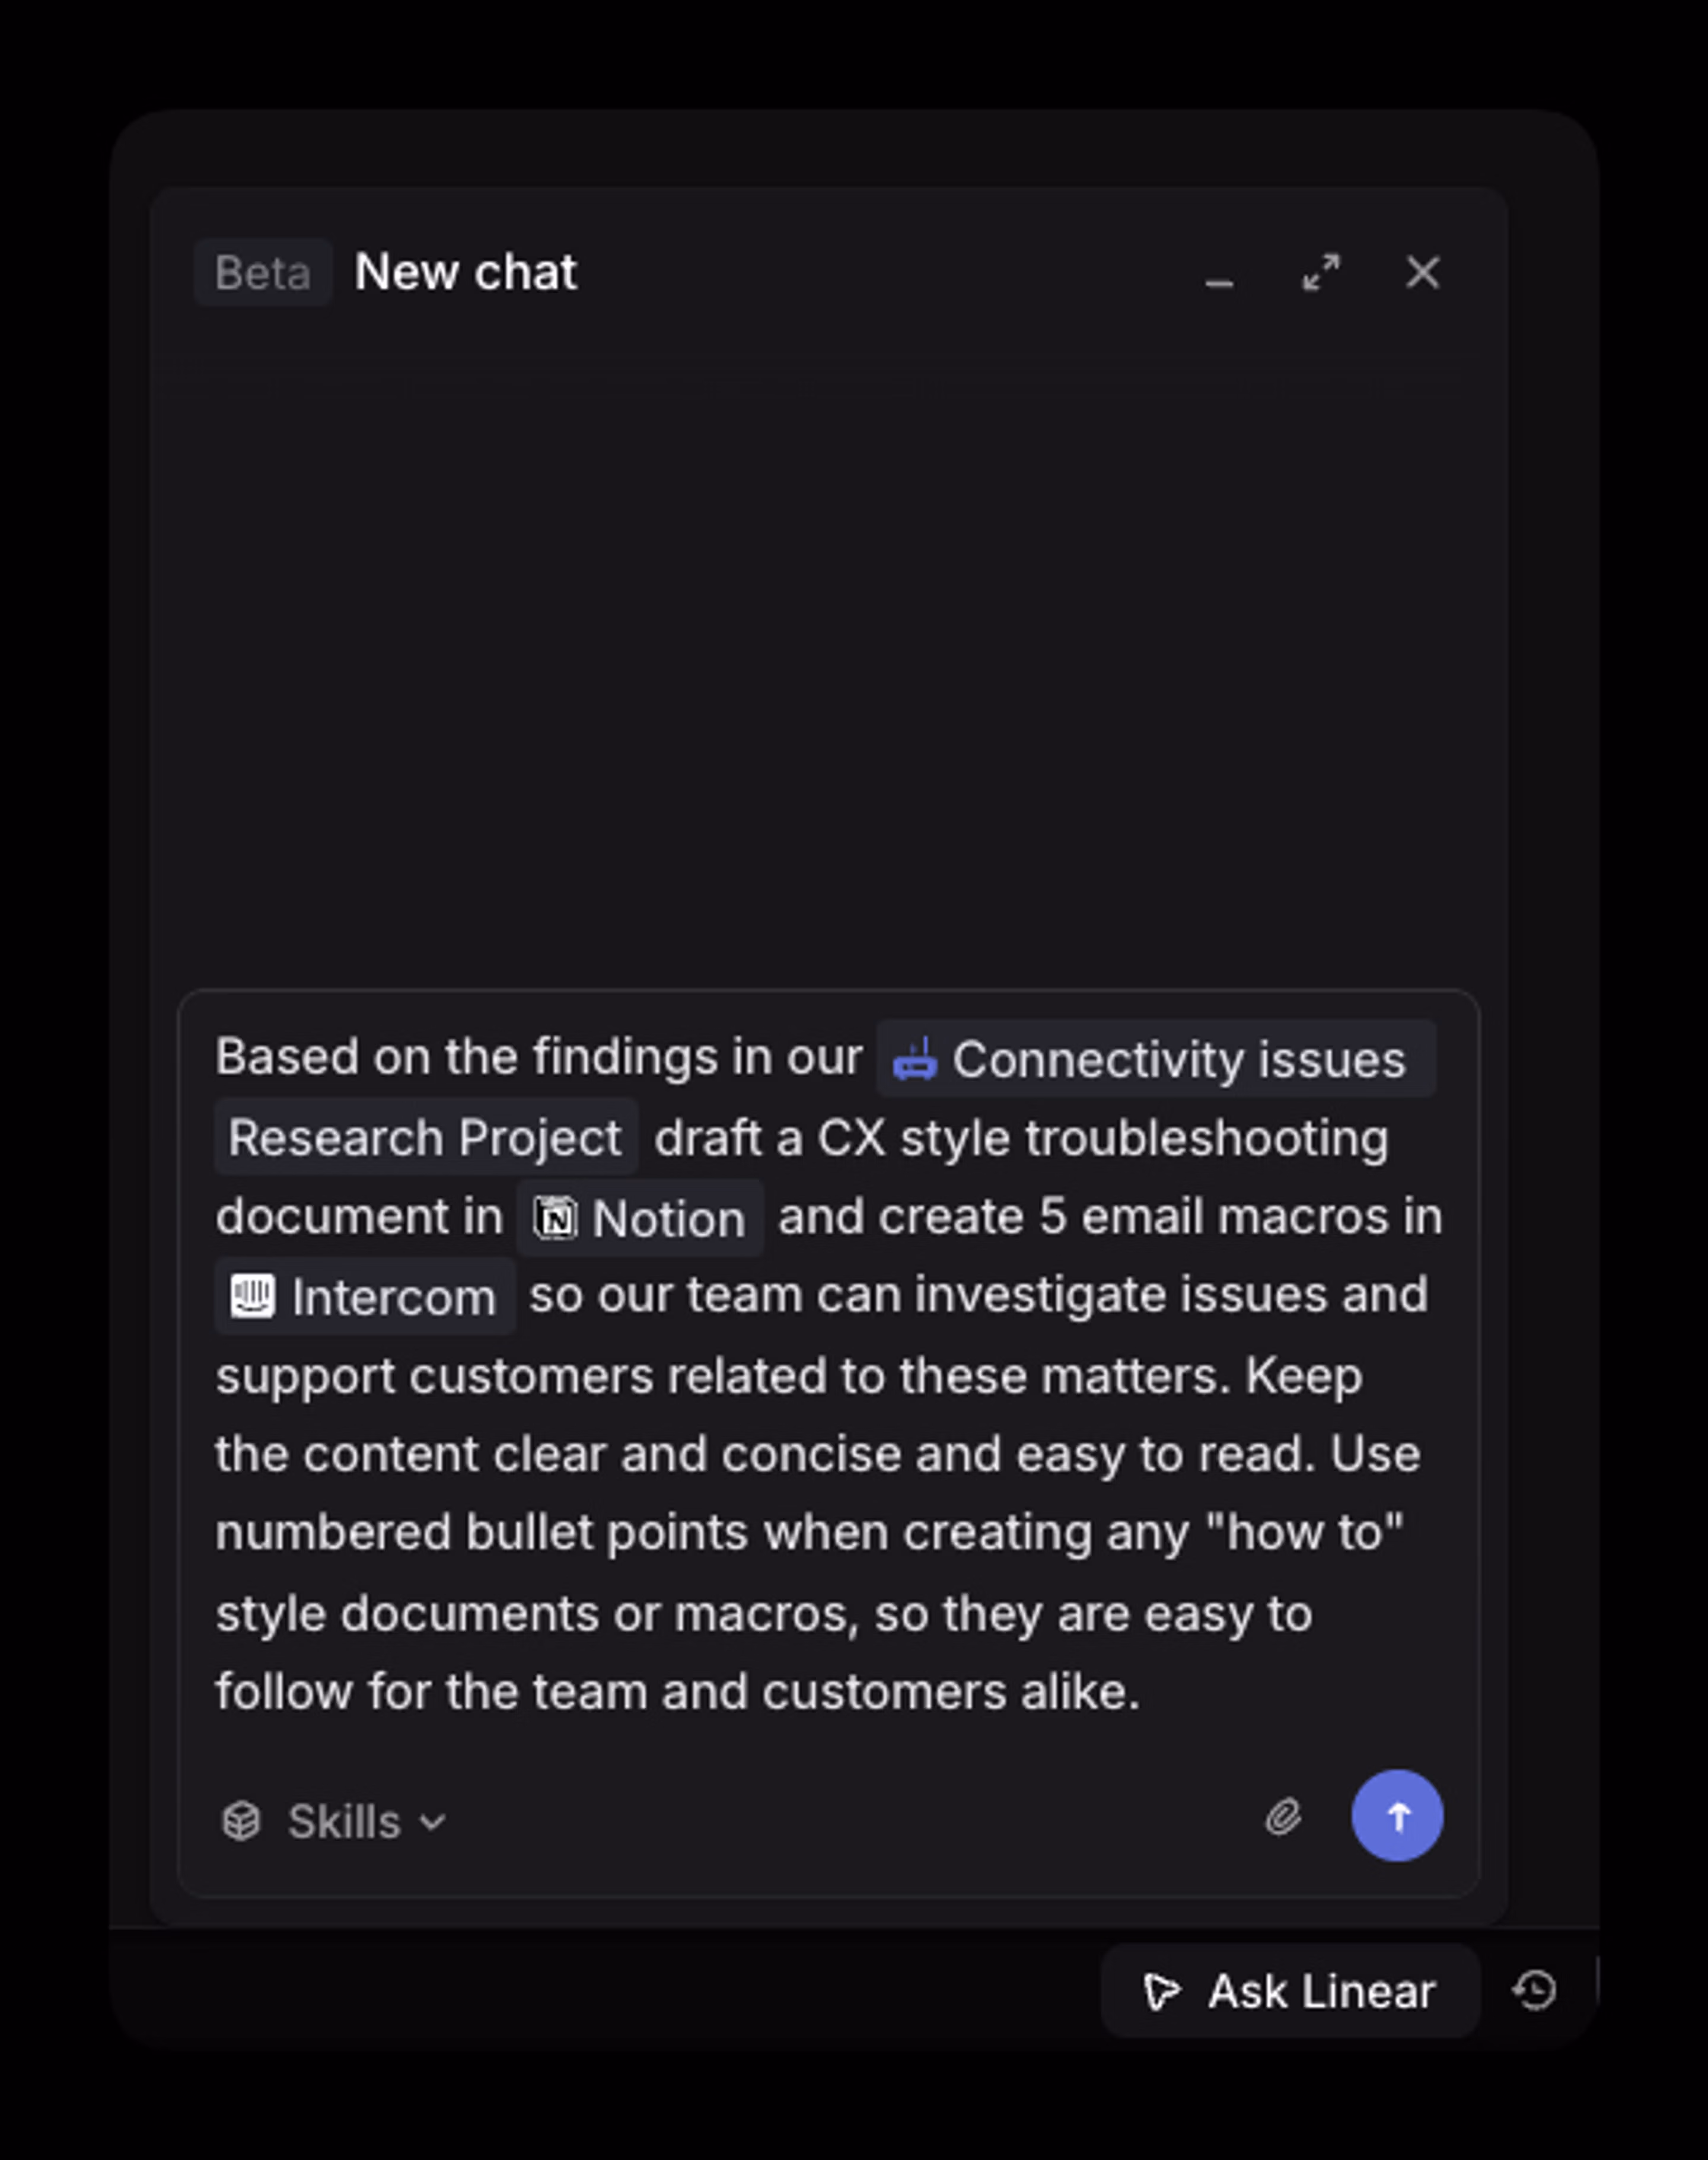
After a server is connected, users can reference it in natural language when using Linear Agent. The agent can use the connected MCP server to gather information or perform supported actions.
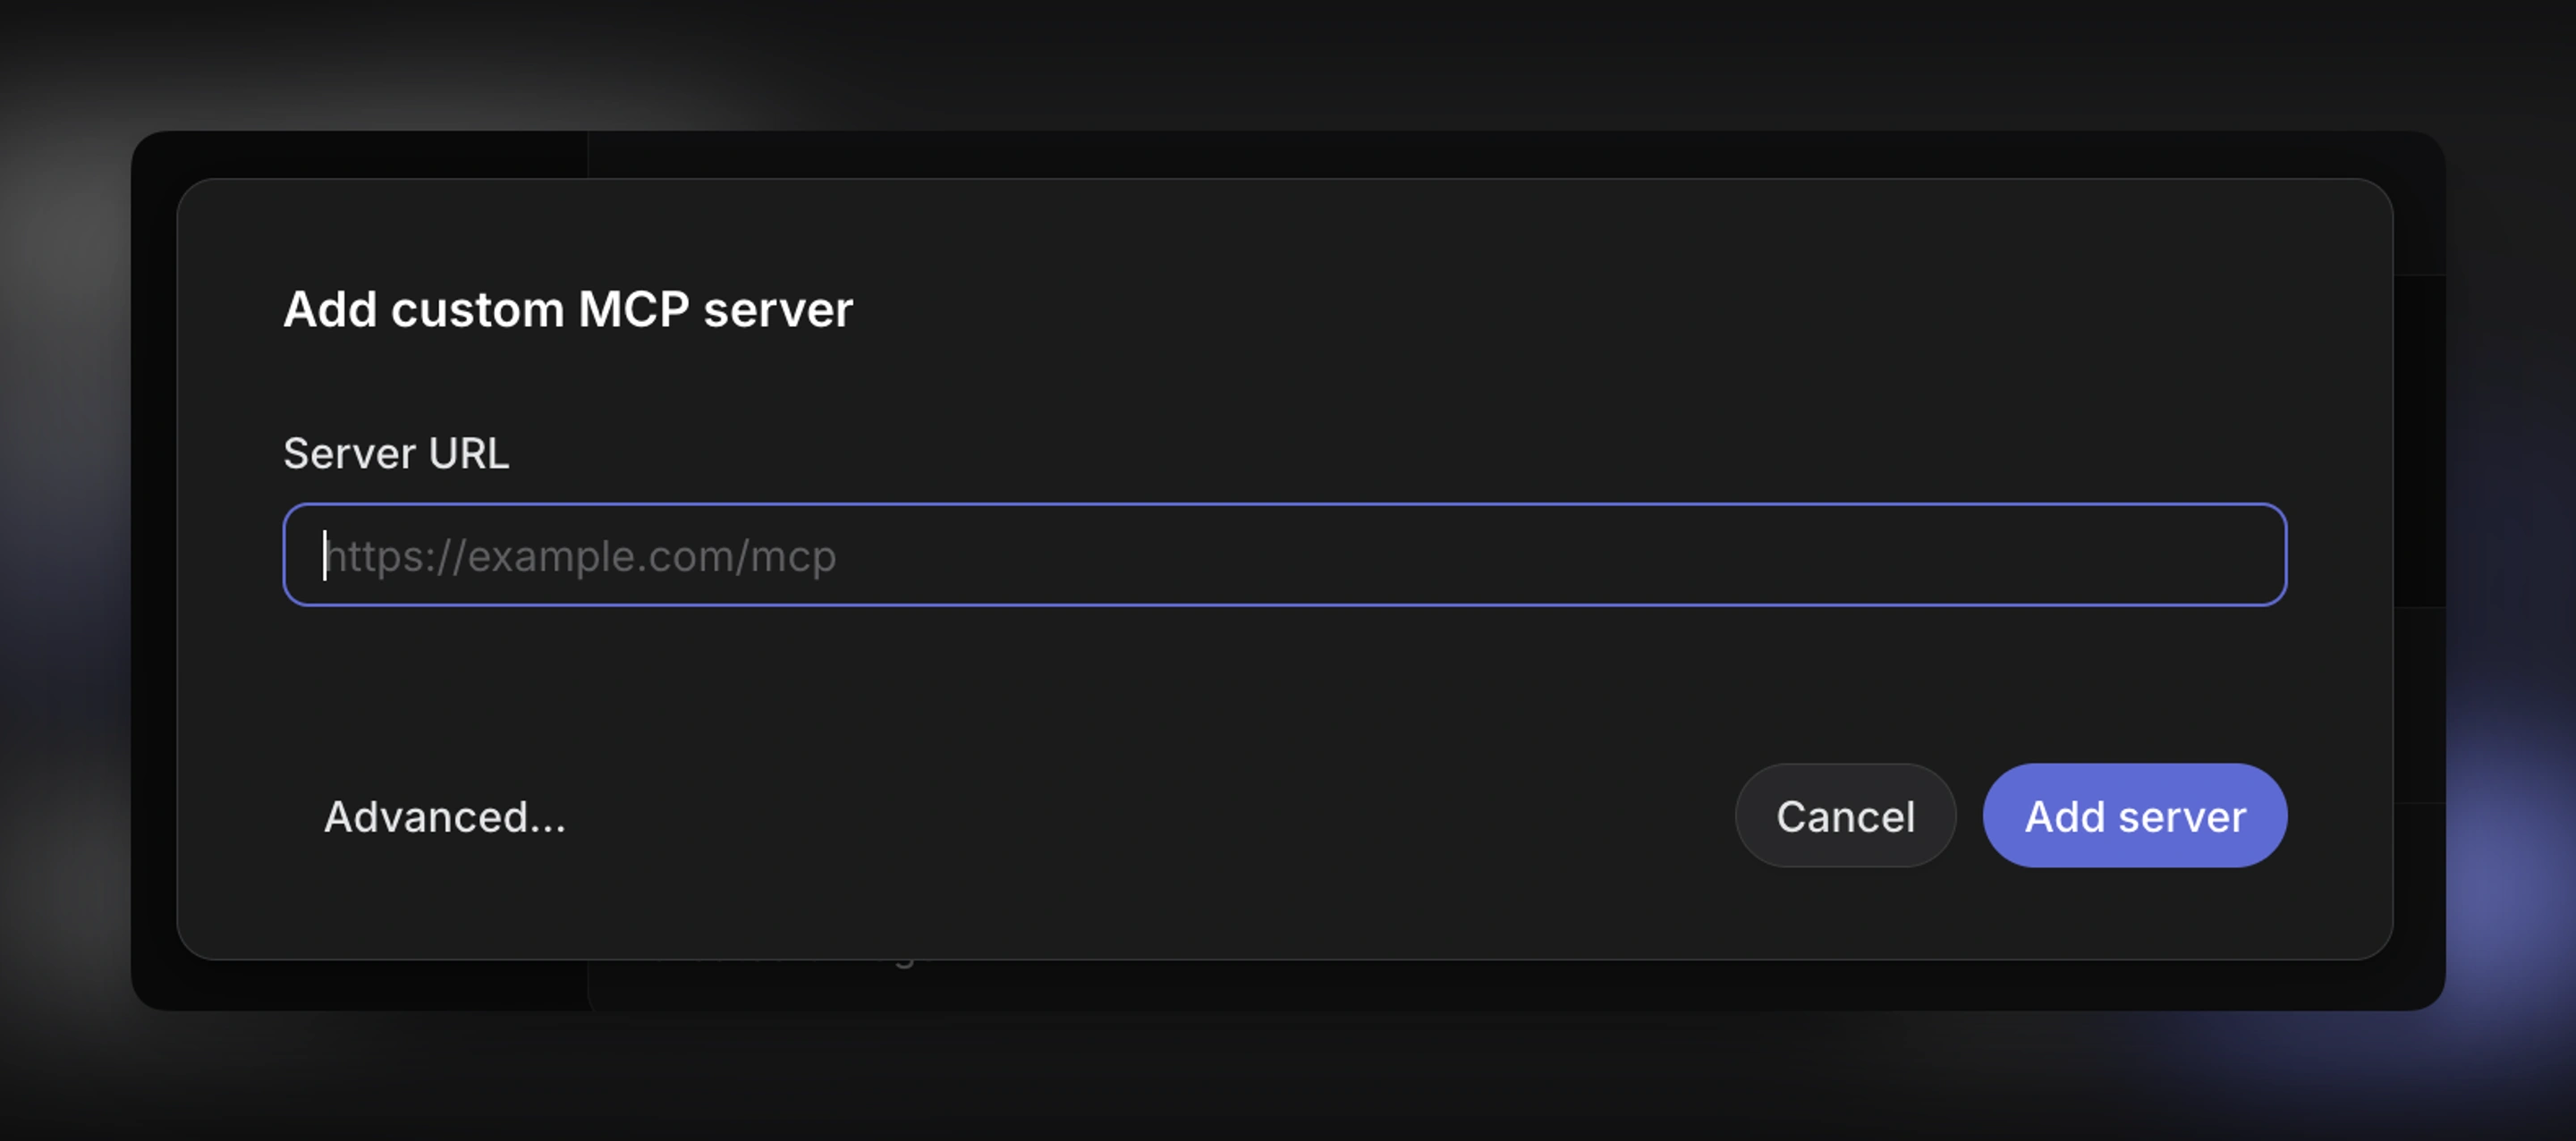
Custom server connection
- Click + Custom URL…
- Select Custom URL…
- Enter your server URL (must start with
http://orhttps://) and complete the connection flow:
- No authentication → connects immediately
- OAuth supported → sign in and authorize
- Authentication headers → enter your custom headers
Custom servers can authenticate with OAuth or with Authentication headers, depending on how the server is set up. Once connected, the custom server will be available for users to connect to through their settings.
Example prompts
Investigate this issue using Sentry and summarize the likely cause
Search Notion for relevant documents and generate a guide ahead of launch
Use GitHub to find the pull request that likely introduced this change