Airbyte
Available to workspaces on our Enterprise plan
Connect with Airbyte to consolidate data in data warehouses, lakes, and databases.

Overview
With the Airbyte integration, you can load your Linear data into any data warehouses, lakes, or databases in minutes. Create custom analytics and dashboards for your company and update them on any schedule through Airbyte.
We support Airbyte Open Source environments, and do not support Airbyte Cloud.
Configure
Configuration requires workspace owner permissions to navigate to Settings > Integrations > Airbyte and click the Enable button.
Copy the one time Airbyte API key as you will need this later. With this key the integration receives read access to all data in supported tables. There is no way to exclude access to private teams at this time.
Set up Airbyte locally
Install Docker Desktop and launch it.
Clone the Airbyte repo and run Docker using the following command in Terminal:
git clone https://github.com/airbytehq/airbyte.git
cd airbyte
docker-compose up
Now you can open Airbyte in your browser at http://localhost:8000.
Set up Linear Source
- In the Airbyte dashboard, click “Settings” on the bottom left.
- Click “Sources” on the left sidebar.
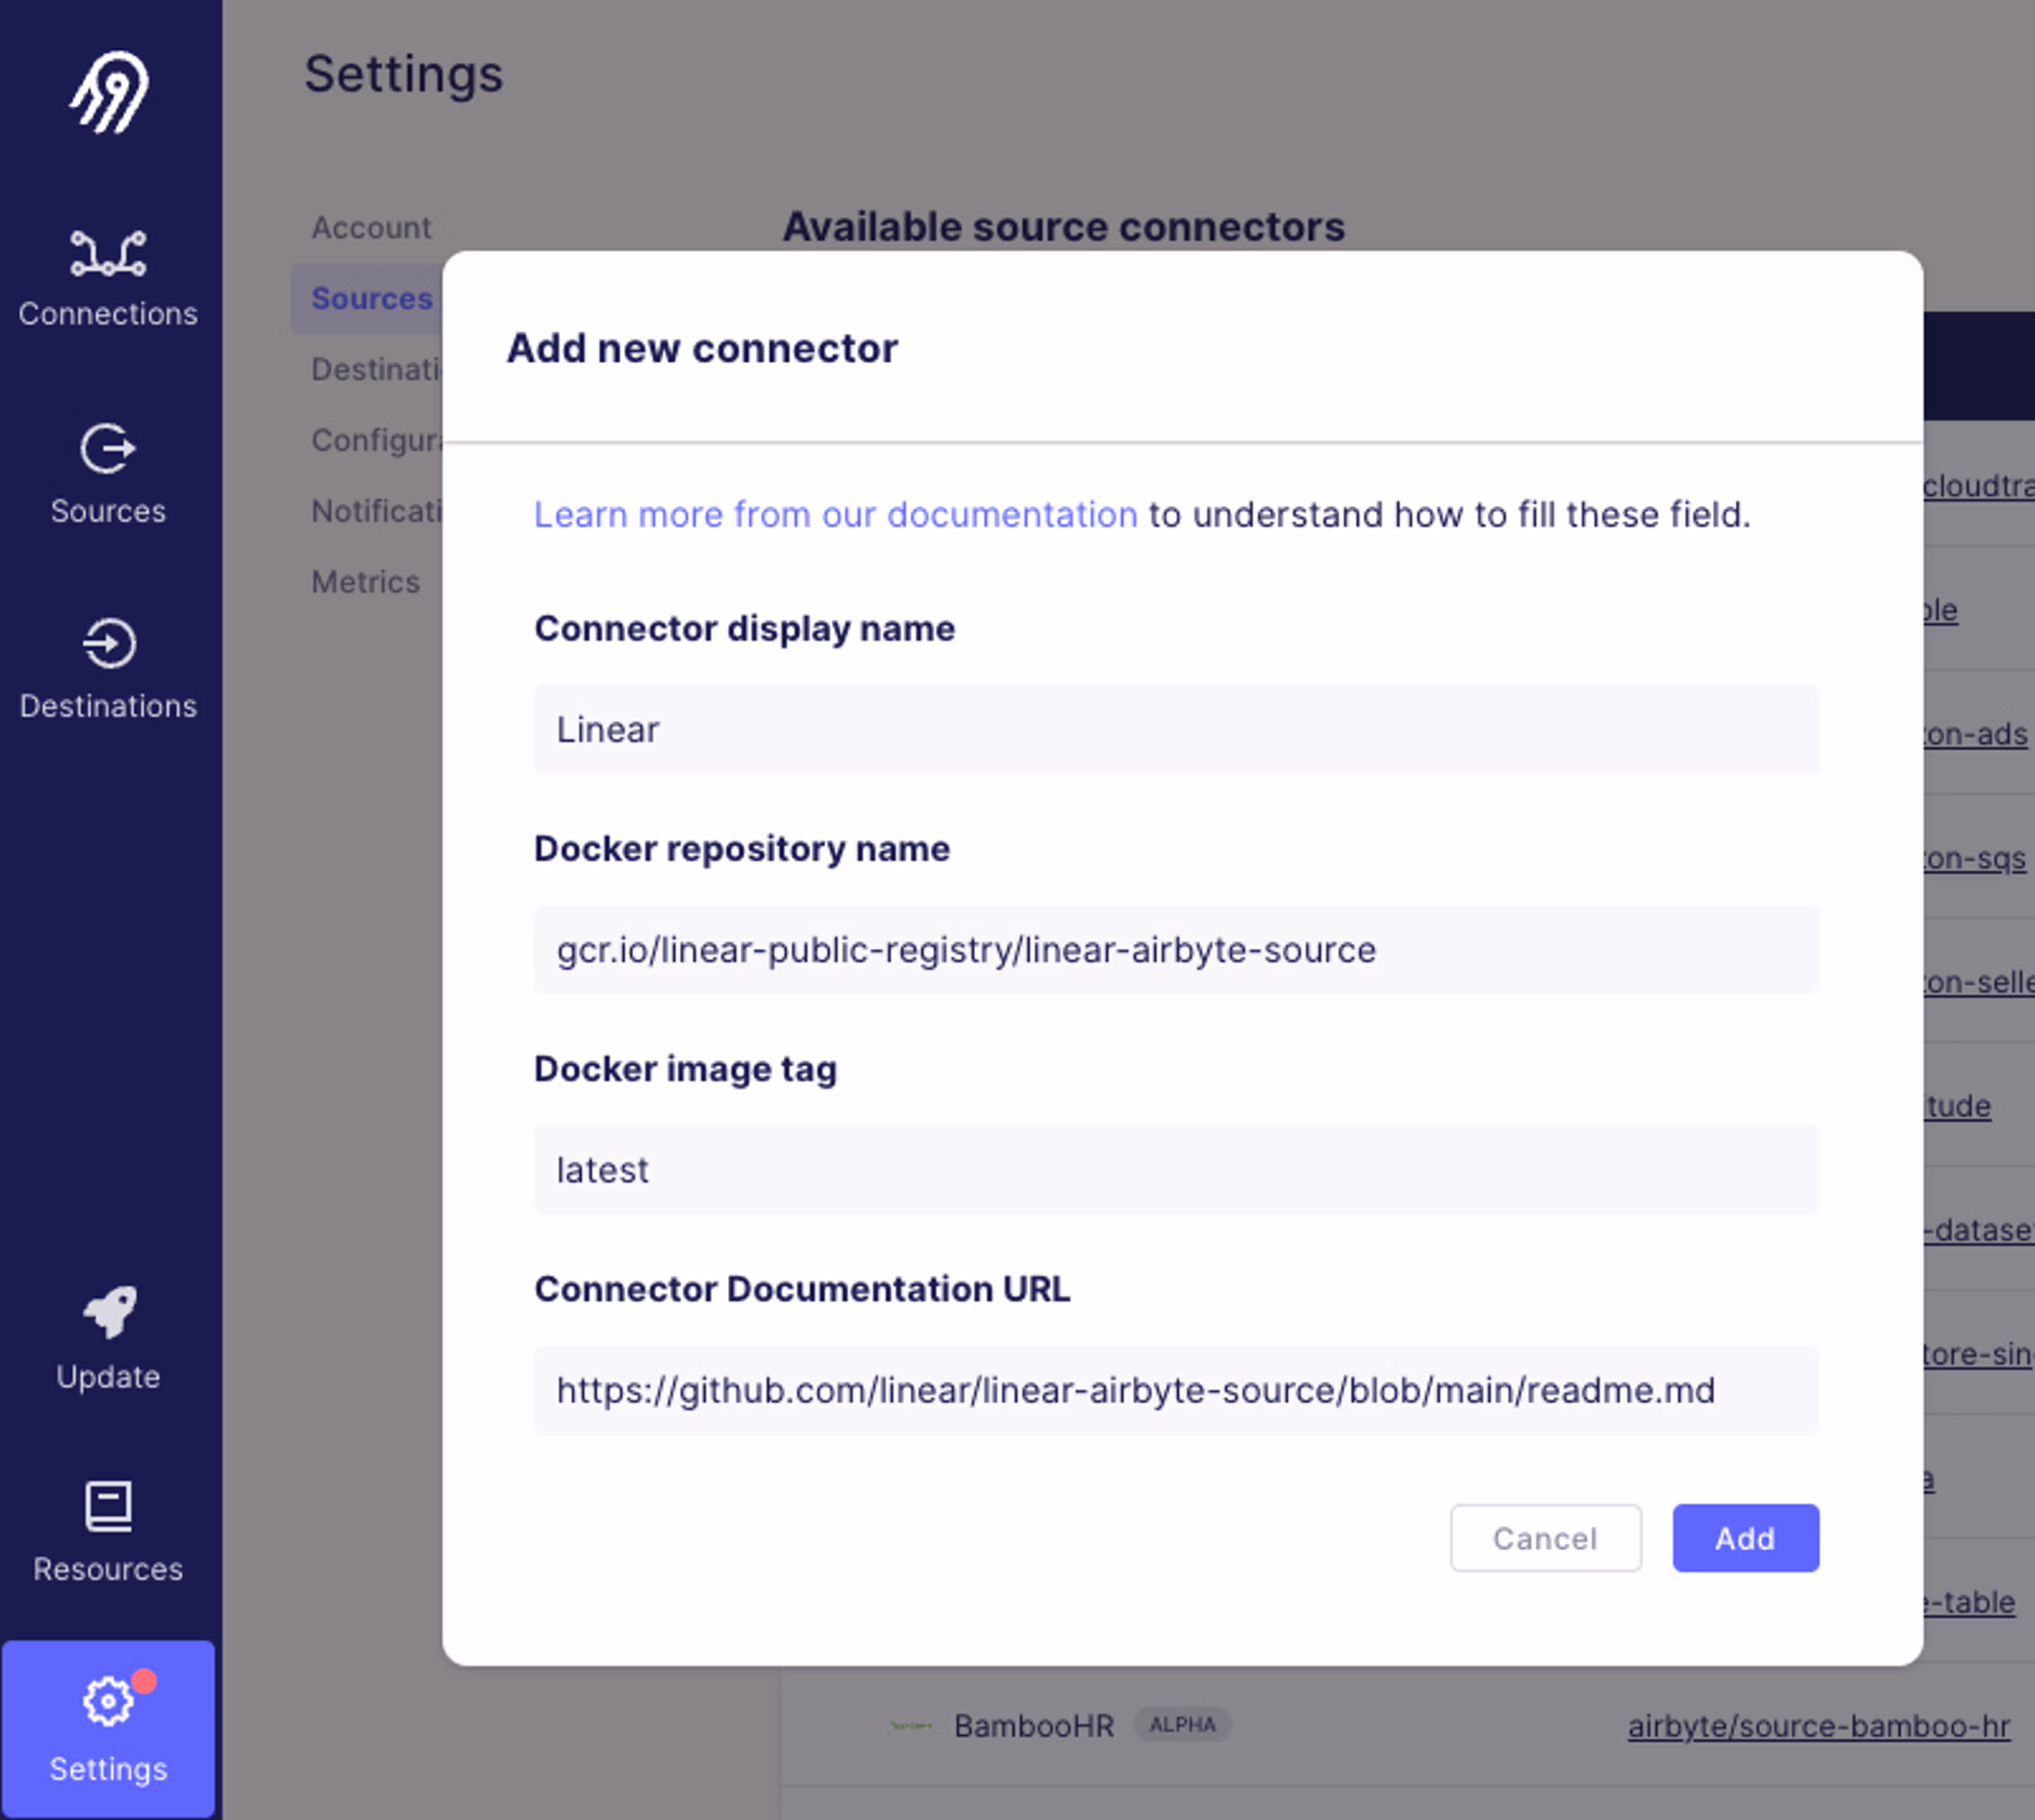
- Click the “New connector” button > enter the following:
- Connector display name:Linear
- Docker repository name:gcr.io/linear-public-registry/linear-airbyte-source
- Docker image tag:latest
- Connector Documentation URL:https://github.com/linear/linear-airbyte-source/blob/main/readme.md
Connect your destination
With the connection complete, you can now choose your destination.
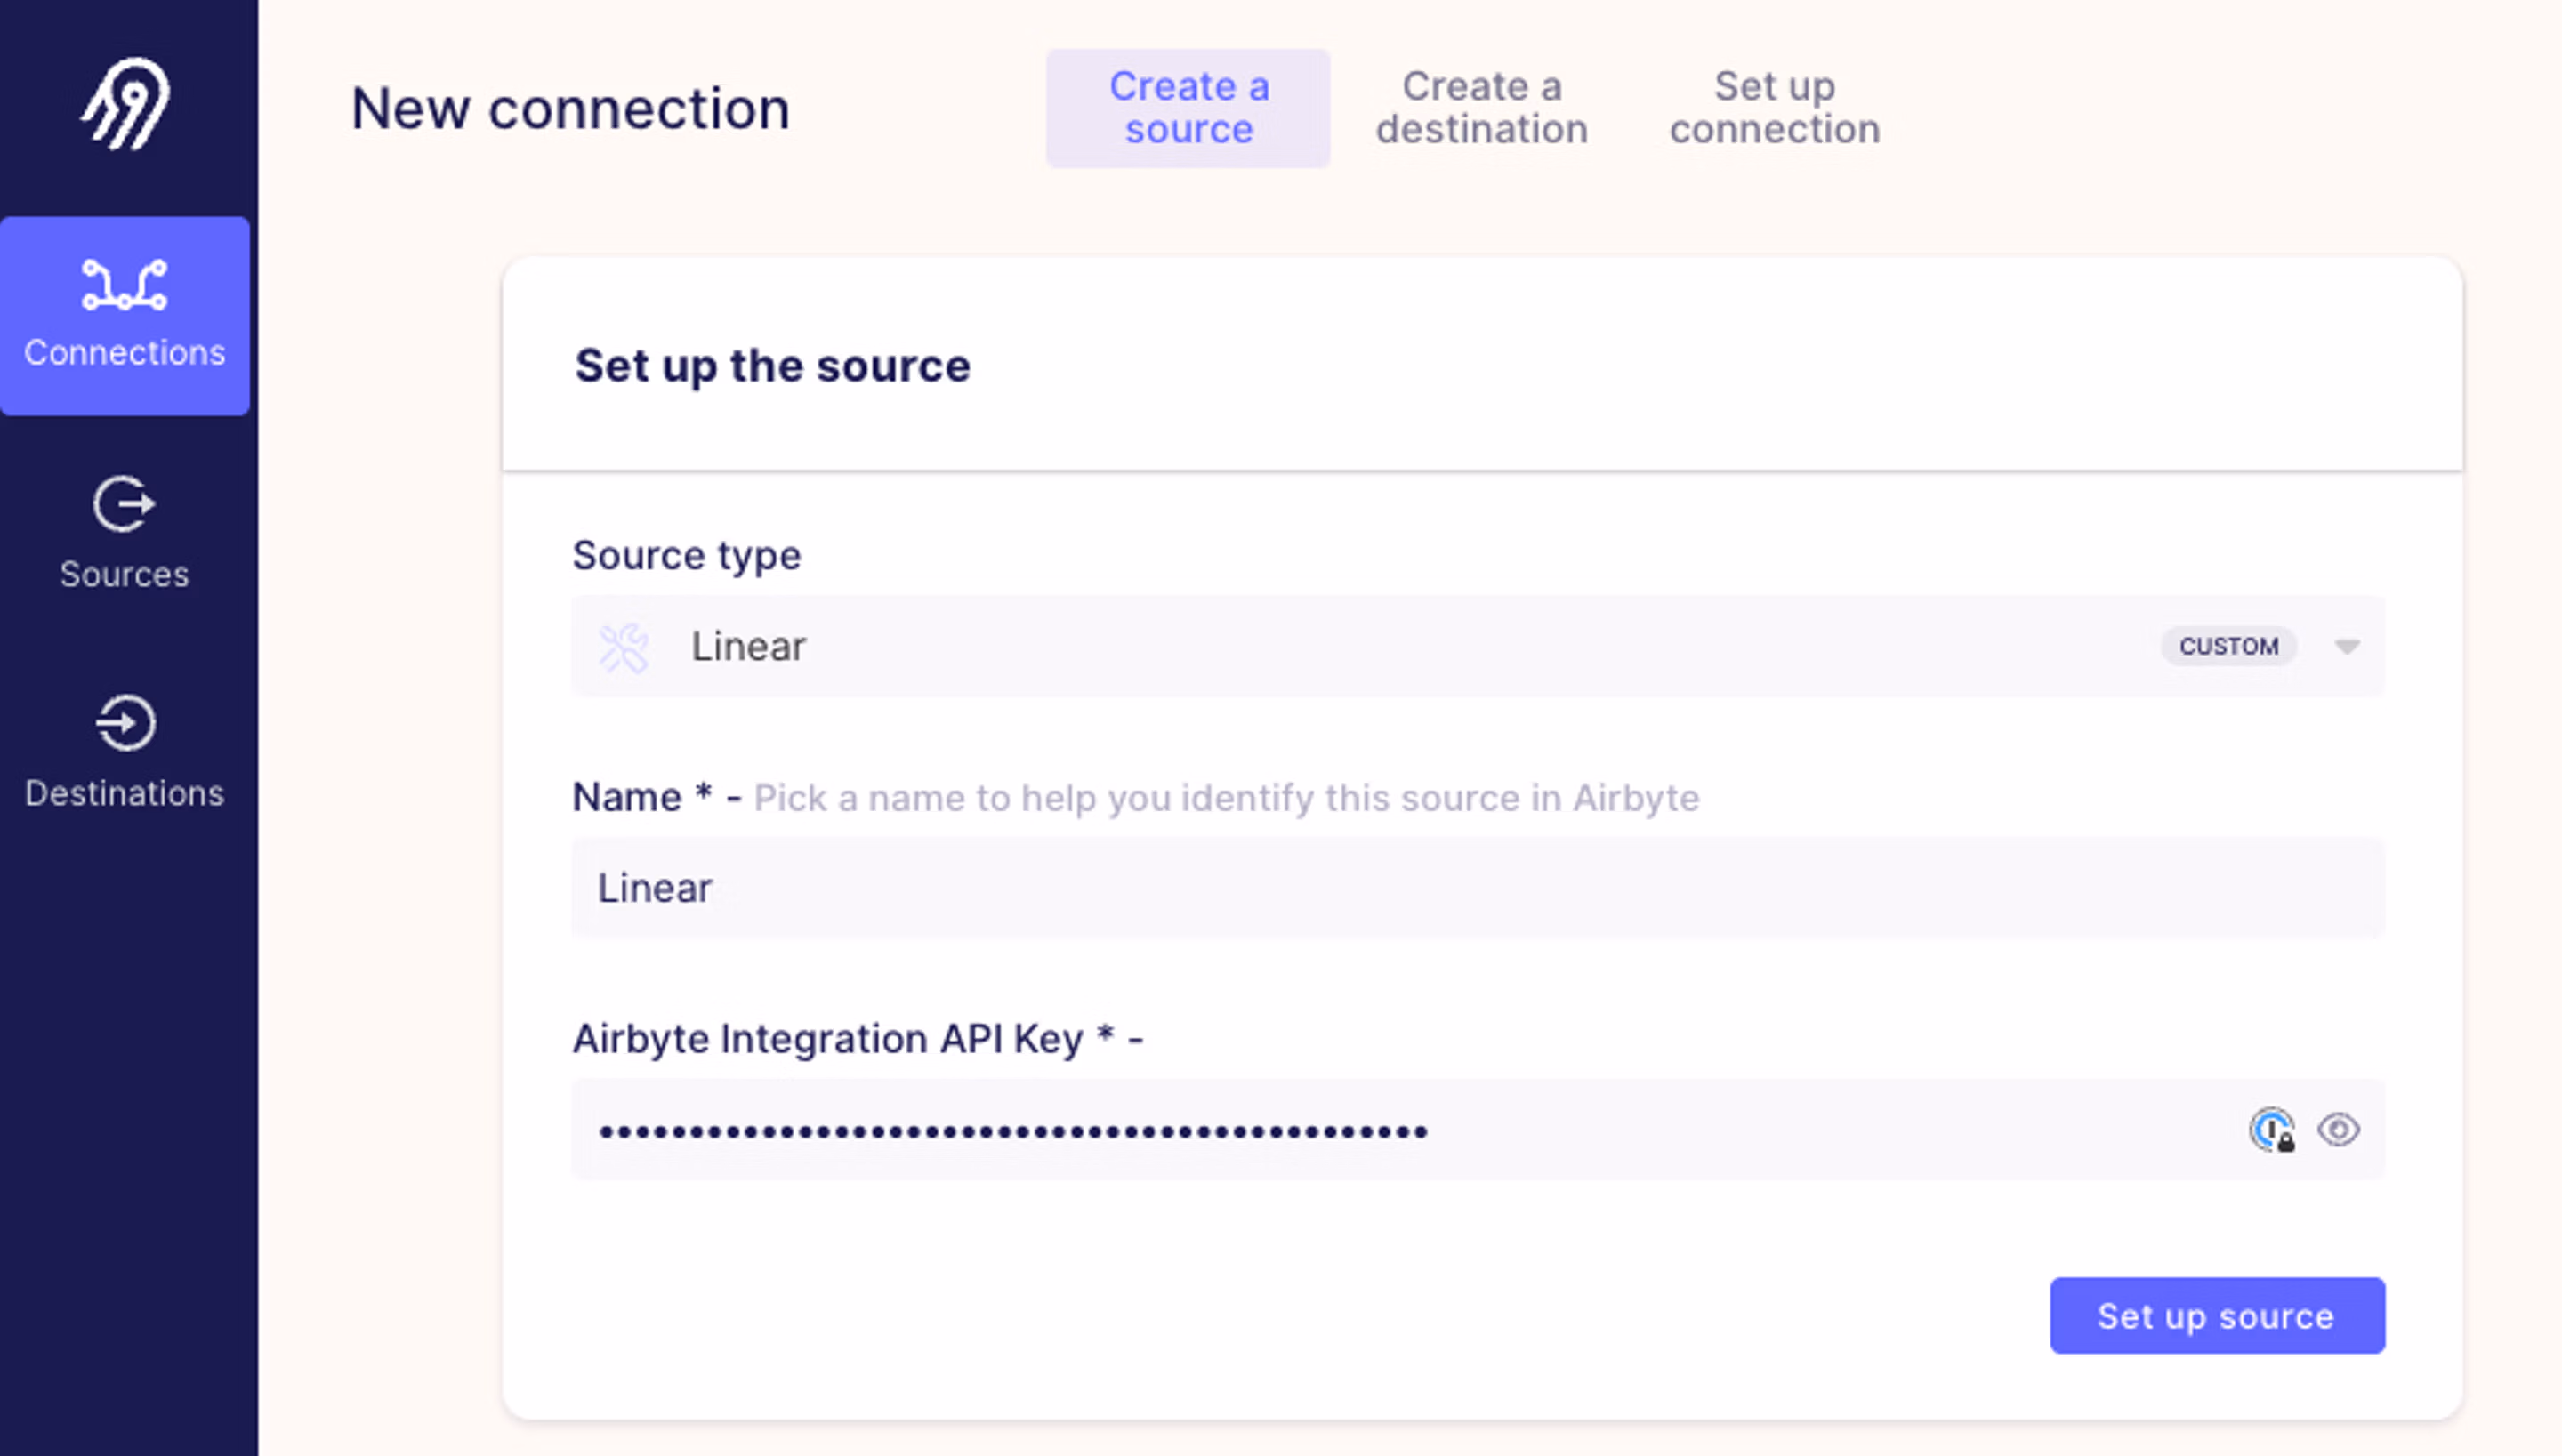
- Click “Connections” in the sidebar and the “New connection” button.
- In the “Source type” box search for “Linear”.
- You can give a custom name to your source or leave it as Linear.
- Paste the API key you generated in the Linear integration page for Airbyte and click “Set up source”.
- On the next page, you can select an existing destination or set up your destination service, their instructions will be provided there if you have not yet created a destination with them before.
- Save the connection.
Choose your sync frequency
Next, you need to choose how often you want to sync your Linear data to this destination:
- Click on Connections, then click your chosen connection in the list.
- Click on the “Replication” tab and choose your Replication frequency.
- Select the data you want to sync. You should see a list of table names. You can select all or choose which ones to sync individually.
- Choose what type of sync mode you’d like to use for each source table. Full Refresh and Append are the options you can choose from. Incremental is not supported at this time. Linear data can sync every 12 hours; it cannot sync sooner than this.
- Click “Save changes”.
Everything is now configured to extract, transform, load (ETL) your Linear data into Airbyte and sync it to the selected destination on the schedule you chose.
The following models will be synced:
- Organization
- Teams
- Team Key
- Team Membership
- User
- Milestone
- Project
- Project Updates
- Project Link
- Issues
- Issue History
- Issue Label
- Issue Relation
- Integration Resource
- Attachment
- Audit Entry
- Comment
- Cycle
- Workflow State
- Document
- Document Content
Remove connection
You can disable any incremental or full syncs by going to the Connection settings page and clicking Delete this connection.