Invisible details - Building contextual menus
We recently added contextual menus to Linear. This makes the app faster and easier to use for people who prefer their mouse.
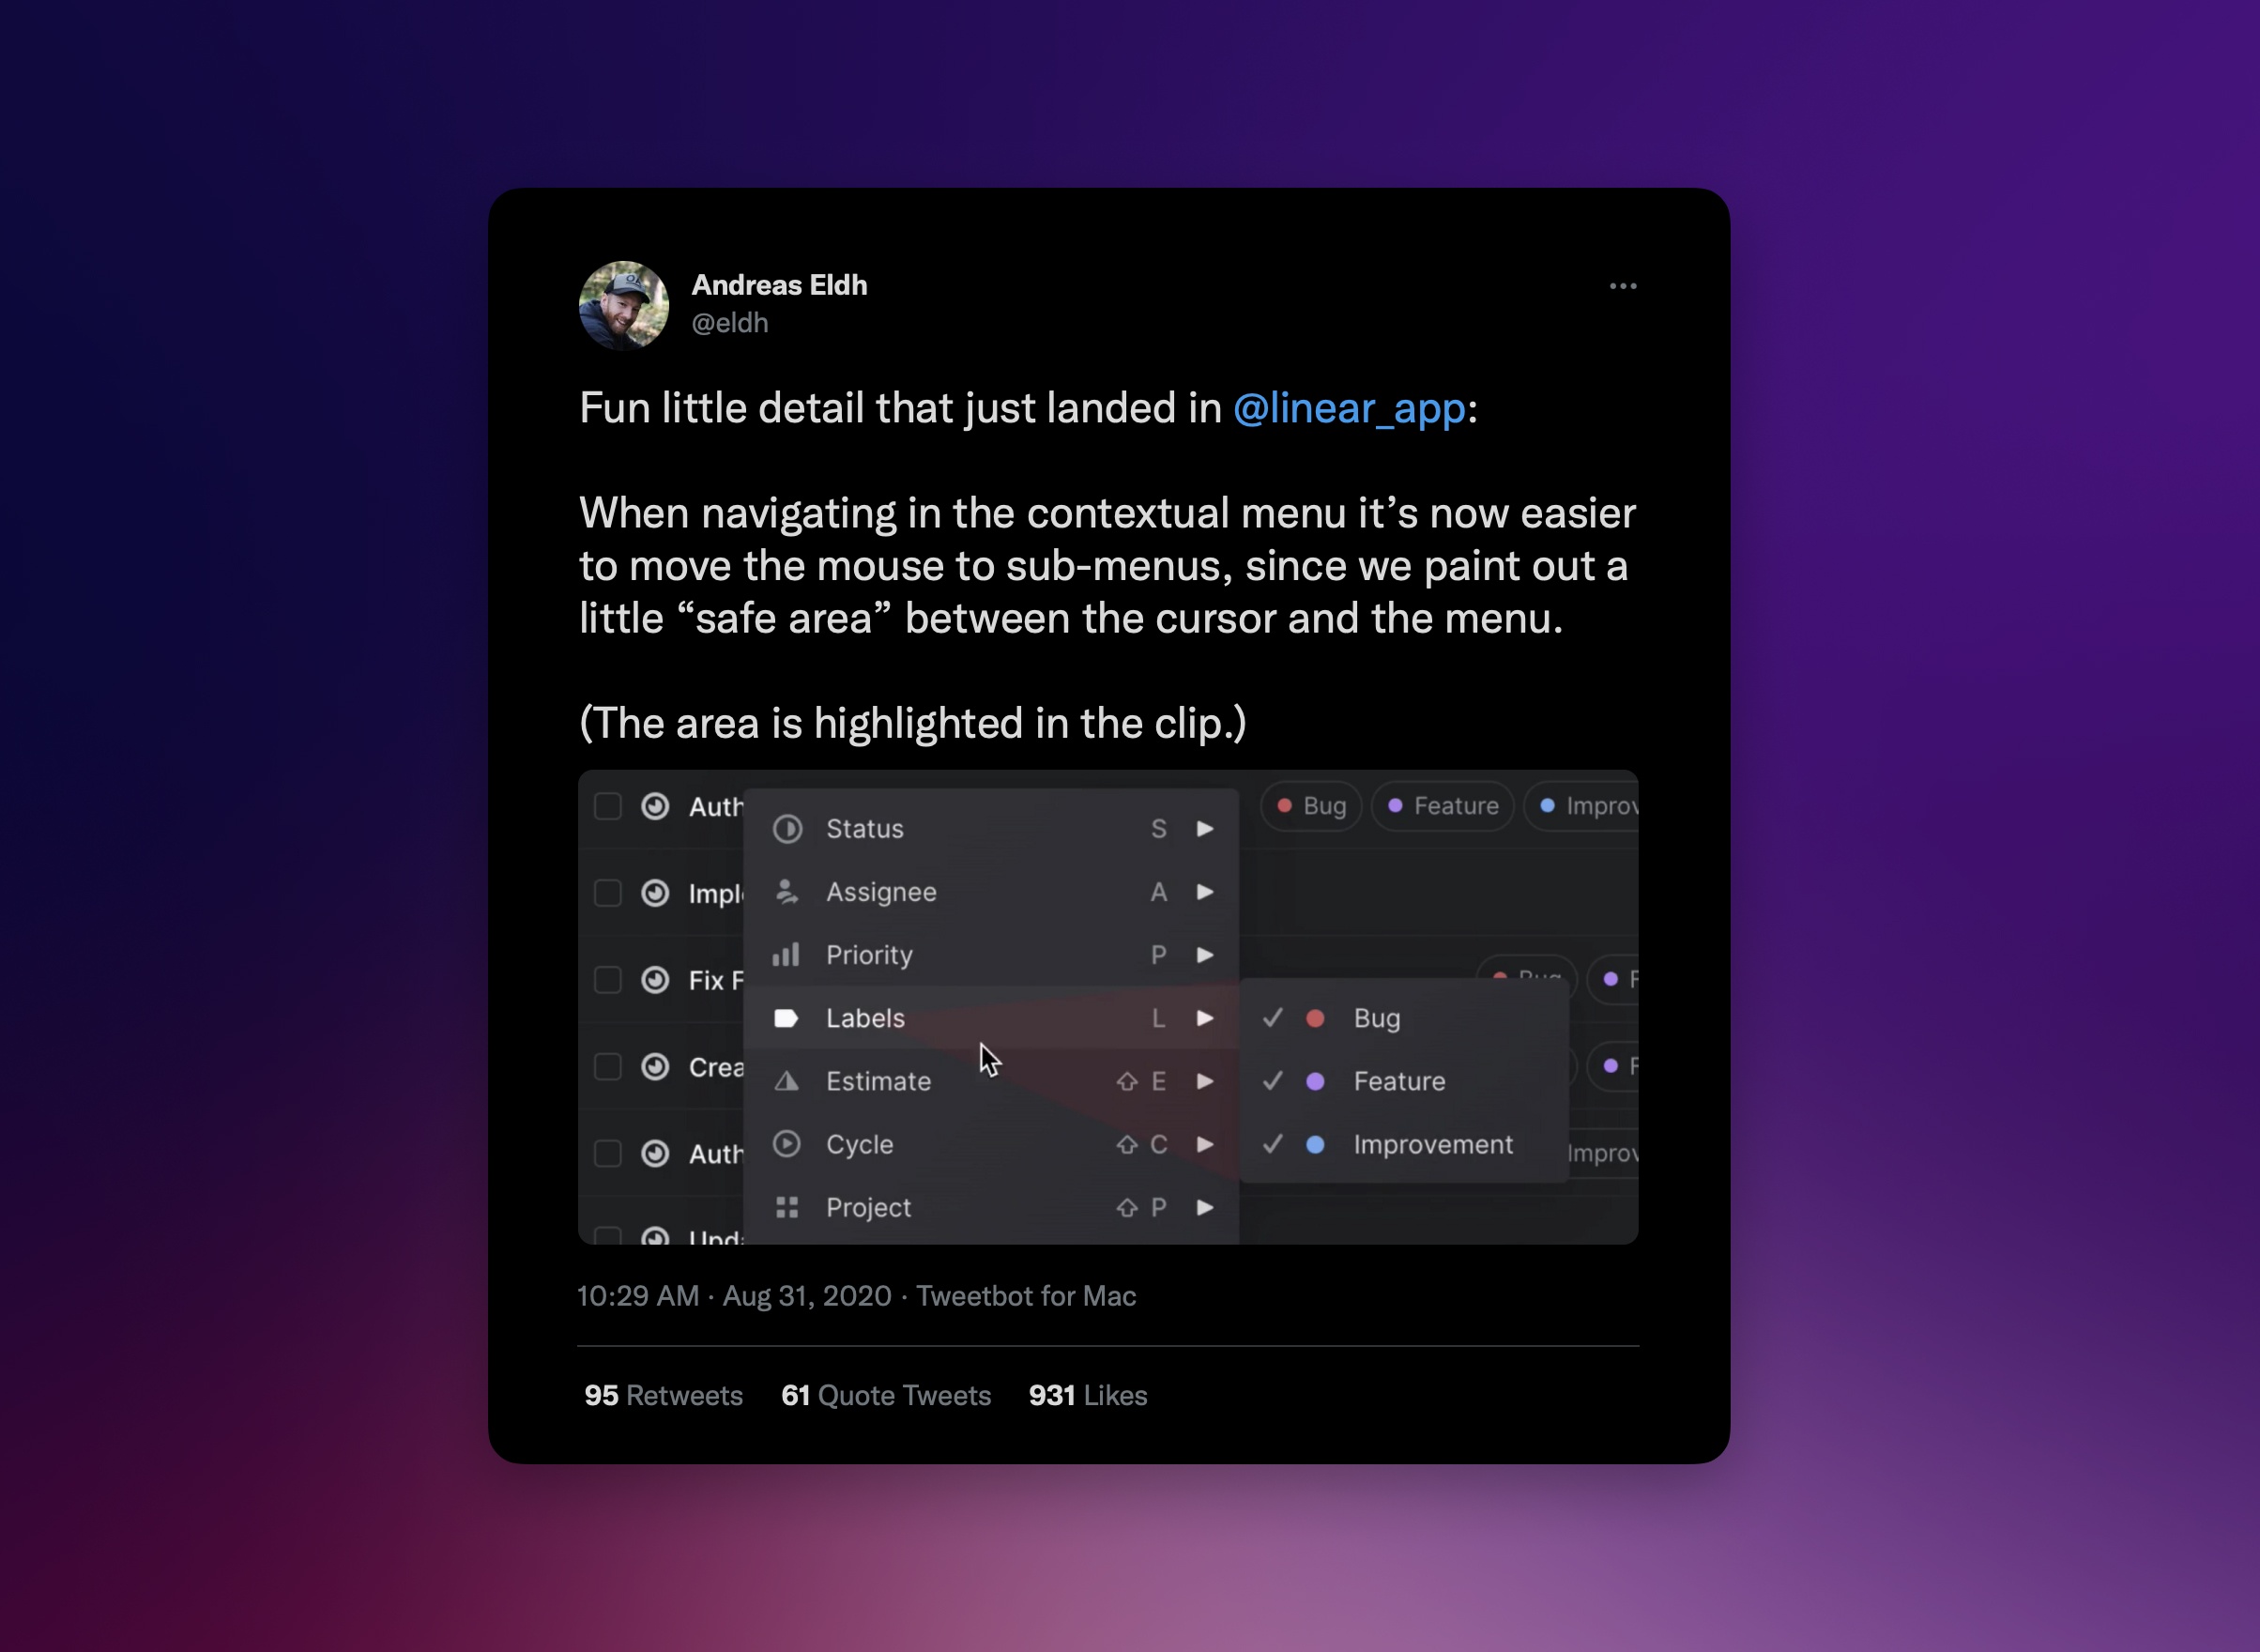
One small thing that you won’t see or think about but will hopefully *feel* is a detail we designed into how sub-menus work.
You may know contextual menus as “right click” or “pop up” menus. Right click with your mouse on this post (or Ctrl+ Click with your trackpad) and you’ll see a short contextual menu appear on your screen with options to reload or save the page. Contextual menus were first popularized by applications such as Microsoft Word which added them so users could more easily copy and paste. You’ll find them in most web and desktop-based applications.
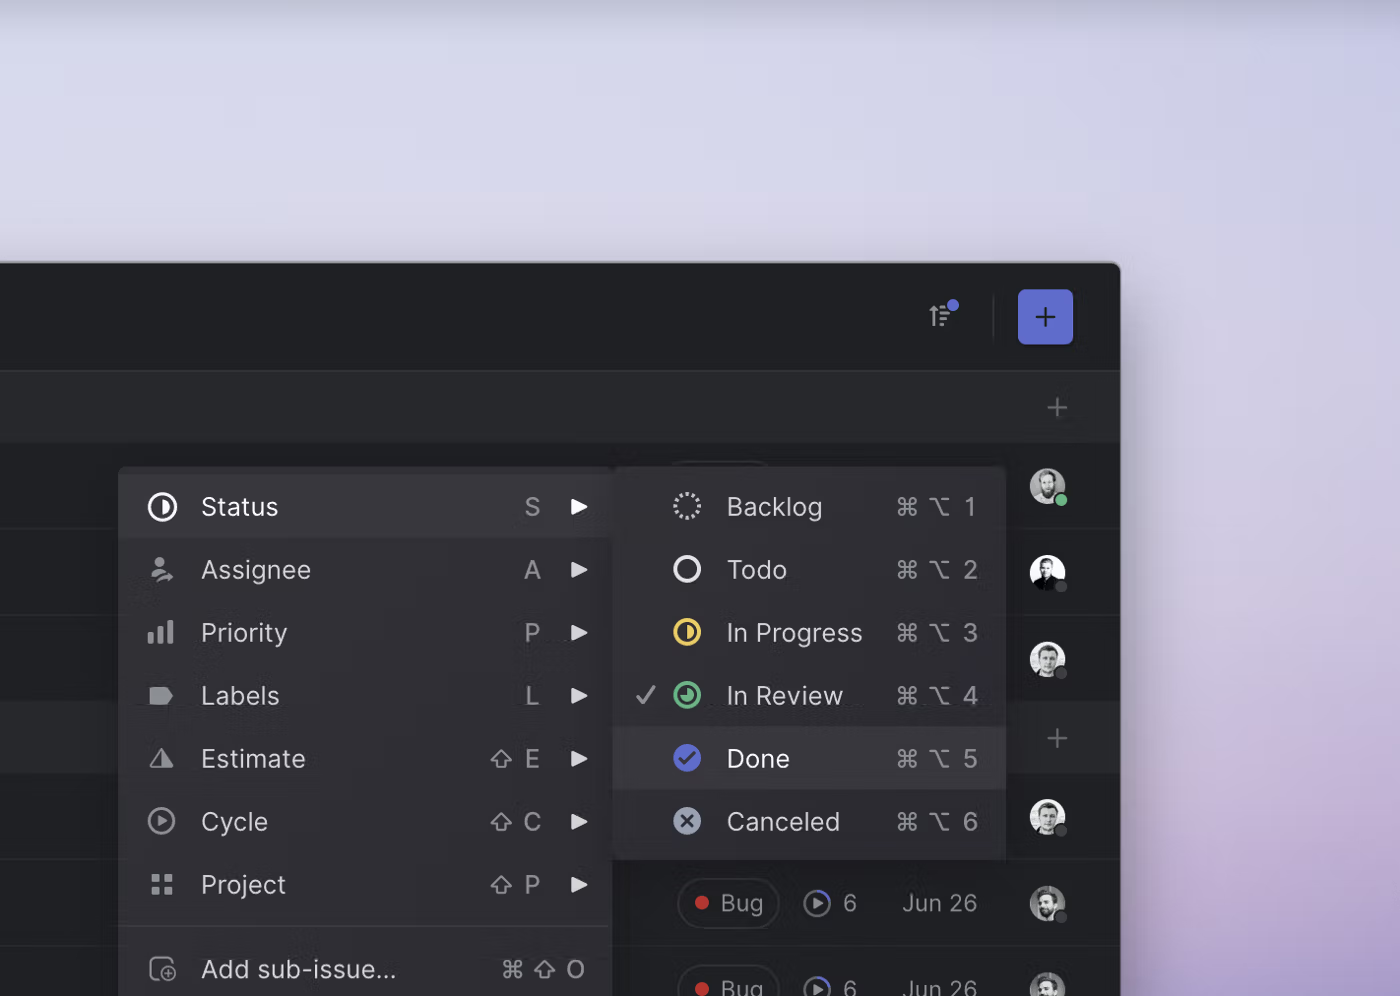
Contextual menus make applications faster and easier to use when navigating a page with your mouse. On Linear, we let you take almost any action on an issue from the contextual menu: set the issue status or priority, assign the issue to a different member of your team, change the estimate, mark it as blocking or a blocker to another issue, mark it as a duplicate, add the issue to a cycle or project, copy the git branch name and even archive the issue to remove it from your active issues list.

A contextual menu in Linear
We’re learning that contextual menus are also a great tool for onboarding and teaching people how to use our popular keyboard shortcuts. You can take almost every action in Linear without lifting your fingers off of the keyboard or using a mouse at all. For instance, instead of moving your cursor to the purple plus sign and clicking on it to create a Linear issue, you can just type C.
We find many Linear users prefer keyboard shortcuts for their speed but it can take some time to learn all of them. It’s also easy to forget the less-used keyboard shortcuts such as the one that lets you move an issue between teams (Cmd / Ctrl +Shift +M). Previously you had to open the command menu with (Cmd / Ctrl + K) and then type out a search query to find a keyboard shortcut you forgot or type ? and then search our long list. Now you can simply right-click to take the action with the mouse or remind yourself of the keyboard shortcut.
In the first iteration of our menu, to access an item in a sub-menu you would have to move the cursor out in a straight line from the selected item onto the sub-menu, then move down from the top of the sub-menu to the item you wanted to click. You basically have to make an upside down L shape with your mouse.
The original design had a couple of problems:
One, it’s not intuitive. It feels more natural to move the cursor in a diagonal line from the selected menu item to the sub-menu item you want to click. If you did that, though, the sub-menu would disappear before you could select the sub-menu item.
Two, it takes longer. At Linear we care a lot about speed. It may only take a fraction to 1–2 seconds longer to move your mouse in an upside down L shape but the seconds add up when you’re taking the action multiple times. Some product and engineering managers take hundreds of interactions a day on Linear. Add in the time required to recoup after a menu disappears on you and the related frustration and it starts to feel like an important interaction to improve.
If you think about it, there’s no real reason why we build contextual menus that require this longer path when there’s an alternative. The shortest distance will always be the Euclidian, or diagonal, distance compared to the Manhattan distance, the distance taken when following the lines of a grid.
Diving into the code
Adding safe areas to contextual menus is not a new problem. Amazon, Khan Academy and others have all implemented mechanisms to handle contextual menus better on their web apps. Native operating systems have followed these design pattern for many years. However, it’s a detail that’s often overlooked early in a web application’s development.
There are a few ways of approaching how to build contextual menus that let users scroll easily to the sub-menu items. We thought the best way would be to draw a triangle between the mouse cursor and the sub-menu to create a safe space where the mouse could move without triggering the sub-menu to close. So we built a component to do just that.
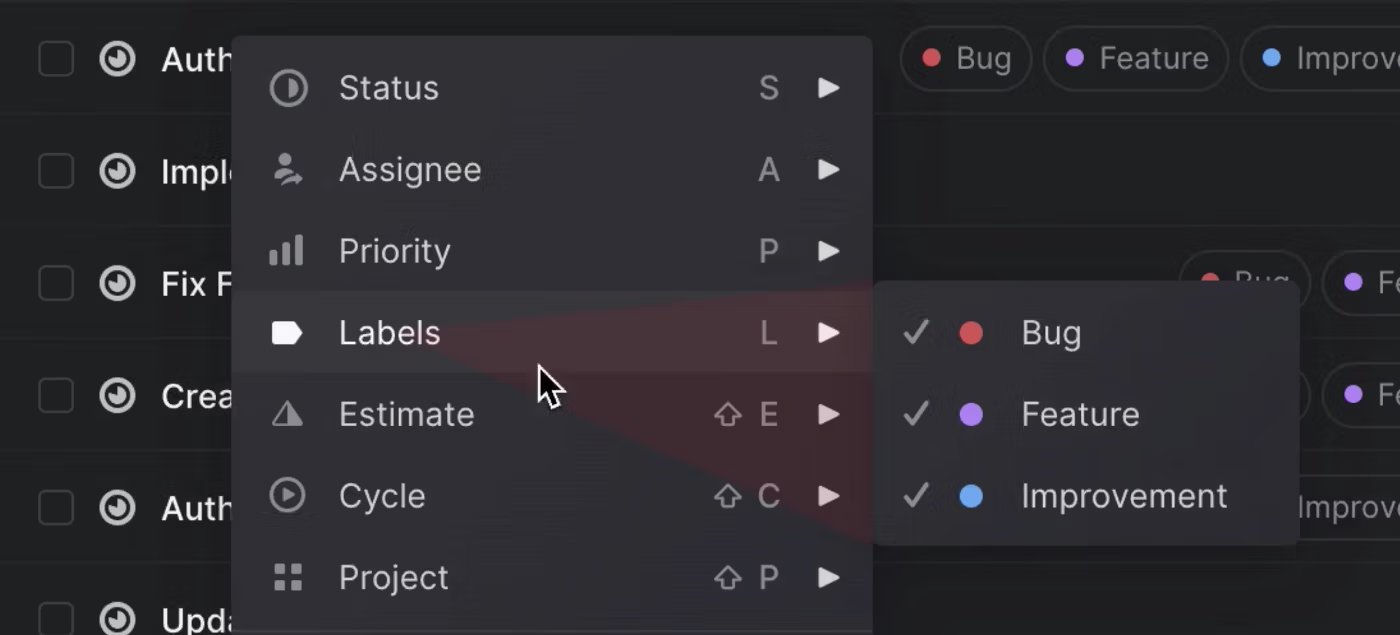
The safe area lets you move the mouse along the shortest path without closing the sub-menu
Here’s how to build a React component that creates a “safe area”:
The component gets a reference to the sub-menu as its only prop so that it can measure its size and position on the screen.
const { x = 0, y = 0, height = 0, width = 0 } = props.subMenuRef.current?.getBoundingClientRect() || {};2. Get the mouse coordinates
For this we built a custom hook that listens to the mouse movement. It’s used like this:
const [mouseX, mouseY] = useMousePosition();3. Calculate the safe area
Now we have all the information we need to calculate what area to render between the cursor and the sub-menu. We need to figure out the position and size of the triangle as well as align the corners of the triangle correctly.
const positions = { x, y, height, width, mouseX, mouseY }
return (
  <div
    style={{
      position: 'absolute',
      top: 0,
      height,
      right: getRight(positions),
      left: getLeft(positions),
      width: getWidth(positions),
      clipPath: getClipPath(positions),
    }}
  />
)
The most interesting bits in the snippet above are perhaps the functions that calculate left, right, width and clipPath:
clip-path is a cool css property that lets you define a region of the component that should be drawn to the screen. In this case we use a polygon to draw a triangle.
Not too bad! It only took about 40 lines of code all in all. Hopefully people using Linear will feel the difference.
If you’re curious, here’s a gist with the full implementation.