Asks with Email
Email Asks lets teams receive requests by email and turn each incoming email into an ask in Linear.
Available to workspaces on our Business and Enterprise plans.
Overview
Use Email Asks when teams want to:
- Accept requests through a familiar shared inbox or custom email address
- Let requesters create asks without needing Slack or a Linear account
- Keep follow-up conversation synced between email and Linear
- Route incoming requests into a team’s Triage queue for review
Each incoming email creates a new issue in Linear using the email subject as the issue title and the message body as the description.
You can also choose to send an automatic confirmation email to the sender, and customize that message.
Requesters can keep the conversation going by replying to email, and teams can respond from the synced thread in Linear.
Linear Asks with Email is not designed to replace dedicated frontline customer support tools.
Features like first response times and NPS scores are not planned.
Configure
Permissions
Admins can add new email, edit, or delete a custom intake email. Members can change settings related to the configured email (team/template/sync-reply/customer requests).
Create an intake email
- Go to Settings → Asks.
- Click the + icon for Add Asks intake email.
- Select the Linear team and, optionally, the issue template that should apply to incoming emails.
- Copy the unique forwarding email created by Linear.
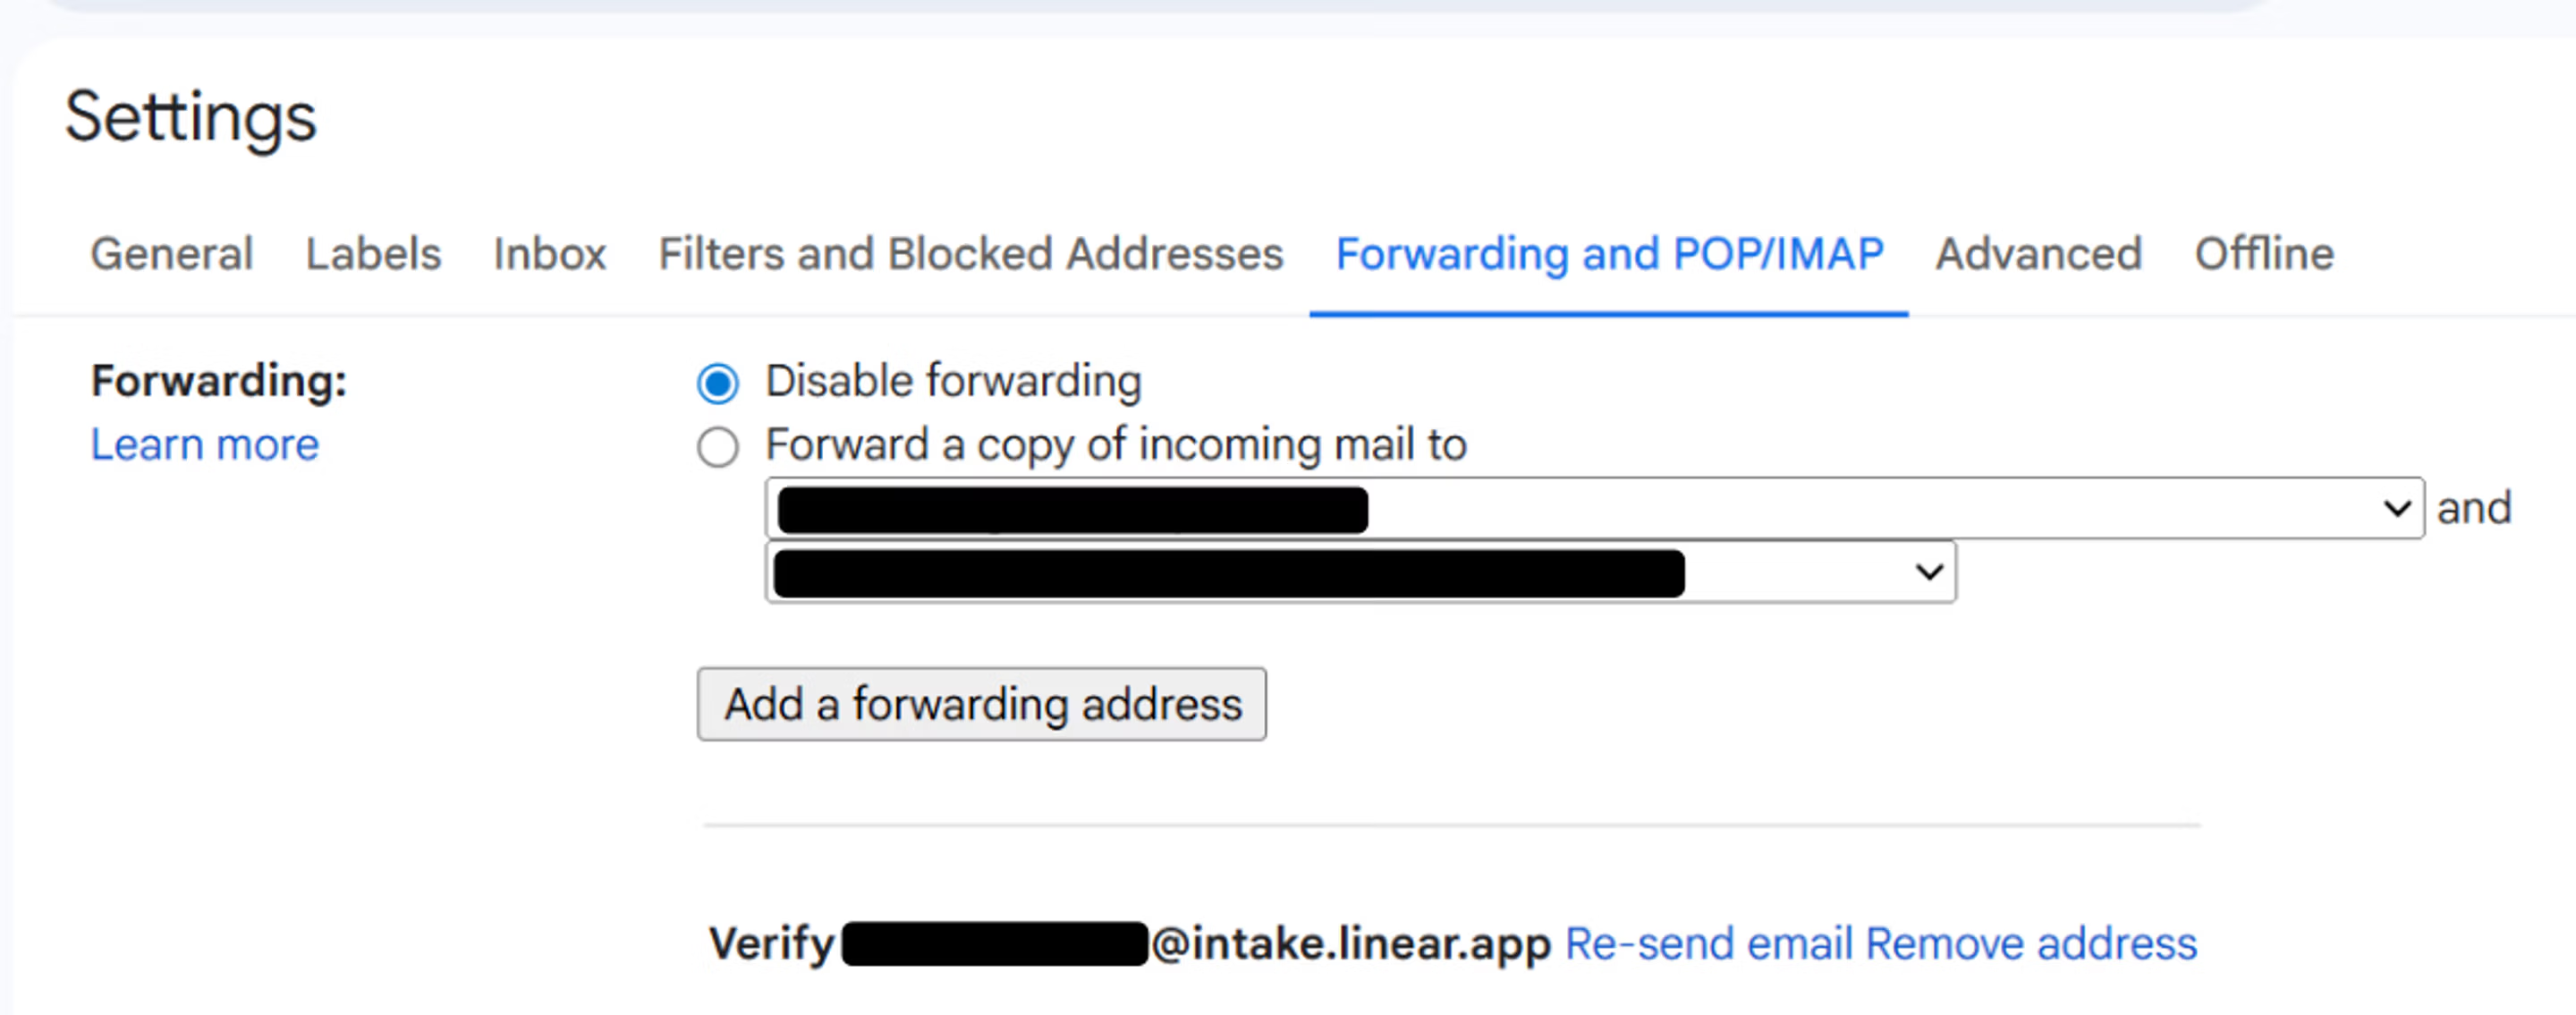
- Configure email forwarding so emails sent to your custom email address are forwarded to the unique Linear email address.
- (Optional) If you want your replies to appear from your custom email address, configure outbound forwarding using the provided DNS records
Configure Email Forwarding
Configure your mail provider so that messages sent to your custom address are forwarded to the unique Linear intake email.
For example, you might forward mail from helpdesk@yourcompany.com to the generated Linear intake address.
You will need administrator permissions to set up email forwarding in your Google Workspace.
We do not recommend using Google Groups to set up forwarding as it modifies email headers which can result in several downstream issues.
Refer to Google’s help documents in Forward email to a third-party CRM for more details.
- Log into your Microsoft 365 Admin Center
- Select the mailbox that you wish to configure forwarding for:
- Shared mailbox: On the admin center homepage, go to the Teams & groups > Shared mailboxes page. Select the mailbox, then select Edit in the “Email forwarding” section.
- User: On the admin center homepage, go to the Users > Active users page. Select the user, then the mail tab and select Manage email forwarding in the “Email forwarding” section.
- On the “Shared mailbox” email forwarding side panel, select the “Forward all email sent to this mailbox” checkbox.
- Enter your Linear intake email address copied from Linear Email Asks Settings
- Select Save
Automatic forwarding needs to be enabled in your anti-spam outbound policy before trying to verify your forwarding setup. This is found in the Microsoft Defender portal.
Refer to Microsoft’s help documents in Configure email forwarding in Microsoft 365.
Configure the reply sender email address
If you want replies to appear from your custom email address instead of the default Linear address (issues@linear.app), add the DNS records provided in Asks settings to your DNS hosting provider.
You can also share those records with your engineering team for implementation.
If you skip this step, or if the custom reply address or domain is not fully verified or supportedreplies will still be delivered, but they will come from issues@linear.app instead of your own domain.
Configure DMARC policy requirements
These requirements matter when configuring replies to come from your own domain.
Linear Asks email integration supports a wide range of DMARC configurations, but domain alignment must be relaxed:
aspf=r(relaxed SPF alignment)adkim=r(relaxed DKIM alignment)
Strict alignment (aspf=s or adkim=s) is not supported and will cause delivery or authentication issues:
Default policy
We recommend starting with a neutral monitoring policy:
v=DMARC1;p=none
This is our default recommendation because it does not interfere with existing email setups and allows domains to collect DMARC reports before enforcing stricter rules.
Enforced policies
More restrictive policies are also supported as long as relaxed alignment is maintained, including:
p=quarantinep=reject
Synced email thread behavior
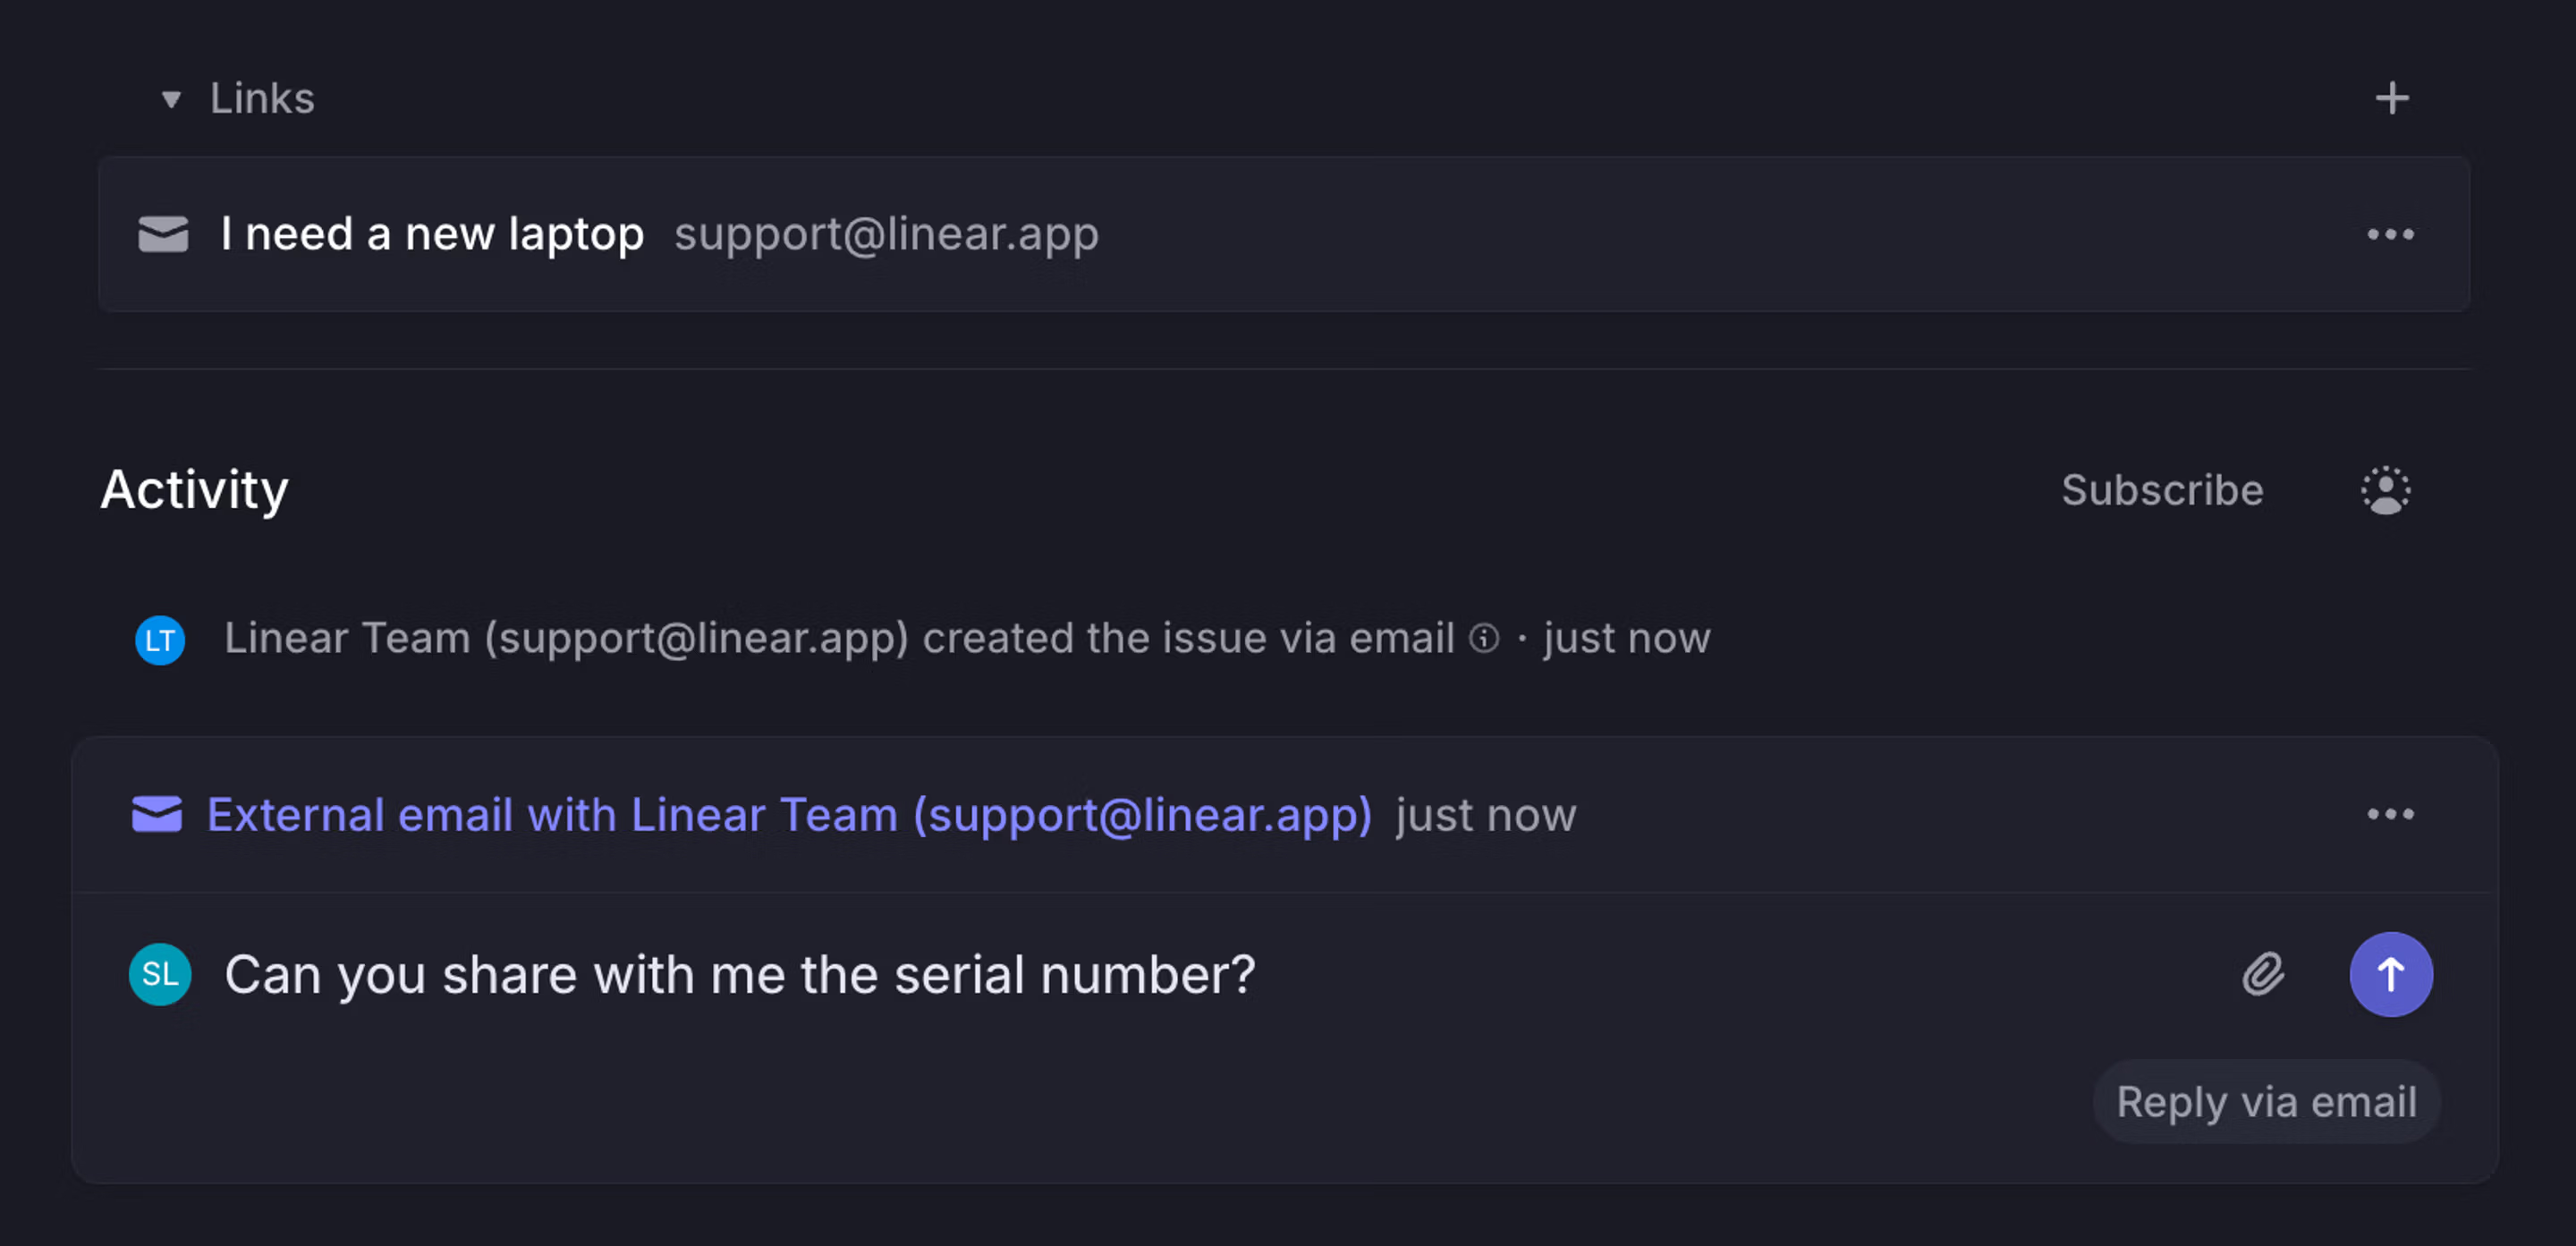
When an issue is created from an email, a synced thread appears on the issue in Linear.
That means:
- Any new email reply to the original email thread appears in the synced thread on the issue in Linear
- Any new comment in the synced Linear thread is sent as a new email to the email thread
This keeps all context centralized in Linear while allowing seamless communication with people who are not using Linear directly.
Replies to the email thread are added to the issue as comments, and quoted reply history is removed to keep the thread readable.
Customize auto-replies
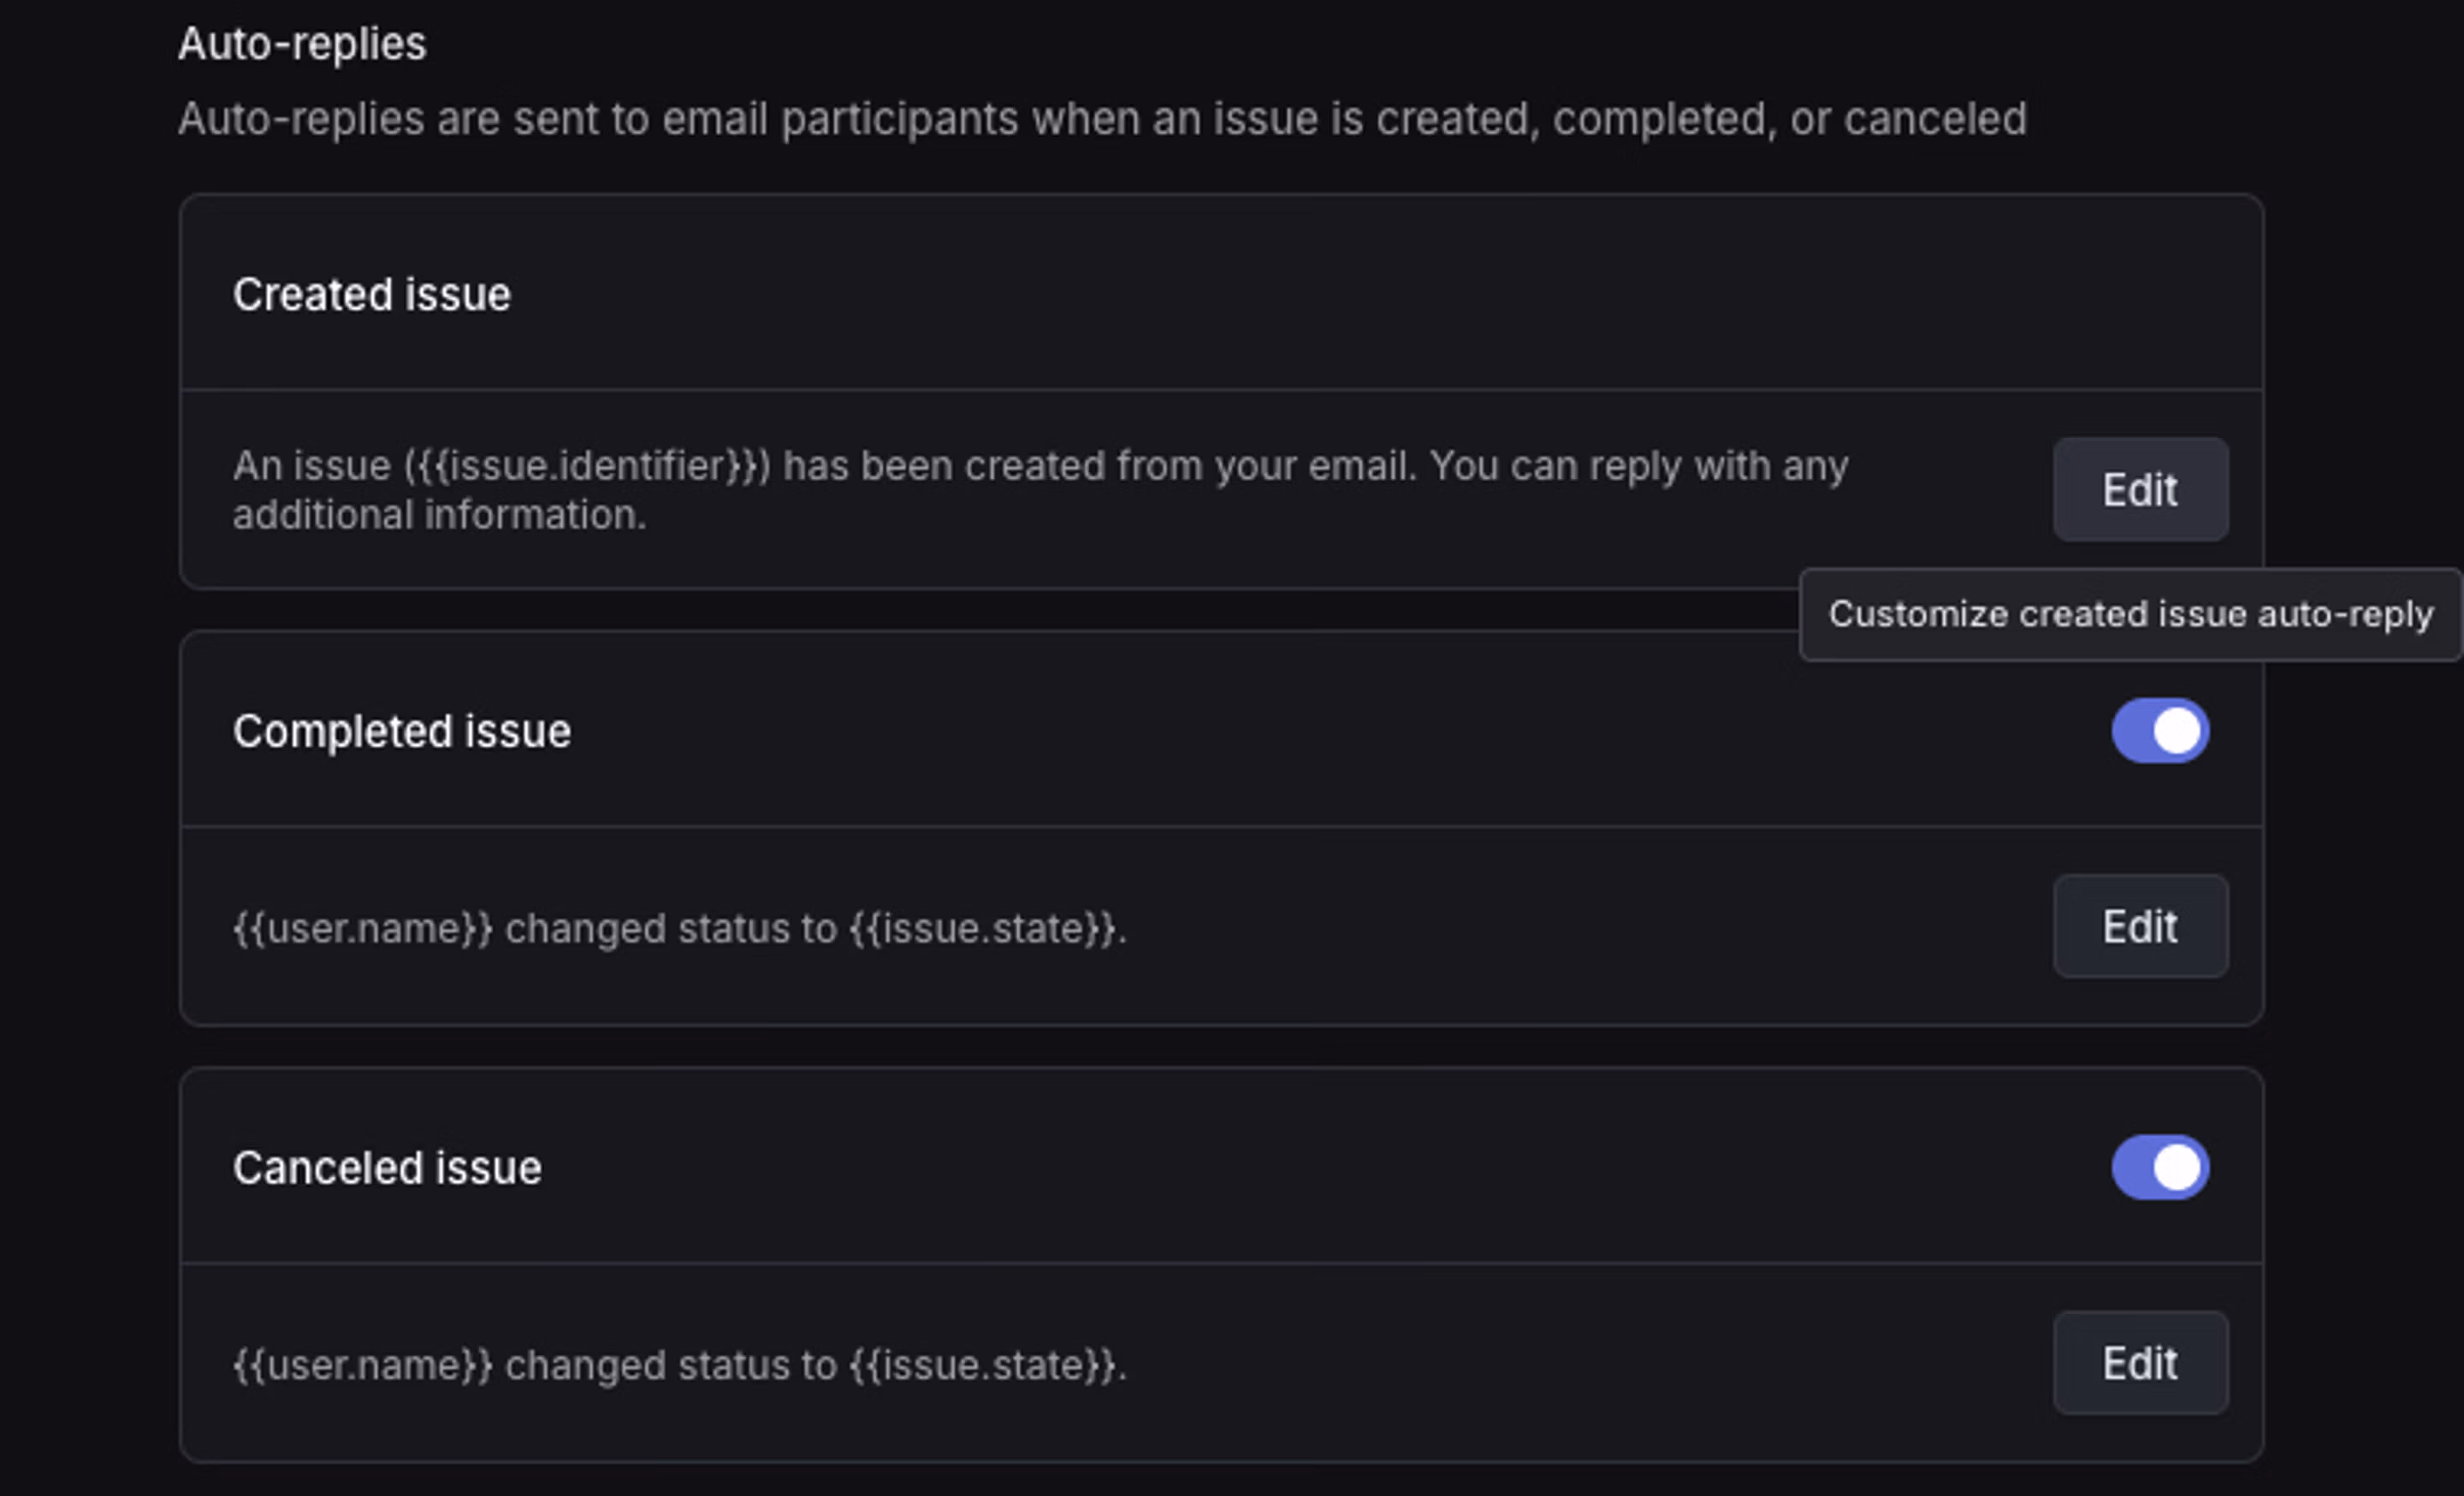
By default, Email Asks can send messages when an issue is created, completed, or canceled.
You can customize which of these messages are sent, along with their copy, in Settings → Asks → Email Intake → the relevant email address.
Enable Customer Requests
Enable customer requests to automatically link inbound emails to customers based on the sender’s email domain. This is useful when you want email asks to connect directly to customer context in Linear.
FAQ
Yes. You can use per-account Gmail forwarding without Google Workspace admin permissions.
This requires a dedicated Gmail user account and a forwarding confirmation flow. Gmail will send an activation code to the Linear intake address, and that code must be entered back into Gmail settings.
If you see an error such as 550 5.7.520 Access denied or a message saying your organization does not allow external forwarding, Microsoft 365 is likely blocking automatic forwarding by default.
Microsoft 365 (Outlook) by default blocks automatic forwarding to external email addresses to prevent data exfiltration/phishing abuse, even if you set up an inbox rule to forward. You will need an admin to explicitly allow it in the Exchange or Defender policies.
Allow external forwarding as Exchange admin:
- Navigate to Microsoft 365 Admin Center
- Open the Exchange Admin Center (EAC)
- Navigate to Mail Flow → Remote Domains
- Edit the default (or relevant) remote domain (usually
*) - Set “Allow automatic forwarding” to “On”
Fix via Microsoft 365 Defender UI
- Go to https://security.microsoft.com/antispam
- Go to Email & Collaboration → Policies & Rules → Threat policies → Anti-spam policies
- Click into your Outbound spam filter policy (likely called “Default”).
- Scroll down to the “Automatic forwarding rules” section.
- Set it to “On – allow automatic forwarding”
- Save the policy.