Agent automations
Agent automations let Linear Agent respond to changes in your workspace without waiting for a user to start a conversation. Define when an automation should run, which data it can access, and instructions describing the outcome Linear Agent should achieve.
Available to workspaces on Business and Enterprise plans
Overview
Use agent automations to:
- Investigate and enrich incoming issues.
- Review issues when their content or properties change.
- Apply repeatable team or workspace processes.
- Run recurring reviews on a schedule.
- Use connected tools to gather additional context and take supported actions.
Availability and permissions
A workspace admin must enable agent automations before they can be created.
Who can manage an automation depends on its scope:
- Workspace automations: Workspace admins with permission to manage automations can create and manage them.
- Team automations: Members with permission to manage the team’s settings can create and manage automations for that team. Team owners can control this permission from Team settings → Access and permissions → Team Settings Management.
- Triage automations: These are configured for public teams and follow the team’s settings-management permission.
Linear Agent operates within existing permissions. Automations can only access permitted data and use the data scope and access configured for them.
Enable agent automations for your workspace
A workspace admin must enable the feature before authorized members can create automations.
- Open Settings.
- Select AI & Agents.
- Select Automations.
- Turn on agent automations for the workspace.
- Confirm Linear Agent is enabled under Settings → AI & Agents → Linear Agent.
- Open Settings → Automations to view or create workspace automations.
If the workspace does not have access to agent automations, Linear displays an upgrade prompt instead of the automation settings.

Automation types
The automation type and trigger determine when an automation runs and where it can be configured.
Issue automations
Issue automations respond to matching issue activity, such as issues being created or updated. Create them at the workspace or team level.
Use issue automations to add relevant context, review issues for missing information, identify risks, recommend next steps, or update matching issues according to your instructions.
Triage automations
Triage automations respond to matching issues in a public team’s triage. They are configured for one team at a time.
Use triage automations to translate or summarize incoming issues, add relevant documents, investigate reports from trusted sources, or comment with additional information before an issue is accepted from triage.
Triage automations complement Triage Rules and Triage Intelligence:
- Triage Rules apply predefined actions when specific conditions are met.
- Triage Intelligence analyzes issues and suggests properties, related issues, and duplicates.
- Triage automations use flexible instructions to perform more complex, open-ended work.
Release automations
Release automations respond to release activity and are configured at the workspace level. Use them to review release activity, summarize associated changes, or perform follow-up work when release conditions are met.
Scheduled automations
A schedule is a trigger option rather than a separate automation type. Add a schedule to a supported automation when it should run at a recurring time instead of responding only to an event.
Use scheduled triggers to review matching issues at regular intervals, produce recurring summaries, or check for stale or at-risk work.
Create a workspace automation
Workspace automations can act across the workspace data available within their configured scope.
- Open Settings → Automations.
- Select New automation.
- Choose the automation type and trigger.
- Add filters to define when the automation should run.
- Define the data scope the automation can access.
- Choose whether the automation has read-only or read/write access.
- Enter instructions describing the intended outcome, permitted changes, and anything Linear Agent must not change.
- Review the automation, then publish and enable it.
Create a team automation
Team automations apply only to the selected team.
- Open Settings → Teams.
- Select the team.
- Select Automations.
- Select New automation.
- Choose the automation type and trigger.
- Add filters to define when the automation should run.
- Define the automation’s access and instructions.
- Review the automation, then publish and enable it.
Set up an issue trigger
Issue automations run when matching issue activity occurs. Configure the trigger when creating or editing an automation.
- Choose Issue as the trigger type.
- Select the event that should trigger the automation, such as issue created or issue updated.
- Add filters to narrow which issues or changes activate the automation.
- Complete the remaining automation configuration and publish it.
The automation runs each time a matching event occurs.
Add a scheduled trigger
A scheduled trigger runs the automation at a recurring time rather than in response to an event.
- Create or edit a supported workspace or team automation.
- Choose Schedule as the trigger.
- Select when the automation should run.
- Add filters and configure the automation’s data scope and access.
- Review the automation, then publish and enable it.
Write effective instructions
Clearly describe the intended outcome and any actions Linear Agent should avoid.
For example:
Investigate the issue using the available context. Add a comment summarizing the likely cause and recommend the next action. Do not change the issue’s assignee or status.
For more reliable results:
- Describe the outcome, not only an action.
- Specify which context or connected tools Linear Agent should use.
- State which changes are permitted.
- Include a fallback for when there is not enough evidence to act.
- Start with narrow filters and review early results before expanding the scope.
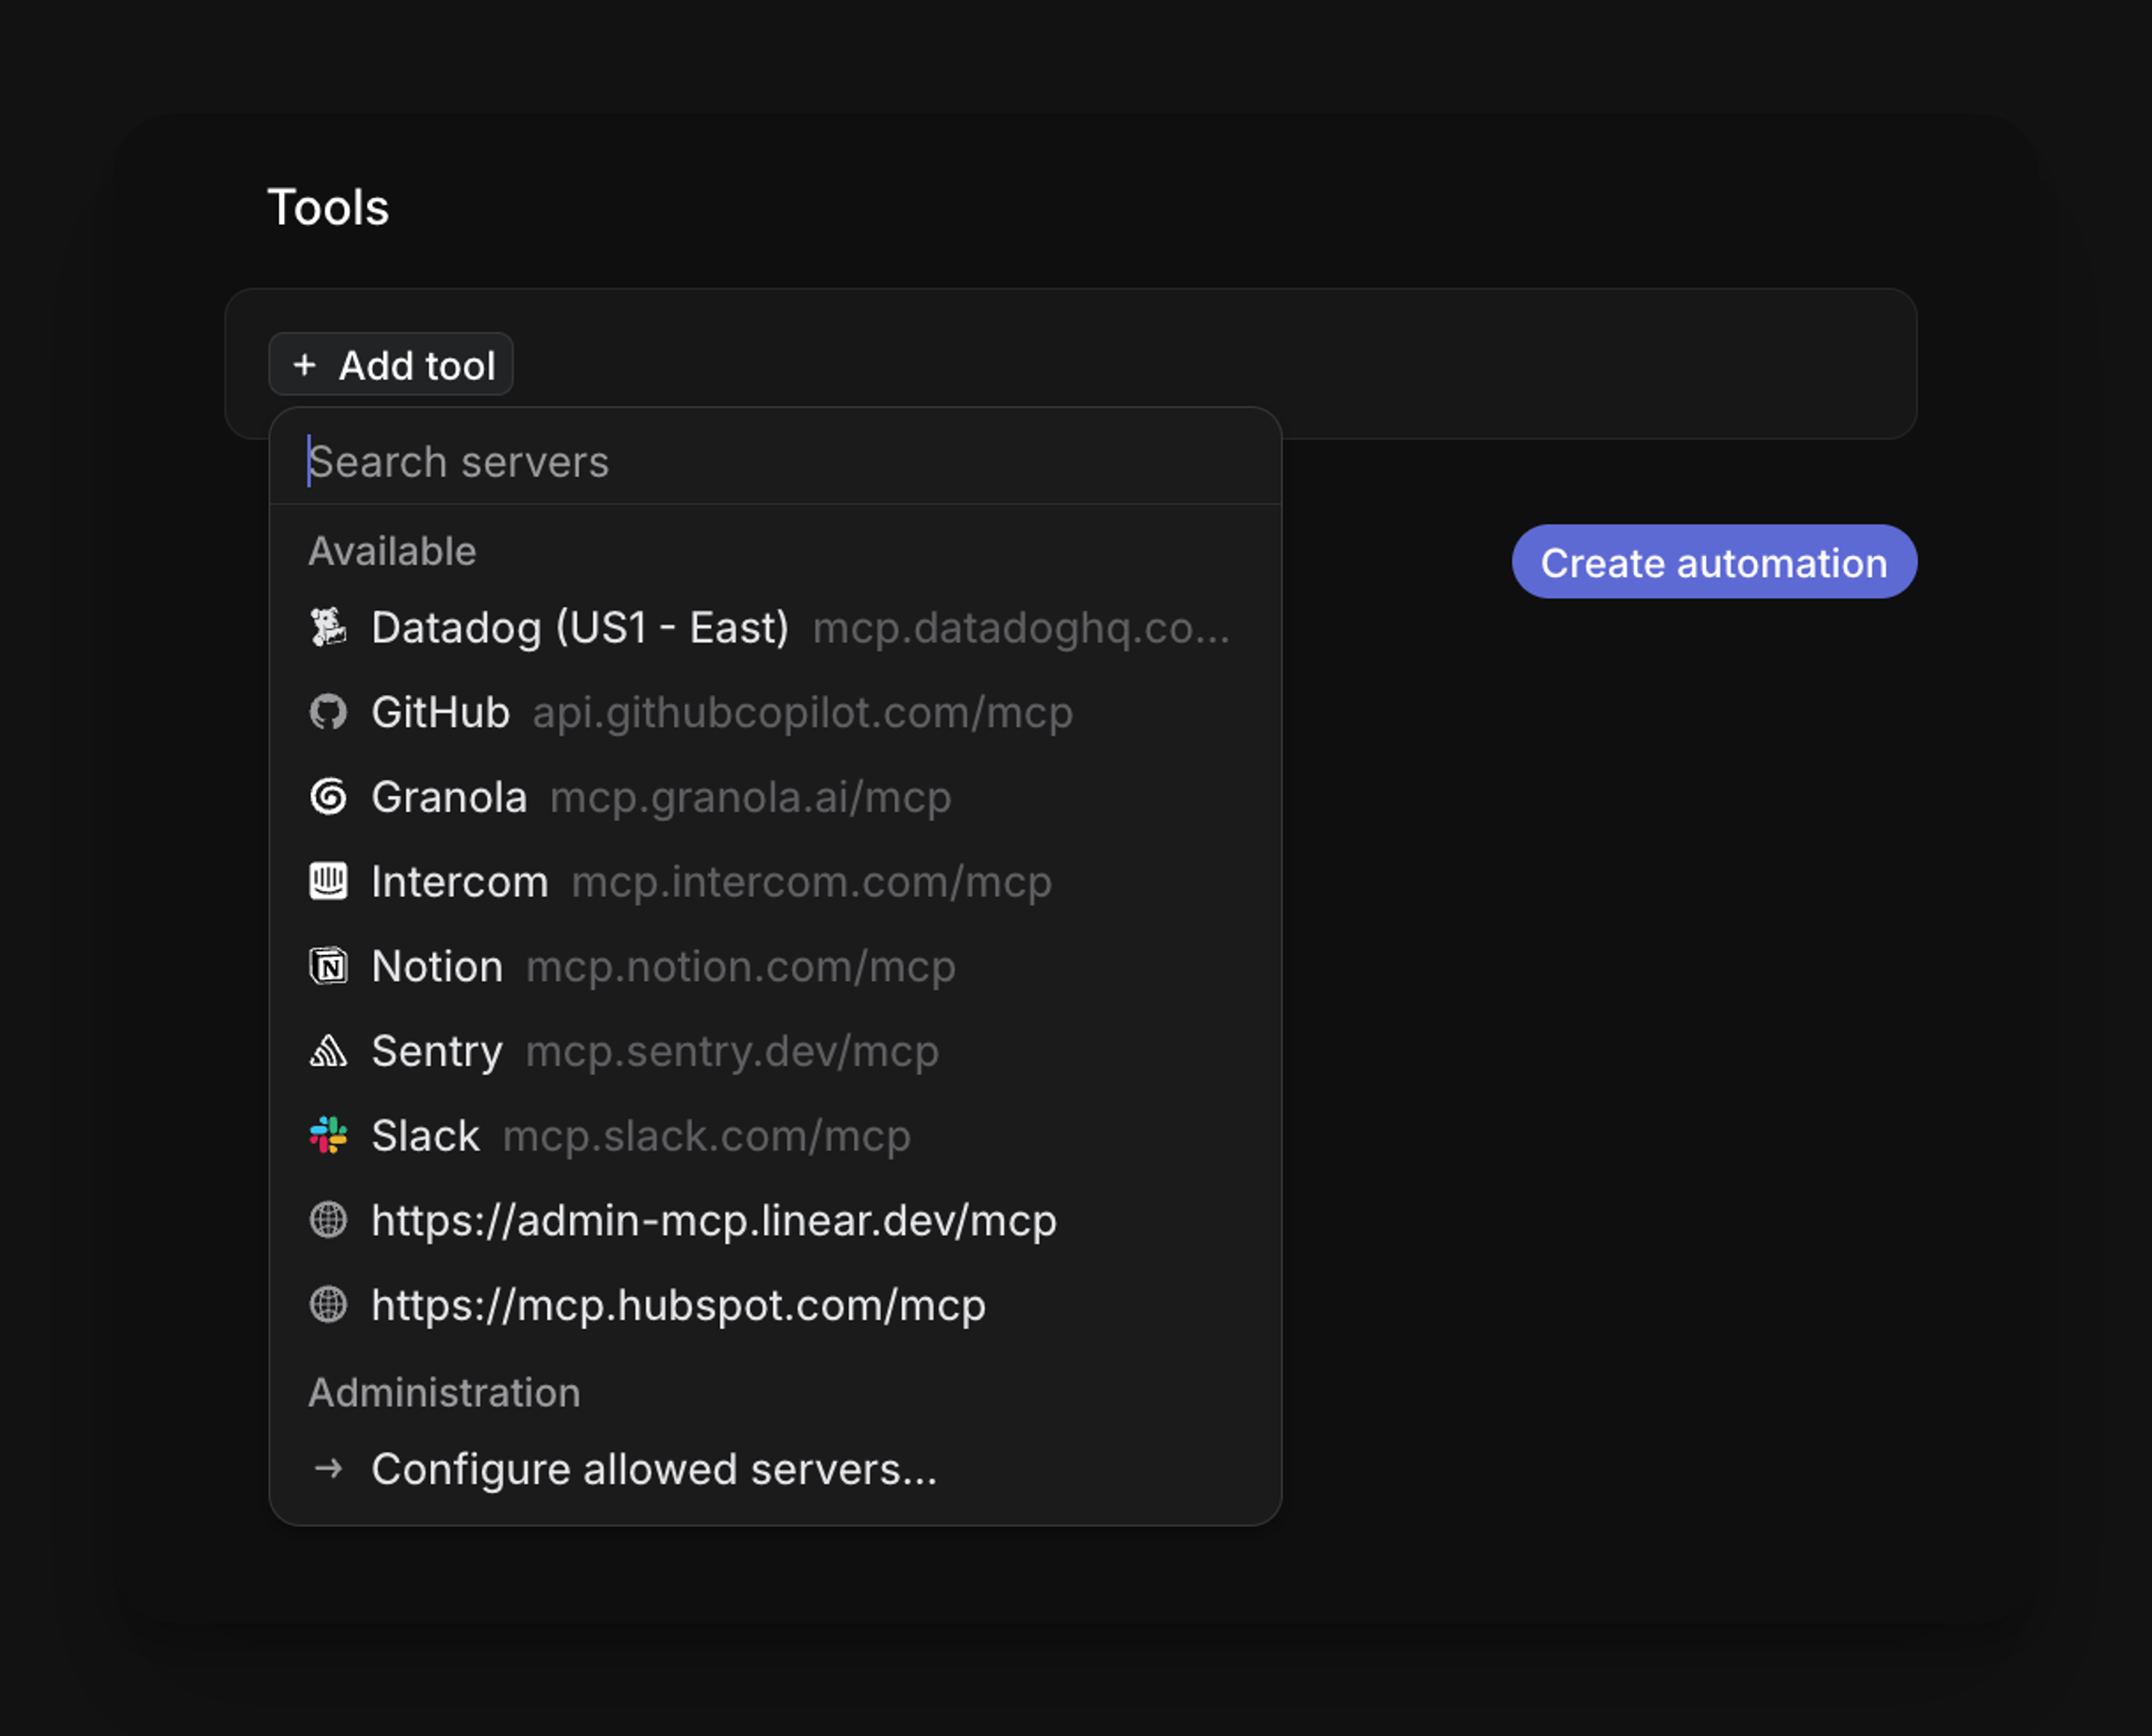
Tools
Tools extend what Linear Agent can do during an automation run. When a connected tool is available and permitted for the automation, Linear Agent can use it to gather additional context or take supported actions beyond Linear itself.
Examples of what tools can enable:
- Search or retrieve content from connected sources such as GitHub, Notion, or Sentry.
- Post comments or updates to external services when the automation has write access to that tool.
- Fetch relevant documentation, pull request details, or error reports to enrich an issue.
To use a tool in an automation, the tool must be connected to your workspace and enabled for Linear Agent. Reference the tool in your automation’s instructions to tell Linear Agent when and how to use it. For example: Use the GitHub tool to find the related pull request and summarize its changes.
Linear Agent operates within existing permissions. A tool can only access data and perform actions that are permitted by the connected integration’s configuration and the automation’s data scope. Review which tools are available and what access they have before referencing them in instructions.
Review automation runs
When a matching event occurs, Linear Agent evaluates the automation’s filters and, if they match, starts a run. The run executes the automation’s instructions using the configured data scope and access level. Linear Agent may read issue data, use connected tools, add comments, or update issue properties depending on the instructions and access granted.
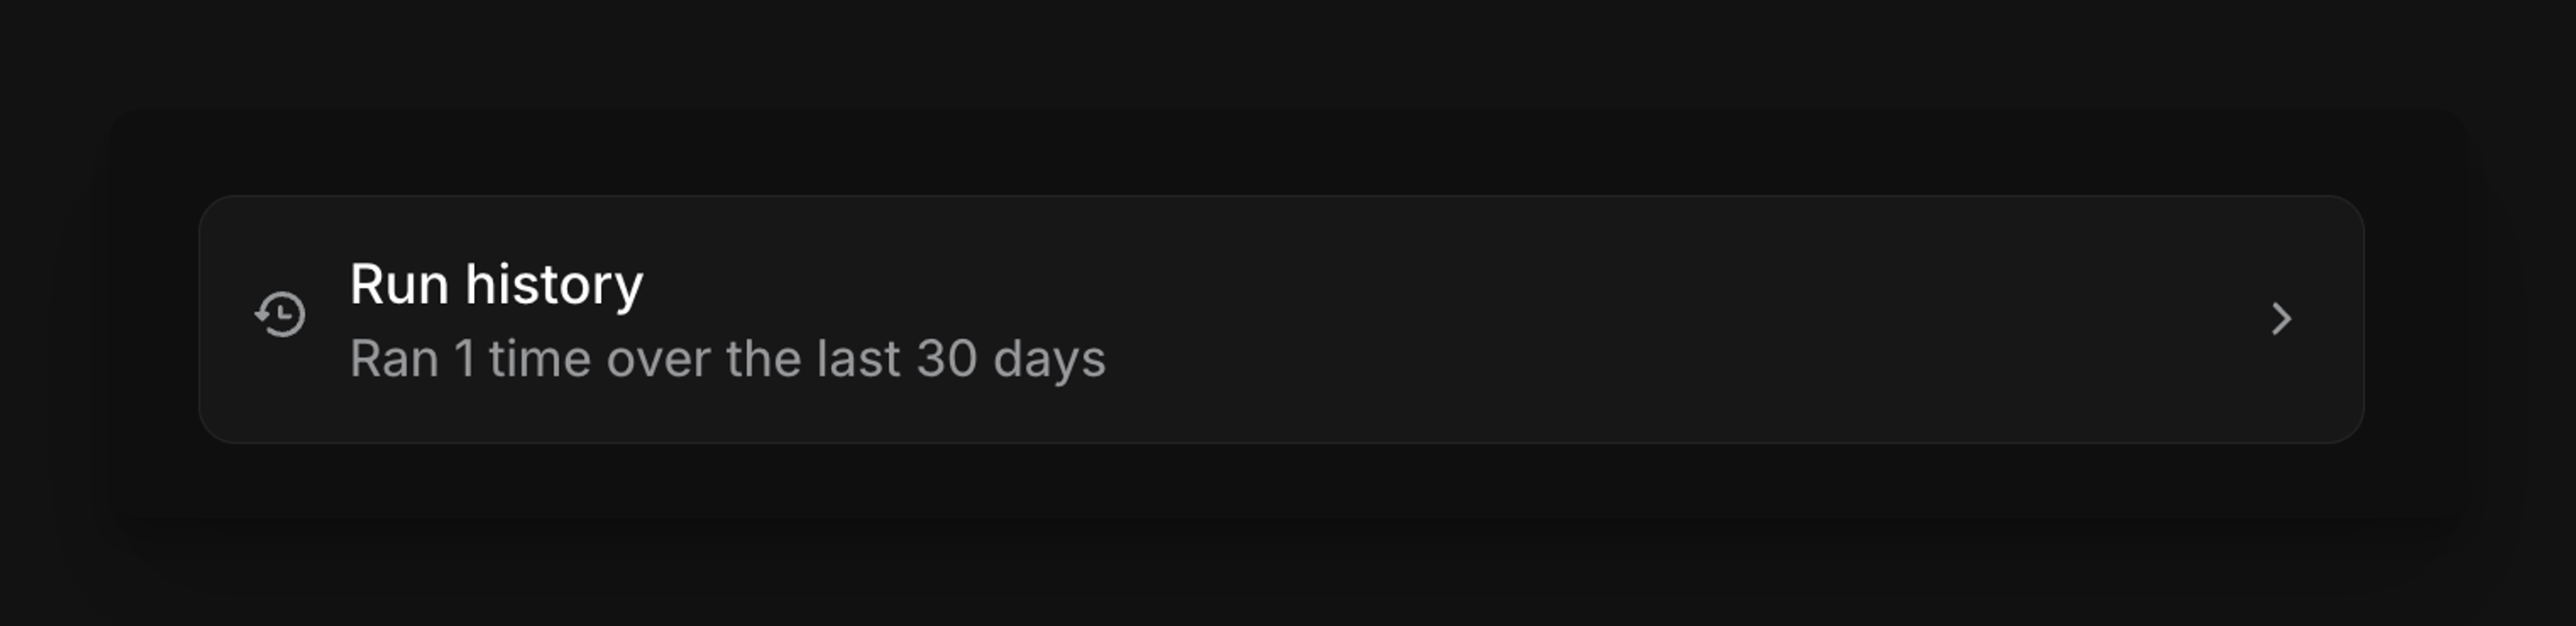
Each run is logged with its status, the Agent conversation, the result, and any error message.
- Open Settings → Automations, or open the selected team’s Automations settings.
- Select the automation.
- Select Run History.
- Select a run to review its status, Agent conversation, result, and any error message.
When an automation changes an issue, the issue’s activity includes an Automation entry. Select it to inspect the related Agent conversation.
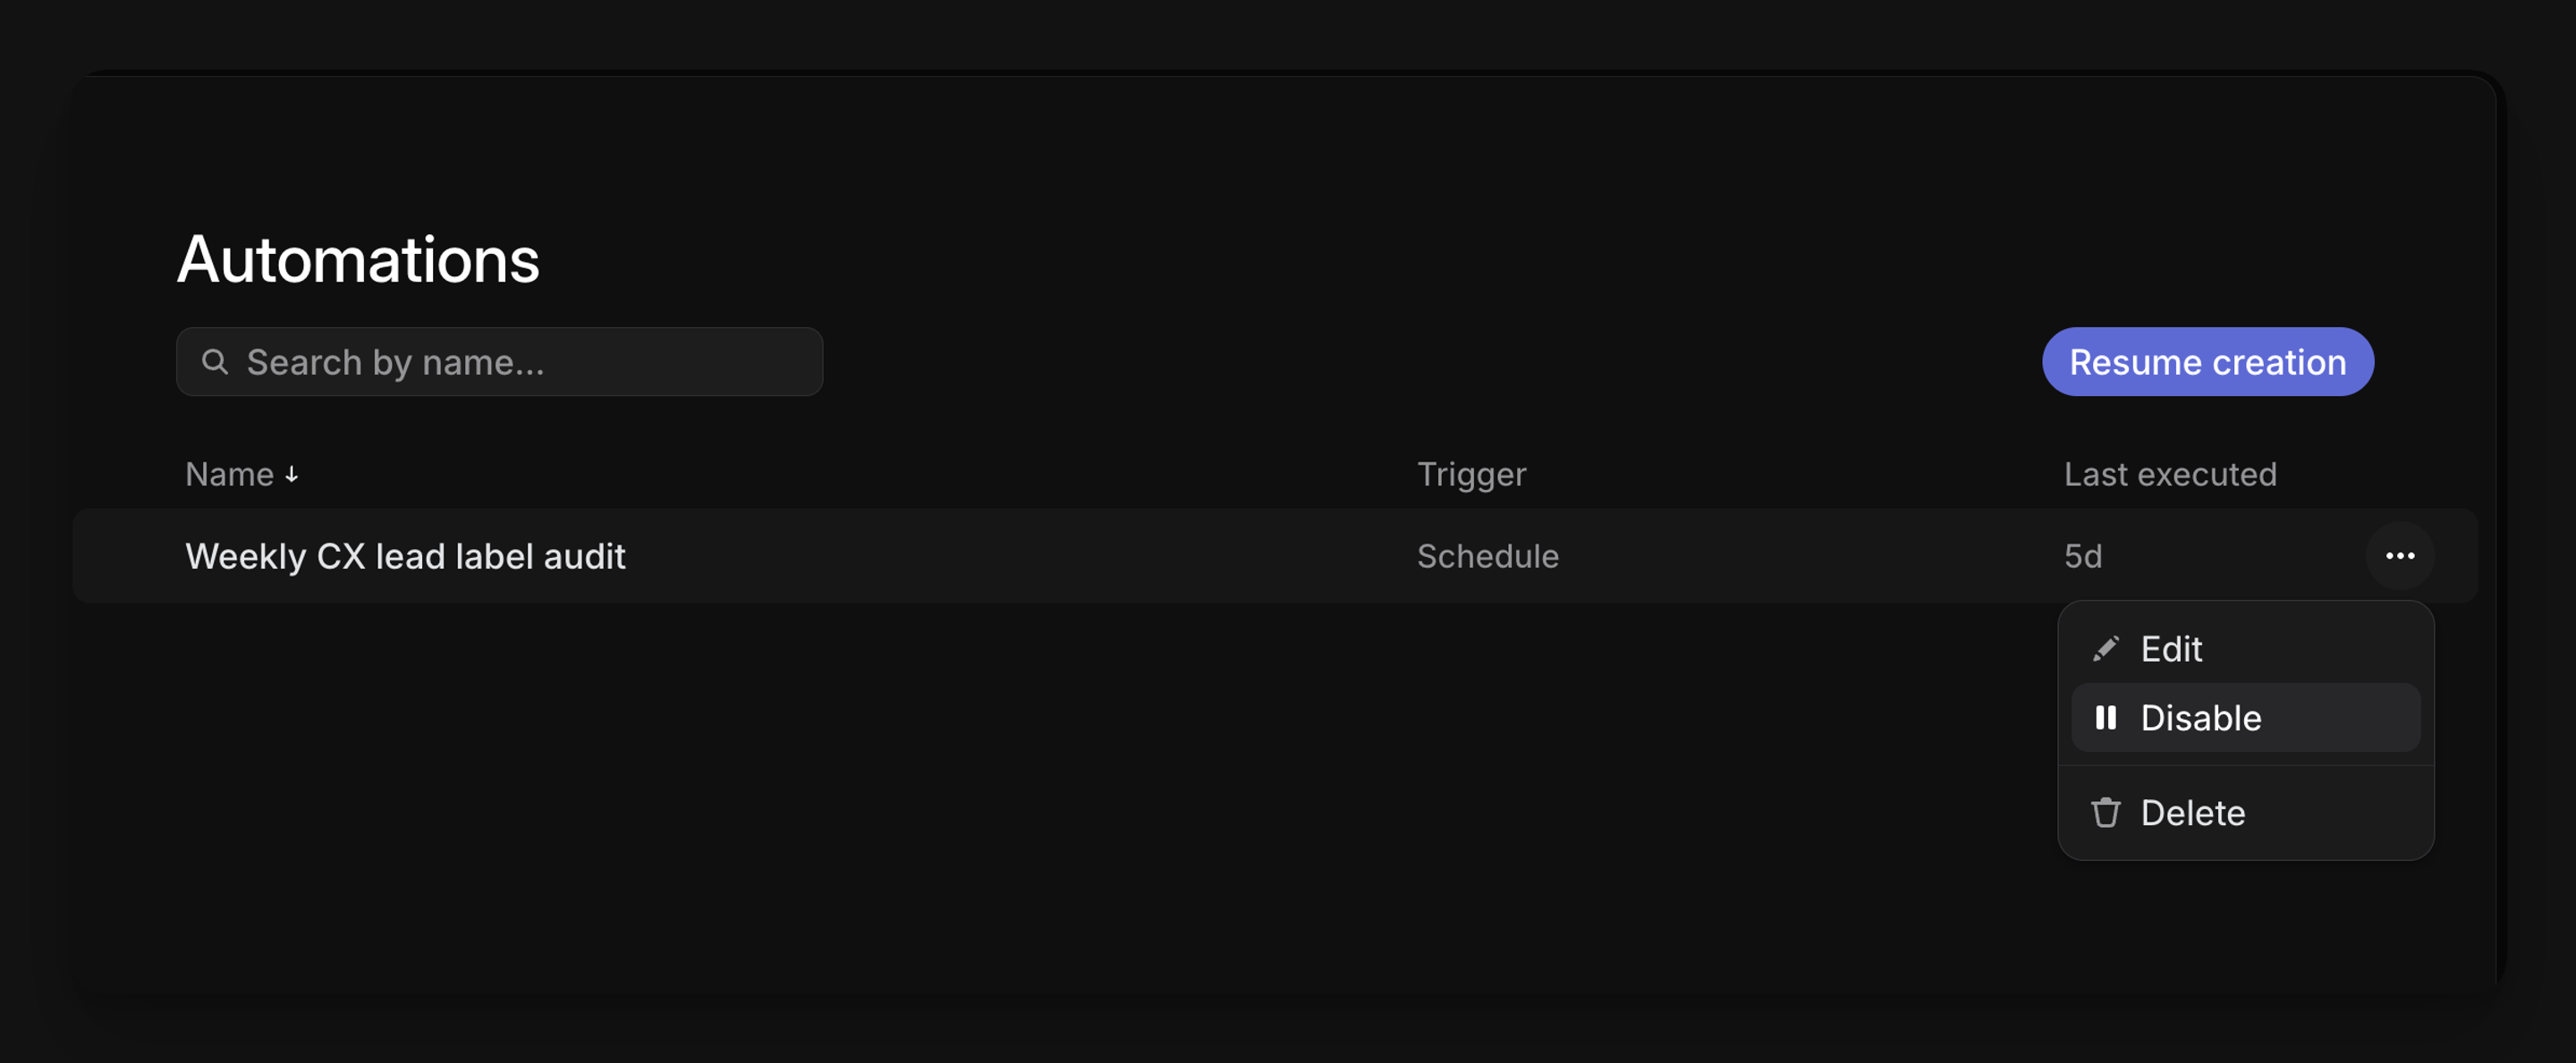
Enable or disable an automation
Enable an automation when it is ready to respond to matching events. Disable it to stop new runs without deleting its configuration or previous run history.
- Open the workspace or team automation settings.
- Find the automation.
- Use its enable or disable action.
Usage-based billing
Agent automations require additional compute and are planned to use usage-based billing. Available usage may determine whether an automation run can execute.
Linear will communicate pricing, included usage, limits, and rollout details before related billing changes take effect. Review automation runs to understand whether a run completed or was blocked.
Best practices
Follow these guidelines to get reliable results from your automations.
- Begin with a narrow team, filter, or data scope.
- Test with disposable issues before using an automation with active work.
- Use read-only access when the automation only needs to investigate or summarize.
- Grant read/write access only when the automation needs to make changes.
- Use trusted sources when external content can trigger an automation.
- Review early runs and refine the instructions before expanding the scope.
- Disable an automation while investigating unexpected results.
FAQ
How are agent automations different from Triage Rules?
Triage Rules apply predefined actions when specific conditions are met. Agent automations use flexible instructions to perform more complex, open-ended work.
Who can enable agent automations?
A workspace admin can enable agent automations for the workspace from Settings → AI & Agents → Automations.
Who can create workspace automations?
Workspace admins with permission to manage automations can create and manage workspace automations.
Who can create team automations?
Members with permission to manage the team’s settings can create and manage team automations. Team owners can configure this permission from the team’s access and permissions settings.
Can I limit which issues trigger an automation?
Yes. Add filters when configuring the automation to target specific issues or events.
Can an automation update issues?
Yes, when it has read/write access and its instructions request a supported change. Use read-only access when updates are not required.
Can an automation use connected tools?
Yes, when the connected tool is available to Linear Agent and permitted for the automation.
Can I see what an automation did?
Yes. Open the automation’s Runs view or inspect the related Automation entry in an issue’s activity.
Where can I check a run directly from an issue?
Open the issue and find the Automation entry in its activity feed. Select it to open the related Agent conversation and review what the automation did, including any changes made and the reasoning behind them.
What happens when there is not enough available usage?
A run may be blocked from executing. Review the automation’s Runs view for its status and result.
Which teams support triage automations?
Triage automations can be configured for public teams.
Can an automation use tools to post to external services?
Yes, when a connected tool has write access and the automation’s instructions request it. Linear Agent operates within existing permissions, so a tool can only post to services and repositories that the connected integration is authorized to access. Review the tool’s permissions and the automation’s data scope before enabling write actions, and use read-only access when the automation only needs to gather information.
How do I prevent an automation from posting to a public repository by mistake?
Linear Agent operates within existing permissions. Automations can only access permitted data and use the data scope and access configured for them. Even so, it is important to review tool permissions carefully before granting write access.
To reduce the risk of unintended posts:
- Use read-only access unless the automation specifically needs to write to an external service.
- Check which repositories and services the connected integration can access before referencing a tool in your instructions.
- Scope the automation’s data access as narrowly as possible.
- Test with a private or disposable repository before enabling write actions on active work.
- Review early runs in the automation’s Runs view before expanding its scope or access.